The next step in our diy camper van build was installing a roof vent exhaust fan, which means cutting a hole in the roof. Fun!
A vent fan is an essential part of creating a comfortable living environment inside of a van. It keeps the van cool by sucking out hot air and creating airflow, and it also vents the living space when you’re cooking.
The vent fan was one of the first van components that we purchased, and installing it turned out to be easier than we thought.
Recommended Vent Fan: MaxxFan Deluxe
Powerful 10-speed roof vent fan with thermostat, remote control, and built in rain cover. Easily the best fan option for full-time vanlife.
The fan we initially chose for our van is the Fan-Tastic Vent Model 7350. This fan is an excellent product, with efficient power draw, 14 speeds, a remote control, a thermostat, reversible airflow to pull air into the van, and a rain sensor.
However, after living with this fan on the road, we discovered that it suffers from a fatal flaw: the lack of a built in rain cover.
Without a rain cover, having proper ventilation while it’s raining becomes an iffy proposition. And when you live full time on the road, you need ventilation all the time. Sure, you can add an Ultra-Breeze Vent Cover onto your Fan-Tastic vent, but it’s very bulky, doesn’t look great, and is an extra expense.
The MaxxFan Deluxe, on the other hand, comes with a built in rain cover that’s low profile and sleek. This allows you to keep your fan running in all weather without worrying about water getting into your van, which is vital when you live in a vehicle.
The MaxxFan Deluxe offer comparable or better features and performance compared to Fan-Tastic fans, and is also a bit quieter when running.
Installing the Vent Fan on our Van
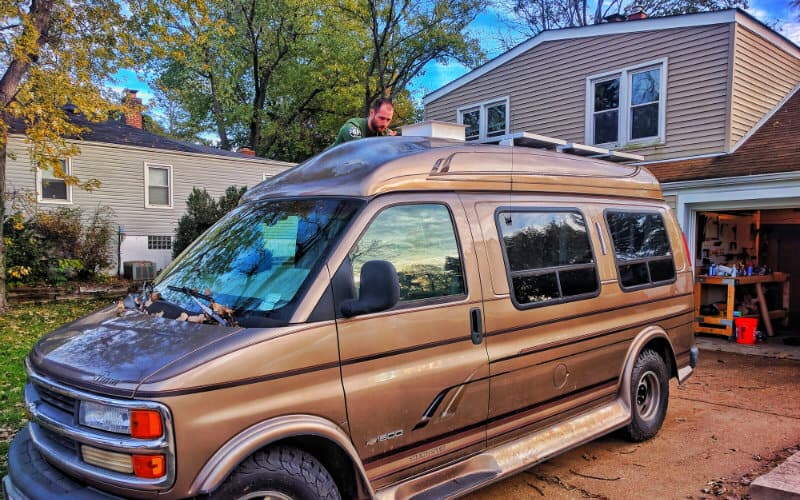
Like when we mounted our solar panels, we had to work around the contoured shape of our high topper.
The big ridge in the middle meant we could only put the fan at the very back of the van where it’s flat, or at the very front of the living space where the ridge is wide enough for the fan. Since we had already mounted a solar panel at the back of the van, the front was the way to go.
The idea of cutting a big hole in our roof was a bit intimidating, but once we got started the install itself was actually pretty easy.
Note: These instructions will work for all models of roof vent fans that fit a standard 14″ opening.
What We Used to Install Our Vent Fan
- Vent Fan (see recommendation above)
- Cordless drill
- Sharpie
- Jigsaw
- 3M VHB Tape
- Dicor Lap Sealant
- Caulk Gun
Step 1: Mark the Hole for the Fan
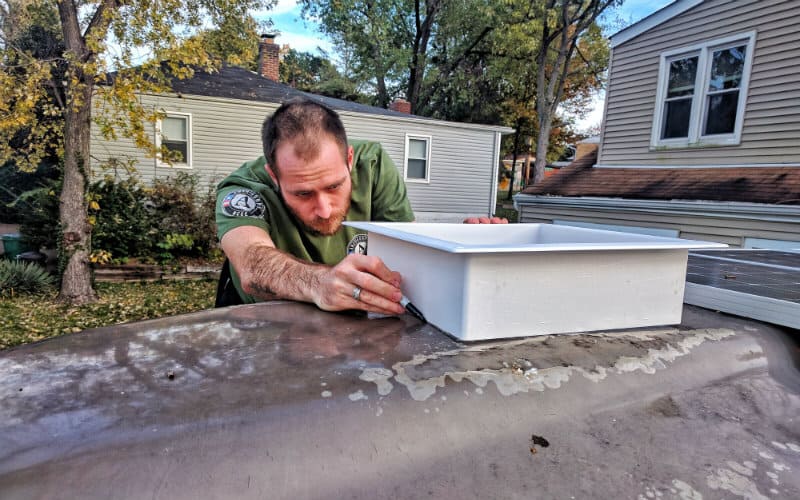
The first step is to mark where you want your fan. Fan-Tastic apparently includes a template in the box, but we didn’t see it at the time so we used the plastic trim piece to trace the shape onto our van’s roof.
Step 2: Cut the Hole with a Jigsaw
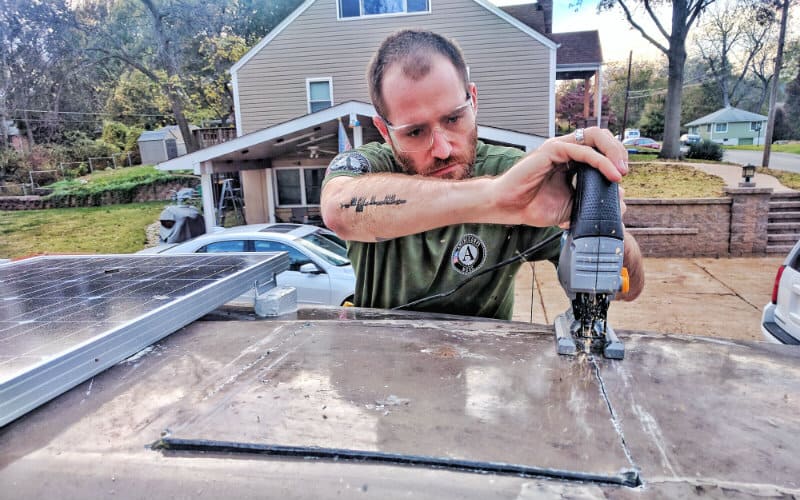
We started by drilling holes at all four corners, then used a jigsaw to connect the dots.
Note: Do yourself a favor and pick up a set of good jigsaw blades. We started off using the included blade on our cheap Ryobi jigsaw. It was slow going and the blade eventually snapped in half. Once we picked up this set of Bosch jigsaw blades we flew through the cuts. With the amount that you use a jigsaw during a van build, it’s worth it to get good blades.
Step 3: Marvel at the Giant Hole in Your Roof
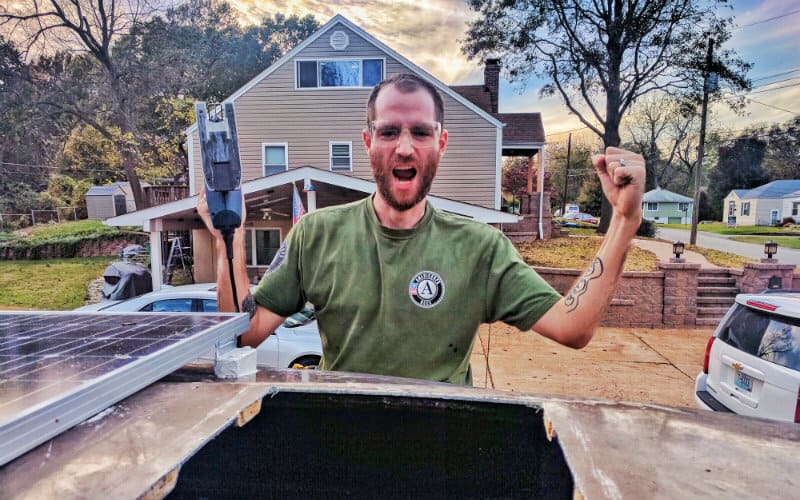
You just cut a big hole in the top of your van. That calls for a victory yawp. But first, better make sure the fan fits!
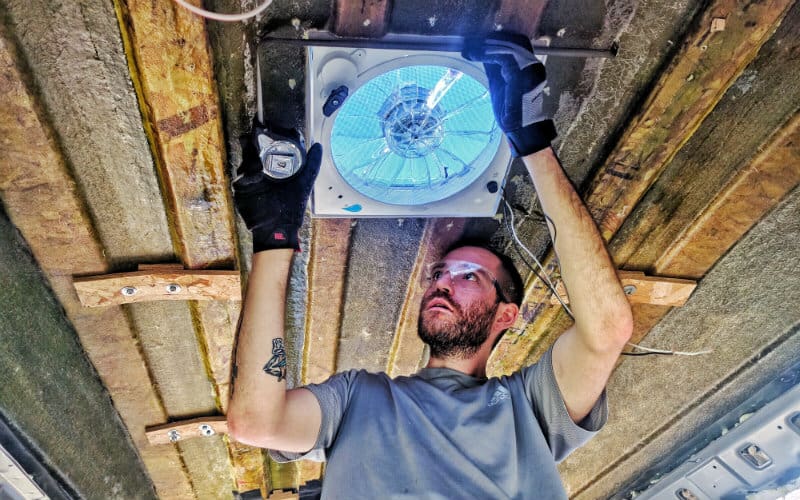
Step 4: Attach the Fan to the Roof
Fan-Tastic includes sheet metal screws for screwing the fan down, but those don’t hold to fiberglass too well. We decided to use a combination of screws and 3M VHB tape to attach our fan. We lined each side of the hole with VHB Tape, inserted the fan, and popped in the screws around the rim.
Step 5: Seal the Edges with Dicor

We used Dicor self-leveling lap sealant to seal the edges of the fan. This stuff is highly regarded in the RV community, and it really does the trick. We covered the screw holes, the rim and the edges in Dicor, and while it sets it levels itself into a solid waterproof seal. Pretty awesome!
We Have a Fan!
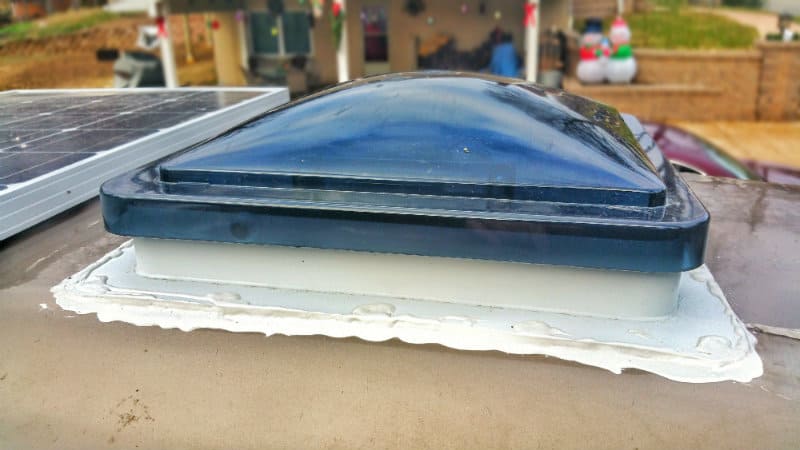
That’s all it takes to install a roof vent fan in a high top conversion van. Now all we have to do is wire it up to our camper van electrical system and we’ll have a cool breeze blowing through our new home. We’ll cover wiring in depth in another post, so stay tuned. Next up is laying down our flooring.




Hi! We are remodeling a 2000 Chevy van express, we are going to install an AC unit on the roof. Would you recommend following these steps for that as well?
Hello, AC units typically fit in a standard 14″ opening, just like roof fans. However, I have never installed one so I’m not sure what differences there may be.
Hi John, While I’ve had nomad vanlife on my brain for several years, I’ve just recently decided that I am taking a job on Cape Cod for the summer and moving into a van full time. In 2 weeks! I just purchased a 2000 Chevy Express high top conversion with 81k original miles. 1 owner. I’m dealing with some mechanical issues already (long story for another time) and not going to have time to do a lot of interior work before departure. Just some basic necessities. I sort of want to keep the walls and ceilings as is for the… Read more »
Hi Chasen, that’s very exciting! Congrats! Sorry to hear that you’re running into mechanical issues – that’s always a little bit of a risk especially with older vehicles, but the Chevy engines are generally solid, so hopefully it will do you well once you get the issues sorted out. Truth be told, you really don’t need a whole lot, and starting barebones will give you the opportunity to really learn what you do/don’t need and how you use your van before committing to a more extensive build. Installing a vent fan is difficult to do without some level of destruction,… Read more »
Wow, thanx for that speedy reply. Didn’t expect that so fast. Thanx for your encouragement. I guess I’m a little worried about installing something directly on the fiberglass. It’ll be strong enough to not rip out the fiberglass? If not, it seems like a better look with more rack options. Anyway, thank you heaps for your input. Chase
Hello. My van has a corrugated roof. Do you think I can install one of these fans vertical in the rear door?
Thanks
Hi Aaron, I’ve definitely seen fans installed in rear doors before. If you’d rather install in your roof but are worried about the structural integrity, you should be able to reinforce with strips of wood around the fan opening on the inside, and screw the fan threw the roof and into the strips of wood. Hope that helps!
Hi John, did you create any sort of wood frame to attach on the inside of the roof to screw the fan into? I have a 1993 Ford Econoline with a fiberglass roof and wasn’t sure if I could just screw into the roof alone or if I needed a wooden frame that is attached on the inside to screw into. Thank you!
Hi Taylor, we did not use a wood frame, but we did use VHB tape underneath the fan also, so it’s not only held in with the screws. Hope that helps!
Hi John! It looks like, from your pictures, that you installed your fan after you insulated and did the wood paneling inside of your fan. Any reason why you didn’t install your fan before insulation?
Hi Keely, installing our fan was actually one of the first things that we did (after mounting our solar panels), before insulation, before wiring, before paneling. Perhaps you were looking at the underside of our high top in the photos?
~John
How much of a curve is there in your roof where the fan was installed? Did the fan rim have to flex at all when screwing it down? There is a pretty good curve in my roof where I want to install my fan and I am not sure how to go about it. Any suggestions?
Hi Zach, we decided where to install the fan around the curvature of the roof. We selected a spot on the central ridge that is fairly flat/doesn’t have an intense curve, so the rim did not have to flex at all. Dealing with a curved roof can definitely be tricky. If there are any flat areas on your roof, I would consider installing it there instead and working your build around that. Another option would be to create a flat area using spacers between the fan rim and the roof, but you would have to make sure that you properly… Read more »
Ah I see! Your roof must be flatter than my Ford’s fiberglass topper. I am putting my fan in a similar location but there is about a 3/8″ difference in height from the center of the roof to the edges of where the fan will sit. I went ahead and had a custom adapter fabricated by diyvan.com. Just had to measure the gap using a straight edge, send them the measurements and my adapter is on the way! Figured I would have more peace of mind knowing the adapter is form fitted to the geometry of the roof rather than… Read more »
Awesome, glad you were able to get an adapter, that seems like a good way to go! And I’m glad our site has been helpful, that’s what keeps us going! Best of luck with the build!
~John
I’m currently researching vans and really like the Astro van High Top conversions. Do you think I’d be able to install one of these fans on it since the high top is smaller than your full sized high top?
Hi Chris, there should definitely be room on top of an Astro to install a vent fan. And we highly recommend installing a vent fan for any sort of van conversion. Vent fans help remove condensation and keep the van cool, as well as provide ventilation when cooking. Since an Astro is smaller, however, you might be squeezed in terms of the amount of solar panels or other things that can fit on the roof. You can mitigate some of this with a roof rack, or we’ve seen some van builders mount their vent fans in place of one of… Read more »
Anyone have experience with a cargo van that has a.c. vents going along the roof? How does that impact adding a roof fan?
Hi Greyson, if you’re not planning on removing the stock ceiling and putting up your own, then you’ll want to make sure that the vents don’t run where you plan on installing the fan. Our ceiling vents ran along either side, so they would not have interfered with a fan installation (we took ours out). If you are planning on gutting the van and putting up your own ceiling, and want to keep the AC vents, then I would imagine that they would only impact the thickness of ceiling, not the fan installation. Vent fans can be installed in pretty… Read more »
Hey, great job! Quick question: did you have to cut the rim to fit your roof + ceiling width? What order did you do things? It looks you installed the fan by fixing it to the roof (and ceiling) and then went from the inside to install the rim and attach it to the ceiling? Thanks!
Hi JP, thanks for reading! You do need to cut the rim to fit, and this is the last step in the process (after the fan and ceiling are fully installed). Hope that helps!
~John
Why did you go with the Fantastic Fan as opposed to a low-profile rooftop AC unit? I’m trying to decide which way to go, and it seems with this Texas heat if all I have is a vent fan – it’ll just be moving hot air around; where-as an AC unit would provide more comfort . . . what are your thoughts?
Hi, thanks for the comment! An AC unit would certainly be more comfortable – the issue is the amount of power it would draw. Our fantastic fan draws anywhere from 0.2A to 3A per hour depending on the speed we set it at. A 13,500 BTU RV air conditioner will draw something like 75A to 150A per hour, which would kill our battery bank in under 2 hours. Our van is 100% powered by solar and we’re never really anywhere we can plug in to shore power (and don’t have a way to plug in even if we were), so… Read more »
Something like this might help y’all down in Texas.
https://www.etsy.com/listing/603150517/12v-portable-air-conditioner-cooler-30?gpla=1&gao=1&&utm_source=google&utm_medium=cpc&utm_campaign=shopping_us_a-electronics_and_accessories-gadgets&utm_custom1=f3d5fe31-0fef-4096-97a6-df7e1ba506c0&gclid=CjwKCAjwy_XaBRAWEiwApfjKHjM9Fe2-rBvU4XBskuA7SHuTfTH6WJ44qiVx_Dk5LtvsnKTZol2X0hoC9ywQAvD_BwE
Or maybe the TurboKool RV swamp cooler that runs on DC.
Thanks Justin! Right now we do ok with following the weather, and making sure to use our awning/shade and reflective window coverings, but swamp coolers are definitely on our radar for the future!