If you want to stay comfortable in your vanlife adventures no matter the weather, you need to insulate your campervan. Insulation is one of the most important steps of any van build, and it pays to take the time to do it right. There’s also a lot of confusion and debate over the best way to insulate a campervan, and it can be tough to wade through all the opinions and figure out what to do.
In this post, we answer the questions that come up most frequently about the best way to insulate a van conversion. We also take a deep dive into commonly used van insulation options, their pros and cons, and whether you should use them. We also dig into our recommendations and go through step-by-step installation instructions.
This post should cut through some of the confusion you may have about vanlife insulation, so you can live on the road in comfort!
Best Camper Van Insulation: What We Recommend
Eco-friendly and all-natural insulation batts made from sustainable sheep's wool. Sound dampening, breathable, controls moisture, sequesters carbon, and easy to install.
Effective, nontoxic camper van insulation material. Easy to install, breathable, hydrophobic, and sound deadening.
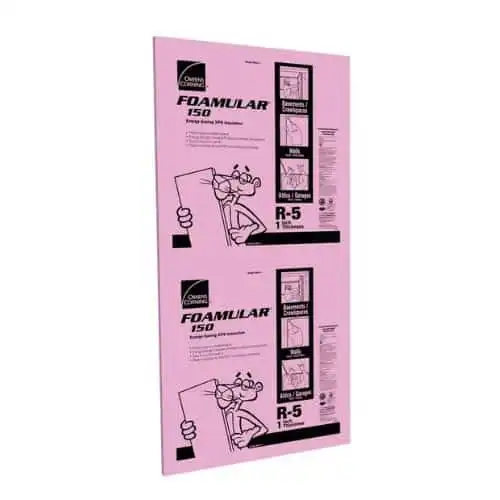
Effective and cheap rigid foam board insulation with a high compressive strength. Easily the best insulation for camper floors, but can be a good budget wall/ceiling option as well.
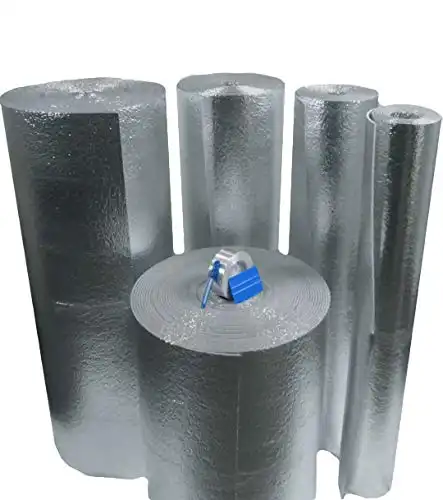
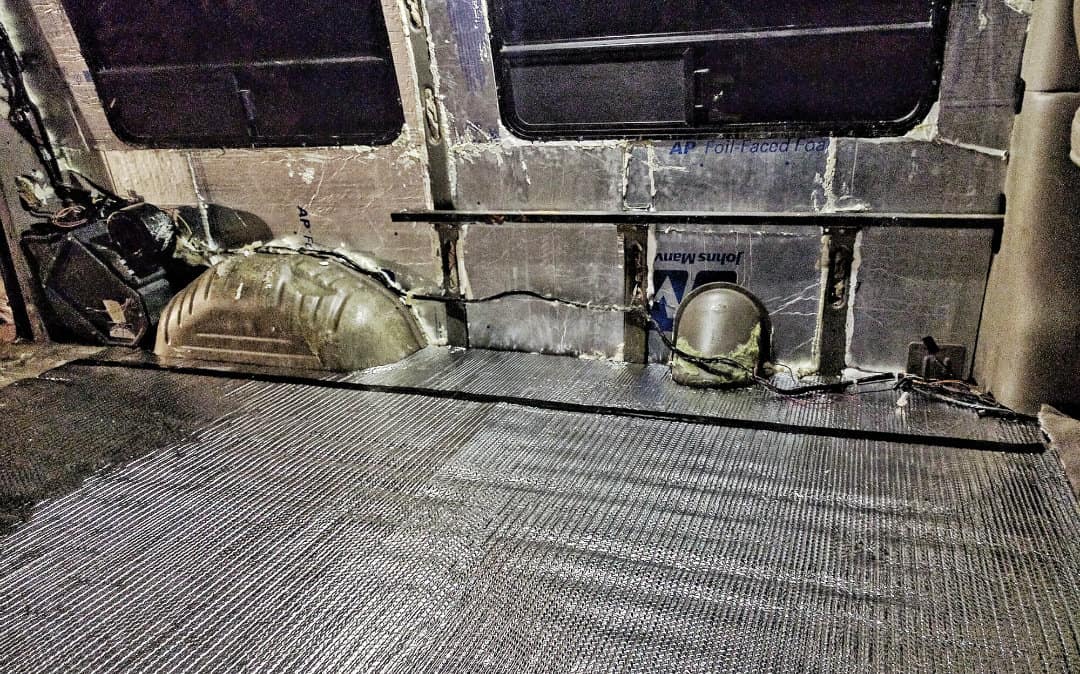
This radiant barrier features foil wrapped around a core of closed-cell foam, making it much more effective than Reflectix. EZ-Cool is excellent as a radiant barrier and you can layer it over your van's frame ribs to serve as a thermal break.
Based on our real world experience building and living in campervans (as well as tons of research), we’ve narrowed down the huge list of insulation materials out there to a handful that are best for insulating a campervan.
Eco-friendly and all-natural insulation batts made from sustainable sheep's wool. Sound dampening, breathable, controls moisture, sequesters carbon, and easy to install.
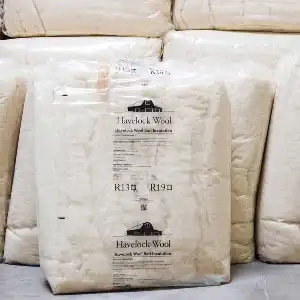
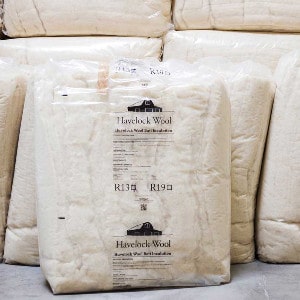
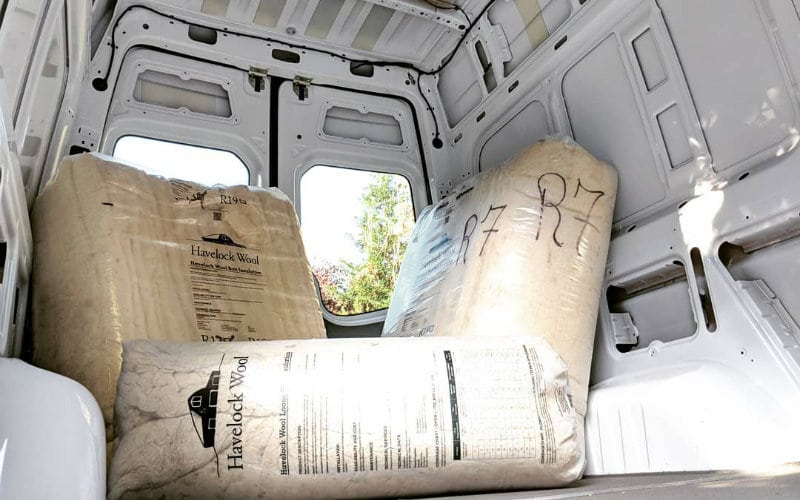
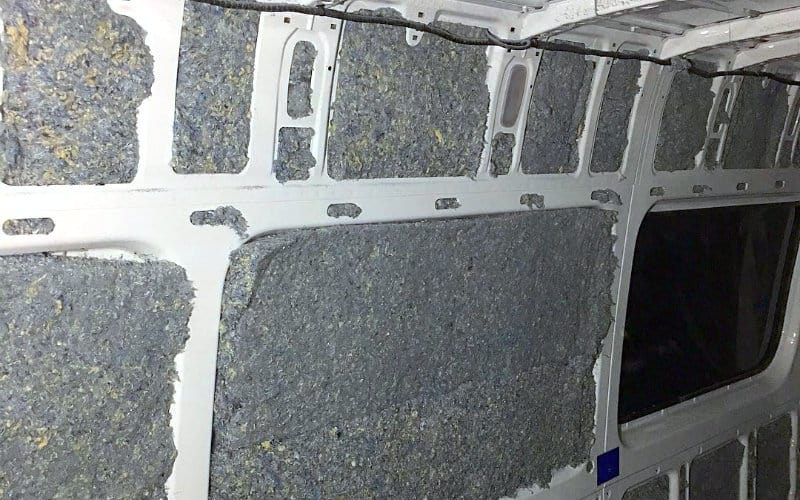
In our opinion, the best all-around material for van insulation is sheep’s wool insulation from Havelock Wool. Sheep’s wool is a sustainable product that insulates well, naturally manages moisture and condensation, and even helps purify the air in your van. It also has sound dampening properties, reducing the need for a separate sound deadening product. Use Havelock Wool to insulate your van’s walls, ceiling, door panels, vehicle frame, and nooks and crannies.

Effective, nontoxic camper van insulation material. Easy to install, breathable, hydrophobic, and sound deadening.
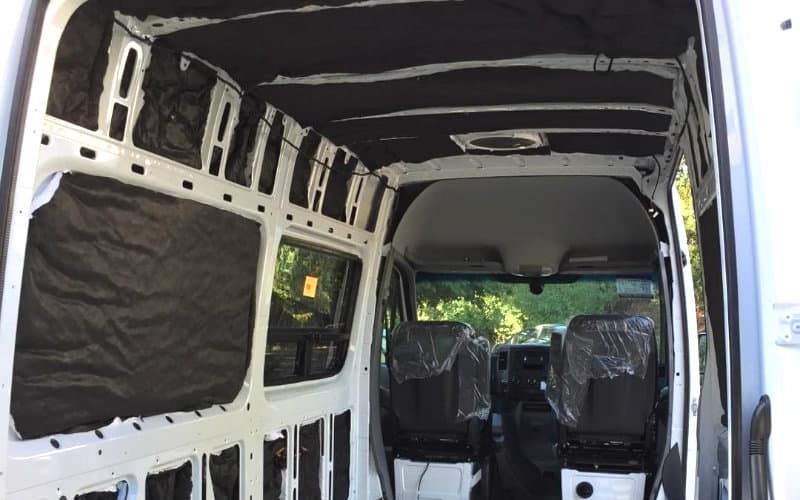
Another great option for insulating a camper is 3M Thinsulate. This nontoxic material is designed for automobile use, has sound dampening properties, and is fully breathable and hydrophobic so it won’t trap condensation behind your walls (neither will Havelock Wool, but it handles moisture differently). Thinsulate is effective and dead simple to install, but it can be expensive and it’s harder to stuff into small openings in your vehicle frame. Use Thinsulate to insulate your van’s walls, ceiling, and door panels.
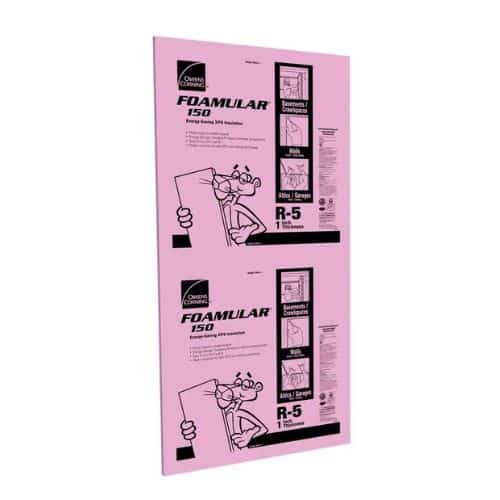
Effective and cheap rigid foam board insulation with a high compressive strength. Easily the best insulation for camper floors, but can be a good budget wall/ceiling option as well.
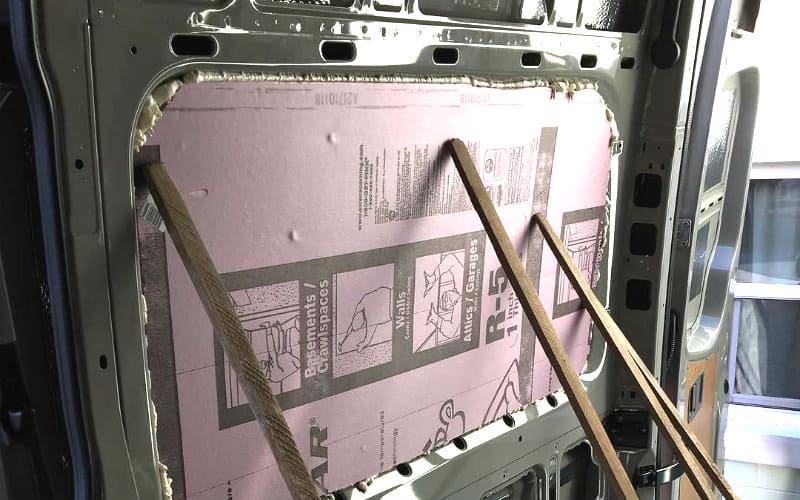
XPS rigid foam board insulation has a high R-value (R-5 per inch) and a high compressive strength, making it perfect for insulating your floor. It’s much cheaper than Havelock Wool or Thinsulate, so you can also use this to insulate your walls and ceilings if you’re on a budget (although there are some potential issues to be aware of, which we dig into later). Use XPS to insulate your floor, or for your whole van if you’re on a tight budget.

This radiant barrier features foil wrapped around a core of closed-cell foam, making it much more effective than Reflectix. EZ-Cool is excellent as a radiant barrier and you can layer it over your van's frame ribs to serve as a thermal break.
Why Do You Need to Insulate Your Campervan?
So why do we need to insulate a van conversion and what exactly does it do for us vanlifers?
Insulation slows the rate of heat transfer into and out of your van, which helps keep it at a comfortable temperature. A well-insulated van is easier to heat and cool, stays warmer in the winter, and won’t heat up as quickly in the summer.
To understand exactly how to insulate a van conversion, it helps to understand how heat transfer works.
Heat Transfer and Campervans: What You Need to Know
There are three types of heat transfer — radiation, conduction, and convection — and you’ll need to deal with all three of these when living in a van.
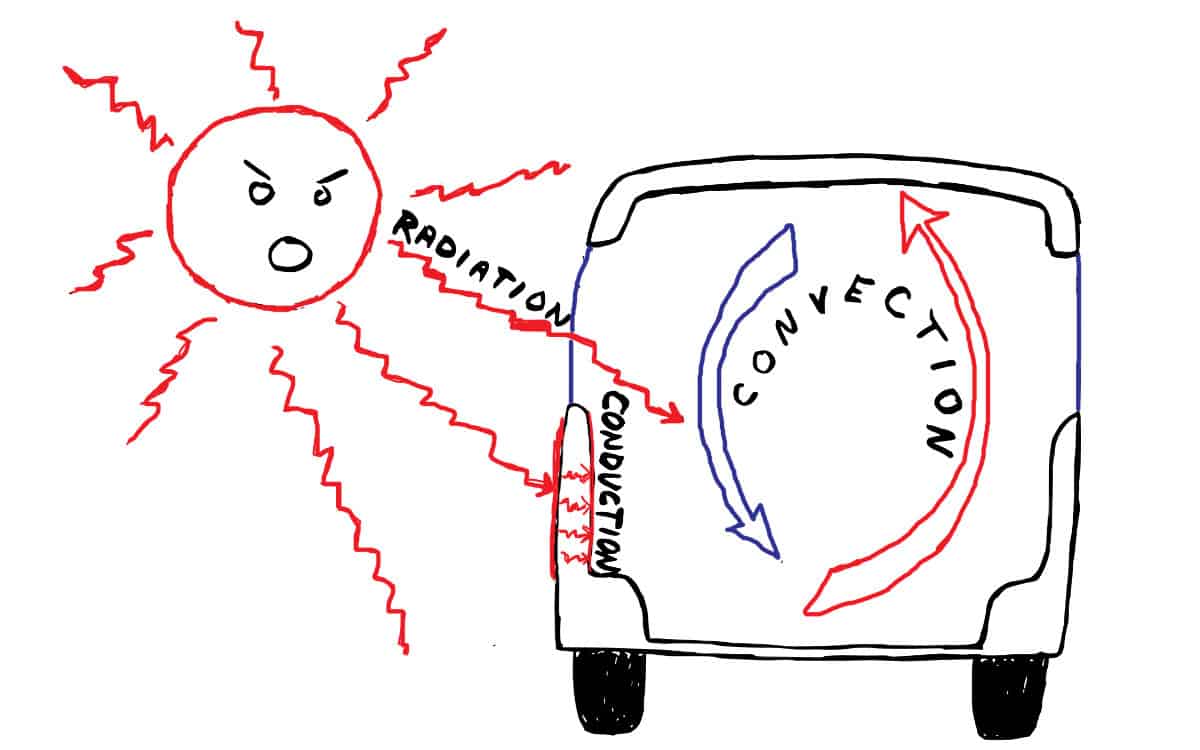
Radiation is heat transferred through air or a vacuum (like through your van’s windows).
The biggest sources of radiant heat in your van are the windows, which allow sunlight to pass through and heat the air inside. This can be nice in the winter, but absolute hell during a hot summer day.
The best way to deal with radiant heat is to use reflective window coverings, which reflect radiant heat away from the van and keep the inside much cooler. Reflective surfaces inside your van can help retain heat during cold weather. You can also help block the sun’s radiant heat from getting to your van by installing an awning or parking in the shade on hot days.
Conduction is heat transferred through solid surfaces (like your van’s metal skin).
When radiant heat from the sun warms the metal body of your van, the heat transfers inside through conduction. When it’s cold outside, heat also transfers out of your van via conduction.
The best way to slow this process of heat transfer is by insulating the walls, ceiling, and floor of your van. Insulation materials block radiant heat, so your van will retain more heat in the winter, and heat will be slower to penetrate into your van in the summer.
Convection is how heat moves through liquid or gas, like the air in your van (hot air rises toward the ceiling while cool air sinks to the floor).
Because of convection, the heat inside your van naturally rises upwards while cooler air sinks to the floor.
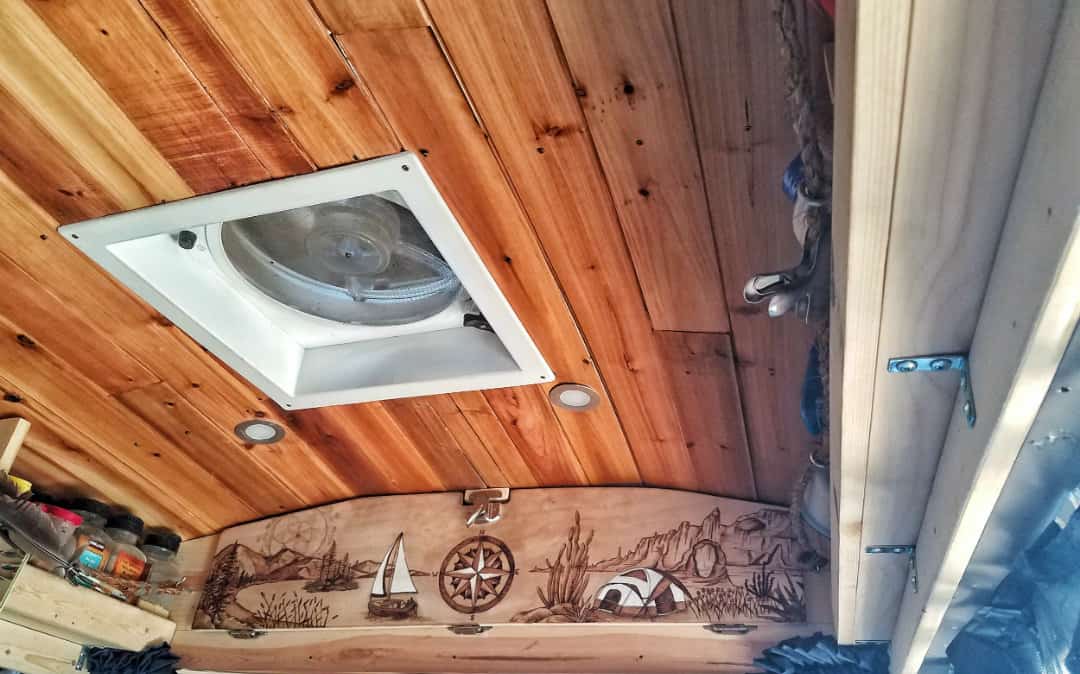
This is one of the reasons why having a roof vent fan is essential for a DIY van conversion. Ventilation fans suck out the hot air near the ceiling while creating airflow that cycles cooler air throughout your van. They also help remove moisture and condensation.
During cold weather van ceiling insulation helps keep heat inside.
What is R-Value?
Every insulation material has an R-value, which is a measure of the material’s Resistance to heat transfer. The higher the R-value, the better it’s able to resist heat transfer via conduction.
However, because R-value only measures resistance to conductive heat transfer, it becomes meaningless when considering the effectiveness of reflective insulations like Low-E/EZ Cool or Reflectix, which protect against radiant heat.
A thermal bridge is an area that has greater thermal conductivity than the materials around it, providing an avenue for heat to pass through.
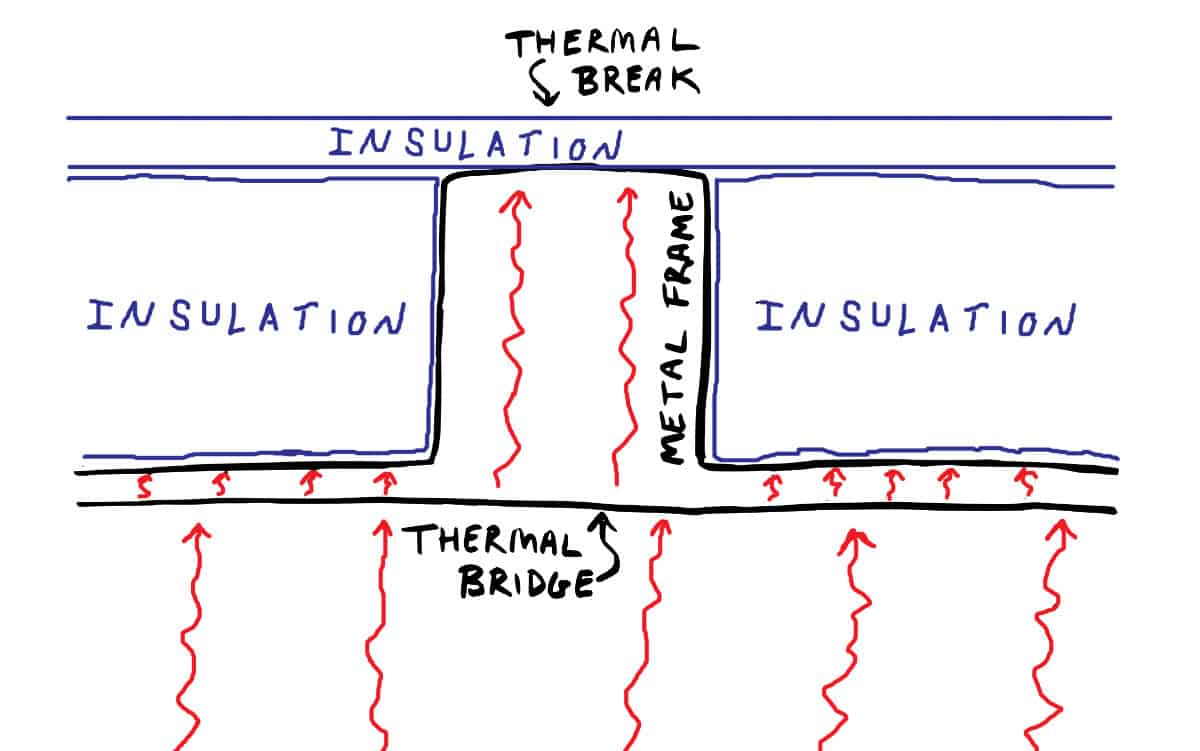
When you stuff insulation between your van’s frame ribs but don’t do anything to the ribs themselves, the frame then becomes a thermal bridge. Heat can conduct inside your van through the exposed frame much more easily than it can through the insulated areas. This thermal bridge reduces the overall effectiveness of your insulation.
Some insulation is always better than no insulation, and an insulated van with some thermal bridging is much more resistant to heat transfer than a van with no insulation at all.
Insulating inside your van’s hollow frame can reduce the effect of thermal bridging. It’s also a good idea put up thermal breaks, which are non-conductive materials placed in the pathway of a thermal bridge to block the flow of heat. Covering your van’s ribs with insulation like EZ Cool or foam board would create a thermal break that cuts off any thermal bridging. You can then place furring strips or wall materials on top of your insulation layers.
Now that we understand how basic heat transfer works, let’s take a look at the insulation materials we can use to slow it down.
Super Detailed Rundown of Common Insulation Materials (Plus an Informative Chart!)
There are a ton of different insulation materials available, from standard building insulation to experimental space-age compounds. Wading through them all and trying to decide what’s best for your van conversion can be a daunting task – which is why we’ve done that for you.
While there are a lot of options out there, not all of them are good choices for insulating a van. Good van insulation needs to have the following:
- High R-value per inch. Space is at a premium inside a van, and you want to insulate with materials that will do the most in the least amount of space.
- Bang for your buck. There’s no need to spend thousands of dollars insulating your van. Some materials may work well, but cost more than your actual van did. On the flip side, some materials are dirt cheap but have a host of other issues. The best insulation materials do their job effectively and are also friendly to your wallet and your health.
- Able to withstand vibration. Unless you’ve got your van up on cinder blocks in the front yard, you’re probably driving it all over the place all the time. Driving causes a lot of vibration inside your van, and your insulation needs to be able to take it without falling apart.
- Resistance to moisture, mold, and mildew. Either the material is impervious to moisture (like rigid foam board or spray foam) or has moisture control properties and natural mold resistance (like Thinsulate or Havelock Wool).
- Non-toxic. You don’t want harmful gases or microscopic particles from your insulation filling your (very small) living space. Bonus points if the insulation is produced in an environmentally-friendly way.
But how do we directly compare different insulation materials when they all come in different thicknesses and square footage and R-values?
With a spreadsheet, of course! The chart below compares the R-value per inch and relative cost of some of the most common and most talked-about campervan insulation materials out there.
* Nominal R-value / Unit Thickness ** Amount you would need to spend to insulate 1 square foot to R-1. *** See below for details on recommended use. Want to see where these numbers are coming from? Click here to view our source spreadsheet!
Looking at this chart, there are a few clear winners that both insulate well and are cost-effective. But every type of insulation may be good for some applications and not so good for others. Below, we dig a little deeper into each of these materials and their recommended uses.
Top Pick: Havelock Wool Sheep’s Wool Insulation
Eco-friendly and all-natural insulation batts made from sustainable sheep's wool. Sound dampening, breathable, controls moisture, sequesters carbon, and easy to install.
- R-Value Per Inch: R-3.7
- Cost for 1 ft2 of R-1: Varies; $0.14 on average
- Where to Buy: Havelock Wool
Sheep’s wool is a renewable insulation material that’s non-toxic, very environmentally-friendly, and has some great benefits. It doesn’t have the highest R-value per inch – it’s about the same as fiberglass and rock wool – but its relatively low price, moisture management properties, and environmental friendliness make it an attractive option (one that we’re sold on using for van build #2).
One big benefit of sheep’s wool insulation is its breathability and moisture control properties. Sheep’s wool can absorb moisture in the air without compromising its insulation abilities, and it will wick condensation away from your van’s metal wall. It’s also naturally resistant to mold and mildew, has some sound deadening properties, and even helps purify your air.
Because of its lower R-value per inch you’ll need more thickness than you would with foam, which may take away from your van’s interior space. But because you don’t have to worry as much about the effects of condensation with sheep’s wool, it’s much more fool-proof to install.
The one downside to sheep’s wool is that it’s not as available in brick-and-mortar retailers, so you will have to order it online – which adds shipping costs to the equation. The good folks at Havelock Wool have been working hard to reduce shipping costs for smaller “vanlifer” orders, and they are currently down to about 15% of the order total.
Bottom Line: Great choice for van insulation, especially if environmental impact and health are top priorities. We really love a lot of things about Havelock Wool insulation. It’s 100% natural, it’s environmentally friendly, it’s resistant to mold and mildew, and it helps manage moisture and condensation.
If you’re concerned about VOC’s, air quality, and condensation inside your van – and if you prefer to use natural materials – then sheep’s wool is an excellent choice. We’re pretty much sold on using this for our next build.
However, Havelock Wool has a lower R-value per inch than foam board, which means you’ll need to give up more interior space to get the same insulating effect. It’s also a bit more expensive, especially after factoring in shipping costs. But depending on your needs and priorities, these trade-offs may be worth it.
Since Havelock Wool is effective, environmentally-friendly, non-toxic, and helps mitigate moisture and sound in your van, we think this is one of the best all-around choices for van insulation.
Reflectix (and Other Radiant Barriers)
- R-Value Per Inch: R-4.4
- Cost for 1 ft2 of R-1: $0.39
- Where to Buy: Most big box hardware stores
Reflectix is thin bubble wrap with a reflective coating on each side that acts as a radiant heat barrier. It’s widely recommended for diy van builds, but it’s also widely misunderstood.
If you’ve watched any van build Youtube videos, chances are you’ve seen someone insulating their van by gluing Reflectix up against the metal walls with paneling right on top of it. This is just plain wrong.
The fact is, Reflectix is primarily a radiant barrier. It’s very effective at reflecting radiant heat, but this goes out the window as soon as you put something on top of it.
Since radiant heat only travels through air or a vacuum, there needs to be at least a ¾” air gap next to the Reflectix for it to have any effect at all as a radiant barrier. When you put Reflectix directly against your van’s walls, you’re now dealing with conduction and the R-value comes into play.
While Reflectix does have an R-value, it’s very minimal (about R-1), and it’s very costly for what you get. Other materials will give you much more R-value for much less money.
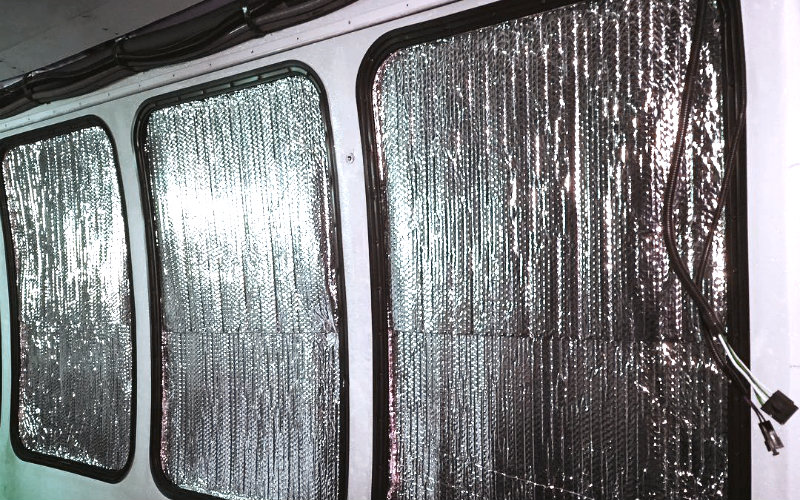
That said, Reflectix has its uses. Because it’s so good at reflecting radiant heat, it’s awesome as a window covering. On a hot day, shield your windows with Reflectix (or another radiant barrier like EZ-Cool or Insul-shine, or an Eclipse Sunshade) and you’ll notice a dramatic difference in the amount of heat getting in. It also works well for insulating large cavities like the interior of door panels, because there will naturally be an air gap that allows it to hold heat in.
VERDICT: Recommended for window coverings and large cavities. Reflectix is great as a radiant barrier, but you’re wasting your money if you put it behind your walls. There are much more effective and much less expensive insulation materials out there that have a higher R-value per inch.
Polyisocyanurate (Polyiso) Foam Board
- R-Value Per Inch: R-6.0
- Cost for 1 ft2 of R-1: $0.12
- Where to Buy: Most big box hardware stores
Polyisocyanurate (or polyiso for short) is a rigid foam board insulation that’s widely used in green building applications and van builds. It has an impressive R-value per inch at R-6, it’s fairly easy to work with, and it’s affordable.
Polyiso typically comes foil-faced on one side, which both acts as an effective vapor barrier and provides a radiant heat barrier if you install it with an air gap.
Polyiso is completely non-toxic and doesn’t off-gas anything harmful. It’s also much more environmentally friendly than XPS foam board, but not nearly as environmentally friendly as sheep’s wool insulation.
VERDICT: An affordable and effective choice for insulating your van. We used polyiso in our first van build, and we highly recommend it – especially for budget builds. With polyiso, you get great bang for your buck and even better R-value per inch. And when you’re building a van, R-value per inch is supremely important.
The downside to using polyiso (and foam insulation in general) is that proper installation is very important – you don’t want to create accessible air pockets behind your insulation where moisture could get trapped.
You can find polyiso at most big box hardware stores these days, but it can still be a bit tougher to find than other types of insulation.
Extruded Polystyrene (XPS) Foam Board
- R-Value Per Inch: R-5.0
- Cost for 1 ft2 of R-1: $0.12
- Where to Buy: Any big box hardware store
Extruded polystyrene (XPS) is another type of rigid foam board insulation that’s also widely used. You’ll recognize it as the big pink or blue foam sheets at the hardware store (the pink stuff is branded as Owens-Corning Foamular).
XPS has very good R-value per inch at R-5, and is also impermeable to moisture. Another benefit is its high compressive strength, making it ideal for floor insulation. You can even use it to build lightweight cabinets for your van!
Although XPS is slightly cheaper than polyiso by the sheet, it also has a slightly lower R-value per inch. And it’s not at all environmentally-friendly. XPS manufacturers use HFCs (hydrofluorocarbons) in its production, which are incredibly harmful greenhouse gases that are much worse than CO2 in their effect on global warming. XPS manufacturers say they will stop using HFCs by 2020.
VERDICT: Use this if you can’t find polyiso. Because of its high R-value per inch and fairly low cost, XPS is an excellent choice for van insulation. Even if you use polyiso as your primary material, we recommend using XPS under your floor because of its higher compressive strength.
There’s also some research that shows XPS performing better than polyiso in extreme cold, so if you regularly spend time in very cold weather this may be your best option. That is, if you can get over the unfortunate environmental costs.
Expanded Polystyrene (EPS) Foam Board
- R-Value Per Inch: R-3.9
- Cost for 1 ft2 of R-1: $0.10
- Where to Buy: Any big box hardware store
Expanded polystyrene (EPS) is another type of foam board insulation. It’s basically the same stuff as typical styrofoam.
EPS works fine, and it’s super cheap. But it contains a lot of air gaps that allow moisture to penetrate, degrading the material over time. It also won’t stand up to vibration as well as polyiso or XPS, and generally isn’t as durable.
But, on the plus side, no HFCs are released in its production, so it’s relatively environmentally friendly!
VERDICT: If you’re going with foam board, there are much better choices. Although EPS is cheap and works fine as insulation, it has a lower R-value per inch and degrades over time – especially when exposed to the vibrations of a van. Polyiso and XPS have much higher R-value per inch, can stand up to vibration, are moisture impermeable, and are generally far better choices.
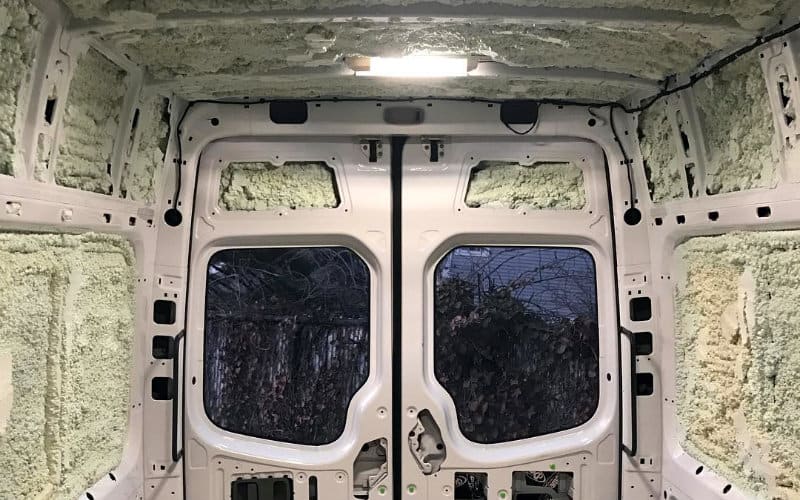
Closed-Cell Spray Foam
- R-Value Per Inch: R-7
- Cost for 1 ft2 of R-1: $0.27
- Where to Buy: Sprayfoamkit.com or most big box hardware stores
Closed-cell polyurethane spray foam comes in two varieties: the big spray kits that professionals use to insulate houses, and the smaller cans of spray foam like Great Stuff.
Spray foam insulation has the highest R-value per inch at R-7, and when installed correctly forms an impermeable vapor barrier that can shield your van’s metal walls from condensation. It also works as a sound dampener.
But, spray foam kits are rather expensive – foaming your entire van would cost upwards of $400. Installation can also be pretty intimidating, not to mention messy. It could end up being a total nightmare if you do it wrong.
Canned spray foam like Great Stuff is fairly inexpensive, and does a great job at filling gaps, cracks, and hard-to-reach areas like your vehicle frame.
VERDICT: Skip the big kits, but use Great Stuff to fill gaps. Spray foam is great insulation, and if you’re okay with the extra expense and installation process then it can be a good choice. But rigid foam board is much cheaper, easier to work with, and nearly as good at insulating.
However, Great Stuff canned spray foam is perfect for gluing up foam boards and insulating between them, as well as filling all those little gaps and cracks.
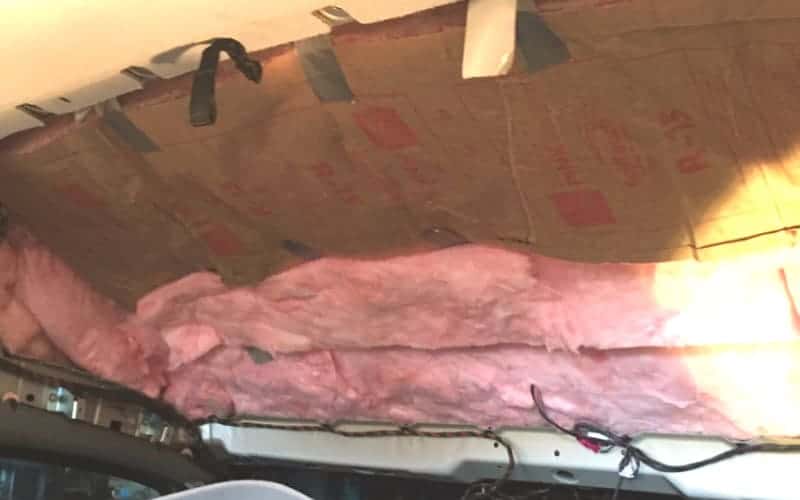
Fiberglass Batts
- R-Value Per Inch: R-3.7
- Cost for 1 ft2 of R-1: $0.03
- Where to Buy: Any big box hardware store
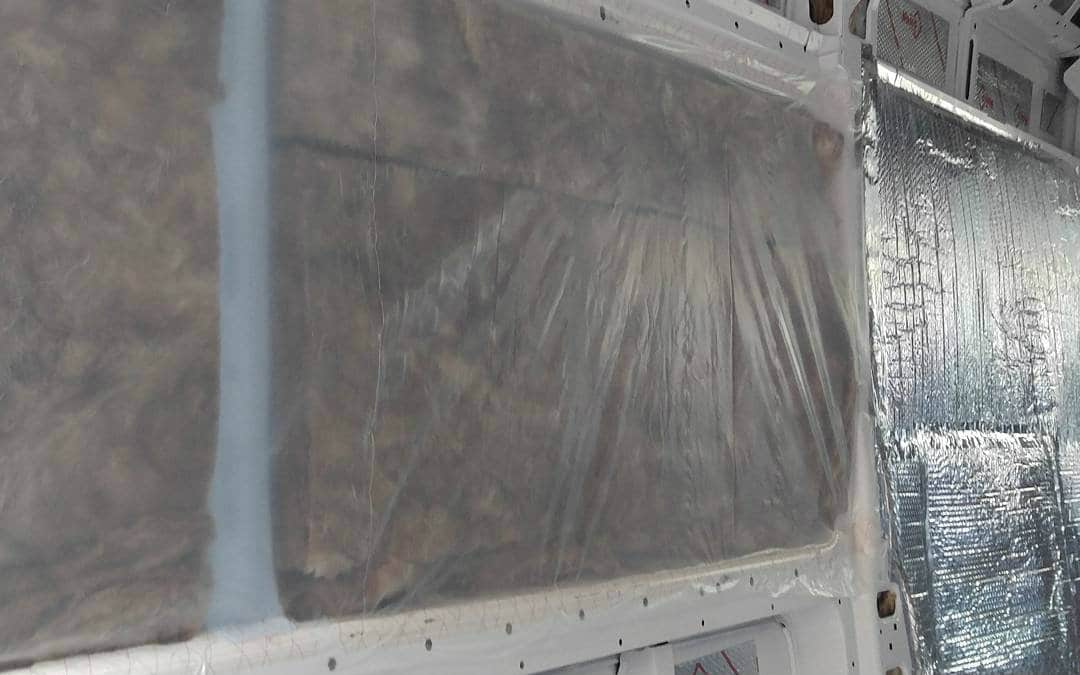
Fiberglass is the most widely-used insulation in houses because it’s super cheap and it works. It stands to reason that it would work well in vans also.
But its only real upside is that it’s cheap. Fiberglass has a fairly low R-value per inch, meaning you need more thickness to get the same insulating value as foam board. It’s also toxic and a pain to work with. It will make your skin itch, and you do NOT want to breathe it in.
Fiberglass soaks up moisture, which you definitely don’t want sitting behind your walls. It also degrades over time, and may fall apart and release harmful particles with all the vibration of driving around in your van.
Because fiberglass is so cheap, it’s definitely an attractive choice for bare bones van builds on a tight budget. It’s also good for stuffing in door panels and jamming into your vehicle frame (that’s what we did). Just make sure you have it fully sealed off from the living space.
VERDICT: Toxic and a pain to work with, but it can be useful in some cases. We generally don’t recommend using fiberglass in your van, but we do recognize its utility as a budget material. It’s also a way to cheaply insulate your door panels to R-13 or higher.
Rock Wool Batts
- R-Value Per Inch: R-4.3
- Cost for 1 ft2 of R-1: $0.64
- Where to Buy: Most big box hardware stores
Rock Wool (also called mineral wool) is a semi-rigid batting material made from recycled stone spun into thin fibers. It’s very common in Europe and Canada, less so in the US. Rock wool has a higher R-value per inch than fiberglass, and its rigidity makes it much more durable and easier to work with.
But, it’s also a whole lot more expensive, and the R-value per inch is still a lot lower than foam board. And, like fiberglass, installation can be a very itchy process. Again like fiberglass, you will want to wear protective clothing and a face mask whenever you work with rock wool. Inhaled rock wool slivers can become lodged in your lungs, and there have been some indications that this can lead to health problems.
VERDICT: Alternative to fiberglass if you can stomach the extra cost, but there is growing evidence of possible health concerns. Rock wool is a more effective insulator than fiberglass, and it does a better job dealing with moisture. This would be a good choice for insulating door panels, but foam board is still a better (and cheaper) choice for the rest of your van. Rock wool also has some emerging health concerns, so if you use this make sure to wear protective gear and seal it off completely from the rest of your van.
Recycled Denim Batts
- R-Value Per Inch: R-3.7
- Cost for 1 ft2 of R-1: $0.31
- Where to Buy: Most big box hardware stores
Denim batt insulation is made from recycled cotton blue jean material. It’s non-toxic and very environmentally friendly. Denim has the same R-value per inch as fiberglass, but it’s quite a bit more expensive (although it’s cheaper than rock wool).
One major drawback of denim when it comes to van builds is that it easily soaks up and holds onto moisture, so you definitely don’t want to get this stuff wet. It’s also more expensive than both fiberglass and sheep’s wool.
VERDICT: Better than fiberglass, but it’s too absorbent and mold-prone for general use in a van. Denim batts are much more pleasant to be around than fiberglass, and could be a good option to insulate cavernous areas like door panels. But because it’s so absorbent and relatively expensive, we don’t recommend insulating your entire van with it.
3M Thinsulate
- R-Value Per Inch: R-3.2
- Cost for 1 ft2 of R-1: $0.53
- Where to Buy: Amazon
Thinsulate is a synthetic insulation material produced by 3M. Originally designed for use in clothing, Thinsulate has become increasingly popular in van builds of late.
Thinsulate is attractive because it combines decent insulation properties with sound deadening and moisture control. The synthetic fibers it’s composed of do not retain moisture, but they do allow it to pass through – meaning Thinsulate will not trap condensation behind it. It’s also non-toxic and easy to install – just glue it up with spray adhesive and you’re good to go.
But, Thinsulate has the lowest R-value per inch of any insulation material we look at here. You would need nearly twice the thickness to match the R-value of foam board insulation, which is a tough sell when every inch of interior space counts.
It’s also expensive – more than four times as costly as polyiso for the equivalent R-value, and much more expensive than sheep’s wool.
VERDICT: Great product and good for nooks and crannies, but there are cheaper choices for the rest of your van. There’s something to be said for Thinsulate’s moisture control properties, but in our opinion it’s just too expensive for general use in a van.
If you’re interested in Thinsulate because of its breathability and moisture management abilities, we highly recommend looking at sheep’s wool insulation instead. It’s much cheaper and has a higher R-value per inch.
Lizard Skin and Other “Insulating” Ceramic Paints
- R-Value Per Inch: N/A
- Cost for 1 ft2 of R-1: N/A
- Where to Buy: Lizardskin.com or Amazon (ceramic additive)
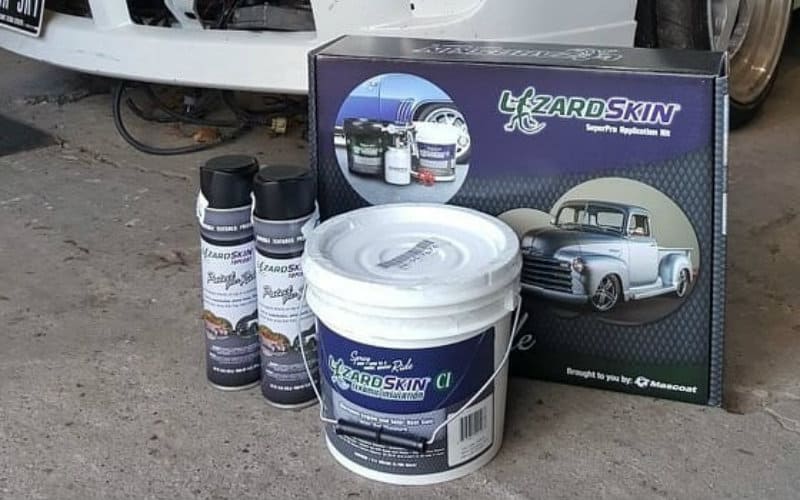
We’ve seen some discussion about using insulating paint like Lizard Skin as an alternative to standard insulation in van builds. Lizard skin is essentially paint with ceramic micro bubbles suspended within it.
Basically, you spray this stuff on the interior (or exterior) of your van, and once it dries you have a very thin layer of ceramic that forms a super effective heat barrier – or so the manufacturers of these products claim. You can also buy just the ceramic microbubbles and add it to the paint of your choice.
While this sounds like a great idea in theory, there is no actual scientific research that backs any of this up. The EPA does not recommend using these products in place of bulk insulation, and there are even tales of quixotic homeowners insulating with only ceramic paint and having severe heating and cooling issues with their homes – not to mention pissing away thousands of dollars in the process.
Not only that – this stuff is expensive. Lizard Skin costs upwards of $180 for a 2-gallon bucket (you would likely need 8 gallons or more to insulate a van). Buying the ceramic additive and using it with your own paint is much cheaper, but there’s still no evidence that it does anything at all for temperature control (in fact, just the opposite).
VERDICT: There’s zero evidence this stuff works. While we really want this to be a thing, it’s just not (at least, not right now). Because of the high cost and dubious insulating value, you’re much better off spending your money on proven materials like foam board insulation or sheep’s wool. If you have a bunch of extra money and want to experiment, go for it, but we just don’t recommend this for most people.
However, if research came out that ceramic paint is indeed effective, we could see it being used in conjunction with standard insulation as an exterior coating to prevent the metal body of your van from absorbing heat in the first place.
How much does it cost to insulate your van?
You should be able to fully insulate your van with Havelock Wool sheep’s wool insulation for about $300 to $600 (including shipping), depending on the size of your van.
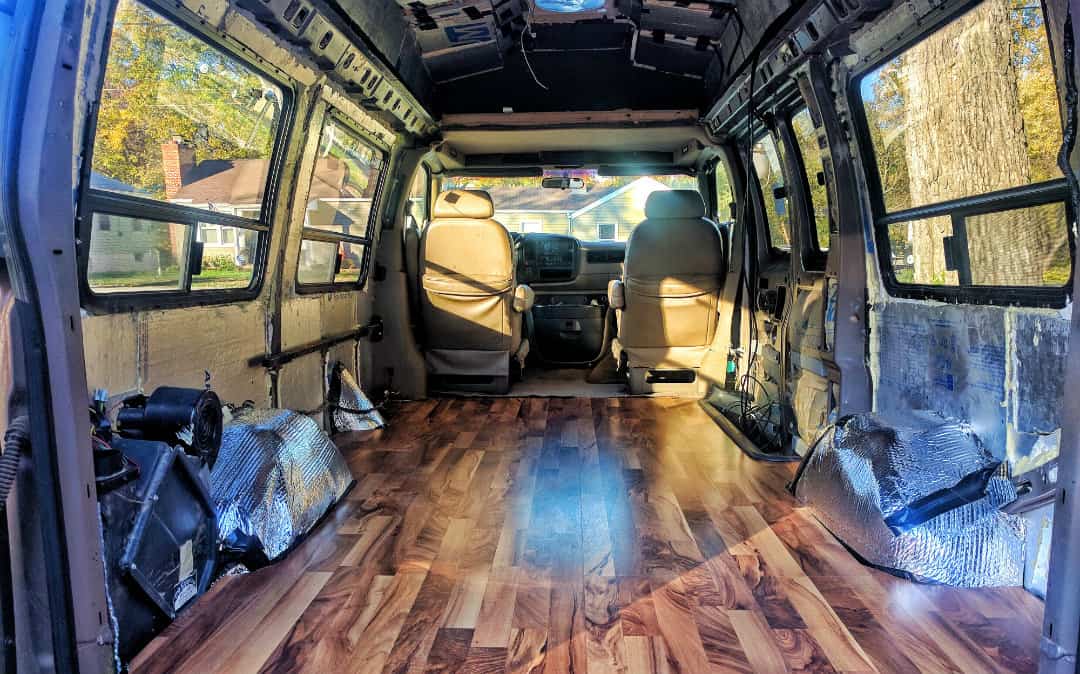
Using foam board, you should be able to fully insulate your van for about $150 to $250 (we spent about $150 to insulate our standard wheelbase Chevy Express).
Warning About Reflectix
Reflectix is a primarily a radiant barrier. It does a great job as a window covering, but as soon as you stick it behind your walls without an air gap it becomes effectively worthless as a radiant barrier and you only get the benefit of its low R-value.
We recommend using Reflectix to shield your windows or to line large cavities (such as inside door panels). But you’re better off with foam board for everything else.
Do You Need a Vapor Barrier?
There’s a lot of debate about vapor barriers and moisture control in van builds. There are two sides to this debate:
Argument 1: You need a vapor barrier to prevent your van from rusting out. When you live in a van you create a lot of moisture from cooking, running a heater, and just breathing. When warm, moist air from the living space reaches the colder metal of the van walls, it condenses into water and gets trapped, potentially causing rust and other problems over time. To keep this from happening, you need to install a vapor barrier between the insulation and your living space, so that moisture can’t even get to the metal walls.
Argument 2: You don’t need a vapor barrier because permeability and proper ventilation will allow any moisture to escape. The idea here is that you’ll never be able to completely seal off your van’s walls from moisture. If you install a vapor barrier that’s not 100% sealed, then moisture will become trapped behind it, potentially causing rust and other issues. Therefore, you should skip the vapor barrier and make sure your van has good ventilation and drainage, so that any moisture will just evaporate back into the living space.
Our opinion: Don’t worry about putting up a separate vapor barrier. If you use foam board insulation (or spray foam) for your van build then you’ve effectively created a vapor barrier anyway, since foam is impermeable to moisture. However, if you go this route it is vitally important to properly install your foam board so that there is no possibility of moist air becoming trapped behind it. This means making sure it’s installed right up against your van body so there are no air pockets, and sealing any seams with spray foam and foil tape.
Another option is to use an insulation material that won’t trap condensation no matter how you install it. Breathable materials like sheep’s wool insulation, rock wool, and Thinsulate manage moisture and allow it to naturally evaporate out of your van. If you use this type of insulation, then no vapor barrier is needed.
In terms of moisture control, it’s extremely important to make sure your van has proper ventilation. A good vent fan like the MaxxFan Deluxe is your best friend when it comes to moisture control. Even in cold weather, it’s a good idea to run your fan every so often to pull out moisture.
It’s also worth mentioning that your van has drain paths built into the floor, so any condensation that does drip down the walls can flow out of the van.
Why You Need Proper Ventilation in Your Van
A vent fan is pretty much a necessity for comfortable vandwelling, and we think every van should have one installed.
Vent fans help you with both moisture control and temperature control, and they also make sure your van stays safe while cooking or running a heater.
If you’re dealing with humidity or condensation, running your vent fan will help pull moist air out of your van. When it’s hot out, running your vent fan with an open window creates a nice breeze inside your van, removing hot air and pulling in cooler outside air.
We have a Fan-Tastic Vent installed on our van that works well, but we recommend going with a MaxxFan Deluxe due to its built-in rain cover and lower profile.
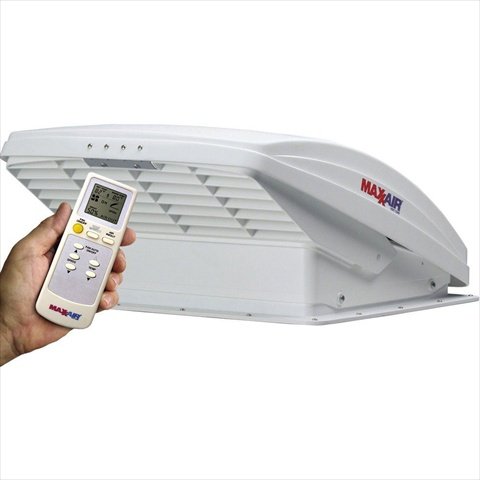
Powerful 10-speed roof vent fan with thermostat, remote control, and built in rain cover. Easily the best fan option for full-time vanlife.
Don’t Forget the Windows!
Your van’s windows are the biggest sources of both heat penetration in the summer and heat loss in the winter. If you spend a bunch of time and money insulating but don’t do anything with the windows, your van just won’t be nearly a comfortable as it could be.
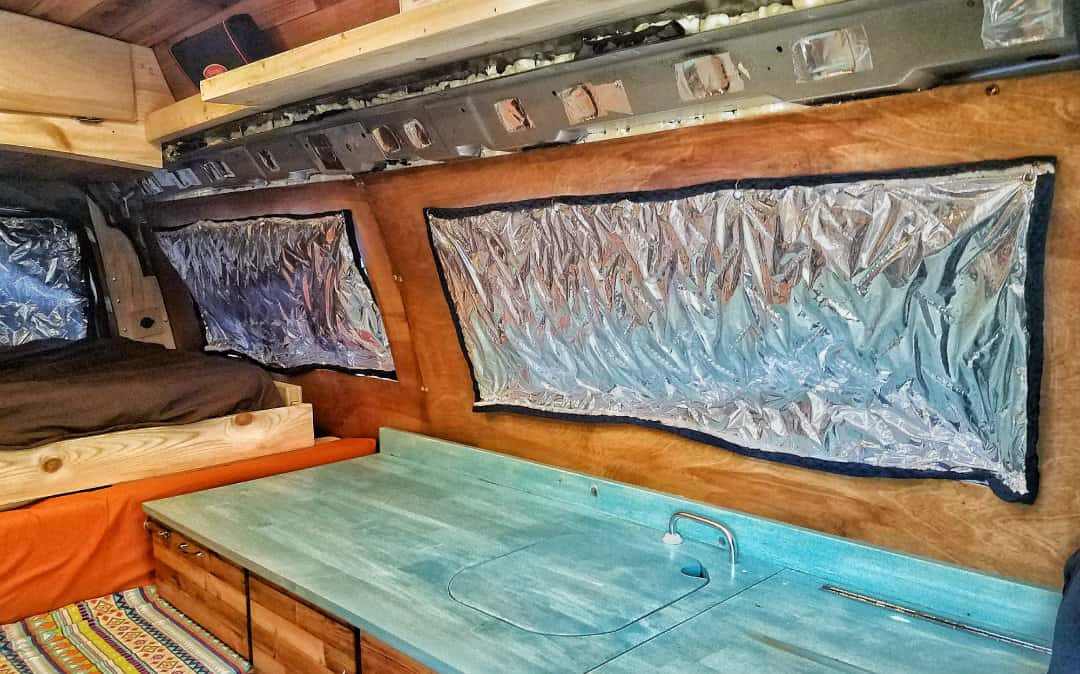
At the bare minimum, we recommend installing curtains made out of insulating thermal fabric. Even better are reversible window coverings with a reflective surface on one side. You can easily make these out of radiant barriers like Reflectix, Insul-Shine, or EZ-Cool, paired with dark fabric.
On hot summer days, putting up your window coverings with the reflective side facing outwards will reflect radiant heat away from your van. On cold winter nights, facing the reflective side inwards will reflect radiant heat back inside.
Here’s the setup we have in our van: we made reversible curtains out of Insul-Shine insulated reflective batting on one side and dark blue fabric on the other. We use these curtains to cover the windows in the rear living space.
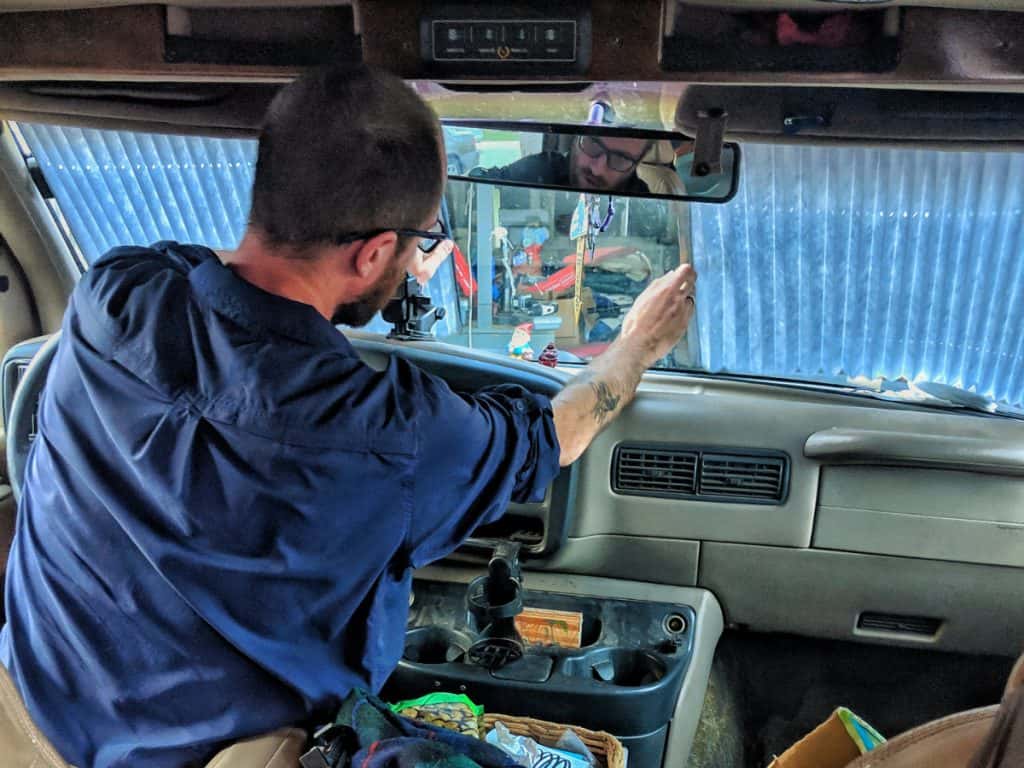
For the cab, we have a retractable Eclipse Sunshade mounted to the windshield and reflective coverings for the driver/passenger windows. We also have a thermal curtain that we can close to separate the cab from the living space, which helps us trap more heat when it’s really cold out.
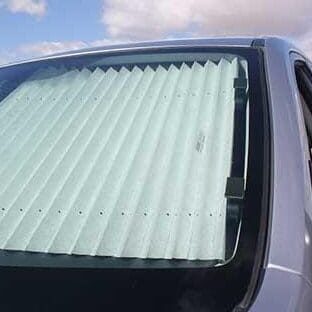
One of our favorite van add-ons. Keep your van cool (and private) with these custom-made, permanently installed windshield coverings.
Buy using the button below to get 3% off your order.
Want an Eclipse Sunshade? We don’t blame you, because they’re awesome. Buy yours using this link to receive a 3% discount off your order.
What About Sound Deadening?
We didn’t put any sound deadener in our van but we wish we had because the road noise is pretty loud (although some of that is due to the old, leaky door seals). It’s too late for us to put sound deadener in the living space, but we plan on adding some to the cab in the future.
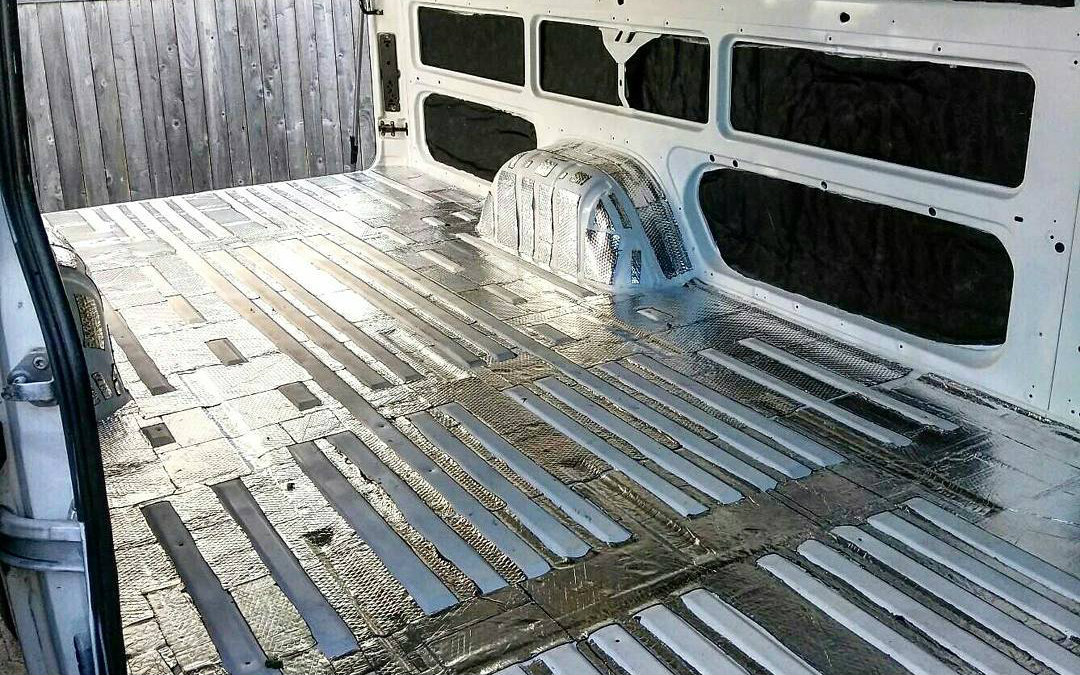
The insulation itself will provide some sound deadening, but adding a dedicated sound deadener like Noico’s sound deadening mat to your van’s bare metal before insulating will help keep road noise to a minimum.

Why overpay for sound dampening? Noico deadens the vibrations on your van's metals panels, drastically cutting road noise and exterior sounds. All for a fraction of the cost of other brands.
Insulating for Different Climates
Many vandwellers find they can stay most comfortable by following the seasons. So, they move to cooler areas when it gets too hot, and warmer areas when it gets too cold. If that’s you, then the insulation system we recommend above should be just fine.
But what if you spend most of your time in areas that are extremely cold or extremely hot? Well, you may have to change things up a bit or put more focus into mitigating certain things.
Insulating for Extreme Cold: More R-Value and Less Thermal Bridging
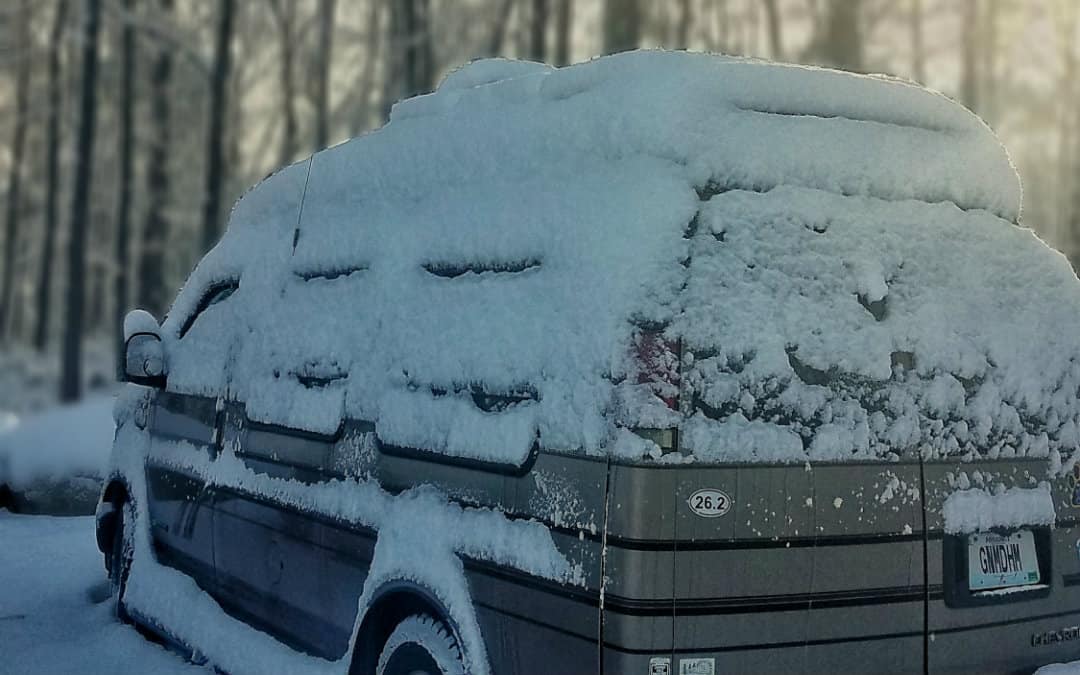
If you spend a lot of time in very, very cold weather, you will probably want to insulate thicker than 1” to get more R-value. You will also want to reduce thermal bridging as much as possible to prevent as much heat from escaping as you can.
To achieve this, we recommend starting with a layer of ¾” to 1” thick polyiso or XPS foam board** in between the ribs of your van. Then, install another layer of ½” to 1” foam board covering the ribs. This gives you between R-8 and R-12 depending on how thick you go, and the second layer of foam eliminates the thermal bridging from the van’s metal ribs
Alternatively, we recommend insulating with thicker Havelock Wool insulation between your van’s ribs, and adding a thin layer of another breathable material like Thinsulate to cover the ribs.
Insulating this thick will cost you some interior space, but if you typically find yourself in very cold weather then that may be a worthy tradeoff.
If you have windows in your van, adding insulated window coverings with a reflective surface facing inwards will greatly reduce heat loss through your windows, and the reflective surface will help keep radiant heat inside. We have reversible reflective curtains in our van, and they make it noticeably warmer inside when we face them inwards.
In extreme cold, you’ll also want some sort of active heat source like a Mr. Buddy heater. But insulating well is the first step to keeping heat inside your van.
**Note: While we generally think polyiso is the best overall choice for foam board insulation, if you’re regularly in extreme cold environments you may want to consider XPS instead. There has been some research that shows polyiso’s R-value decreasing in very cold temperatures, to the point where it’s less effective than XPS. The jury’s still out on this, but it’s something to think about.
Insulating For Extreme Heat: Active Ventilation and Reflective Window Coverings
Is there ever a time you shouldn’t insulate your van – like if you spend all your time in really hot weather? There’s a bit of a debate on this question, and the answer really depends on your overall setup.
Some argue that if you only spend your time in hot climates (i.e. Florida or somewhere similar) then insulation may do more harm than good. The argument is that while the insulation will slow down the heat from getting into your van at first, once it does get in the insulation actually prevents it from radiating back out once the day cools off.
But, that’s only really an issue if you don’t have any sort of active ventilation.
Installing a good ventilation fan will really help you control the temperature in your van.
A vent fan creates nice air flow that helps keep you cool. It also sucks out hot inside air and pulls in cooler outside air, which basically takes the insulation out of the equation when it comes to heat escaping at night. When we’re in hot weather, we run our vent fan literally 24 hours a day and it works wonders.
Here’s our opinion: if you have a very bare bones setup (i.e. no electricity or vent fan) and only spend time in hot climates, then insulation may trap heat inside when you don’t want it to. But if you’re installing an electrical system and running a vent fan (so there’s an active way for heat to escape), then insulating will only help with temperature control.
This is actually one time you may want to consider using Reflectix with an air gap between your van’s metal walls and the Reflectix. That way you’ll have something reflecting radiant heat during the day, but not stopping heat from escaping at night. But, we do not recommend doing this if you plan on spending any time at all in colder weather.
No matter what kind of setup you have, we highly recommend installing reflective window coverings if you spend time in hot weather.
Your windows are the biggest sources of heat coming into your van in the form of radiant heat from the sun. Adding reflective coverings to your windows during the day will reflect radiant heat away from your van and keep the inside much cooler. For covering your windshield, we highly recommend the Eclipse Sunshade retractable windshield cover.
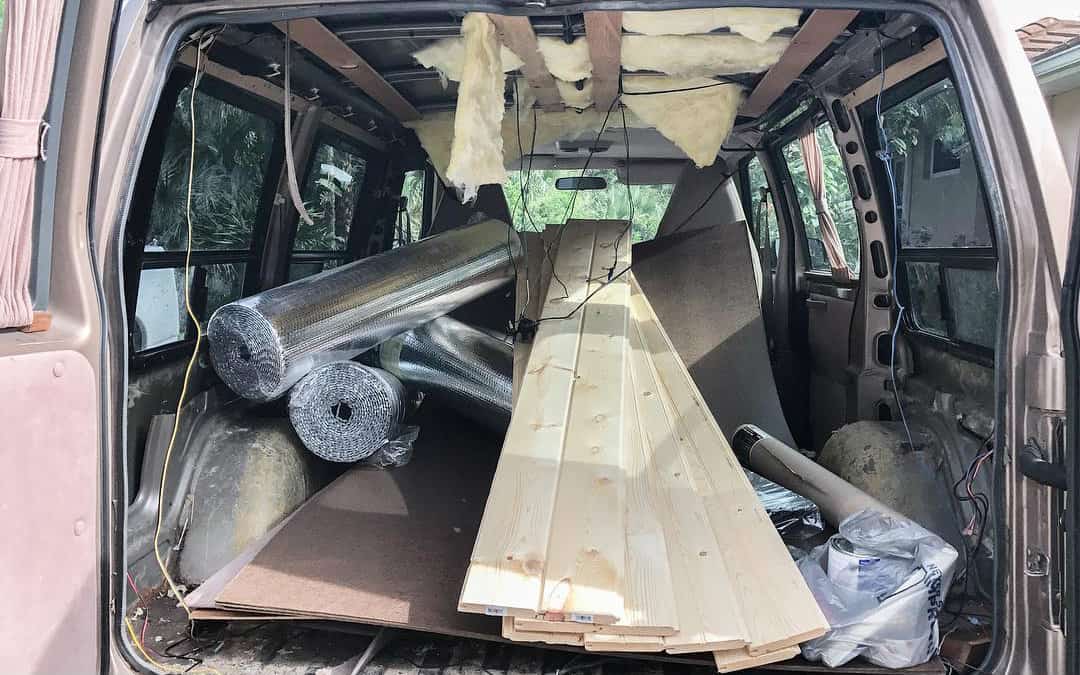
Insulating Your Van: Step-by-Step
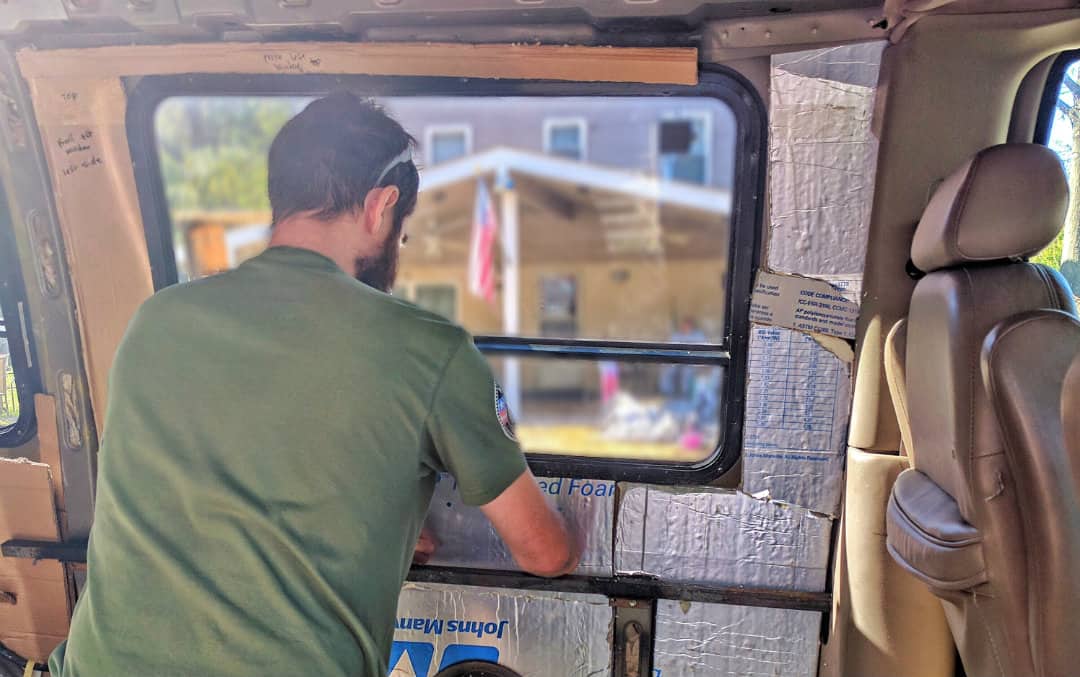
These instructions are for insulating your van with foam board. If you choose to use sheep’s wool insulation, you can find some helpful installation videos here.
We recommend using ¾” to 1” polyiso or XPS foam board to insulate your van, glued in place with either Great Stuff spray foam or 3M High Strength 90 spray adhesive. If you choose to insulate your floor, we recommend using ½” XPS due to its compressive strength.
We wrote a post with detailed information about how we insulated our van awhile back that we recommend checking out. But we’ve learned a bit since then, and here’s our updated step-by-step:
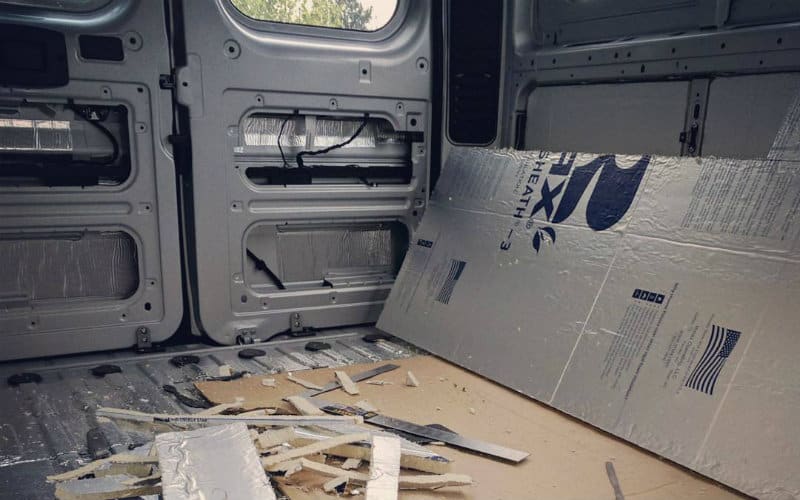
- Make templates out of cardboard. Cut to fit the areas in between the ribs of your van walls and ceiling. If you plan to insulate your floor, make templates for this too.
Pro tip: Keep all your templates! You can reuse them later when you install your wall paneling and your flooring.
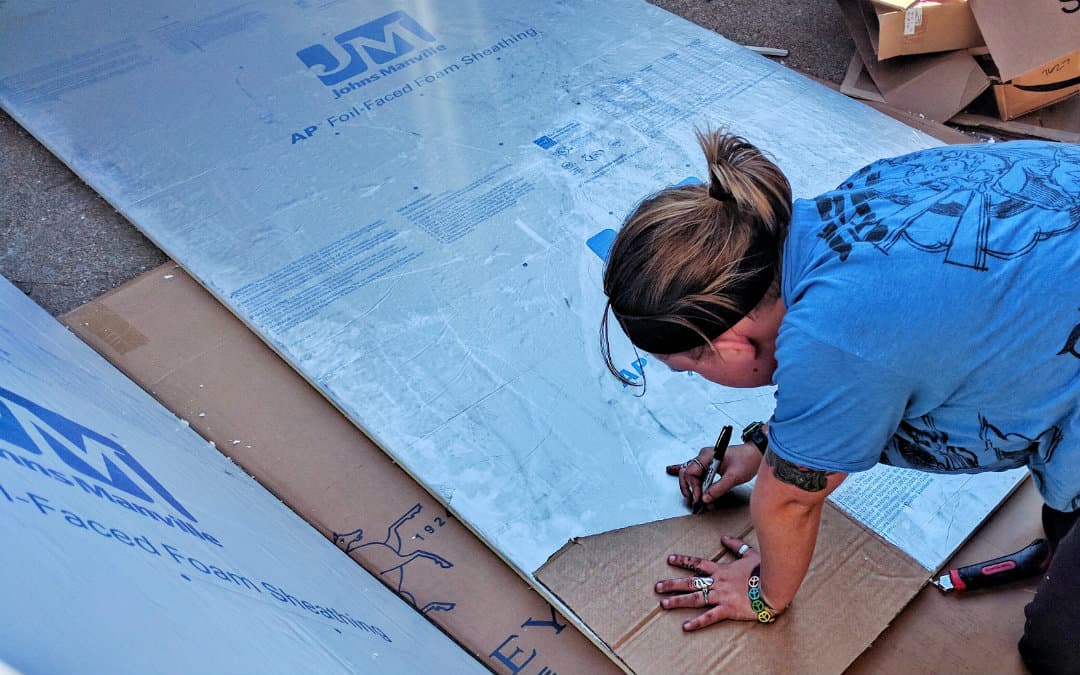
- Trace the templates onto the foam board with a Sharpie, and cut with a utility knife.
- Install each panel one-by-one. Spray Great Stuff on the back of the panel along the perimeter as well as a few lines across the middle. Make sure the perimeter is completely covered.
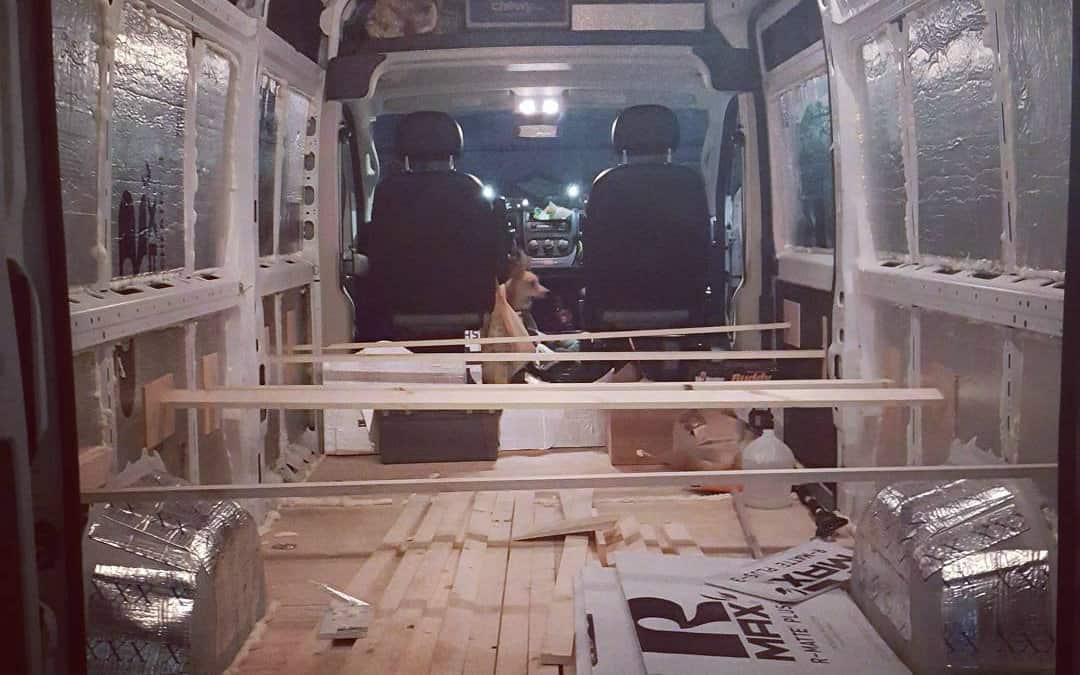
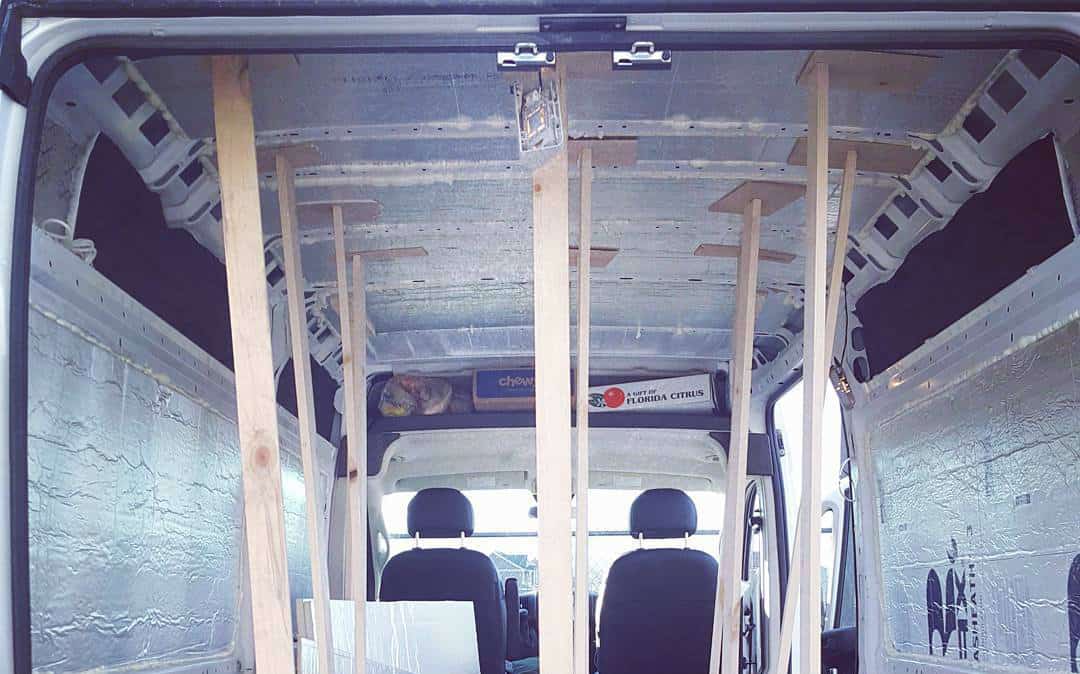
- Once the panel is coated in Great Stuff, press it against the van wall and brace it with a piece of lumber until the spray foam sets. If your van wall is curved, use several pieces of lumber to get the foam to conform to the curved surface (XPS is more bendable than polyiso if you have really curvy walls). Repeat these steps with each additional panel.
- Ceiling: Follow the same process, once again bracing each panel with lumber until the spray foam sets.
- After all your insulation panels are installed, fill any gaps with spray foam. Once the foam dries, cut off any excess with a utility knife.
- If you choose to insulate the floor: use cardboard templates to cut ½” XPS or Reflectix to fit. Spray the underside with 3M High Strength 90, set in place, and weight it down until dry.
- Door panels: Use the same method to install foam board insulation. Or, use 3M High Strength 90 to glue up thicker batting insulation. Another option is to line the door panel with Reflectix, since there will be a natural air gap to help hold heat in.
- Wheel wells: Wrap the wheel wells in Reflectix, glued down with 3M High Strength 90. Tape the seams with foil tape or Gorilla tape.
- Vehicle frame: Fill the frame with Great Stuff spray foam, or stuff with loose fill or batt insulation.
And There You Have It! A Fully-Insulated Van!
Now you’re ready to head off to Alaska in December, or drive down to Baja in July.
Well, maybe not. No matter how well-insulated your van is, it’s still a good idea to follow the weather you want. While insulation does make the inside of your van more comfortable, vanlife isn’t about sitting in your van – it’s about getting out there and enjoying everything this world has to offer!
For more epic build guides, vanlife tips, and puppy photos, be sure to follow us on Instagram @gnomad_home and on Facebook. Cheers!


Hey John, I am about to start on my build and like most watched so many vids, esp on insulation. The big thing that almost sent me astray as most on the insulation vids are designed for USA and Europe which get damn cold and snow. We in Oz do not get that unless you go up the mountains. So our climate is WARM to HOT most of the year. In looking at your pics for putting on the reflective foam unsulation to reflect the heat, 99% of the vids say DO NOT stick it to the walls of the… Read more »
Hi Terry, you’re correct about needing a gap for reflective insulation, and the scheme you have would allow reflection of radiant heat coming off of your van walls. The debate is whether or not the impact of that justifies the loss of interior space in your van from adding that gap. One other thing to note is that putting up reflective insulation taped up with foil tape will create a vapor barrier, since both of those things are impermeable to moisture. Not a bad thing especially in dry climates, but just something to note. And yes, the product linked is… Read more »
Great information!
Wondering what your thoughts would be on using a closed cell foam covering as much of the metal walls/ceiling as possible (something along the lines of Armaflex or Minicell) – either with adhesive backing or using spray adhesive – with Thinsulate to supplement in the voids? The closed cell foam would give us a bit of insulation, some sound blockage/deadening, create more of a vapor barrier than just Thinsulate would give us, and give us thermal breaks on all the ribs/exposed metal.
Am I missing a fatal flaw in this plan? Other than some added cost?
Hi Distracted, the main issues with any foam insulation relate to proper installation. Since foam is impermeable to vapor, if there is any way for moist air to get behind the foam (say, through a gap from installation that allows air into a bubble behind the foam) then you would have trapped condensation that does not have a way to evaporate out. If you use foam insulation, you’ll want to seal any gaps with spray foam, not Thinsulate. Thinsulate is vapor permeable and will allow vapor to pass through, whereas spray foam will not. The idea behind using breathable insulation… Read more »
thank you so much. I will always follow this site.
how about insulating/sound proofing the doors where there is constant moisture infiltration?
Hi Eric, we definitely recommend both insulating and soundproofing doors.
I bought a conversion cargo van. Most of the interior metal walls & ceiling are covered w natural wood. The interior of the sliding door and back doors aren’t. My plan was always to paint murals over the metal. It’s getting too hot in some areas I travel to, (not concerned about cold cuz of portable propane heaters), and not happy w any options for insulation. I was reading about ceramic coatings. Thinking I can paint the exposed INTERIOR metal with a brush myself. It’s doesn’t have an R rating cuz it stops the conduction phase altogether. It’s used on… Read more »
H Gloria, ceramic coatings sound nice in theory, but they are still rather unconventional for insulating buildings and vehicles so there is not a lot of solid data on them. I can’t offer an opinion at this point, but I do plan on doing some testing with ceramic coatings to investigate their utility as insulation for campervans. If you go this route, please let me know how it goes!
If money was no object, the best way to go would be 1/2″ overlapping VIPs (vacuum insulated panels)…for about 1″ total. Also add reflectix to both sides to add some protection to the panels. This would give you a minimum of R40.
Hi John,
I just read your article on insulation and it was a strong case for wool insulation. That sounds great, I checked out the Havelock website and noticed on their install videos they were using a combination of what looked to be a Radiant Barrier. Is this something you would recommend over simply just putting the wool into the cavities?
Hi James, the reflective material you see in their install video is Kilmat, which is a sound deadener. We definitely recommend putting something like that on, since it will prevent your van’s body panels from vibrating and help a lot with road noise. Hope that helps!
This article was so helpful in trying to filter the many options and related pros and cons of each material. Thank you! You mentioned in the article that Thinsulate is much more expensive than sheeps wool. I priced out materials on Havelock and then separately for Thinsulate and they seem to be about the same price, in some cases the Thinsulate was cheaper. Am I underestimating my materials for the Thinsulate or is the Havelock just a premium higher priced wool?
Hi Rob, it’s possible prices changed since we created that pricing chart. I’m getting about the same as well, when I price out just the same square footage. One thing to consider is that with the Thinsulate SM600L you’re getting about R-5.2, whereas with the 2″ batts from Havelock you’re getting R-7. We’re working on an update to this post, so we’ll have all current numbers at that point.
That’s was the best blog I have read and actually understood! Thank you for making it so easy to follow yet still have the info about each thing.
All the other blogs just confused me and I have actually put off my van build because I was so confused about the installation part.
Thank you! This is awesome!
I can finally start!!
Hi Emma, so glad this helped! Best of luck on your build!
I have decided to use foam board as the insulation for my van but you seem to be contradicting how I believed it should be installed. Because the board is foil sided, I thought it needed an air gap between it and the external van wall in order to work properly. In your article you say to glue it directly to the van wall. Am I missing something here? Also, I would have thought gluing it to the wall would cause moisture issues while having an air gap would allow the moisture to escape. I am confused now and would… Read more »
Hi Greg, thanks for reaching out. To answer your questions: –If there is no air gap, the foil won’t do anything, that’s correct (other than act as a vapor barrier). However, the foam itself is a highly effective insulator, and does not need an air gap to work. This is in contrast to Reflectix, which has almost no insulating properties and does basically nothing without an air gap. Foil/reflective surfaces only provide a barrier to radiant heat, which requires an air gap since radiant heat only travels through air (or clear materials like glass). Insulation like foam board, etc, provides… Read more »
Great answer thanks John. I was thinking the air gap would allow the condensation to run out or evaporate. Apparently it doesn’t work like that! I’m a bit scared of my nice new van starting to rust due to condensation though. With that in mind, would you say sheep’s wool would be a better way to go? I am more interested in keeping the van cool rather than keeping it warm. What would you suggest?
Hey Greg I just asked John the same question before reading yours. I live in Oz so cold is not really an issue here. What did you end up doing? and what was the result?
Cheers
Terry
Hey there, I’m thinking to buy a 02 Express 15 passenger with lots of windows. You mentioned reversible window coverings with reflectix on the inside or outside depending on weather, for doing the windows.. What are the reversible window covers and where can I find them? How do you stick the reflectix to the reversible window cover? Thank you for sharing such great work!
Hi Jason, great question. We need to do a write up on this. There are a few ways to do reversible window coverings. The simplest way is to cut some Reflectix to the shape of your window, and put dark colored tape or fabric on one side. If you cut the Reflectix so it’s just slightly oversized, you can get it to wedge into your windows, and then just flip it around to reverse it. The other main way to do this is to make some sort of insulated curtain, which is what we did. We used a product called… Read more »
Hi!! I have a 144 Sprinter High Roof. I am 6’3″ and need all the space i can. Live in So Cal and need it cool most of the time. Insulate for hot climate for us. What is the best way for the floors, ceilings and walls? Keeping the most height available. Was thinking either no insulation on the floors or Lizard Skin? Thanks
Hi Eric, I would personally fully insulate the floors with XPS. An uninsulated floor will allow in heat rising from the drive train, as well as hot ground. For the rest of the van, you want to pay attention to a few things: 1. Reflectivity. If keeping out heat is your primary concern, a gloss white van is best for reflecting sunlight. Also, make sure to install reflective window coverings to reflect heat away from your windows. 2. Ventilation. Make sure your van has a roof vent fan, and keep it running. Some vanners install two fans, one blowing one… Read more »
Thanks John for the information! I don’t have a van but I typically gather research for affordable, DIY winterization/weatherization options, for my rented home, my family can do to keep costs down with high benefits for us. For years, we’ve used bubble wrap (even sold at dollar tree w/perforated lines so no scissors and only needs to be put on with water in a spray bottle) on windows as well as obtaining just about any item as free samples mailed to the house or local materials from free trading groups I’m apart of. One of the last things I picked… Read more »
Hi Nicki, foam in general is a great insulator, and should definitely work for thermal curtains. We’re all about repurposing things, as well. We once talked to a guy who insulated his whole van using foam from the cushions of couches he found left by dumpsters in alleys. Very thrifty, haha.
John
What do you think of this idea:
Install a layer of Havelock wool directly next to the metal of the wall or ceiling. Then, add a second layer of insulation by adding a 1 inch poly iso foam board over the Havelock wool.
Hi Dawn, doing it that way would eliminate some of the benefit of using the wool, since it would be basically sealed off from the main living space. There’s also the danger of creating a cavity for condensation to get trapped. Hope that helps!
~John
John, hello. At 72, I haven’t the time or skill to install insulation and was wondering: What are the pros and cons on having spray foam insulation applied by a professional? Also, can you ‘ball park’ a price?
Hi Lynna, thanks for reaching out. Having spray foam professionally installed would likely eliminate much of the headache of doing it, namely incorrect installation. I’m not sure how much that would cost, though – you would need to find a professional who’s willing to work on a vehicle and chat with them. Hope that helps!
~John
Your input was hugely helpful. Keep up the good work.
Hi there, not sure if you can help me but I would like to insulate my van with sheep wool. However, I don’t have access to Havelock Wool. I live in New Zealand. As the country of sheep you would think that you could get inexpensive 100% sheep wool insulation here, but you can’t! I can only get 60% wool, 40% polyester or 70%, 30% polyester. They say they use polyester to bind the product. Do you think a wool blend would work as well as 100% wool? Would it lose some if it’s features that we need for a… Read more »
Hi Olivia, while I don’t know about those products specifically, I do know that 3M Thinsulate insulation uses a blend of polyester and polyethylene fibers, and has many of the positive properties of wool like moisture control and breathability. So I imagine that the wool-polyester blend would have similar properties as wool and Thinsulate. Where you would lose out is on the environmental-friendliness aspect. Hope that helps!
~John
I just got hired on as a traveling welder, so I will be traveling all over the country for work. I have a long bed truck with a shell on it that I’m considering converting to a camper to save money on lodging while traveling. Because I’m likely to end up in extreme hot and cold environments what would you recommend for insulation? Also After reading your full article I thought it might be a good idea to put some Reflectix on the outside of the bed between bed and bedside and maybe the bottom of the bed too. What… Read more »
Hi Arley, for extreme cold environments higher R-value insulation like foam board is especially important to keep heat in, and make your active heating more efficient. For extreme hot, ventilation is going to be most important. I’m not sure what you’re thinking for the Reflectix there – on the inside of the van, it can help you keep heat in during the winter, but during the hotter months it will create an oven effect inside your van. Hope that helps!
Hi,
Quite a nice write up.
I did some testing on various types of insulation for moisture management and insulating value in a realistic van setup. Results here:
https://www.buildagreenrv.com/insulation-testing-for-van-conversions/
One thing you don’t mention that I think is valuable to know for van insulation is that both XPS and EPS have a max service temperature of 165F, and under hot sunny conditions (particularly for non-white vans) the sheet metal can reach these temps.
Gary
Hi Gary, thanks for the comment. I refer to your website in a few places on our site, it’s packed with great info. We’re working on an update to this post and will be sure to mention temperature considerations for different materials. Thanks again!
~John
This article is well-written and precise. Thank you for making this available.
Thank you for a great guide
Hi Amy, so glad our site was helpful!
Thanks John, Great information. I have replied to a comment further down in the thread with regards to a discussion about cork insulation. But, wondered if you’d had anymore exposure to cork builds in the last couple of years? I am UK based and although not the cheapest insulation, cork is widely available here (I remember using self-adhesive cork tiles in my first VW conversion 20 years ago!). I’m using cork boards for under-floor & ceiling and granulated cork for in-filling the cavities in walls and door panels. It’s pretty light weight and as I understand, it should be very… Read more »
Hi Richie, glad the post was informative. We have since seen some builds that used cork insulation in interesting ways, and it’s definitely one of the options we are considering for our next van. We’re gearing up for a major update of this post that will go into further detail on cork, as well as examine the environmental aspects of all the materials. Hope that helps!
~John
The R-value for 3M Thinsulate is actually 5.2
Hi C, the R-value we list is per inch of thickness. While the total R-value of Thinsulate is 5.2, this is for 1.75″ thick material. Our goal here is to compare different insulation materials on a 1-to-1 basis that the layperson can understand, so we calculated R-value per inch for all materials rather than go with something like total R-value or K-value. Hope that clarifies!
I am on the fence about whether to use the lambs wool or Rockwool insulation. The Rockwool is much cheaper around here and there’s the savings on not paying for shipping to consider, but that lambs wool looks pretty nice. Whichever I go with, can the batts go directly against the inside of the metal wall?
And thank you for all the useful info!
Hi Fred, both can go against the metal wall. They are both breathable and naturally derived. The lamb’s wool is awesome, but it may not justify the cost if there’s a big difference. Hope that helps!
Hi again…found the answer to my question…metric (SI) vs. inch-pound (I-P). Need to multiply by 5.678263337. Something to watch out for if you are from Europe, Australia etc and using American based data.
Hi John
Can you expand on where you obtained the R-Values per inch from in your table. The Rockwool for example has a thermal conductivity of 0.044W/mK (www.rockwool.com). The R-Value is related to the thickness of the material so 1″/25.4mm of Rockwool only has an R-Value of 0.58. To achieve the R-Value of 4.3 in your table wouldn’t you need a thickness of 7.4″/189mm?.
Hi John, I obtained these values of using a fairly simplistic method of looking at insulation R-values and dividing by the material thickness. To use Rockwool as an example, an R-15 batt of Roxul Comfortbatt brand rock wool (view at Lowes.com) has a thickness of 3.5″. R-15 / 3.5″ = 4.29. I realize this is an imperfect way to calculate this, since thickness does play a role. To use another Rockwool example, the same brand batt in R-23 (view at Lowes.com)is 5.5″ thick, which equals 4.18 R per inch. R-23 / 5.5″ = 4.18.
Hope that clarifies things!
~John
Great Tips ! Awesome
Thank you for such in-depth information!
Thank Laura, glad this was helpful!
To the editor or those in the know, I am finalizing my insulation plan for my 1987 Vanagoin Syncro. I have already applied sound deadener to all paneling. I thought that applying the silver foil might be good againt the sound deadaner then wool but it seems that after reading your digest on silver foil requiring an air gap to work effectively I am convinced of not and saving money therefore it sounds like I will apply the wool to all air cavities. I was wondering how you treat an area like the front end therefore the area between the… Read more »
Hi James, you are correct about the foil insulation – it needs an air gap to work effectively, so if you have the space to spare you are generally better off using an insulation with a higher R-value. As far as the front end goes, I would be very careful about insulating up there since as you saw there is a good chance of interfering with moving parts. Generally, you would just insulate the living quarters in the back, and perhaps use an insulating curtain in between the cab and the rear if you need to contain heat a bit… Read more »
Really good article, thanks! My main worry is sweating and condensation. I may have missed it, but what’s the best insulation or way to avoid moisture and mold once it’s closed in? I intend to get a black van too too, to avoid the white commercial look.
Hi Jay, the number one thing you can do to avoid moisture and condensation issues is to have good ventilation in the form of rooftop vent fans. A good fan and a cracked window will keep the air flowing and will help prevent condensation from collecting anywhere. We run our fan 24/7, even in cold weather, just so we keep the air moving (if it’s really cold we’ll close the window and run the fan on “ceiling fan mode” with the vent closed). As far as insulation goes, there are two general ways to insulate a van. The first involves… Read more »
We are looking to insulate a Ford E-series Shuttle Bus. Both sides are lined with windows. We want to cover most of the windows, insulating over them. What is the best way to do this without risking condensation & other problems?
Hi Abi, you can use the same method you’re using to insulate the rest of your bus to cover over the windows. In general, there are two main ways to go about this. The first involves using an impermeable insulation like rigid foam board (XPS, polyiso, etc). Foam insulation is cheap, easily available at big box hardware stores, and insulates well. It is also impermeable to moisture, which can prevent condensation from getting back to the metal walls in your van. However, if it’s not installed correctly, then moisture could potentially find its way behind the insulation and get trapped.… Read more »
Thanks for a thorough supply of info, soon starting on our van! I’ve read a fair amount about thermal bridges but never seen any advice about how to insulate the van ribs? Obviously need to be able to see where to fix structures, but every photo I’ve seen in every blog shows bare metal ribs, major thermal bridges. What’s your take on this?
Hi Nick, great question. Most people tend to pack the inside of the ribs with insulation – either spray foam or stuffing some sort of loose fill insulation in there. We did a half-assed job of spraying foam in ours. This probably helps a bit, but obviously does not fully eliminate the thermal bridge. At the end of the day, it’s impossible to eliminate all thermal bridging in a van. Even if you were to cover the van ribs with insulation, you will still have fasteners attaching your walls/furniture to the van frame that will act as thermal bridges (albeit… Read more »
As others have said, this is a fantastic write up! I’m wondering your thoughts on demin insulation. I understand it’s hydrophilic nature isn’t great, but since the stuff you buy at big hardware stores is all treated with boric acid to resist mold and mildew, do you think that would still cause issues over time?
Hi Eric, thanks for the comment! I would be very skeptical of using denim insulation in a van build. Even though it’s treated to resist mold and mildew, the denim itself holds on to moisture much more than a hydrophobic insulation like sheep’s wool or Thinsulate. And because a van is such a small space, moist air and condensation can quickly get into things, where in a house there’s more space for it to dissipate. Despite the boric acid treatment, mold would still be a risk, and if you have wood or other organic materials right up on the denim,… Read more »
Thank a lot for sharing this! It’s really helpful and thorough. I just wanted to ask if you need a vapour barrier at all if you use Sheep wool insulation. I was thinking of putting vapour barrier between the wool and the timber cladding.
Hi Michael, you do not need a vapor barrier with wool insulation. Wool is very breathable and also hydrophobic, so any condensation can easily evaporate out with proper ventilation. Hope that helps!
~John
Do you have a video showing you doing the insulation?
Hi Suzy, unfortunately we haven’t gotten into doing videos yet :(.
aerogel mats may be another extreme high r value option 😉
Hi Otto, thanks for the suggestion, we’ll look into those for a future update!
This is an excellent article. Thank you . We have a question about sticking the polyiso foam board to the van…I have a 250 Transit van that we are converting. The upper portion of the walls curve and the foam board will likely leave air pockets between it and the walls. If we put great stuff around the perimeter of the back of the foam board and a few lines of it in the middle are we not creating a moisture trap?
Hi Gail and Jim, that is definitely the trick with properly installing an impermeable insulation material like foam board. As long as everything is sealed off and there is no way for moist air to get back there, then it shouldn’t become a moisture. Issues arise if the area isn’t completely sealed and moisture manages to get back there. Putting Great Stuff back there can fill the gap, and you can reinforce all of this by putting a layer of reflectix over your insulation as a vapor barrier, which will prevent moist air from getting into your insulation. Hope that… Read more »
You really did your home work, and its made my instalation a whole lot better THANKS
So glad we could help! 🙂
Hi John
What do I use to block out the window behind a shower wall in a Ford Transit van?I want to be sure it stays in place permanently since I wont be able to get to it ever again..
Thanks Rosanne
Great! Very thorough explanations!
Thanks Craig, glad it was helpful!
Awesome write-up, thanks for the effort. I just researched the Owens-Corning XPS rigid foam, and they have indeed eliminated HFCs from their construction. I really wanted to make sure that was the case, and it is noted in the updated MSDS dated 6 June 2020. Cheers!
Hi Aaron, thanks for adding that info. We’ll be sure to note that when we update this article next. Cheers!
~John
Hi, Great read and very informative, I was just wondering what information you have to say that wool is an environmentally friendly choice?
Hi Doug, wool is a renewable resource that is not made from fossil fuels. Many of the options (such as foam boards and spray foam) on this list are made from petroleum products, and release harmful chemicals into the atmosphere during their production. Hope that helps!
~John
That’s what got me, too. Yeah, it’s renewable and not made from fossil fuels, but it still creates a good amount of CO2e. Animal agriculture in general is horrid for the environment, and sheep are no exception to that. See, for instance, Poore & Nemecek (2018), the recent IPCC report, and UN FAO reports like “Livestock’s long shadow.” Animal products, including wool, aren’t “eco.”
Noted and agreed. With building materials in general, eco-friendliness is often relative. When compared to something like XPS, polyiso, or spray foam, wool has the advantage of being renewable, biodegradable, nontoxic, and a natural product. Sheep’s wool also sequesters carbon (which makes up 50% of wool), in contrast with fossil-fuel-derived insulation, which actually desequesters stored carbon. This all serves to make wool’s payback time in emissions saved vs emissions expended much shorter than synthetic/fossil-fuel-derived insulations, and even cellulose-based products. But as you mention there are certainly emissions associated with animal agriculture. Another natural insulation material to investigate is cork. We… Read more »
Great article but the webpage is over-monetised so the advertising distracts and detracts from the flow of the article.
Hi Freeman, thanks for the feedback. While we do monetize in order to keep our content free, usability is our primary concern. We’ll definitely take this into advisement.
Wow wow wow – that’s all I can say! Thank for sharing!
QQ: how much space allowance should I make on the width? The van I’m looking at is 1787 mm and I am exactly 1701 mm, giving me 88.5 mm to play with on the width (I want to sleep side-to-side in the back of the Sprinter). This is about 3.2 inches … which doesn’t seem like a lot (enough?) to account for the insulation + whatever wall cover I/the builder chooses.
Thoughts? Guidance? Am I cray-cray?? 🙂
So glad you found this helpful! Are those measurements between the frame ribs, or does that go all the way out to the sheet metal walls? Most of the insulation will be flush with the ribs – so if the measurements are rib to rib then you’ll still have inches to play with. Wall paneling goes on top of the ribs, and shouldn’t take more than 1 to 1.5 inches. If you are gungho on sleeping side to side instead of back to front, one strategy that some use is to sleep at a diagonal. Hope that helps!
~John
Hey! thanks so much for all your write ups! I’m in the process of building my Chevy Express with a fiberglass high top and your site has been super helpful (everyone else posts about Sprinters, Promasters, and Transits). One issue I have is that I hope to use the van to chase snow, and the Express ribs are pretty awkward to work with. I read you guys left the metal exposed for a while but have since covered it up. What are you guys using as a thermal break for the exposed ribs by the door and along the top… Read more »
Hi Aiguo, so glad you found this helpful! We think Chevy’s can be a pretty awesome base for van conversions. As far as thermal breaks, we wrapped the ribs below the high top with a flexible foam. Not a super high R-value, but at least it’s some kind of thermal break. The rib by the door houses a lot of our electrical wiring as well as our light dimmer and inverter switch, so we just faced it with a plywood panel. Hope that helps!
~John
Thank you so much for this site! We are “baby” VW Type 2 owners at the beginning of our rebuild. I read through your insulation page but didn’t see anything specific to sound dampening recommendations. Did I miss it?
Hi Kimli, so glad you enjoy the site! We have two general recommendations for sound deadening: there’s a product called Noico that you can purchase online that works equally as well as more expensive name brand options. Another option that some use is a product called “Peal ‘n” Seal,” which is a product you can grab from the roofing aisle at Lowe’s (Home Depot has a similar product under a different brand name). This is similar material to sound deadeners, and it’s what we used when we redid our floor. You can check out our post about that here: https://gnomadhome.com/vanlife-mold-prevention-flooring-redo/… Read more »
Hi there!! Amazing article! Thanks for that! One question, please – I understand the difference between using sheep wool and spray foam, but … Is the higher R for spray form worth the risk of not installing it properly over the lower R factor for sheep wool, but that being riskless?
Hi Radek, it really depends on your needs and priorities. If your number one priority is R-value, then spray foam is tough to beat. But, there are some additional complexities/costs to installing spray foam. Sheep’s wool is easier to install, is more environmentally friendly, and is nontoxic, but it definitely is not as efficient in terms of pure R-value. There are good use cases for both, but it depends on what you value more. I hope that helps!
~John
more please on reflectix for window coverings. i’m reading some suggesting it can get so hot to ‘break windows’. i have reflectix coverings for my van’s windshield and have not had a problem, but i don’t keep it in place in the hot sun for very long.
what are you finding on this question?
Hi there, I have not heard of Reflectix breaking windows. It’s very commonly used in budget van builds, and I’m not aware of any issues. Hope that helps!
Hello! I’ve been going back and forth about insulating my Ford Transit Connect Cargo van. My question is: if I insulate only certain areas of the walls (like in cavities), is that ineffective? And therefore not worth insulating at all? Will the areas not covered by insulation (like where the wheels stick out) defeat the purpose of insulating at all? Thanks so much!!!
Hi Penina, great question! Insulation is definitely not an “all-or-nothing” proposition, so some insulation is better than none. That said, having gaps and/or large uninsulated areas will reduce the overall effectiveness of your insulation. I’m not sure where the specific cost/benefit line is, however. To help you figure out if it’s worth it to insulate, think about how you plan on using your van. Do you plan to travel in extremely cold temperatures? Van insulation tends to be more effective at holding heat in, and can be a real game-changer in cold environments. If you’re mostly traveling in “comfortable” temps,… Read more »
Thanks for your webpage! It is very helpful and informative for those of us who are about to embark on such a mission. I am an RN who is planning to do very short assignments. I am planning to convert either a use Sienna or Odyssey by striping it down (a la Forestry Forest van in youtube), live in it and come back home to South FL from time to time. I would spent parts of all 4 seasons up North and West as do a variety of outdoor activities such as hiking and skiing. I want to contribute by… Read more »
Hi Fre, thanks so much for the info! We’ve definitely read about the temperature performance differences between these two types of insulation. We are working on updating this post and plan on adding additional information, as well as “green” ratings for each insulation type. Thanks again!
~John
Question: if you want to install sound insulation, where does it go? Under the thermal insulation right next to the body of the van? Or over the thermal insulation on top of the metal struts?
Hi Robin, sound deadening materials should go directly next to the body of the van. They work by adding mass to the metal panels, which prevents them from vibrating and transmitting sound. Hope that helps!
~John