Vanlife is entirely what you make of it, and nowhere is that more true than the van you live in. But no matter what vehicle you have or can afford, living in a van is ultimately about freedom, rebelling against the typical, and enjoying life on your own terms.
This page is all about helping you, future vanlifer, choose your van, plan your design, install creature comforts like a van electrical system and plumbing, and actually build out the interior of your DIY camper van conversion. Below you’ll find awesome infographics, detailed information, step-by-step van build guides, links to helpful van life resources, and more.
Your van is an important aspect of #vanlife, but it’s also just a vehicle – van living is really all about the experience of being out there. And we’re here to help you turn your van into a home so you can get on the road as quickly and easily as possible!
What’s the Best Van for Van Life? Choosing a Vehicle for Your Van Build
Choosing a vehicle for your campervan conversion is your first important step when taking the leap towards van life. There are many types and models of vehicles out there, and the best one for your tiny home on wheels really depends on your needs and wants.
Some vans are better for extra space, some are better for stealth camping, some are better for keeping your van conversion costs low. If you’re reading this page, chances are you plan to build out your van yourself. But if you want something already converted that will take minimal work to get on the road, there are options for that, too.
To help you choose the best van to live in for you, we’ve put together some pros and cons of some of the most common types of vehicles out there on the road.
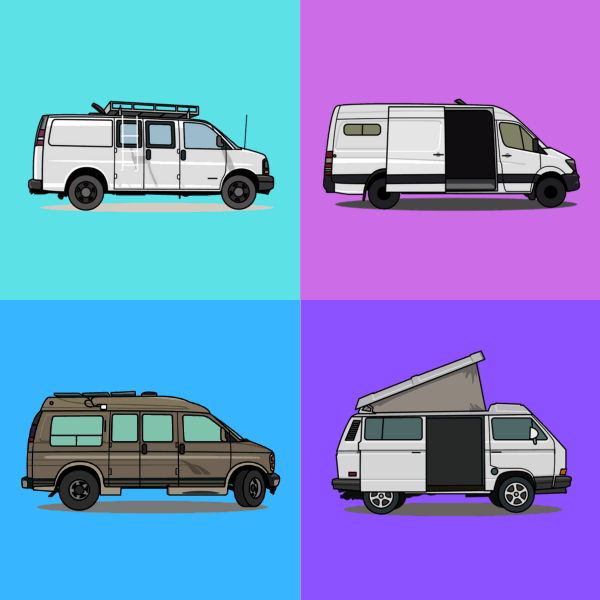
Cargo Vans (and passenger versions)
Cargo vans are the ultimate blank slates for van life. They come in many different types and sizes, and their empty interiors make it easy to craft your ideal DIY van build. Most of these vans come in cargo versions (without windows) and passenger versions (with windows).
If you want to do a lot of city camping, a cargo van is your best option. There are so many of them on the road that people just don’t notice them, and they have a lot of floor space to play around with your perfect layout.
Within the cargo van category, there are different types and brands. We’ll broadly break these down into “modern vans” and “old school vans.”
Modern Vans (Mercedes Sprinter, Ford Transit, Dodge Ram Promaster, Nissan NV, etc)
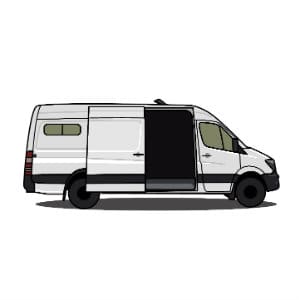
Modern vans are especially known for their interior height, long wheelbase, and boxier shape – making them ideal for building out a spacious, functional tiny home on wheels. This category includes Mercedes Sprinters & Dodge Sprinters, Ford Transits, Dodge Promasters, and Nissan NV-series vans.
If you want the ultimate vehicle to customize for your DIY van conversion, this is the van for you. They have enough headroom even for tall people to stand up, and enough interior space to design any kind of layout. And if you’ll be offroading, the Mercedes Sprinter comes in a 4×4 version and the Ford Transit offers All Wheel Drive.
However, modern vans are a lot more expensive than other options. For the Mercedes Sprinter, parts are more expensive and it may be difficult to find mechanics that have experience working on them (this is less of an issue with Ford Transits and Ram Promasters). And, since these are complex computerized vehicles, they don’t lend quite as well to tinkering as something classic like a VW Vanagon or old Ford Econoline.
There are some variances in the features and reliability of different model years, and differences between the Sprinter van, Ford Transit, Dodge Promaster, and Nissan NV (now discontinued, but still available on the used van market).
Depending on your wants and needs, one type of van might be better for you than the others. In our opinion, the Ford Transit offers the best blend of features, cost, repairability, and size among new vans. A new Ford Transit is significantly cheaper than a new Sprinter, parts and mechanics are commonplace, it has available AWD, and it comes in multiple roof heights and wheelbases. However, if you’re shopping for a used van, it’s much easier to find an affordable older Sprinter since they’ve been around the longest.
Note: Many of these vans are also available in smaller versions. The Ford Transit Connect, Ram Promaster City, Nissan NV200, and Mercedes Metris are all smaller cargo vans that offer similar benefits to their bigger siblings, get better gas mileage, are more affordable, and fit into a standard parking space. However, the footprint is smaller so there’s less space to work with when planning your camper van conversion.
If you have the money to spend on a modern van, there are few better van life vehicles out there. There’s really nothing else that competes in terms of flexibility and space for a dream van buildout. But if you’re on a budget, there are other options that work well and cost less.
Read More:
- Compare Sprinter vs Transit vs Promaster for Van Life
- Complete List of AWD and 4×4 Vans in the US Right Now
- 24 Best Small Camper Vans for a Van Conversion
- 15 Awesome Ram Promaster Van Conversions to Inspire Your Build
- 9 Badass Ford Transit Conversions to Inspire Your Van Build
- 13 Unique Sprinter Van Conversions for Van Life Inspiration
- 16 Nissan NV200 Camper Conversions That Are Really Innovative
- 13 Promising Electric Camper Van Options for Van Life
- Why I Chose a Sprinter Van for Van Life
- Why I Chose a Ford Transit for Van Life
- Why We Chose a Ram Promaster for Van Life
- Why I Chose a Nissan NV for Van Life
“Old School” Vans (Chevy Express, GMC Savanna, Ford Econoline, Dodge Ram Van, etc)
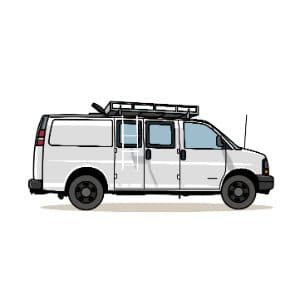
The quintessential “creepy white van” van, these are super common, dead-on reliable, more affordable than modern vans, and are an excellent choice for living in. This category includes the Chevy Express/GMC Savanna, Ford Econoline/E-Series, Dodge Ram Van, and the old Chevy G-Series vans.
Old school vans are ubiquitous and their base designs have barely changed for decades. That means they’re overall reliable, parts are common, and mechanics know how to work on them. They’re also generally good, flexible vans – nothing fancy, but they offer a perfect blank canvas for your own custom van build.
People tend to buy old school cargo vans for work and hold on to them for years, so many vans on the market can be pretty beat up. Although you can find inexpensive cargo vans in good condition, it can be tough to find anything with lower mileage – so be prepared for all that comes with owning a higher mileage vehicle.
A cargo van also doesn’t offer much headroom. There’s no way even shorter people will be able to stand in one, and the lack of headroom also cuts down on storage space (however, you can always add a custom high top if you have the budget). If you don’t plan on stealth camping and you value headroom, there may be better choices.
There are a few different types of old school vans out there. From GM, there’s the Chevy Express / GMC Savanna, as well as the older Chevy Van G-Series and GMC Vandura. From Ford, there’s the E-Series (now discontinued), as well as the older Econoline. From Dodge, there’s the old Dodge Ram Van.
The “Ford vs Chevy” debate is alive and well in the van world, and there’s no clear answer here. Our mechanic friends like the long-standing reliability of the Chevy 5.7L V8 engine and the newer 5.3L and 6.0L LS variants. Ford has gone through more engines with more issues in the same time span, but there are some gems and they tend to have better quality trim than Chevy vans. But as long as you find a solid vehicle that’s been well-cared-for, the brand doesn’t matter as much.
Read More:
- 10 Chevy Express Van Build Examples You Need to See
- 10 Ford Econoline Van Conversions to Make You Drool
- Why I Chose a Chevy Van for Van Life
High-Top Conversion Vans
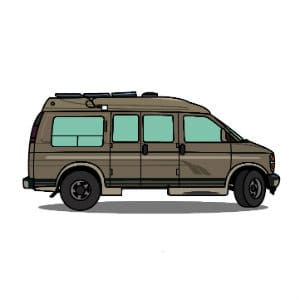
Our first van was a conversion van. A conversion van is a full-sized passenger van (Chevy Express/GMC Savana, Ford Econoline, Dodge Ram Van, etc.) that has been converted into a comfortable traveling vehicle, or even a wheelchair lift van.
Conversion vans have some pretty sweet built-in amenities, including high-tops for extra headroom. Many have comfy captain chairs, leather seats, mood lighting, TV/VCR, and a rear bench seat that folds down into a bed. If you’re not picky about your living situation, this could be all you need to get started. And if you gut it and customize it yourself, the high top offers tons of great overhead storage options.
You can often find these vans for cheaper than other vans. Most conversion van owners don’t use them as their daily driver, so you may be able to save money on an older lower-mileage vehicles in good condition. However, conversion van prices have been on the rise due to the growing popularity of van life.
Conversion vans are awesome, but there are some downsides. If you want to customize the interior you’ll have to completely gut the entire thing, which can be a lot of extra work. The weird shape and fiberglass construction of most high tops also make it more difficult to install solar panels, a ceiling, or anything else on the roof. The typical conversion van is also older, so you’ll have to deal with the mechanical hassles of driving an older vehicle.
Still, with the high top and low cost of conversion vans, they offer a great combination of affordability, versatility, and space compared to many other van life vehicle options.
Read More: Why We Chose a Conversion Van for Van Life
Volkswagen Westfalia Campers (and anything VW)
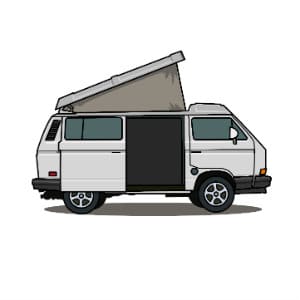
Volkswagen camper vans are by far the most iconic vehicles in the vanlife community. They’re classics, and they always will be. This category includes the old Kombi bus (VW Bus), the 1980-91 Vanagon, and the newer Eurovans. Also known as Westfalias or Westies, many VW vans were converted into campers by the Westfalia Company in Germany (except for Eurovans, which were converted by Winnebago in the US).
Westies are just plain awesome. They’re fun to cruise around in, they’re pre-converted, the camper van setup is very functional, and there’s a large community of VW owners, aftermarket parts, and innovative modifications. Many of them also have pop tops, which add a ton of extra headroom when parked and even let you sleep two extra people.
But if they’re so awesome, why wouldn’t you want a Westy?
Well, for starters, they can take a chunk out of your wallet. Since vanlife has been gaining in popularity, the price of old Vanagons has risen along with it. They’re also very old vehicles, and there’s just a lot that can go wrong mechanically with anything that rolled off the assembly line during the Cold War.
GoWesty, a well-known Vanagon restorer and parts maker, recommends not buying a Westy unless you have at least $25,000 to spend overhauling it and replacing aging components. Even if you find a cheap Westy hiding out in a garage somewhere, be prepared for frequent breakdowns and expensive mechanical headaches unless you spend the cash to fully rebuild it.
This is also what some people really like about Vanagons. There’s a certain romance to working with a pre-computer engine, learning it inside and out, fixing it on the road, and having the ability to add new innovations to a classic vehicle. If you’re mechanically inclined, enjoy tinkering, and have some cash to burn, a VW could be a lot of fun.
But if you’re on a budget, don’t want to deal with a lot of mechanical issues, or really want to customize your van’s interior and functionality, there are much better options for van life.
Read More: Why We Chose a Volkswagen Vanagon for Van Life
Class B / Class C RV Campers

If you want to hit the road as soon as possible, then a Class B/C RV camper is a great option to consider for van life. These vehicles are typically move-in ready, and barring any mechanical issues shouldn’t need much customizing before hitting the road. Class B campers (aka “campervans”) are built inside a van body, while Class C campers have a custom body built on a van cab/chassis.
Older Class B/C campers are built on Chevy or Ford base, but you can find some built on Toyotas and other vehicles. If you have the money for a newer one, you can find campers built on a Sprinter, Promaster, or Ford Transit vehicle base.
The big advantage to buying a pre-built camper is that it’s already built out, so you won’t have to wait to hit the road. Many feature innovative ways to convert the living space into a sleeping area, and may even include a bathroom/shower. These vehicles should also have electrical, plumbing, propane, and water systems already installed (although if you want solar power, you’ll likely need to add this yourself).
Older class B/C campers can also be relatively affordable – more expensive than just a van, but comparably priced to what you would spend buying a van and DIY converting it. These vehicles are typically not daily drivers, so with some looking you should be able to find older low-mileage campers in decent condition.
So what’s the downside? Well, for starters, RV conversions aren’t exactly known for quality. Most manufacturers use cheap (i.e. shitty) materials, and just don’t build their vehicles to withstand the stresses of full time living. You’re also locked into a pre-designed layout, so it will be a lot more difficult to customize how everything functions.
And, if you buy a used pre-built RV, you really have no idea what’s going on behind the walls. You could easily end up inheriting someone else’s problems, whereas with a custom van build you know exactly what went into it and how to go about fixing anything that goes wrong.
Despite the downsides, buying a Class B/C camper can be an excellent choice if you want to get on the road quickly, or if you want to test out vanlife before throwing yourself into a custom DIY van build. Just make sure you know what you’re getting into.
Read More: Why We Chose a Toyota RV for Van Life
Skoolies (school bus, short bus, shuttle bus, etc)

In many ways, skoolies are the ultimate in mobile living. The big advantage here is space – there’s tons of room for couches, beds, even a full bathroom, and you can easily accommodate families and other larger groups. There are also some really impressive skoolie builds out there that are nicer than actual houses, and it’s a whole lot cheaper to convert a bus than to buy a similar-sized RV. Skoolies come in multiple sizes, from “shorties” (short school buses) to shuttle buses to full-sized buses.
Skoolies do have significant drawbacks, however. Their size makes them a bit unwieldy to drive, and getting to some of the more out-of-the-way camping spots just won’t be an option. If something goes wrong mechanically, it can be much more expensive to fix than a normal vehicle. Also, the sheer size of these vehicles means the gas mileage is much worse than other options.
But, if you’re traveling with multiple people and you want the best in space, comfort, and flexibility, a skoolie can be a great choice.
Read More:
- 15 Short Bus Conversions That Are Really Frickin’ Awesome
- 12 Dope Shuttle Bus Conversions That Are Unbelievably Practical
Minivans
A minivan camper is an excellent choice if you don’t need a whole lot of space and/or if you’re on an especially tight budget. Even though they’re smaller than a full-size van, they’re not as small as you think. For example, the typical Toyota Sienna is both longer and wider than a VW Vanagon. You can easily build a nice, functional interior inside of a minivan, and you can even have a high top or a pop top installed.
Older minivans are often cheaper to buy and and have better gas mileage than larger full size vans. But if you have some money to spend you can also buy a newer vehicle with all kinds of bells and whistles like All Wheel Drive, power doors, or even a hybrid powertrain.
This category includes any type of minivan. Old Chevy Astros/GMC Safaris are especially popular for DIY van builds, and are a kind of hybrid between a minivan and a work van (check out IntotheMystery13’s Youtube channel to see what he did with an Astro – and for some great tips on building a van in general). The Toyota Sienna is also especially popular, since it offers bulletproof Toyota reliability and is available in All Wheel Drive.
As mentioned above, there are also vans that split the difference between larger vans and minivans. The Ford Transit Connect, Ram Promaster City, Nissan NV200, and Mercedes Metris offer cargo van functionality in a minivan-sized footprint.
Read More:
- 10 Minivan Camper Conversions That Will Blow Your Mind
- 10 Stunning Ford Transit Connect Camper Van Conversions
- 11 Awesome Toyota Sienna Camper Conversions That Will Inspire You
- 16 Nissan NV200 Camper Conversions That Are Really Innovative
- 14 Dodge Caravan Camper Conversions That Are Surprisingly Awesome
- 15 Honda Odyssey Camper Conversions That Are Great for Van Life
Other Vehicles
You don’t need an actual van to live vanlife! Truck campers, car conversions in Honda Civics, sedans, Honda Elements, Subaru Foresters, camper trailers, old ambulances, box trucks, sail boats, even bicycles – people are hitting the road and living nomadic lifestyles in all types of rigs.
It’s very inspiring to see all the creative ways that our fellow nomads are using to make even the most unexpected vehicles work as a living situation. And many of the ideas and principles used in custom van builds easily translate to other types of vehicles.
Don’t let not having a van stop you from freeing yourself! We think that vans are awesome, but just know that if you have the desire to live this lifestyle, you can make it work with just about anything.
Read More:
- Why We Chose a Badass Truck Camper for Van Life
- 10 Awesome Car Camper Conversions for Life on the Road
- 15 Amazing SUV Camper Conversions You Need to See
- 13 Subaru Forester Camper Conversions for No Frills Van Life
- 17 Kickass Box Truck Camper Conversions for Van Life
- 10 Creative Ambulance Campers to Live Out Of
- 9 Honda Element Camper Conversions You’ll Love to Live In
Testing Your Options
Are you eyeballing a few different types of rigs but aren’t sure what to go with? One option is to try renting a van for a short trip. Testing out van life with a camper van or Class B RV rental can be a great way to get a feel for the vehicle and the lifestyle, and get some ideas for your own diy camper van build.
Take vanlife for a testdrive with a campervan or RV rental from Outdoorsy. Available nationwide.
Use coupon code GNOMADHOME for up to $40 off your booking.
Outdoorsy is a peer-to-peer rental marketplace where real van owners list their campervans for rent, and they have all kinds of rigs available to test out (if you already have a camper van, listing it for rent can be a great way to make some extra bucks when you’re stationary).
Read More: Top 61+ Camper Van Rental Companies in the US
Planning Your Van Conversion Layout
Planning the layout of your new home is one of the most exciting parts of building a campervan conversion. The possibilities are endless at this point in the build process, and it’s a lot of fun to imagine how everything will fit together in your DIY van build.
But laying out your van effectively also takes forethought and some careful planning. You need to figure out how best to cram everything you need into a small space, all while keeping it comfortable and livable.
Here are some things to consider when planning your layout:
- How do you plan to use your van? Will you be living in it full time, part time, or just taking the occasional road trip?
- How many people will be living in your camper van? One, two, three or more? Do you live with pets? More people means more bed space or additional convertible sleeping areas. And don’t forget that you’ll need enough open hangout space for everyone as well.
- Do you want a permanent bed or a convertible one? A bed that converts during the day makes the interior much more usable, but can be a drag to set up every night and cuts down on space for storage. A permanent bed setup is easier to deal with and allows for more storage, but takes up more room. This can be an issue in such a tiny space, but is less of a problem in larger vans like the Sprinter or Transit.
- How tall are you? If you’re over 6’ tall, layouts where the bed goes across the van will prevent you from comfortably stretching out. But if you’re short, crosswise beds won’t be a problem.
- How much storage space do you need? Do you have a lot of clothes, instruments, equipment, books, or other things you just can’t part with? We highly advise downsizing as much as possible, but you’ll need a place to store everything you’re bringing.
- Do you want to have windows and natural lighting? Windows and natural light help your van feel bright and open. But windows are less stealthy, and they also prevent you from putting in full-height furniture and storage areas. Some vans already have windows and some don’t, but you can always cover up existing ones or install your own.
- How much power do you need? The larger power system you have in your rig, the more space it will take up.
- Do you need somewhere to sit and work? If you do computer-based work on the road, consider including a comfortable seating area with a table in your layout. Tables are also great for meals and congregating.
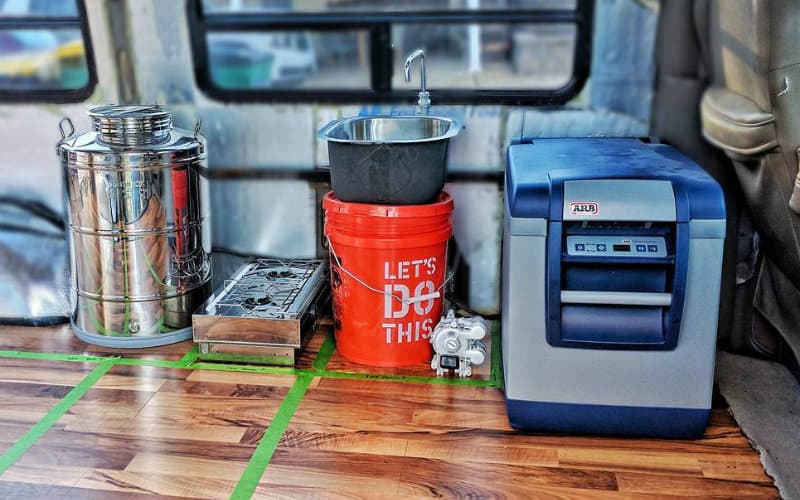
- Do you plan to cook inside your camper van? If you see yourself doing a lot of cooking, it’s a good idea to include a full campervan kitchen with water tank, counter, sink, fridge and stove. You’ll also want to include enough space for dry food storage.
- Do you have large items like dirt bikes, surfboards, or mountain bikes that you need to haul? Some camper van layouts include storage space for such items inside the van, or you can look at options for hitching them on.
Read More: Building the Perfect Vanlife Rock Climbing Rig
Keeping an Even Weight Distribution
When planning your layout, make sure to even out your van’s weight distribution. This means you’ll want to avoid putting the heavy items (batteries, water tanks, etc.) all on one side. In our camper van, we installed the water tank on the driver’s side and the batteries on the passenger’s side to help keep weight evenly distributed.
You’ll also want to think about distributing weight in the right places for traction. For example, if you have a rear wheel drive van, placing the heaviest items near the rear wheels will help increase traction.
Making Sure Everything Has Multiple Functions
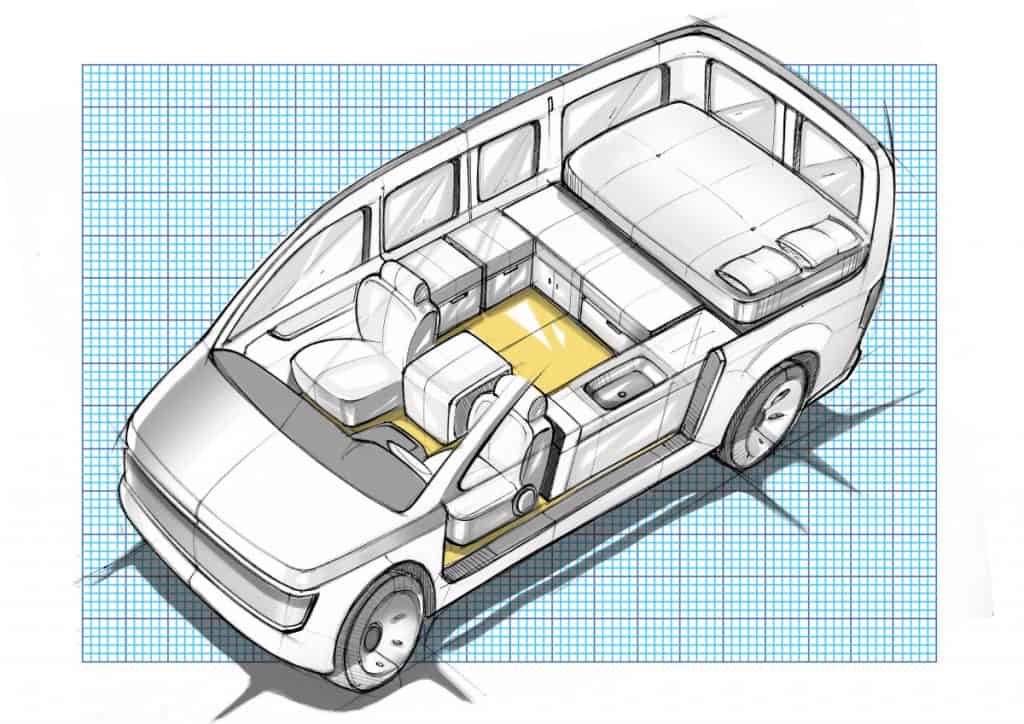
When you live in a small space like a camper van, it’s a good idea to include multi-function items wherever possible. For example, having a kitchenette that’s also a structural support for a pull-out queen-sized bed frame. Or having a passenger seat that swivels, which makes it functional for hang out seating and really opens up the tiny space in a van.
Designing your van build layout with an eye towards multiple uses for everything will help you include all the functionality you need while still creating a comfortable and inviting space.
Read More: 101 Van Life Essentials You Don’t Want to Forget
Examples of Common Campervan Layouts
The layout of your van is very personal – there isn’t one magic floor plan that will suit everyone’s needs. But there are quite a few tried-and-true camper van layouts that work well in different situations. Even if you go your own way, exploring different layout ideas is a great way to get inspiration.
Fixed Rear Bed Platform Layouts
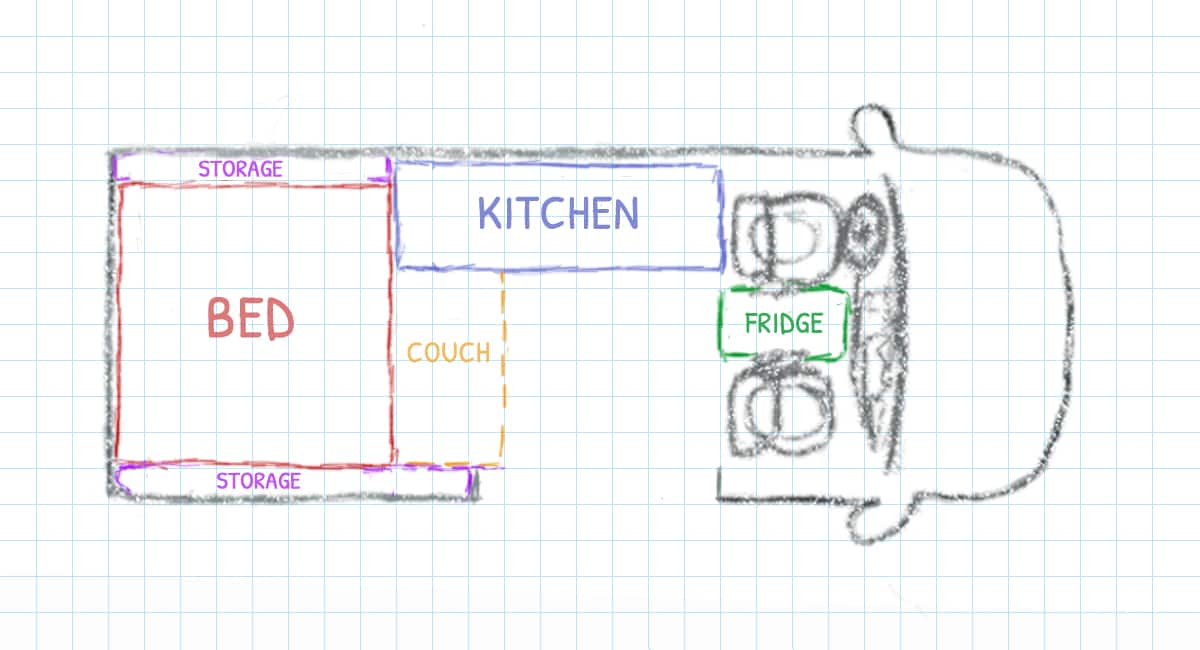
This is the layout we had in our conversion van. It’s also probably the most widely-used camper van layout in general. Variations of this floor plan can be found in many different campervans, including VW Westfalias.
The hallmarks of this layout are a permanent bed platform in the rear that also functions as a couch, and a kitchen unit along the wall behind the driver’s seat. A 12V refrigerator can be integrated into the kitchen unit or couch, stowed behind the passenger seat, or squeezed between the two front seats.
The Westy version of this layout features a futon-style bed that flips up into a couch during the day, and full-height storage along one side. Other variations of this layout have bed frames that pull out to full length (like our queen-sized pullout bed frame) – or if you’re shorter than 6 feet you can lay across the van. Modern vans like the Sprinter, Transit, and Promaster come in long wheelbase versions that are large enough to accommodate a fully permanent bed that does not need to be expanded.
This camper van layout is a simple all-around performer, but its biggest strength is all the storage space underneath the permanent bed platform. We kept four instruments, backpacking gear, workout equipment, tools, a spare solar panel, extra water, books, and our entire camper van electrical setup under ours. There’s a ton of space!
The drawback is that the space taken up by the fixed bed platform is not functional hangout space when your van is in “day” mode, so it’s overall more cramped. But if you have a lot of larger items to store, a fixed rear bed platform is probably your best bet.
Lengthwise Bed Layouts
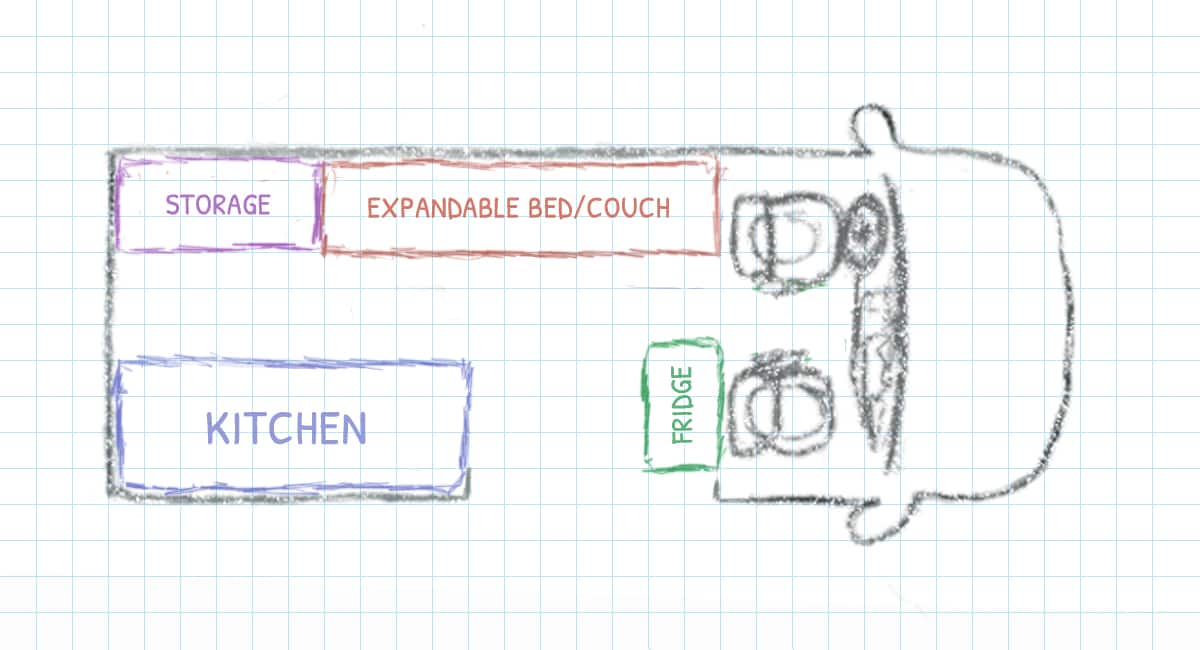
These camper van layouts typically feature a lengthwise bed that functions as a couch during the day and pulls out into a wider bed at night. The middle of the van is open from front to back, with the bed and storage on one side and the kitchen unit on the other.
This type of van build layout is great for organization and easy access to your things. You can have shelving and cabinets down both sides, and store more stuff underneath your bed. One downside is that the central “hallway” can make this layout feel cramped and closed in.
Convertible Dinette Layouts
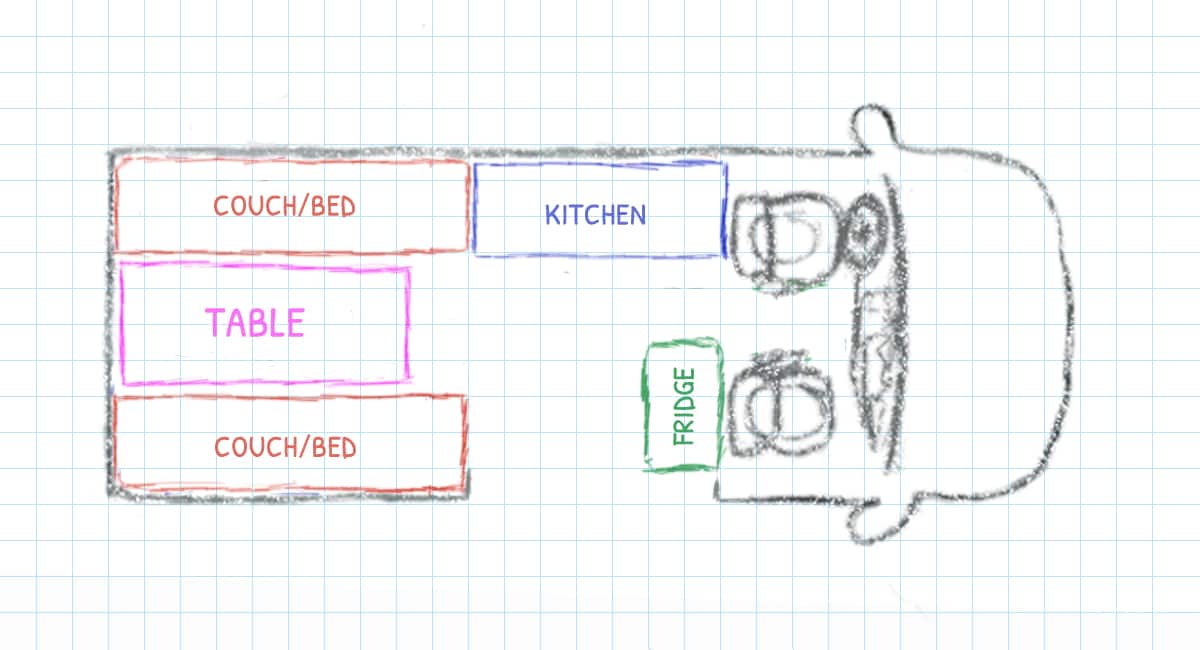
This versatile layout combines the best of the first two floor plans. The back of the van functions as a dining area with spacious table during the day, then converts into a bed at night. Some camper van builders set the dinette on a raised platform with storage underneath.
This type of layout offers tons of storage space (though not as much as fixed platform layouts) and easy organization. The convertible bed design also means that the entire van is usable hangout space during the day – there’s no “dead” space.
The downside is that it could be a process converting your van into “bed mode” every night. It also doesn’t have as much storage space as fixed platform layouts, which could be a problem if you have bulky items like bikes, surf boards, or instruments.
Kitchen Behind the Cab Layouts

Some DIY van conversions have kitchen units that are directly behind the cab, sealing it off from the rest of the van. These layouts offer increased privacy and stealthiness, especially if you completely wall off the cab, and open up some space in the back of the van. This layout can be paired with a lengthwise bed, fixed bed, or convertible dinette bed. You can also place your propane and water connections right by the door, making refill easier.
We’re personally not the biggest fans of this camper van layout – we like the ability to move from the living area to the cab without having to exit the van. But it does allow for some creativity with the rest of your floor plan.
Where to Put the Kitchen?
You can easily flip any of these van build layouts around left to right or front to back and still make a functional van conversion. So where’s the best place to put your kitchen? Should it go on the passenger side or the driver’s side? Behind the cab or in the back?
It all depends on what you care about most. Putting your kitchen by the side door could simplify refilling your water and propane tanks. Putting it behind the driver’s seat creates a nice, open feel in your van. Right behind the cab makes your van more private, while all the way in the back is a different twist on most van layouts out there. Some vanlifers even have kitchens that pull out of the trunk on drawers for cooking outside.
The fridge location can also be very flexible. Putting your fridge behind the passenger seat keeps things simple, and allows you to use it as a seat in a pinch – though it does take up floor space. Keeping it between the two front seats opens things up, but makes it more difficult to climb into the cab. Putting it on sliders and incorporating into your kitchen unit or another aspect of your build is versatile but also adds some complexity and takes up space that could be used for something else.
Read More: 18 Awesome Campervan Kitchens That Will Fuel Your Design Inspiration
Resources and More Example Layouts
- Sportsmobile Standard Floor Plans
- CheapRVLiving Floor Plans and Bed Design
- Cargo Van Conversion Floor Plans
- Build a Green RV Choosing a Floor Plan
Designing and Testing Your Layout
So you’ve got tons of ideas for your DIY camper van conversion swimming around in your head. How do you go about making them into reality?
The first step is to draw out your ideas. The easiest way to do this is with a pad of graph paper, a mechanical pencil, and a ruler. This allows you to quickly sketch layout concepts, see how everything fits (or doesn’t fit), and work out potential problems. Be sure to draw your layouts to scale – say, one inch = one foot.
After you’ve decided on a basic layout for your van build, it’s time to test it in your van. We blocked out our layout on our van’s floor using painter’s tape. Some vanlifers even construct full-scale mockups out of scrap wood and cardboard. If you have the extra time, this will really help you iron out any issues before you start actually building.
Planning Your Layout with SketchUp
Computer-based layout tools like SketchUp are another option for planning your van build. SketchUp is a free 3D design tool that can really help you visualize your van’s layout. It has a bit of a learning curve, but there are some great tutorials out there going over how to use SketchUp to design your van.
Bathroom Setup: Camper Van Toilets & Showers

Everybody poops. (And pees. And needs to shower). But can you do it in your van?
Some of the most common questions we see from people considering van life revolve around how to incorporate an elaborate bathroom and shower situation inside their vans. This is certainly possible, and many do just that for a variety of reasons. But is it necessary, and is it the best option for your diy van build? Let’s dig into it.
Do You Need a Toilet in Your DIY Van Conversion?
A bathroom setup is something you may think you need at first, and it certainly can be nice to not have to worry about leaving your van in the middle of the night to poop (if we’re just talking #1, you can always use a pee bottle, even without a bathroom).
But there are some tradeoffs to be aware of before you put that bathroom in your rig:
- Bathrooms take up a lot of space – which is already at a premium inside a camper van. Even if you just have a small composting toilet that you tuck away, it still takes up space. Whether this is an issue depends on how much storage space you need.
- There’s a potential risk of unpleasant smells overtaking your living space
- You’ll have to deal with dumping your waste somehow
- There are so many easily accessible places to go to the bathroom that having one in your van just isn’t necessary
Adding some sort of toilet and/or bathroom setup is definitely a choice that some vanlifers make. But if you choose not to add one, how and where do you go to the bathroom on the road?
Option 1: Public Restrooms and/or a Poop Shovel
The idea of not having your own bathroom nearby can be incredibly intimidating, but we’ve found that this is actually one of the easiest parts of vanlife. Public restrooms are plentiful throughout North America, and we’ve never not had a bathroom when we needed one. Gas stations, truck stops, Walmarts, McDonald’s – you name it, we’ve pooped there.
Most campgrounds (including many free National Forest and BLM campgrounds) have some sort of bathroom situation. If there’s not an actual running water bathroom, you’ll typically find pit toilets (aka vault toilets), which are basically much nicer/cleaner permanent porta-potties.
What about when you’re boondocking in the middle of nowhere? We recommend picking up a good poop shovel for those times you’re camping in a wilderness area without bathrooms.
But what if you really, really, really need to go right now and you can’t just step outside? This is where an emergency pee bottle comes in handy. Many vanlifers hold on to old yogurt containers for this purpose. We keep a Nalgene water bottle in the van for emergencies – it holds a lot of volume and it’s spill proof. Just make sure not to use it for drinking!
Option 2: Bathroom Installations and Portable Toilets
If you hate the idea of not having your own bathroom and you’re okay with giving up the space, it’s completely possible to put a toilet in your van.
Installing a full-blown RV toilet and blackwater tank is generally too expensive and complex for the typical van build, but there are some portable options.
- Porta-Potty: Camco 5.3 Gallon Portable Toilet. This little toilet has a flush tank and separate holding tank for your waste. Odors are controlled using chemicals, just like in a porta-potty. These types of toilets are relatively inexpensive, but remember – you’ll need to dump your waste somehow.
- Composting Toilet: Nature’s Head Dry Composting Toilet. Composting toilets are much more expensive than other types but also much more pleasant and environmentally-friendly. Just drop your load and add some peat moss/sawdust, and your toilet will naturally break down your poop into compost. If the Nature’s Head toilet is out of your price range, you can also try making your own composting toilet.
- Budget Toilet: Luggable Loo. With the Luggable Loo from Reliance Products, you can turn any 5-gallon bucket into a portable toilet for your van. Make sure to line your bucket with a trash bag or toilet waste bag – then once you’ve done your “doodie” just tie up the bag and dump it in the trash. Reliance also sells deodorant chemicals that will make it easier to live with your new roommate
Again, we really think having a toilet in your DIY camper van is unnecessary – there are bathrooms all over the place, and there are better ways to use the space. But if you want more information on putting a toilet in your van, this page from Build a Green RV is an excellent resource.
Van Life Shower Options
Part of the reality of living in a van is that you probably won’t be able to shower every single day. This is easier for some than it is for others.
We’ve met people on the road who hate going more than a couple of days without a shower, so they’ve built or bought elaborate shower setups for their vans. And there are others (like us) who are totally fine going a week or two without a shower.
Whatever your shower preferences, there are tons of options for taking a shower on the road, from portable systems you can bring with you to inexpensive public showers. Here are some of the most common:
- Shower at a Gym. For $20 per month you and a guest can get access to every Planet Fitness location, and with over 1,400 clubs throughout North America you’ll never be far from a shower. Many other gyms and YMCAs also offer free trial memberships if there isn’t a Planet Fitness around.
- State Parks/Developed Campgrounds. Every once in awhile, it’s kind of nice to stay at a state park, other developed campground, or even an RV park – and a big reason why is that they have showers (and sometimes laundry, too). This is what we’ve done most often when we need a shower on the road. Many state parks also have small day use fees if you don’t want to actually camp there.
- Truck Stops. Sometimes you might end up spending the night at a truck stop, and most of them have shower facilities you can use. They tend to be a bit pricey – something like $10 or more – but if you really need a shower this is definitely an option.
- Solar Shower. For easy, inexpensive showering in wilderness locations, nothing beats a good solar shower. This is basically a bag of water that you leave out in the sun until it heats up, then hang it from a high place and shower using the attached nozzle. 5-gallon solar showers should get you about 5 minutes of good water flow. There are also pricier but more convenient pump-operated solar showers that you can buy.
- Electric Portable Shower. Electric showers like the Big Kahuna Portable Shower feature a 12V submersible water pump and a holding tank that let you shower anywhere – just fill up the tank and turn it on. However, if you want a hot shower you’ll need to preheat the water somehow.
- Buy (or Build) a Road Shower. Essentially a black water-filled tube with a spray nozzle that you mount on your roof racks, a road shower is a solar shower on steroids. You can buy a ready-made one, or build your own out of PVC pipe.
- Portable Tankless Hot Water Heater. If you’re serious about your showers, then look into getting a portable tankless hot water heater. These run off of propane to deliver on-demand hot water, and you can even pair this with a pump to pull water from a nearby water source.
- Desperation Move: Baby Wipe Shower. Sometimes a real shower just isn’t available. In those situations, cleaning yourself with baby wipes will do in a pinch.
Read More:
Van Build Solar & Electrical
Having electricity in your DIY camper van is essential, especially if you want to refrigerate food, see at night, and do computer-based work on the road. But it’s also one of the most intimidating aspects of any van build.
When we built our first camper van, we didn’t know the first thing about electrical wiring, solar panels, or batteries, and there weren’t a whole lot of resources out there. But with some patience and ton of research, we were able to rig up a functional DIY solar electrical installation in our camper van.
There are several different options for adding electricity to a van build, with varying levels of complexity and cost.
Option 1: Build Your Own System (Cheapest but Most Complex)
We had absolutely zero experience with electrical work before we built our van, but we found a ton of really helpful information out there on the internet. We even wrote a detailed post about how we wired our electrical system that walks you through everything we did.
That said, working with electricity can be dangerous, and you should be sure you know what you’re doing before you dive in. If you have any electrician friends, this might be a good time to bribe them with beer.
Every DIY solar setup has a few main components:
- Solar Panels take sunlight and convert it into electricity.
- Batteries store all of your electricity that you’ll use to power everything.
- Charge Controller. This takes the current flowing from your solar panels, regulates it, and charges your batteries at the optimal rate.
- Battery Monitor. This shows you useful information, including how charged your batteries are. With lead-acid batteries, going below 50% charge may damage them.
- Inverter. This converts the 12V DC current from your batteries into 110V AC current that you can use for charging computers or using other things that have a standard wall plug.
- Wiring and Fuses. These connect everything together and add an element of safety.
We also recommend adding a DC-DC charger, which charges your batteries from your vehicle’s alternator while you’re driving.
You can buy full solar kits that have all the components you’ll need except for the batteries and inverter. Kits come sized as small as 100 Watts and go all the up to 1600 Watts. Whatever you go with, we highly suggest getting an MPPT charge controller, which are a little more expensive but much more efficient than PWM charge controllers.
Here are the main components for a basic vanlife electrical setup:
This setup should take care of all your basic power needs, unless you’re regularly running things that draw a lot of power, like televisions, air conditioners, or power tools. If you need more charging power, you can always plug additional solar panels into the system.
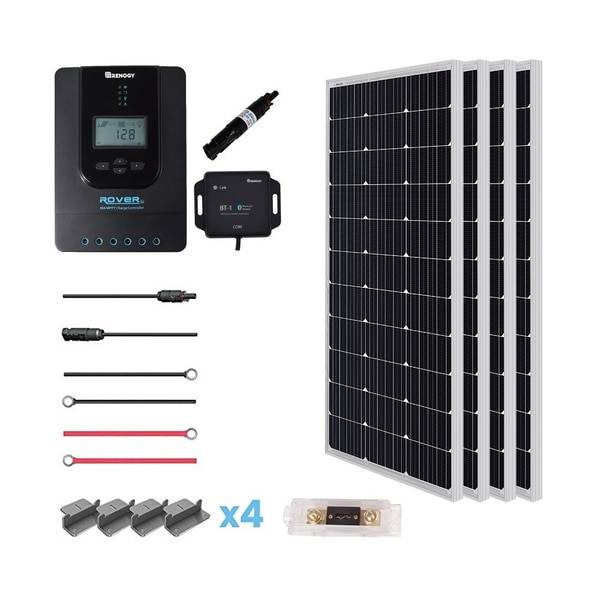
Everything you need to add solar to your van. Including solar panels, mounting brackets, MPPT charge controller, fuses, and wiring. Available in 100W, 200W, 400W, 600W, and 800W.
Enter discount code Gnomad8 for 8% off at Renogy.com
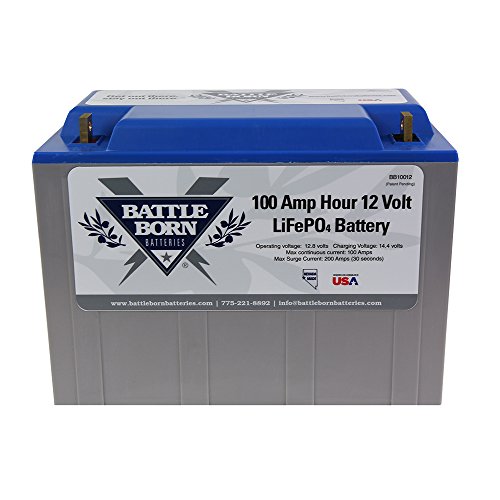
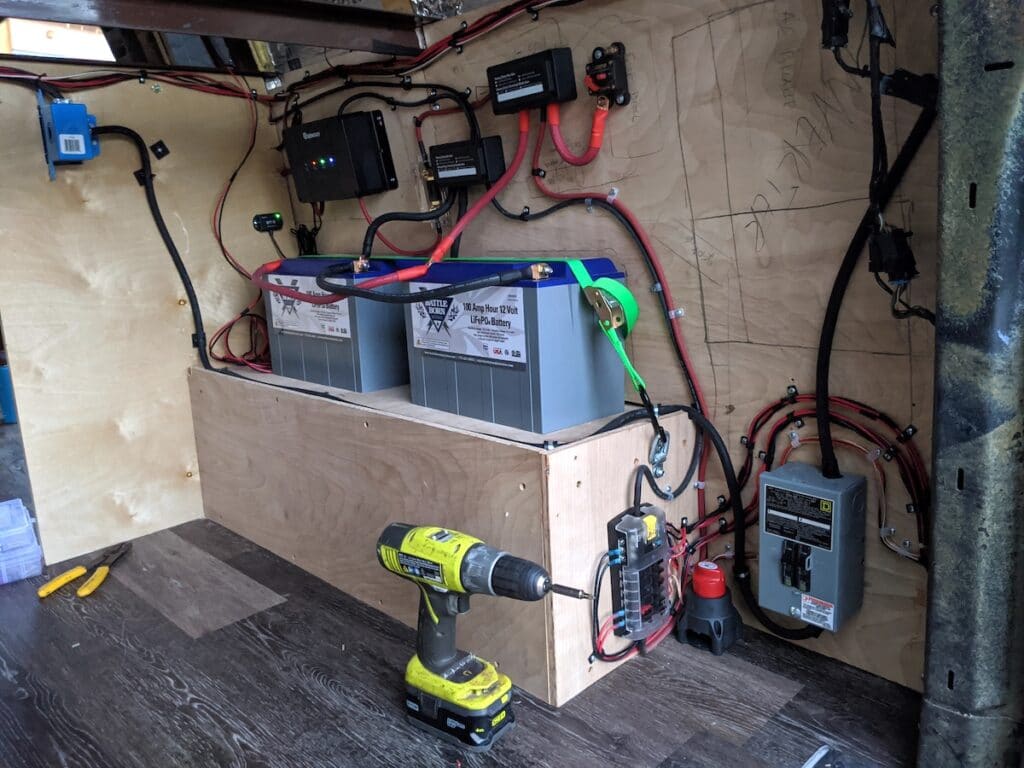
Lithium iron phosphate (LiFePO4) batteries are THE best choice for modern camper vans.They last much longer, charge faster, and can be fully discharged without damage. Battle Born batteries are made in the US, and designed specifically for mobile living and off-grid dwellings.
Our #1 recommended battery choice.
Check out our epic guide to vanlife solar and electrical for additional recommendations based on your needs and budget.
Budget Note
If you only have a few hundred dollars to spend on electrical, we recommend starting with a good battery, DC-DC charger, and inverter. This will be enough to do basic things like charge phones and computers. You can always add more batteries and solar power down the road.
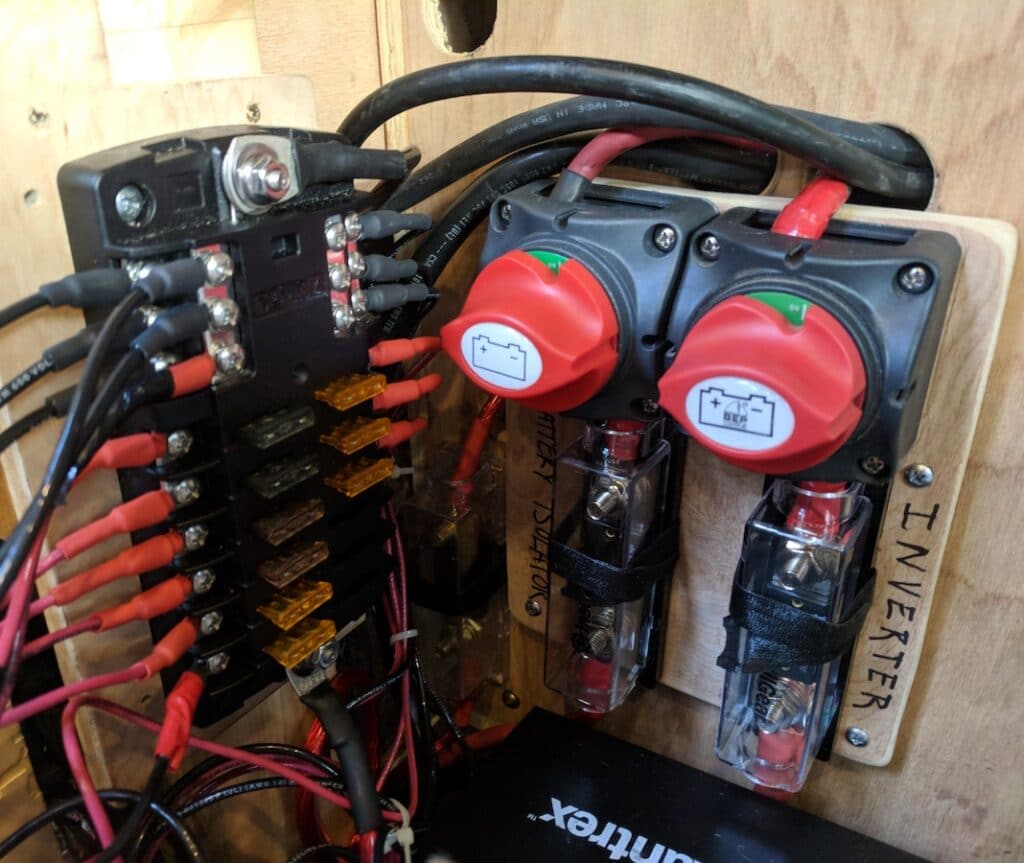
Installing Your Electrical System
For installation, you’ll first need to mount your solar panels on your van’s roof and run wiring inside. Then, it’s simply a matter of connecting the dots and securing everything down.
We cover everything you need to do to wire and install your own solar and electrical in our epic guide.
power your van
Epic Guide to Van Life Electrical Systems
Confused about installing solar & electrical in your van? Read our free guide. We cover everything you need to know – from how everything works, the best options for your needs, sizing your system, selecting components, installation, and more!
Here are some resources and instructions from our blog:
- Epic Guide to DIY Van Build Electrical: How to Install a Campervan Solar Electrical System
- The Best Solar Panels for Van Conversion Power Systems
- 9 Best RV Solar Panel Kits That Are Actually Legit
- How We Mounted Solar Panels on a Fiberglass Van Roof
- How to Charge Your Van While Driving with a DC-DC Charger
- The Best 12V Power Inverters for Campervans and RVs
And here are some other resources we’ve found to be helpful:
- 12V Electrics and Wiring for my Campervan Conversion
- CheapRVLiving Basics of Solar Power
- RV Solar Power Made Simple
- u/VanGoFuckYourself’s Solar Calculator Tool
- Basic 12V Wiring: How to Install a Light Fixture
Option 2: Portable Power Station + Solar Panels
If the idea of wiring your own system is a bit too intimidating and you have a larger budget to work with, then buying a portable power station like a Bluetti AC200P or a Jackery Explorer is an option. Portable power stations feature lithium batteries, solar charge controllers, inverters, and outlets all contained in one compact unit. They’re about as plug-and-play as you can get.
Portable power stations that are 1000Wh or smaller are excellent choices if your van life goals consist of mostly weekend trips and the occasional longer road trip. The larger ones like the Bluetti AC200P can accommodate the demands of full time van life, and are suitable replacements for a camper van electrical system. However, if you’re planning on long term life on the road, installing your own DIY solar electrical setup is a more customizable option.
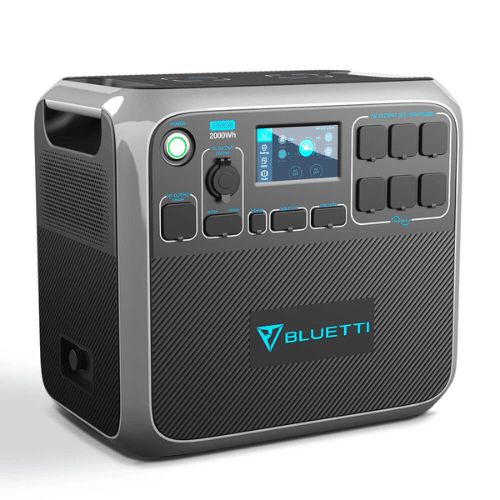
Large capacity solar generator with enough battery capacity and solar input to fully power your camper van or RV.
To charge up your power station, you’ll still need to add solar panels to the mix. The choice comes down to portable solar panels, and fixed panels mounted to you van.
Portable solar panels like Jackery’s can cost nearly three times as much as fixed panels. This may be worth it you if you’re constantly moving your power setup in and out of your van and need more mobile charging. But if you’re using your portable power station as more of a permanent hub for your tiny home on wheels (or if you’re on a budget), there are better options.
For budget and/or permanent installations, we recommend either Renogy’s 100W solar panels or BougeRV’s 180W solar panels.
While portable power stations are dead simple to install and operate, the big downside here is cost. For about the same price as a Jackery, you can buy a complete system with greater capacity. And that’s before you add the solar panels that you’ll need to keep the Jackery charged.
Another downside is flexibility. With portable power stations, what you get is what you get. If you have more custom needs, then you’re better off building your own system.
Read More:
- Bluetti AC200P Review: Portable Power Station for Full Time Van Life
- Jackery Explorer 1000 Review: Is This a Legit Option for Fulltime Vanlife?
How to Charge Batteries while Driving with a DC-DC Charger

Charges your auxiliary batteries from your alternator. Also available in 20A and 60A sizes.
- 20A size is best for 40Ah+ LFP or 100Ah+ AGM batteries
- 40A size is best for 100Ah+ LFP or 200Ah+ AGM batteries
- 60A size is best for 120Ah+ LFP or 300Ah+ AGM batteries
Enter discount code Gnomad8 for 8% off at Renogy.com
If you find yourself in overcast climates or heavily forested areas for an extended period, solar panels alone may not be enough to keep your batteries fully charged. When we first spent several days camping in the deep woods, we ran into issues with battery drain because we weren’t getting enough sun. That’s where DC-DC chargers come into play.
DC-DC chargers (and battery isolators) allow your vehicle’s alternator to charge your auxiliary batteries while you drive, and keeps everything separated so you don’t drain your starting battery. Since we installed one, our batteries are almost always fully charged. It’s also very simple to install – the toughest part is running the cable inside your van from the engine compartment (some DC-DC chargers may require tapping into an ignition circuit).
If you’re on a very tight budget, a DC-DC charger (or battery isolator), an auxiliary battery, and an inverter may be enough to get you started. You can always add solar later if you need it.
Read More: Best DC-DC Chargers and Battery Isolators for Vanlife (How to Charge Your Van While Driving)
Other Van Life Electrical Options: Shore Power
While we think a battery isolator and a 200-watt solar kit provide more than enough power for most vanlifers, some people may want additional ways to generate electricity and charge up their batteries. Especially if you’re planning on running power-hungry electronics like TVs and air conditioners, adding a generator and/or shore power hookups will help you deal with the extra load.
Connecting to Shore Power
If you’re staying at developed campgrounds, many sites have electrical hookups that allow you to plug in to run electronics and charge up your batteries. To do this, you’ll need a charging unit like this 2000W Inverter/Charger from Renogy.
These units take 20A or 30A power input, and also include a built-in pure sine wave inverter for running your sensitive electronics. You can either run a cable inside, or attach a power inlet to your van (like this 20A power inlet or this 30A power inlet). Renogy also makes a 3000W Inverter/Charger if you need more power.
Enter the code Gnomad10 at checkout for 10% off at Renogy.com
Having the ability to plug in to shore power gives you more flexibility in charging your batteries, and it doesn’t add all that much cost to a build (about an additional $200 over a solar-only setup). We’ve definitely been in situations where our batteries were running low in a forested area and we wished we had hookups.
Shore power isn’t strictly necessary, but it’s also good to have as a backup or for more power-intensive activities.
Lighting Options For Your DIY Van Conversion
LED lighting is basically the only choice for your van build. The style of lights you pick comes down to personal preferences, but they should be LED and able to work on a 12V system.
LED lights have several advantages that make them perfect for DIY van conversions:
- They’re energy efficient. This means they won’t be a huge drain on your battery.
- They last forever. Most LEDs are rated to last 50,000 hours. That means you could leave your lights on 24/7 for nearly 6 years before they burned out.
- They don’t give off heat. This is very important in a small space. You don’t want your lights making those sweltering summer nights even hotter.
- They come in a variety of hues. Love the warm feel of incandescent lighting? Get some soft white LED lights. Prefer the harshness of bluer light? Pick up bright white LEDs. Whatever your preference, there’s a tone to match.
- They’re cheap. It won’t cost much to light your whole van.
There are three main styles of LED lights that are commonly used in DIY van builds: LED puck lights, LED strip lights, and LED Xmas lights.
12V LED Puck Lighting
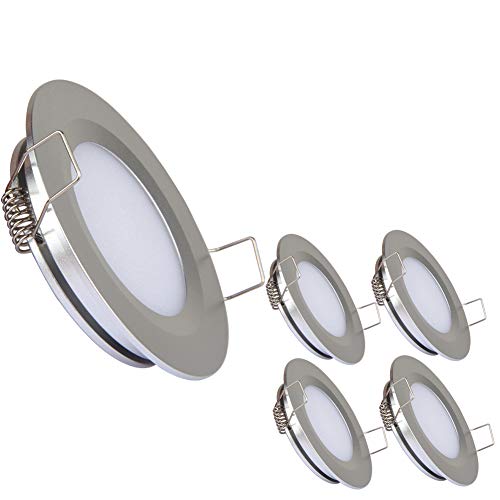
We used these lights in our van, and they kick ass. They're cheap, dimmable, easy to install, and look great.
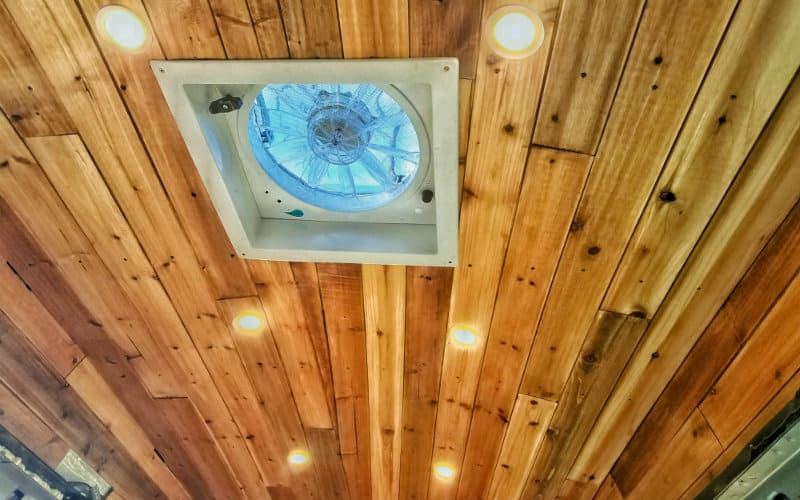
We have LED puck lights in our van build. Puck lights are typically recessed into the ceiling, so they have a very clean look that’s really integrated with your van. It’s also easy to create different lighting zones by running your lights to different switches. We have six puck lights in the main living area that are controlled by one switch, and two more over the bed that run off a separate switch.
Of all the LED lighting options, puck lights are the most difficult to install. You’ll have to run wiring behind the ceiling/walls for each light. And you’ll need to cut a hole with a hole saw to recess the lights into the ceiling. But with some preparation and care it’s not too difficult. We have full instructions for installing LED puck lights in our epic electrical post.
12V LED Strip Lighting
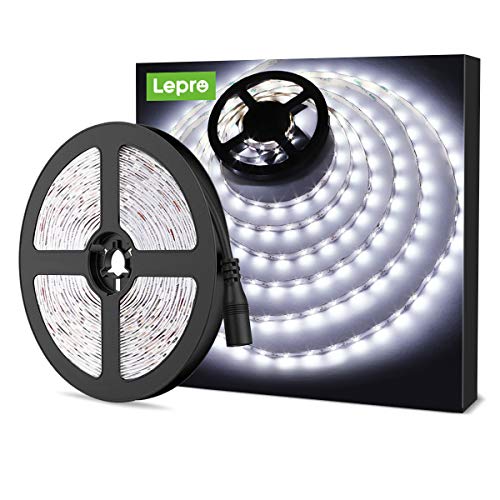
LED strip lights are another popular option for camper van lighting.
LED strip lighting is another way to put simple and attractive lights inside your van. Strip lighting is typically sold in 5 meter (16.4 ft) lengths, and you’ll probably need about two strips – one for each side of your van. This type of lighting produces an even glow throughout.
Since there’s less wiring involved, installing LED strip lights is much simpler than puck lights. You also won’t need to cut any holes because strip lighting should come with its own adhesive. We’ve seen most vanlifers stick strip lighting down the side edges of their ceilings. However, it’s not as easy to create separate lighting zones as it is with puck lights.
LED Xmas lights
Another option some people use for lighting their vans is LED Xmas lights. Installation is simple (the wiring is similar to installing strip lighting), and the visual effect is striking – a bit more rustic and fun. If that’s the style you’re going for, then LED Xmas lights can be a great option.
Adding a Dimmer Switch
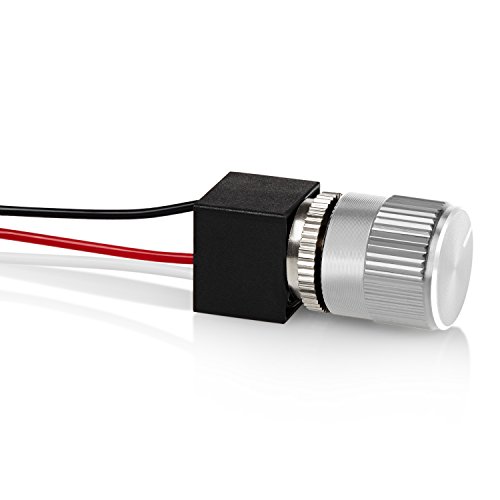
This versatile dimmer switch works great and is easily mountable in a switch plate.
LED lights can be incredibly bright when they’re on full force, and we don’t always want to be blinded when we’re inside our van. Running lights at full brightness also consumes a whole lot more power than running them at a lower intensity.
We strongly recommend wiring your LED lights to a dimmer switch so you can control the brightness. You’ll use less electricity, and your camper van will be much more comfortable.
Installing Lighting
We wrote a detailed blog post about our electrical system that includes instructions on wiring and installing 12V LED puck lights and dimmer switches in a DIY camper van.
If you’re going for strip lighting or Xmas lighting, this Youtube video is a helpful step-by-step.
Insulating Your DIY Camper Van Conversion
Insulation is often the first step in any diy van build, and it’s also one of the most misunderstood. There are a lot of misconceptions and incorrect information about van insulation out there, and many people end up wasting money and time on unnecessary steps and products.
So what is the best way to insulate a DIY van conversion? Below, we go over everything you need to know about insulation for van builds, the different products out there, and how best to use them.
Read More: Insulating Your Van: Everything You Need to Know for your DIY Van Build
A Primer on Insulation and R-Values
There are two types of heat transfer that we’re insulating against when we build a DIY camper van: radiation and conduction.
Radiation (why you need to shield your windows)
Radiation is heat transferred through air or a vacuum- think the heat radiating off of a fire. In a camper van, the biggest source of radiant heat is your windows. Sunlight (radiant heat) shines in through the windows and heats up the inside of your van. Using a reflective window covering will help deflect radiant heat and keep your van cool. Reflective surfaces also help keep radiant heat inside the van during the winter.
Conduction (why you need to insulate your walls, ceiling, and floor)
Conduction is heat transferred across solid surfaces- think touching a hot stove. It’s also how heat gets out of your van in the winter. The heat inside your camper van is conducted through the solid surface of your walls and ceiling. Insulating the inside of your van will help prevent heat loss through conduction during the winter, and will also stop your van body from conducting the sun’s heat inside during the summer.
Convection (why you want thicker insulation on the ceiling)
The third type of heat transfer, convection, means that hot air naturally rises to the ceiling. Because of this, insulating your ceiling is most important for keeping your camper van warm. If you can spare the height, we recommend using thicker insulation on the ceiling.
What is R-Value?
R-value is a measure of a material’s Resistance to heat transfer by conduction. Space is at a premium when you’re living in a van, so we usually want to use insulation with a higher R-value per inch of thickness.
How to Insulate a DIY Camper Van Build
There are many different types of insulation material out there, and some are a much better choice for vans than others. We generally recommend two insulation schemes for van life builds, depending on your budget and your priorities.
Option #1: Havelock Wool Insulation (effective and breathable, with sound dampening and moisture management properties)
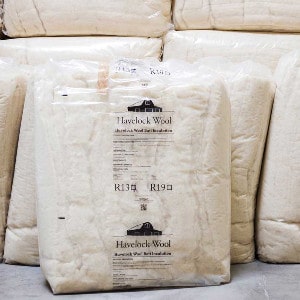
Eco-friendly and all-natural insulation batts made from sustainable sheep's wool. Sound dampening, breathable, controls moisture, sequesters carbon, and easy to install.
Sheep’s wool insulation is our top choice for insulating a DIY camper van. It’s effective as an insulator, but more than that it eliminates some problems that plague most vanlife insulation installs.
Condensation can be a big issue when you live in a van. Most other types of insulation either soak up moisture or may cause it to become trapped, creating problems down the road. Sheep’s wool insulation is entirely breathable, allowing moisture and condensation to naturally evaporate out of your van. This also means you don’t have to worry about installing it incorrectly, like you do with foam insulation.
Havelock Wool is environmentally friendly, and doesn’t carry any of the concerns around production methods, off-gassing VOCs, or toxicity that comes with most other insulation materials. It’s also a natural sound absorber, and even helps purify your air (and air quality is extremely important in such a small space as a camper van).
The downsides to Havelock Wool are availability and cost. You can’t just run out to the hardware store to pick some up – you have to order it online, which means shipping costs (generally about 15% on top of the material cost). Sheep’s wool is more expensive than rigid foam board, and thus might not be an option for barebones budget builds. But it’s also much cheaper than other widely-used insulation materials like rock wool or Thinsulate.
Here’s how we recommend installing Havelock Wool insulation in your camper van:
- Walls, Ceiling, and Door Panels: Havelock Wool Insulation
- Floor: ½” Extruded Polystyrene Foam Board
- Frame and Fill-In: Havelock Wool Insulation
Popular Wool Alternative: Thinsulate

Effective, nontoxic camper van insulation material. Easy to install, breathable, hydrophobic, and sound deadening.
3M Thinsulate is another popular camper van insulation material that is highly breathable, nontoxic, and easy to install. Thinsulate is a great option, and also has moisture management and sound dampening properties (it was originally designed as acoustic insulation for vehicles). However, it is made from synthetic materials and is more expensive than wool insulation.
Option #2: Rigid Foam Board Insulation (cheap and effective workhorse, but its lack of breathability comes with some drawbacks)
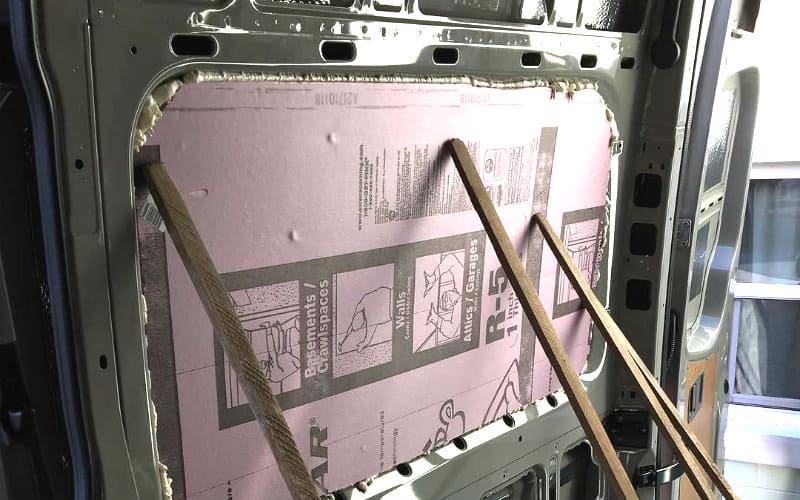
Rigid foam board is an excellent choice for insulating a DIY camper van conversion. It’s the biggest bang for your buck by far – you can insulate an entire van with it for less than $200 – and it gives you high R-value without sacrificing too much internal space. This is what we used to insulate our conversion van, and we highly recommend it if you’re on a tighter budget or short deadline.
But, proper installation is vitally important when working with foam board. You don’t want to create a situation where moist air can become trapped behind the insulation, since it can condense and potentially cause rust issues over time. Rigid foam board products are also derived from petroleum, and some products may have environmental concerns associated with them.
The main type of foam board insulation that we recommend is extruded polystyrene (XPS). We do not recommend using expanded polystyrene (EPS), and we only recommend polyisocyanurate (polyiso) in limited use cases, since it loses R-value at lower temperatures.
- XPS has a high R-value at R-5 per inch, and is our top choice rigid foam insulation for your DIY camper van builds. It also has high compressive strength, which means you can stand on it without damaging it, so it’s an excellent choice for insulating under your floor. It’s so strong that you can even use it to make lightweight cabinets for your van.
- Polyiso is a bit more expensive, but it has the highest R-value at R-6 per inch. Polyiso loses R-value at lower temperatures, so it’s not a good choice if you’ll be doing a lot of winter camping. However, if you plan on mostly camping in moderate temperatures, polyiso will add the most insulation value to your camper van.
- EPS is an inexpensive open-celled foam board (think styrofoam) that is a poor choice for van builds. It’s R-value is less than the other options at about R-4 per inch. And the gaps between the foam cells allow moisture to penetrate, which degrades the insulation over time, especially when exposed to the vibrations of a moving vehicle.
We recommend using ¾” to 1” thick foam board insulation on the walls of your van, and 1” to 2” thick foam board on your ceiling. You can also use foam board to insulate your door panels and underneath your camper van flooring. Here’s a breakdown:
- Walls: ¾” – 1” XPS rigid foam board insulation
- Ceiling: 1” – 2” XPS foam board
- Door Panels: XPS or batt insulation, such as Thinsulate
- Floor: ½” minimum XPS foam board
- Frame and Fill-In: Great Stuff Gaps and Cracks Spray Foam Insulation
To install rigid foam board insulation, we recommend using Great Stuff Gaps and Cracks spray foam as adhesive to glue the foam boards to the inside of your van. Line the backs of your foam boards with the spray foam, and brace the boards against your van walls until the foam cures. Then, fill in any gaps and cracks with Spray foam.
Other Camper Van Insulation Materials
There are many other insulation materials out there, most of which are not ideal for campervan usage. Let’s go over some of the big ones.
- Closed-cell spray foam. Very effective insulation, but it’s expensive, difficult to install, and is not the best choice for a van. Its lack of breathability can be a problem in a vehicle, and if installed incorrectly can actual warp the sheep metal of your van and mess with structural integrity.
- Rock wool. Hydrophobic and insulates well. However, it’s expensive and releases toxic fibers during installation. Also may settle with vibration and become unevenly distributed over time.
- Denim. Eco-friendly but settles with vibration and is prone to holding on to moisture.
- Cellulose. Eco-friendly but settles with vibration and is prone to holding on to moisture.
- Fiberglass. Cheap and available, but degrades with vibration, and you don’t want this stuff in the air.
- Lizard skin. Expensive, unproven, and ineffective.
- Cork underlayment. Eco-friendly and effective insulation that manages moisture well. However, it’s extremely expensive and difficult to find.
Reflectix: Recommended for Radiant Barrier Only
If you search “how to insulate a campervan” on Google, you’ll find many videos, blog posts, and instructions recommending that you line the whole interior with Reflectix and put more insulation or your walls directly on top of it. This is not correct, and if you do this you’re just wasting money.
Reflectix is essentially a sheet of bubble wrap covered in reflective foil. It’s effective as a radiant heat barrier but does almost nothing for conductive heat. It definitely has its uses in a van conversion, but most people have a fundamental misunderstanding of how Reflectix works.
Reflectix only works if there is an air gap next to it – Reflectix themselves recommend at least a ¾” gap between their material and the area to be insulated. This because Reflectix is a radiant heat barrier, and when you put it right up against your van walls the foil cannot reflect back radiant heat (remember, radiant heat is only transmitted through air or a vacuum). If there is not an air gap, the insulating power of Reflectix is almost nothing.
So how do you best use Reflectix in a van build?
In the summer months, your windows will be one of the primary ways that heat gets into your van. Because of its reflectivity, Reflectix works great as a window covering to reflect radiant heat away from your windows. Reflectix can also be used to line areas where there’s a natural air gap (such as the inside of door panels or cabinet interiors).
We do not recommend using Reflectix to insulate your walls or ceiling. Without an air gap, the R-value of Reflectix is negligible. Even if you have the recommended ¾” air gap next to the Reflectix, the R-value per inch is less than R-3. There are much more efficient and cost-effective insulation materials out there for these purposes. You’ll be better off filling the space with wool or rigid foam board.
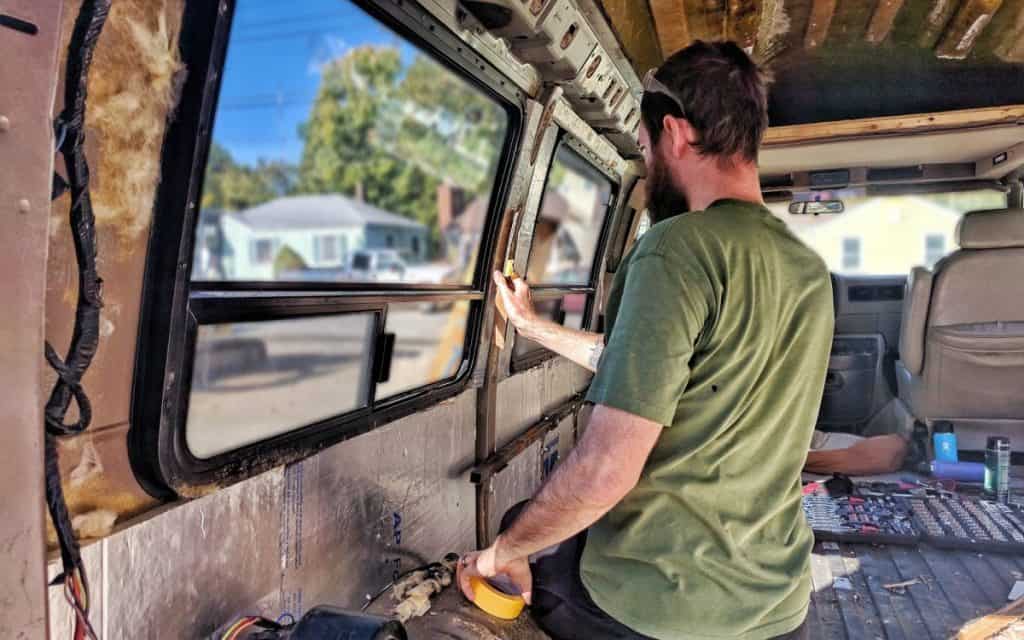
Insulated Window Curtains with Reflective Fabrics
Most of the radiant heat entering your van comes in through your windows. To help mitigate this, you can make window curtains using reflective fabric to block out radiant heat.
You can also make reflective curtains reversible by sewing dark fabric on the back. When it’s hot out during the day, face the reflective side outwards to prevent radiant heat from penetrating. In cold weather, turn the reflective side inwards to reflect heat back into the van.
Here are some reflective fabric options:
- Insul-Shine. Reflective batting material that adds additional insulation value, although it is a bit thick.
- Insul-Brite. Reflective lining material that’s thinner and a bit easier to work with.
Upgrade: Eclipse Sunshades Retractable Windshield Covering
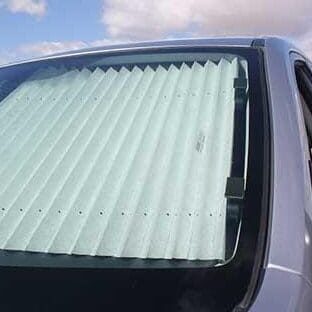
One of our favorite van add-ons. Keep your van cool (and private) with these custom-made, permanently installed windshield coverings.
Buy using the button below to get 3% off your order.
Don’t overlook making sure your windshield is covered up – it will help dramatically in your efforts to keep heat out of your camper van. If you have leftover Reflectix, you can easily make your own reflective windshield covering. But if you want something that’s much easier to set up and take down, we highly recommend getting an Eclipse Sunshade retractable windshield covering.
This awesome piece of equipment permanently mounts on either side of your windshield and accordions out when you need it – simply pull the two sides to the center of the windshield, where they attach together with heavy duty velcro. Our Eclipse Sunshade is easily one of our favorite things we’ve ever installed on our van. We’ve beaten ours up over the years, and it still looks and functions like new.
WANT AN ECLIPSE SUNSHADE? Buy yours using this link to receive a 3% discount off your order!
Installation and Resources
If you’re looking for even more info on insulation for van builds, we wrote a detailed post all about van life insulation that digs into the hows and whys, and digs into different materials for insulating a DIY camper van conversion. We also wrote a detailed post on how we insulated our van that goes over installing rigid foam board, filling gaps with spray foam, and insulating our door panels with fiberglass.
- Insulating Your Van: Everything You Need to Know for Your DIY Van Build
- Insulating Our Conversion Van: Tips, Tricks, and Step-by-Step
And here are some other informative resources that we found helpful along the way:
Heating & Cooling For Van Builds
Properly insulating your van is the first step in staying comfortable on the road. But insulation by itself is not enough to keep your van a comfortable temperature no matter the weather conditions.
Heating your van in cold weather is fairly simple – use a heater. But there are several different types of van heaters, which we’ll dig into below.
Keeping your van cool can be a bit trickier. Active cooling systems like air conditioners are a massive power suck, and are not a real option without a installing large (and expensive) electrical system or staying plugged in at campgrounds.
That leaves more passive options, namely proper ventilation and proper shading. If you do these things well, you’ll actually be surprised how comfortable you can keep your van in even the hottest weather.
Ventilation is Key
You absolutely need a vent fan when you live in a vehicle full time. Your vent fan will help keep your van build cool and free of condensation, and the airflow is a lifesaver in hot weather. You’ll also need to keep it running while you cook inside the van to suck out any fumes.
Vent fans start with basic, no-frills, three-speed units and go all the way up to expensive fans with thermostats, rain sensors, and remote controls. Here’s what we recommend:
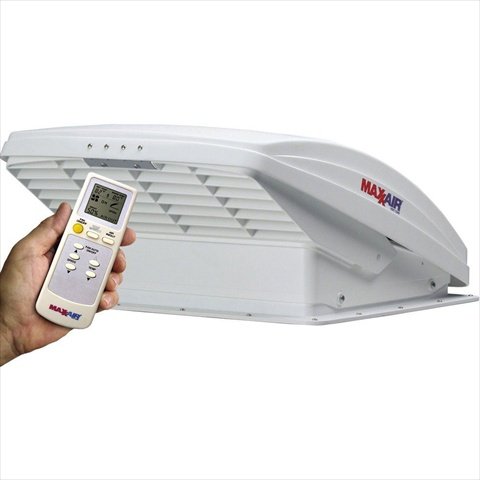
Powerful 10-speed roof vent fan with thermostat, remote control, and built in rain cover. Easily the best fan option for full-time vanlife.
The Maxxfan Deluxe is our top vent fan choice for van builds. We didn’t put one on our first van, and we really wish we had. The Maxxfan’s biggest selling point is its built-in raincover. The ability to open your vent and run your fan while it’s raining is critical, and the raincover on this fan lets you do that while still looking sleek and low-profile.
The Maxxfan Deluxe has 10 speeds, reversible airflow, a thermostat, and it can run in “ceiling fan mode” for air circulation.
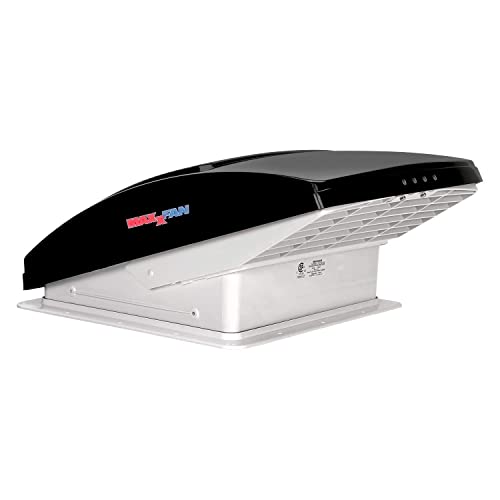
All the same features as our top pick, just without the remote control.
This variation of the MaxxFan Deluxe is significantly cheaper than the top model, and the main difference is that it lacks a remote control. If you want to save money and don’t mind getting up to press buttons on a keypad, this fan is an excellent choice.
How Many Vent Fans Do You Need?
Many van lifers choose to install dual vent fans in their van builds – one blowing fresh air in, and one sucking air out. Doing so can definitely increase the air circulation in your van, which is one of the primary ways of staying cool. However, this is not strictly necessary. Installing two vent fans adds cost and takes away roof space, so this may not be the right choice for everyone.
Installing Your Vent Fan
Cutting a big hole in your roof sounds intimidating, but it’s actually a lot of fun. If you follow a few simple steps, you’ll have your vent fan installed in no time. Check out our blog post on installing our vent fan for step-by-step instructions:
You’ll also need to run wiring and hook the fan into your electrical system. We wrote an epic guide to setting up solar and electrical in a van build that should get you started.
Refrigeration Options for Vanlife

Having a reliable refrigeration setup is vital to living a comfortable van life. No refrigeration means you’re limited in what you can cook on the road, and chances are you’ll end up spending more money eating out. Having a cooler as your fridge means you’ll need to buy ice frequently to keep everything cold – and that cost adds up. Not to mention the constant pain of dumping melted ice and dealing with water-logged food.
Investing in a refrigerator for your DIY camper van conversion means you can store vegetables, meat, dairy products, and even beer. It means you can save money by cooking in your van, all while eating healthy fresh foods instead of processed meals. And if you have a good solar power system, you can keep your food cold with nothing but sunlight.
Read More: Refrigeration on the Road: The Best 12V Fridges for Vanlife
Why Portable 12V Fridges are the Best Option for Van Life
In our opinion, the best kind of fridge you can get for a DIY van conversion is a portable 12V fridge/freezer. These fridges are built for adventuring on 4×4 vehicles and boats. They’re very rugged, and they don’t need to be kept perfectly level like mini-fridges. They can run off 12V power or regular 110V. They keep your food as cold as you want, and they can operate as either a fridge or a freezer.
They’re also very energy-efficient, so they won’t be a heavy load on your batteries. The best 12V fridges use highly-efficient compressors that have very low power draw. They’re also well-insulated and feature top-open lids, which prevent the cold air at the bottom of the fridge from escaping when the lid is open.
There are some downsides. 12V fridges from the top brands can be extremely expensive (although there are some really solid budget and mid-priced fridges on the market these days). Some may find it difficult to organize food effectively with the top-open design. And with this type of fridge you won’t get the homey look of a built-in mini-fridge.
But in our minds the energy efficiency and ruggedness of these fridges win out over other concerns. Here are the top fridge choices for your van:
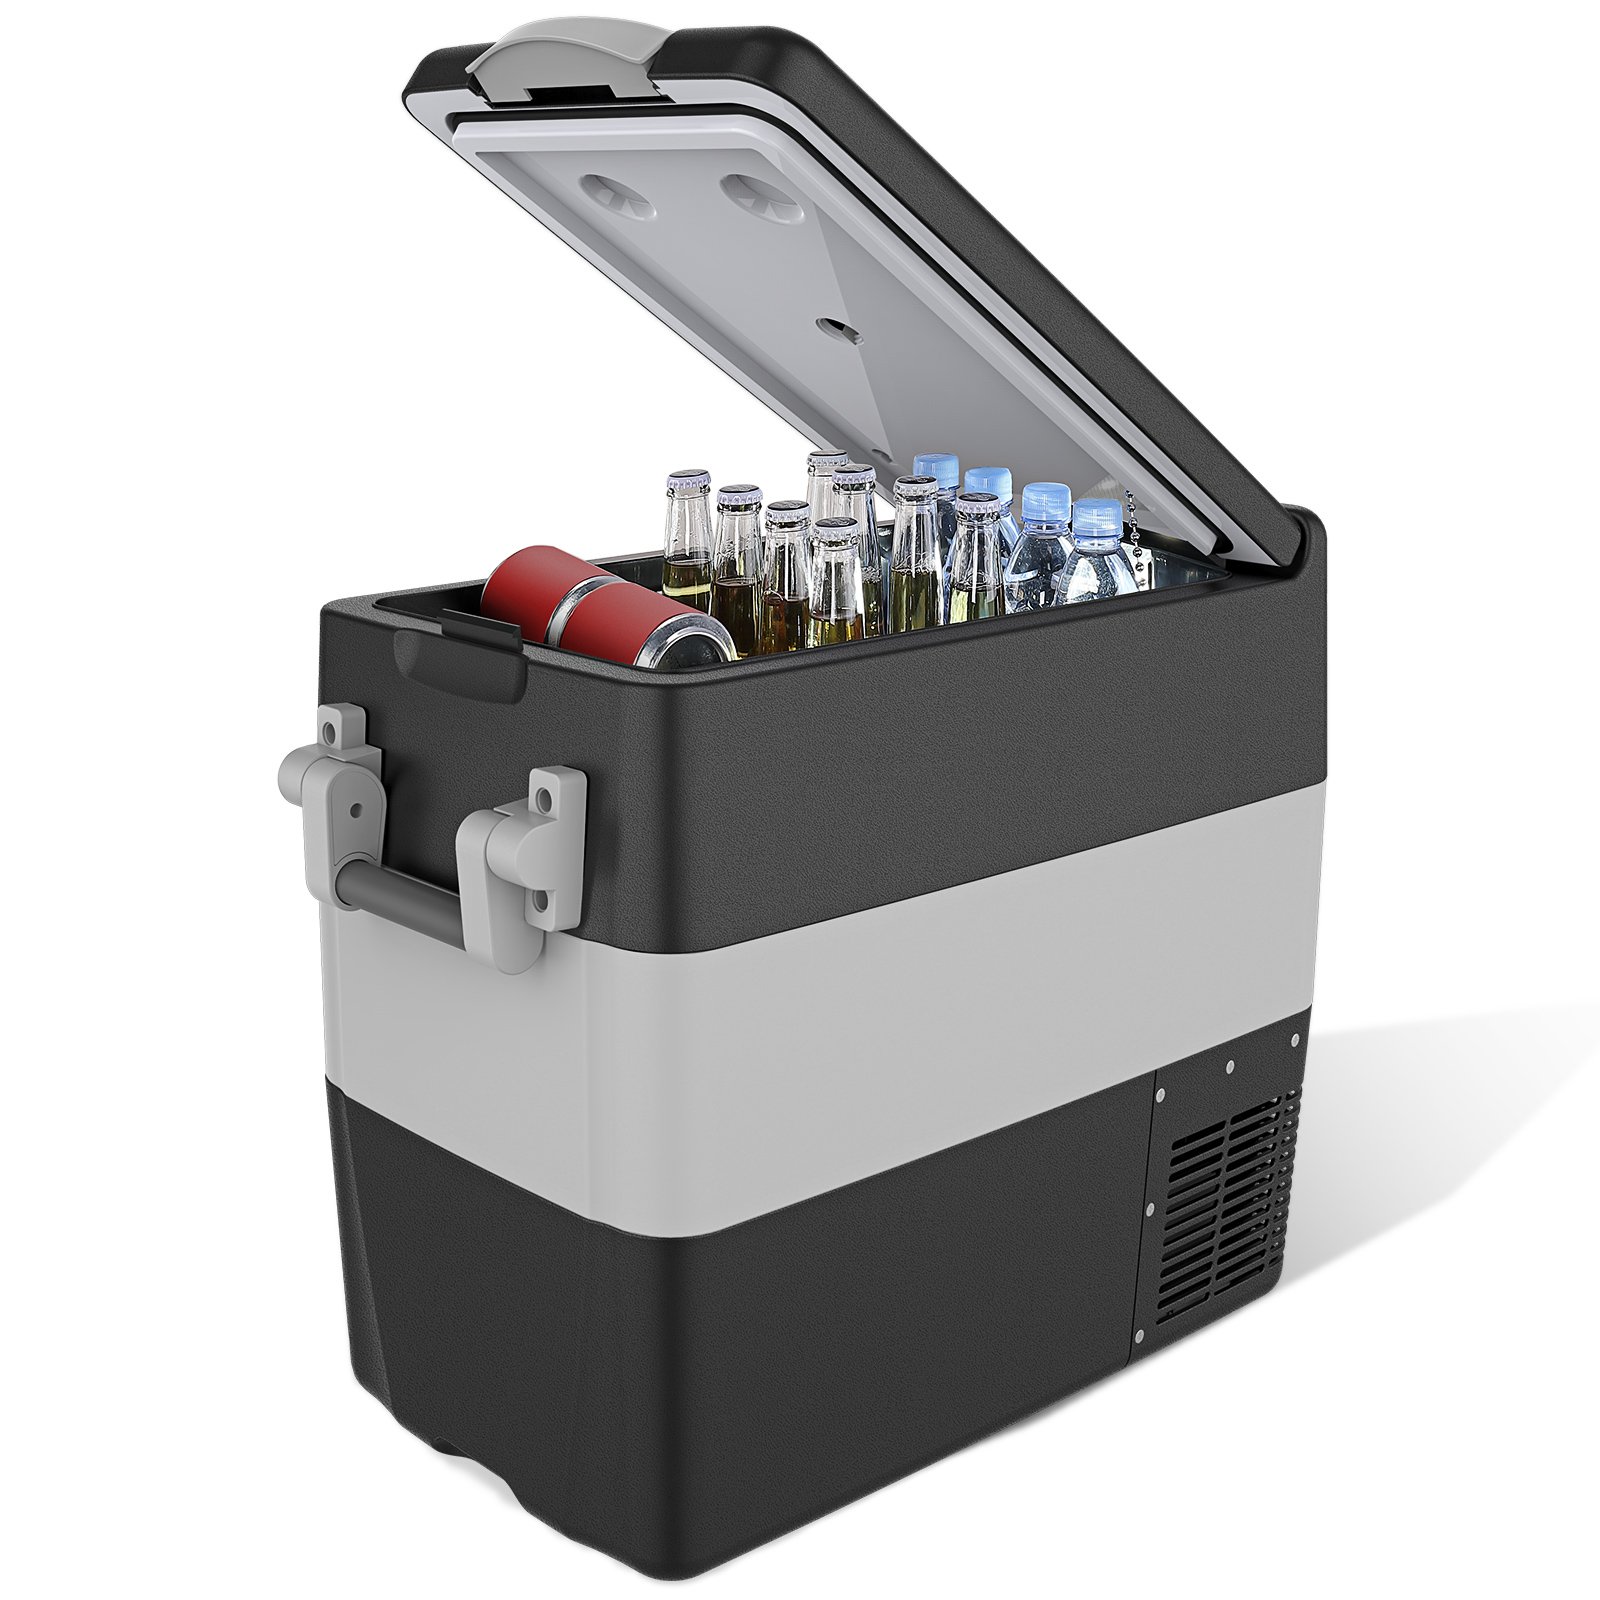
Best Overall Value: Iceco VL-Series 12V Refrigerators

Sporting the ultra-efficient Danfoss SECOP compressor and stainless steel construction, these fridges have everything you need for life on the road for about half the cost of higher end units.
Available in sizes from 45 to 74 liters, and both single and dual zone.
Enter discount code GNOMAD for 12% off at Icecofreezer.com
Iceco is a newer player in the vanlife, RV, and adventure vehicle refrigerator scene. But they’ve come in “hot” with their “cool” product, so to speak. And they quality and value that they offer is giving the big players a run for their money.
Iceco refrigerators are built like tanks (the VL-series features stainless steel construction), they use top shelf components such as Danfoss SECOP compressors, they’ve proven to be ultra energy efficient, and they do it all for a price that’s nearly half as much as high end van life fridge brands. On top of that, they offer a variety of sizes, both single and dual zone, and a few different form factors.
That’s all really tough to beat, and in our opinion Iceco offers the best overall value in vanlife refrigeration. Which is why they’ve have earned our top pick and selection for best overall value.
Upgrade Pick #1: Dometic CFX3 12V Refrigerators

Featuring best-in-class energy efficiency, cutting edge technology, rugged build quality, and overall reliability, CFX3 fridges are the top choice of many vanlifers for good reason.
Available in sizes from 24 to 99 liters, and in both single and dual zone.
Use coupon code GNOMAD for 5% off + free shipping at Dometic.com.
We don’t have a Dometic CFX3 in our van, but we wish we had gotten one for our van build. This is a great fridge that many vanlifers happily own. It’s rugged and durable, and it keeps your food cold while only sipping power. And it has some advanced features, including the ability to control the temperature via a wifi app.
The CFX3 is also very energy efficient – in our research for our epic post on 12V fridges, we found that it is the most efficient van life fridge on the market. If you need more or less capacity, Dometic CFX fridges also come in a variety of other sizes, including some that are double-zoned.
Dometic generally makes excellent products, and they’re heavily invested in the vanlife community
Budget Pick #1: BougeRV 12V Refrigerators
Solid, efficient, and inexpensive 12V vanlife refrigerators. Available in sizes from 34 quart (32L) up to 53 quart (50L).
Coupon codes for Bougerv.com:
- GNOMAD90 for $90 off the 53-Qt fridge
- GNOMAD for 16% off sitewide
If you’re frugal or are on a super tight budget, you may not even want to throw down for the cost of an Iceco. Luckily, there are still quality options for getting refrigeration in your DIY camper van, in particular the BougeRV portable refrigerator.
BougeRV refrigerators are the best among the mass-produced Chinese 12V fridges that have been flooding the market. They have good build quality, are very power efficient (though not quite as efficient as Iceco or Dometic), and all the features we would expect from a modern 12V refrigerator. And with discounts the BougeRV fridges cost about 1/3 the price of high end brands.
This is the cheapest way to add refrigeration to your van build, and is especially cost effective if you’re a part-timer or are only planning on vanlife for a year or two.
Read More: BougeRV Portable Fridge Review: Is This Cheap Vanlife Fridge Worth It?
Can’t You Just Use a Cooler Instead of a Fridge?
If your budget doesn’t allow for a portable 12V fridge and you just want to hit the road, a decent cooler works fine for basic refrigeration. Many vanlifers began their journey with a cooler and upgraded to a fridge down the road.
While coolers are much cheaper upfront vs buying a fridge and allow you to store cold food, they don’t work quite as well as fridges and come with several downsides to consider.
There are two types of coolers out there: passive coolers (your typical Coleman or Yeti cooler) and 12V thermoelectric coolers.
Passive coolers work just fine for vanlife, but they have the added headache of needing to be replenished with ice every few days. This can be a bummer if you don’t want to leave that sweet campsite and run into town. You’ll also have to worry about dumping ice melt and keeping your food from getting wet, and ice costs can add up over time.
However, passive coolers are a cheap way to get started. For less than $100 you can buy a basic cooler that will hold ice for up to 5 days. High end coolers hold ice longer, but can cost hundreds of dollars. Still, they’re a great option if you don’t have the money to throw down for solar power.
Thermoelectric coolers like the Coleman PowerChill plug into a 12V outlet and keep your food cold without ice. However, they can only cool to about 40° below the ambient temperature, so if you’re in temps above 78° you probably shouldn’t store meat or dairy products in one. They also draw a ton of power, so they aren’t the best choice for off grid van builds.
DIY Refrigeration Options
With a little electrical ability and some patience, you can convert a regular 110V mini-fridge or freezer into a 12V refrigerator. Doing this could be complex and time-consuming, but it will get you a true refrigerator for a fraction of the cost of buying a high end van life fridge. If you’re on a budget and willing to spend the time, this is a great DIY option.
Read More: Refrigeration on the Road: The Best 12V Fridges for Vanlife
Stoves and Cooking
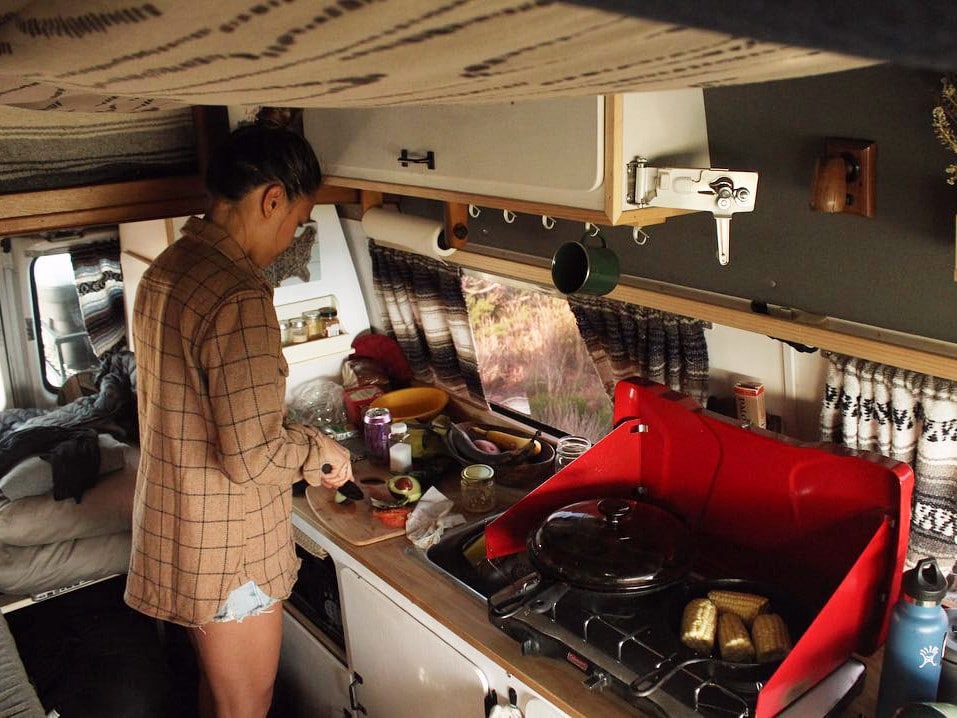
Note: If you cook inside your van, it’s vitally important to have a vent fan and a good carbon monoxide detector. Any kind of stove will give off at least some fumes. The vent fan will suck dangerous fumes outside, and the CO detector will let you know if your van isn’t ventilated properly.
Budget Choice: Coleman Classic Propane Camping Stove
If you want the ability to cook inside your van but don’t have a whole lot to spend, your best option is the Coleman Classic propane camping stove. For about $60 you get a sturdy and reliable 2-burner stove that runs off of replaceable 1-lb propane canisters. We’ve seen many people using these out on the road, and they do the job very well. Coleman has hardly changed the design of these stoves for decades, so you know they’re doing something right.
You can use the Coleman Classic both inside and outside your van. 1-lb propane canisters are widely available for a few dollars, or you can buy a hose adaptor that lets you run this stove with refillable 20-lb propane tanks.
The downsides include everything that could go wrong with using propane in an enclosed space, especially explosive fumes and carbon monoxide (make sure you have a CO detector). And buying 1-lb fuel canisters gets expensive after awhile. Having a larger tank is cheaper, but introduces more failure points into the system.
Integrated in Your Kitchen: Built-in Cooktops (Most Complex Option)
If you’re willing to spend extra time and money installing a stove and plumbing fuel lines, integrating a built-in cooktop into your build will give you a more permanent kitchen feel in your camper van. These stoves usually look great, and some even have covers that turn them into counter space when you’re not cooking.
Most cooktops you’ll find are propane, but electric induction cooktops are another common option (if you can afford the batteries and solar to run one).
- Basic Propane Cooktop: Atwood DV 20S Stainless Steel 2-Burner Drop-In Stove
Built-in cooktops are significantly more expensive than portable stoves. Installing them could be complicated, including adding plumbing to connect your cooktop to its fuel source. They also eliminate the freedom to take your stove and cook outside.
But if you want your DIY campervan conversion to really feel like a home, a nice countertop with a built-in stove goes a long way.
What if You Want an Oven?
You can cook almost anything with pots, pans, and a stove top, so an oven isn’t a necessity. Most vanlifers we know don’t have one. But there are some things that you won’t be able to cook easily without an oven (how best to cook pizza in a van is an ongoing debate).
Oven units can get expensive and take up a lot of space, but if you have the budget and really want an oven here are some options:
- Propane Oven Unit: Camp Chef Outdoor Camp Oven
- Alcohol Oven Unit: Dometic ORIGO 6000 Oven with Stove
Budget Oven Options
Coleman makes a foldable camp oven that sits on top of any camp stove. It’s cheap and it works, but you have to pay constant attention to it while it’s cooking.
Another option is using a solar cooker. Solar cookers harness the power of the sun to heat up food inside a reflective box. You can buy one, or make one yourself. Solar cookers don’t heat up to extremely high temperatures, so plan ahead for longer cooking times.
Water and Plumbing
No matter if you just need drinking water or if you want a full-blown sink setup, having a water source in your van is a must. And though water systems can get quite complicated, they really don’t have to be.
Will you be cooking in your van? If so, you’ll need some way to wash dishes. Do you plan on boondocking away from civilization for extended periods? Then you’ll need to make sure you bring enough water with you, and/or have a good water filter.
Below, we’ve compiled our recommendations, as well as a guide to common van water systems.
Our Choice: Under-Cabinet Manual Pump System
If you really want your van to feel like a home, nothing beats having a built in sink and faucet. A built in sink provides an easy spot inside your van to refill drinking water and wash dishes, and with some planning and a little bit of elbow grease installation isn’t that difficult.
There are a few ways to go about setting up your water system, and you can make it as simple or as complex as you want. But all built-in manual pump systems share the same basic components:
- Manual Water Pump
- Faucet or Spout
- Freshwater Tank
- Gray Water Tank (Waste Tank)
- Sink and Drain
- Plumbing/Tubing
Manual Water Pumps and Faucets
We think a manual water pump is the best choice for vanlife. Manual pumps are easy to use, they don’t require electricity to run, and they help you conserve water.
Our Choice: Whale Systems MKIII Gusher Galley Foot Pump

The best foot pump out there. High flow rate, saves water, and allows you to do dishes hands free. Possibly our favorite vanlife product of all time.
We have this Whale foot pump in our van conversion, and it works flawlessly. Whale Systems makes excellent products primarily for marine use, but their products also work great as the basis for van water systems.
Before we installed our foot pump we were a little concerned that it would take many foot taps just to fill up our water bottles, but it’s surprising how much water this thing can spew. It’s easy to pump out as much or as little water as you need. And the foot operation means that both of your hands are free for washing.
Installation is also really simple – just screw it to the floor and clamp on the tubing. The Gusher Galley pump has connectors for ½” ID tubing. We found that ½” beverage tubing and hose clamps worked best.
We recommend pairing this pump with Whale’s Telescoping Spout Faucet – although it would be awesome to build your own spout faucet out of pipe and fittings (we’re considering this for our next build).
The Alternative: Whale Systems Flipper Hand Pump Faucet

If you want a more compact solution and don’t mind losing out on the flexibility of a foot pump, the Whale Flipper hand pump is a great choice. This is a combination hand pump and faucet that works well and is cheaper than buying both a foot pump and a faucet.
Another solid (and cheaper) hand pump option is Whale’s Vertical Self-Priming Pump faucet.
Both pumps accept ½” ID tubing and are easy to install. These hand pumps are good choices for a van build, but for us the lack of hands-free operation is a big downside.
Budget (But Less Reliable) Hand Pump Option: Valterra Rocket Hand Pump and Faucet
Freshwater Tanks
Your freshwater tank stores all the water that you’ll use for drinking and washing. It needs to be made out of FDA-approved material to prevent dangerous chemicals from leaching into your water. It also needs to be big enough for your needs. This will vary from person to person.
At a bare minimum, humans need 0.5 gallons of water per day for survival. We’ve found that between drinking, making coffee and tea, and cleaning up after meals, we use about 1.5 gallons per person per day. So, our 14-gallon water tank plus our 6-gallon portable reserve tank can keep us going in the wild for 6-7 days before we need a refill.
Here are some good choices for water tanks in a manual pump system:
Our Choice: 14-Gallon Stainless Steel Fusti Tank
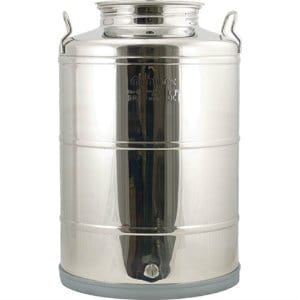
When we started putting together our water system we decided to look for a stainless steel tank. Even though plastic tank options are FDA-approved for potable water use, we still don’t like the idea of our drinking water being in contact with plastic for extended periods. Sure, they say it’s “safe,” but not long ago water bottles containing BPA were considered to be safe.
After weeks of searching, we stumbled upon this 14-Gallon Stainless Steel Fusti Tank from the winemaking supplier MoreWine. Fusti tanks are designed for wine storage and fermentation – but they also work perfectly as DIY campervan water tanks.
Our fusti tank keeps our water fresh-tasting and chemical-free, and the large top opening makes it easy to refill. We just fill up our 6-gallon reserve tank, dump it in the fusti tank, and repeat until full.
In order to hook this into your water system, you’ll also have to buy the ball valve attachment. The ball valve accepts ⅜” ID beverage tubing, so you’ll need a ½” – ⅜” reducer to attach this to a Whale pump.
If you need greater capacity, MoreWine also carries a 28-gallon Stainless Steel Fusti Tank.
The Alternative: Polyethylene Water Tank
Polyethylene water tanks – like this 20-Gallon one – are the standard for RV and marine use. They come in a variety of shapes and sizes, and you can even have them custom-made if you need specific measurements or connector locations.
Installing a polyethylene tank is a bit more complicated because you have to think about how you’re going to fill it. Depending on where you place it, you could have to run a potable water hose inside your van, or install an exterior water connection. Another option that simplifies filling is to position the water tank near your side door.
Polyethylene tanks work just fine and many people use them successfully. But if we’re spending over $100 on a water tank, we’re just more comfortable with a non-plastic option.
Budget Option: Refillable Plastic Water Containers or Water Cooler Jugs
The cheapest and easiest way to supply fresh water to your sink is with refillable plastic water containers. There are many styles available, including jerry-can style containers, the extremely common Aqua-Tainer, or standard 5-gallon water cooler jugs. Which one you go with really depends on personal preference and the dimensions of your kitchen cabinets.
This setup has a few advantages. It’s much cheaper than buying a dedicated water tank. It’s also a whole lot easier to install – just thread the tubing from your water pump straight down into the bottom of the container.
It also simplifies refilling – when your tank runs out, you can pull it out, refill it, and replace it. That means no risk of spilling and no installing a water fill attachment to the outside of your van. You can even carry multiple tanks for greater capacity and just swap them out when they’re empty.
Grey Water Tank (Waste Tank)
Your waste tank doesn’t need to be anything elaborate – any sort of plastic water container will do. Just keep in mind that you’ll need something small enough to fit under your sink, but large enough to not need emptying every single day.
We have a 5-gallon clear plastic Hedpak container that our sink drains straight down into. We really like this container because it’s clear, which means we can easily see how full it is. With 5 gallons of gray water capacity, we only need to empty it every 3-4 days. Dumping is easy – just remove the tank from under the sink and pour it out into an RV dump facility or other approved area.
If you use biodegradable camp soap like we do, you may be able to dig a hole in the ground (at least 200 feet away from a body of water and away from your campsite), dump your gray water, and cover it back up. Regulations on grey water dumping vary from state to state, so make sure you’re not breaking any laws before doing this.
More Complex Option: Install Grey Water Tank Under Your Van
This involves cutting a hole through your floor to route plumbing and attaching a suitable holding tank to the underside of your vehicle. While this is a whole lot more complex, it does open up some space under your sink for storage. However, dumping won’t be as easy as it is with a portable container.
Sink Recommendation: Kingston Brass 16” Bar Sink and Bar Sink Strainer
You can make just about any sink work inside of a DIY camper van conversion, but we really like this 16” Kingston Brass bar sink because it’s a good size (not too small, not too big), it looks great, and it’s a whole lot more affordable than other bar sinks we found.
You’ll also need a 2” bar sink strainer and a drain pipe from the hardware store (you may have to cut the pipe short or find a flexible one to feed into your gray water tank).
Budget Option: Turn a Metal Salad Bowl into an Inexpensive Sink
If you’re really on a budget and want a built-in sink, it’s possible to turn a cheap metal salad bowl into an attractive and functional DIY sink.
Plumbing/Tubing
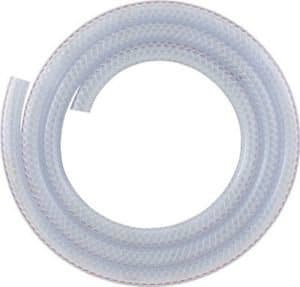
What kind of tubing to use to connect the dots was incredibly confusing for us at first, and it took us awhile to weigh the options and figure out the best route.
The cheapest and easiest option is to use flexible beverage tubing to connect your water tank, pump, and faucet. Beverage tubing is available in whatever diameter you need, the most common being ½” and ⅜”.
Some people choose to use PEX tubing in their van builds. PEX is very common in household plumbing, but it’s not the best choice for most van builds. We tried using it at first, and it turned out to be nothing but a headache.
The trouble with PEX is that it requires special tools and fittings for installation, which dramatically adds to the cost. PEX also comes in sizes that are slightly off from the sizes you need for the pumps and faucets that we recommend, so it just won’t fit properly.
For ease of installation and overall quality, beverage tubing is the way to go.
More Complex Alternative: Adding an Electric Pump
If you want running water without having to pump it yourself, you can install an electric water pump. Electric pumps give you on-demand water flow, and can be paired with just about any faucet.
The downside is a more complex installation process, including wiring and electrical. This is also the most expensive option. You’ll need to buy the water pump itself, an accumulator tank and strainer.
Having nonstop running water also means you’ll likely waste more water and will need bigger tanks for both fresh and gray water.
- Pump Recommendation: SHURflo 4008 Revolution 3.0 Water Pump
- Accumulator Tank: SHURflo Pre-Pressurized Accumulator Tank
- Strainer: SHURflo Twist-On Pipe Strainer
Installation and Resources
Our detailed blog post on our water system install is still in the works. In the meantime, here are some resources that we found helpful:
- Running Water in My Van – Installing the Water System (Vandogtraveller)
- Install Fresh and Grey Water Systems (Buildagreenrv)
- Plumbing System (Sprinter Van Diaries)
- Tiny Home / Stealth Camper / Van Conversion Water System (Youtube)
- Campervan DIY Water System Install (Youtube)
Budget Option: Water Cooler Jugs with Dolphin Hand Pump and Folding Sink
Many vanlifers we’ve met use this inexpensive system as a basic way to store and use water in a DIY van conversion. This setup consists of a standard 5-gallon water cooler jug paired with a Dolphin hand water pump, which easily pumps out water for drinking, hand washing, and cleaning dishes.
5-gallon water jugs are widely available almost anywhere, and you can easily increase your water capacity by carrying several with you. When you finish one jug, just swap the pump onto the next one.
When you need a refill, you can exchange your empty jugs for full ones anywhere that sells water cooler jugs. Or just fill them up at your campground or other water source on the road.
The best thing about this option is that it’s extremely affordable – for less than $50, you can buy two water jugs, a hand pump, and a portable wash basin. And you’ll still have almost all the functionality of a more complex and expensive system.
Washing Dishes with a Folding Camp Sink
If you go with this budget water jug option, chances are you won’t be installing a permanent sink – in which case you’ll need a basin for washing dishes. Folding camp sinks are inexpensive, pack away easily, and work perfectly for a cheap vanlife sink setup.
Camp sinks come in a few different styles, from double basin folding sinks to collapsible bucket-style basins.
Here are some good options:
- Coleman Folding Double Wash Basin
- Freegrace Folding Single Wash Basin
- Sea to Summit Kitchen Sink
- Ultimate Survival Technologies Flexware Sink
Where to Find Water on the Road
Once you’re on the road, where exactly do you find fresh water? Here’s a quick guide to some common methods.
Refill Stations at Walmart (and Some Grocery Stores)
This is our primary method of getting water. Most (but not all) Walmarts have water refill stations where you can refill any container for about $0.37 per gallon.
The water you get goes through several stages of filtration so it’s free of microorganisms, harmful chemicals, and fluoride. To replenish our water we take our 6-gallon water jug inside, fill it up, dump it into our water tank, and repeat until we’re fully loaded. You can also find water refill stations at some grocery stores.
Water Cooler Jug Exchanges
If you use a 5-gallon water cooler jug in your system, you can easily exchange empty jugs for full ones just about anywhere (grocery stores, office stores, hardware stores, Walmart, etc).
Campground Water Spigots
Developed campgrounds and parks will have potable water spigots you can use to refill your tanks. We always make a point to fill up whenever we stay at a campground.
Filtering Water in the Wild
If you’re camping in a beautiful wilderness area and you run out of water, you can easily refill your supply at any water source – provided you have a good water filtration system.
Recommended: Sagan AquaBrick Pressurized Water Filtration System. The AquaBrick easily filters the nastiest water you can throw at it – it will even filter pool water. If you want safe drinking water no matter the source, this is your filter. However, it’s bulkier than a collapsible filter.
Compact/Budget Choice: Platypus GravityWorks 4L filtration system. This is a gravity-fed bag system that’s more compact than the Aquabrick. Simply fill the 4L bag with water from any source, hang up the bag, and let gravity take over. In just a couple minutes you’ll have 4L of fresh, filtered water.
Flooring Options
After you insulate your new home, the next step in a van build is installing a floor. This is an easy way to make your van look awesome – our shiny faux-wood laminate floor gets a lot of compliments – and really makes it feel like a home.
A sweet-looking van floor that’s also functional is not expensive. We did ours for less than $100. But there are a few things to think about before laying down the floor in your van. It’s important to understand each layer of a floor, and to pick the right materials for each section.
Anatomy of a Van Floor
Your van floor will have several layers:
- Sound Deadener (Optional)
- Insulation (Optional but recommended)
- Subfloor
- Main Floor
Sound Deadener (Optional)
Loud road noise can get pretty annoying when you’re driving. But you can install sound deadener like Noico’s Sound Deadening Mat under your your van’s floor to help eliminate road noise and make your van much more enjoyable to drive.
We didn’t do this at first, and the road noise was terrible. However, we ended up redoing our floor after a year, and we added some sound deadening material. It was well worth it.
But, sound deadener isn’t cheap – it will at least double the cost of your van’s floor installation. Most vans will need 2 rolls of Noico Sound Deadening Mat to cover the entire floor. Some vans (like extra long Sprinters) may need more.
For a budget option, you can also get some Peal ‘N’ Seal roofing tape (in the roofing aisle at Lowe’s – Home Depot has a similar product as well), and use that instead.
Floor Insulation
Since warm air rises there’s little danger of heat escaping through your floor. But that doesn’t mean you should ignore this aspect of your van’s insulation. Insulating your van’s floor has the following benefits:
- It prevents heat from below from rising into the van on hot days and while driving
- It will help keep the floor warmer on cold days
- It helps prevent drafts under youinsr van on cold days from affecting your van’s internal temperature
The best floor insulation is minimum ½” XPS foam board due to its high r-value per inch and its compressive strength.
Subfloor
The subfloor provides a stable layer – basically a sheet of plywood – for your floor to sit on. You’ll see a lot of van build videos on Youtube showing a ¾” subfloor, but that thickness just isn’t necessary in a van. The thicker the subfloor, the higher the cost and weight, and the more valuable interior space it takes away. We recommend using 1/2″ plywood for your subfloor. This thickness allows for a stable subfloor and enough grip for securing furniture, but also isn’t too thick or heavy.
Flooring
There are several different materials you can go with for your van’s floor, from high-cost wood to low-cost laminate. Here are the pros and cons of each:
Laminate Flooring (Recommended)
We have laminate flooring in our van. It was simple to install (once we figured out how – which took a while), it’s easy to clean, and it looks great. It was also pretty cheap – three boxes cost us a total of $60, and it was more than enough to cover our floor.
The only downside is that our dogs have trouble walking on it without slipping. If you have dogs, we recommend getting a laminate floor with some texture.
Sheet Vinyl Flooring (Recommended)
Sheet vinyl flooring is another great option for your van’s floor. It comes in many different styles including wood-look and tile-look. It’s the thinnest flooring option, so it will save headroom, and it’s waterproof and easy to clean. The cost is similar to laminate flooring.
On the downside, it’s not the most environmentally-friendly flooring option, and it just doesn’t look as good as other options. But overall, sheet vinyl is a solid choice for any DIY campervan.
Cork Flooring (Recommended)
Cork flooring not only helps insulate your floor. It also acts as a sound deadener and it’s very comfortable to walk on. Cork comes in many different styles and colors, and it always looks unique. It’s also impervious to mold and mildew.
But cork is expensive – it can cost between four and ten times as much as laminate or vinyl flooring. Since it’s a natural material, cork flooring needs regular maintenance that could turn into a pain. It also stains and scratches easily, which is a concern living on the road.
Hardwood Flooring (Not Recommended)
Nothing beats a beautiful hardwood floor, but it’s not the best choice for a van. It’s much heavier than our recommended options, it’s expensive, and it’s also pretty thick – at least ¾”.
In a van build, there’s just no reason to go with a flooring option that’s thicker than ¼” because you’ll lose out on too much headroom. But if some free or cheap hardwood flooring falls into your lap and you’re okay with losing out on the height, it can certainly make a unique addition to any van.
Carpeting (Not Recommended)
We’re not the biggest fans of carpeting in general, and it really doesn’t make sense in a van. It gets dirty easily, retains moisture, and smells. If you like the feeling of walking on carpet, we recommend getting a nice rug or floor mat and putting it on top of your floor.
Installation and Resources
Check out our blog post on installing our floor for a step-by-step guide to laying down subfloor, Reflectix, and interlocking laminate flooring.
Other helpful resources:
Walls and Ceiling
After your floor’s installed, it’s time to put up your walls and ceiling. There are two main materials that we recommend using in your van build: ¼” plywood sheets and tongue-and-groove paneling.
You can use the same material for your ceiling and your walls, or you can mix-and-match two different materials.
¼” Plywood Sheets
Building your van’s walls and/or ceiling out of ¼” (or even ⅛”) plywood sheets is the easiest and cheapest method. The big benefit of ¼” plywood is that it bends easily – which is very important when you’re working with the curved surfaces inside of a van. You can also stain and paint it any color, or just cover it with a tapestry.
Plywood comes in several different types, the most common being pine and lauan. We used ¼” lauan plywood for the walls in our van. Lauan is cheap, it bends easily, and in our opinion its grain pattern looks nicer than pine. Hardwood plywood like birch costs more than pine or lauan, it weighs more, and it’s more difficult to bend. This type of plywood is a great option for furniture, but we think lauan is a better choice for your walls and ceiling.
A more expensive option is to go with cedar plywood. Cedar smells and looks great, plus it’s resistant to mold and mildew (which is a good thing if you’re spending time in humid areas). But, it’s more difficult to find, it’s a bit brittle, and it can be 4 to 5 times more expensive than other types of plywood.
Tongue-and-Groove Paneling
If you want that homey cabin feel inside your van conversion, then lining the walls and/or ceiling with tongue-and-groove paneling is a good choice. Paneling looks awesome – the cedar paneling on our ceiling is one of the defining features of our van. And we cut ours to random lengths and stained it several colors to really give it that mismatched, rustic look.
You can typically find paneling in pine and cedar. Pine is cheapest, looks fine, and will do the job. Cedar is more expensive, but it looks and smells awesome – and it’s resistant to mold and mildew. Paneling comes in different thicknesses, but we recommend using ¼” (5/16”). Thinner paneling weighs less, costs less, takes away less interior space, and will bend with your van’s contours.
While paneling looks better than plywood, it’s a bit more difficult to install. You’ll have to make more cuts, drive more screws, and make sure your lines stay straight. But if you have the skills and patience, using paneling really adds a lot of character to any van interior.
Installation and Resources
Installation can be simple or complex depending on your van. Typically, you’ll screw your walls/ceiling directly to the metal “ribs” of your vehicle frame using self-tapping screws(be careful not to go through the exterior sheet.
However, you may need to add studs or nailers in some situations. Our fiberglass high topper had nowhere to attach our ceiling, so we added 1×2 strips to screw into.
Check out these blog posts for step-by-step instructions:
- DIY Van Conversion: Installing Plywood Walls in Our Van
- DIY Van Conversion: Awesome Cedar Plank Ceiling Installation
- Creating Our Mobile Log Cabin: Easy Steps to Staining a Van
Essential Tools
What tools do you really need for a van build? It’s less than you think. While having access to a full wood and machine shop would be awesome, the truth is you only need a few basic tools to build your van.
Jigsaw (The Only Saw You Really Need)
If we had to choose just one saw to use on our next van build, it would be a jigsaw. No contest. Other saws excel at cutting straight lines, but jigsaws can also cut curved lines and any other shape you can think of. You can even cut through metal with the right blade – which comes in handy when installing a vent fan.
While other types of saws may be better for specific things (a miter saw is by far the best for making straight and accurate cuts on pieces of lumber), no other saw can do everything that a jigsaw can do. A good jigsaw will help you make all the cuts you’ll need to make in your van build. Just make sure you get some high quality blades with it.
Cordless Drill and Drill Bits
This is the next tool you should have in your van build toolkit. A good cordless drill is essential for drilling holes and driving screws. You’ll also need a set of high quality drill bits, because you’ll be drilling some holes through metal.
We have this 20V cordless drill from Black & Decker and we highly recommend it. This drill is affordable (right around $50) lightweight, powerful, and performs nearly as well as drills that cost more than $100.
Mechanic’s Toolset
A quality mechanic’s toolset includes socket wrenches, extenders, various screwdriver attachments, and other useful tools. This is something every van should have in the trunk, even when you’re on the road.
Aside from mechanical repairs, a mechanic’s toolset will help you loosen and tighten bolts – which you’ll need to do during the gutting process, installing your electrical system, and at many other points during your van build. This Crescent 170-piece tool set has all the essentials, including 6-point and 12-point sockets in ¼”, ⅜” and ½” – not to mention pliers, crescent wrenches and screwdrivers.
Mouse Detail Sander
You’ll need to sand your van’s wood surfaces to create finished pieces that are smooth to the touch and ready for staining/painting.
The Black & Decker Mouse Detail Sander is inexpensive, easy to work with, and durable. We’ve broken orbital sanders from using them too aggressively, but this detail sander just keeps coming back for more.
You’ll also want sandpaper in a variety of grits – we recommend 60-grit, 80-grit, and 120-grit to start with.
Caulk Gun
You’ll need a caulk gun to spread sealant over any holes you drill in your van (like when you’re installing your vent fan or mounting your solar panels). We normally hate using caulk guns because many of them are difficult to squeeze, but this caulk gun from Newborn is incredibly smooth and effective.
Kreg Jig R3 Junior Pocket Hole Kit (Recommended But Not Essential)
A Kreg Jig pocket hole kit is technically not essential, but we think that using one is a great way to make strong, long-lasting joints when building furniture for your van. In fact, we wrote an entire blog post about how pocket holes can make your van build easier.
Kreg makes several kits, but the R3 is the basic one we recommend. We also recommend picking up the Kreg Face Clamp, but you could just use regular bar clamps to clamp your workpieces.
Other Basic Tools
- A Good Ol’ Hammer. Comes in handy in a many situations.
- Flat Bar (Essential for Gutting). If you’re gutting a van, a flat bar is one of the most useful tools you can have.
- Bessey Bar Clamps. For clamping pieces in place while you’re gluing or screwing them down.
Measuring and Layout Tools
- Tape Measure. The #1 measuring tool to have.
- Carpenter’s Square. This helps a lot with laying out designs on pieces of plywood.
- Speed Square (Recommended but Not Essential). For marking straight lines when cutting pieces of lumber.
Essential Electrical Tools
- Wire Cutter/Stripper/Crimper. The all-in-one most handy tool for your electrical install.
- MC4 Disconnect Tool. If you have to disconnect your solar panel wiring, you need this tool.
- Multimeter. For measuring voltage, checking circuits, and other electrical tasks.
Safety Equipment
- N95 Masks. Sawdust and paint fumes are bad for you.
- Safety Glasses. Protect your eyes from flying shards of wood.
- Work Gloves. Splinters really hurt (ouch!).
- Nitrile Gloves. Trust us, you do NOT want to get Sikaflex on your hands (also protects your hands when working with wood stain and other chemicals).
Non-Essential (but nice to have) Tools
- Compound Miter Saw. We already had one of these in our woodshop and we used it a ton. Nothing beats a chop saw when it comes to cutting pieces of lumber quickly and accurately. While a jigsaw can do the job (as long as you have a straight-edge guide), if you have access to a chop saw this will be much easier.
- Angle Grinder. For cutting through protruding bolts and other pieces of metal. We borrowed one of these from a friend, and it helped a lot with gutting our van.
- Kreg Jig K5 Pocket Hole Kit. We have the Kreg Jig R3 Pocket Hole Kit and we use it all the time. But we would love to upgrade to the K5 kit, which makes creating pocket hole joints even faster and easier.
- Sewing Kit. For upholstering cushions, making curtains, and any other fabric work you might want in your van.
- Tool Storage. It’s important to keep your tools organized, and a good toolbox helps you do that – as well as stores your tools in a compact space to bring on the road. Bucket organizers are also awesome for managing a ton of tools.
Helpful Extras for Van Life
One of our favorite van add-ons. Keep your van cool (and private) with these custom-made, permanently installed windshield coverings.
Buy using the button below to get 3% off your order.
Your windshield is the number one source of radiant heat getting into your van. Making sure that it’s covered with a reflective surface goes a long way towards keeping your van cool during the daytime, and also comes with a privacy bonus.
We have Eclipse Sunshades installed on our conversion van. While they’re pricier than the cheap sunshades you’ll find at Walmart, they’re very effective. And since they permanently install on your windshield they’re much more compact – a big plus for living in a van. All we have to do is pull the shades across and velcro them together in the middle and we’re protected from both the sun’s rays and prying eyes.
Interested in some Eclipse Sunshades for your van? Buy yours using this link to receive 3% off your purchase.
Mr. Heater Portable Buddy Heater

AKA "Mr. Buddy"
Keep your van warm in cold weather. This 9,000 BTU portable propane heater is a staple in the vanlife community.
This little heater can crank out a lot of heat. When we started our van life journey in early spring 2017, the overnight temps regularly dipped below the 20’s. Our portable buddy heater made our van toasty in a matter of minutes, and our insulation kept much of the heat in when we slept.
The “Mr. Buddy,” as it’s called, is a great choice for keeping your van toasty warm. It uses 1-lb propane canisters, or you can connect it to a larger tank with an adaptor. It also has safety features such as an auto shutoff if it tips over, if the pilot goes out, or if it detects low oxygen levels.
Wilson WeBoost Drive 4G-X Cell Signal Booster
Finding reliable cellular service (and the internet that comes with it) is a constant challenge in vanlife, especially if you do computer-based work on the road. A cell signal booster like the WeBoost Drive 4G-X helps a lot in areas where service is spotty. It can take a weak cellular signal and amplify it into usable internet for web browsing and getting work done.
Since we got our WeBoost, we can camp for extended periods in more places than we ever could before – all because we can get internet. We also have Wilson’s extended antenna for even more range.
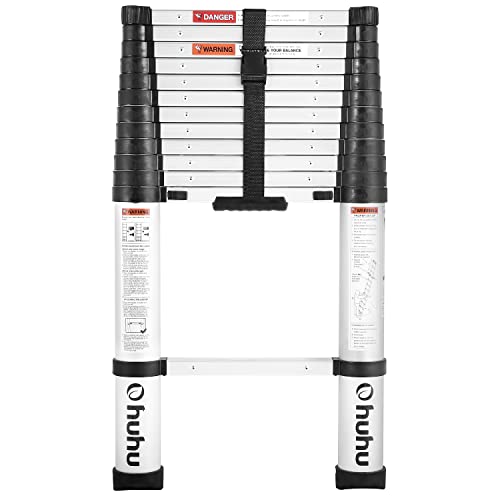
Allows access to your roof without permanently mounting a ladder, and stores easily inside your van.
You need a way to access your van’s roof on the road, and permanently attaching a ladder to your van isn’t always a good option. Telescoping extension ladders are very compact and lightweight, they easily store in the back of our van, and extending them to get up to the roof is simple.
This ladder allows us to do things like clean our solar panels, install new antennas, and add wiring for our portable solar panel. It’s been an absolute game changer, since we can always get up to our roof when we need to. This is especially good for fiberglass roofs like ours, since they may not take the weight of someone walking around on them.
Magnetic Mesh Bug Screen
We’ve run into some seriously mosquito-infested areas on the road, and it’s not fun when they get into your van. A magnetic mesh bug screen lets us keep our doors and windows open while keeping mosquitoes, flies, and other insects out. The magnetic seal keeps your van protected even while entering and exiting.
In our opinion, having one of these is an absolute must for living on the road – especially in humid areas. To fully cover the width of a van’s side doors/back doors, you’ll need a larger screen that’s designed for French doors. If your vehicle has a smaller door opening like an RV, a screen meant for a standard door will work fine.
Basic Safety & Security Items
- Fire Extinguisher. Fires can happen, and you should never be without a fire extinguisher in your van.
- Smoke/CO Detector. Carbon monoxide is odorless and fatal, and it’s important to be alerted if there are dangerous CO levels building up in your van.
- First Aid Kit. If you injure yourself out in the wilderness (or even just cut yourself in a Walmart parking lot) it’s vital to have a robust first aid and survival kit on hand.
- Auto Roadside Emergency Kit. Everything you need to stay safe if you break down on the side of the road.
- Heavy Duty Jumper Cables. Don’t buy shitty jumper cables. Make sure to get quality ones with thick wire.
- Portable Jump-Starter. One of these is essential if your van battery dies in the middle of nowhere and you don’t have a way to jump it from your house battery.
- Pepper Spray. In case you need to deter someone with ill intentions.
- Bulldog Cases Locking Car Safe. It’s a good idea to have somewhere secure to hide certain valuables like passports and some emergency cash. This safe mounts securely and holds everything we need. We keep the key stashed away in a magnetic key safe.
Taking a Test Run
You’ve spent weeks planning your layout, insulating your van, and putting in your floor, walls, and ceiling. Maybe you’ve built some furniture and even started installing electrical. You think you’ve got the whole thing figured out, that your van will work perfectly as a mobile living situation and you’ll be living happily on the road in no time.
Now is the time to take a step back and go on some test runs in your van. Take it out for some weekend trips here or there (or better yet, road trips of a week or more). Try living in it as you expect to on the road. We guarantee there will be things that worked well in your head but not so much in reality. And you’ll come up with random little van life hacks and innovations that will make your life on the road easier and more enjoyable.
When we first set out in our van, we figured out several things that just didn’t work within days. They were all simple fixes, but they also weren’t things we could do easily on the road. Luckily, we already had plans to return to our former home soon for a wedding – so we stayed for a little bit longer and modified things to work better for us.
If you have the available time, taking your DIY campervan for a test run (or two) is a great way to identify any problems while you still have access to tools, package deliveries, and a place to work. There’s just a lot that you can’t foresee until you actually live in your van. Taking it out for some short trips throughout your build will help you understand how you’ll actually use your new living space, what’s necessary, and what’s not.
Even if you don’t yet have a van, you can still get a jump on figuring out what you need in your build by renting a campervan for a short road trip. Peer-to-peer rental marketplaces like Outdoorsy feature all kinds of unique vehicles that you can test out and see what’s to your liking. Testing out a camper van or RV rental might help you nail down the type of van you want, or you might get an awesome idea for your own build
Take vanlife for a testdrive with a campervan or RV rental from Outdoorsy. Available nationwide.
Use coupon code GNOMADHOME for up to $40 off your booking.
Van Build Resources
The resources on this list have a ton of great ideas and information that will help with your van build. Included are everything from awesome van life websites, blogs, and forums, to helpful Youtube videos and informative ebooks.
Websites and Blogs
- Project Vanlife
- The Wayward Home
- Far Out Ride
- Parked in Paradise
- Our Karavan
- Cheap RV Living
- Van Dog Traveller
- Build a Green RV
- Live the Vanlife
- Joe + Van
- Gone with the Wynns
- Sprinter Van Diaries
- Far Out Ride: Build Journal
- The Vanlife Library
- Fifth Element Camping
Forums and Communities
- reddit.com/r/vandwellers
- Cheap RV Living Forum
- Expedition Portal Forum
- Sprinter Conversion Forum
- Promaster Conversion Forum
- Ford Transit Conversion Forum
Van Build Ebooks
- Sprinter RV Conversion Sourcebook
- From Van to Home (Van Dog Traveller)
- Nate Murphy’s Van Conversion Guide
I’ve used a GMC Savana (Chev Express) with AWD and traction control 6 years on extensive camping expeditions, MOAB Lake Powell to Alaska. It’s a full size passenger van with incredible grip on slippery surfaces and it handles extremely well, even in high cross winds on the highway. It has a 450 mile range on good gas (winter gas is junk losing 100 miles off the range). I did solar panels so I could have icy cold drinks and fresh food dinners without fear of draining the car battery. I also put a security camera in that emails me if… Read more »
This resource has been great! Admittedly, I have really looked around your site for this answer, but do you have a guide which includes adding a bench seat with two additional seat belts (ice t then seen as part of a dinette)? Thanks so much!
Hi Melissa, unfortunately we don’t have a guide on adding seats with seat belts as that’s something we haven’t done yet. However, we plan on doing this in our next rig to accommodate our 2-year-old’s car seat. I hope you find some guidance on this out there!
I’m thinking about converting an old U-Haul Truck 14″ or a 17″ any ideas? This is a future project of mine that I wish to do.
Hello, that’s a great idea! Box trucks provide a great blank slate for building, with tons of space and flat, square walls. We recently published a post rounding up some ideas that you can check out here:
https://gnomadhome.com/box-truck-camper-conversions/
Hi,
I have been looking into building a Camper Van for quite sometime now. Would it be a good idea to buy an old used van ? If so, Does that mean we would need to change the engine?
Hi Tonya, old vans can be great options, and many people do vanlife in them successfully. You won’t necessarily have to change out the engine, but older vehicles will have a higher likelihood of mechanical things that need to be addressed. However, if it was well taken care of and lower mileage, an older van can be a great option.
~John
Thank you so much! This is very helpful!!
Hi Grace, so glad this was helpful!
This is seriously a life saver!
So glad this is helpful!
Hey, I’m in South Florida. Only plan on going to Southern states with my van. Since the weather is always hot here, what type of insulation (if any) do you recommend? We consider 60 degrees cold.
Hi Mark, if you’re mainly traveling in areas that has comfortable/warm weather, then the best bang for your buck is going to be investing in reflective window coverings, shade/an awning, and ventilation (roof vent fan). This will all serve to keep the sun out of your van, and allow you to get good airflow on the inside. Additional insulation will help slow heat transfer into your van, but again I would prioritize window coverings, shade, and ventilation. If you choose to go with additional insulation, something breathable that deals well with humid environments would suit you well, such as sheep’s… Read more »
This is amazingly comprehensive, thank you for sharing! This might be a silly question but would there be any weight distribution or suspension issues if you positioned a fixed bed behind the driver’s cabin?
Hi Stephanie, so glad this was helpful! Regarding weight distribution, you mainly want to make sure that you’re not loading up all of your heavy items on one side – so don’t put your batteries and your water tank on the same side of the van, for example (this also is not a good idea because then you’d have water and electrical right next to each other). Most vans are rear wheel drive, and it’s generally advantageous for traction to concentrate your weight towards the back so that the rear wheels are weighted down more. Hope that helps!
~John
Hey guys! My partner and I are currently at the electrical stage of the build and we are pretty confused (we’re newbies). Hopefully you can tell us if this is doable or not. We are thinking of buying an isolator, hooking that up to 2 external batteries, and adding an inverter (to charge our laptops and for other accessories). Now, the only things we would be running full time are our 12v fridge (ICECO VL60 Dual Zone), a weBoost cell signal booster (which wouldn’t even be on ALL the time), and the Maxxair 4500K fan roof vent. Our stovetop/oven will… Read more »
Hi James and Sasha, thanks for reaching out! While you can certainly power all those things and recharge your batteries from your alternator, having that level of power usage without solar might be challenging. Here are a few things to consider/keep in mind. If you don’t have solar, whenever you’re stationary your batteries are just draining. So, you will want to make sure you have enough battery capacity to get you through the periods when you’ll be camping out and not driving. A fridge, fan, and device charging could completely drain a 100ah LiFePO4 lithium battery in 24-36 hours, depending… Read more »
So much information! What a great help! Thank you!
Hi Kathryn, I’m so glad you found this helpful!
This is the most detailed and patient cvan construction manual I have ever seen, thank you so much! Too practical! Did you have YouTube Channel?
Hi Jade, so glad you found this helpful! Unfortunately, we don’t have a Youtube channel right now, but maybe someday!
I have sail for years and for months using only a alcohol stove burning methyl hydrate. I found it gave off more water than propane and nasty fumes if you button the boat up. You will only button up once when burning methyl, once the choking, burning throat and eyes kick in. Propane is a real hazard on a boat bc it is a heavy gas and will end up in the bilge. I work for years for Bell in construction and ran a generator every day and hydraulics on a bucket truck a few times a week in Ontario… Read more »
Hi Steve, thanks for the insight. We love our alcohol stove and don’t have issues with fumes, but we burned denatured alcohol and not pure methyl hydrate. It’s too bad Dometic discontinued it, we can’t find anything similar out there that’s not pressurized. We use propane and sometimes have to run a gasoline generator at our off grid property, but I’m excited for the day when batteries are cheap enough for us to afford to power everything with solar energy. That’s interesting about the alternators, I will have to investigate that further.
~John
Excellent recommendations. A lot of common sense and tips for future use.
Planning ahead is very important. Thank you.
Hi George, so glad you found this helpful!
I personally have an elevator bed that makes it very easy to convert to night mode. All I have to do is remove my Lagoona table and press and hold a button. It is as simple as that, although it does remove some head room, but over the sitting area you don’t notice too much anyways.
That sounds like a great option for a van bed!
I have dreamed of having a van since I was 13 and now that I am 17 I am building my own van for college with the help of my mom and grandpa. This was very helpful and I am now almost done with my van. All I have left is to move in and get on the road.
Hi Enna, that’s amazing, I’m sure you will have blast! Best of luck to you!
I’m an electrician and I’m here to confirm that beer/ale bribery works.
Very well written and informative. Thank you.
Haha, so glad you approve of both the information and the bribery advice!
Question about the subfloor. In terms of sealing off the edges ( like where the doors open up) is it best to use foam there? I didn’t see anything specifically in your subfloor blog or floor rebuild blog. Thanks!
Hi Shaun, we covered over the edges of the flooring using metal carpet transition strips from Home Depot. We did not use any foam or other sealant, we merely covered it with the transition strips for aesthetics. Hope that helps!
~John
I am building out a 1997 GMC savanna 3500 passenger van. It has a rear ac/heater unit and I am wondering if I should remove or leave in. Its expensive to remove and I am wondering if I can still build around it and keep it, I’m stuck on what to do. It does take up a lot of space and I can only use it when the van is running. Any suggestions? Thanks!
Hi Matt, we also had a rear air handler unit, but ours was completely nonfunctional. We chose to leave it in due to the cost/hassle of removing it (you’re dealing with pressurized AC lines, so you need a licensed mechanic to take care of it safely). However, the AC lines running under our van developed a leak, and to fix it we had to cut/cap the lines anyway. We were able to remove the unit ourselves after that, but we probably would not have done it otherwise (the total cost of draining the AC, cutting the lines, having a custom… Read more »
My husband wants to do his own build using the Ford 350 Transit… I want the rear full bath like in the Coachman Beyond, where can I purchase components like this?
Thanks in advance!
Rosanne
Hi Rosanne, thanks for reaching out! I’m not sure what exactly is involved in that type of bathroom, but you can purchase all kinds of RV toilets and bathroom components at places like Camping World (https://www.campingworld.com/) or even on Amazon. I hope that helps, and best of luck with the build!
~John
Thanks John, we bought the van now onto soundproofing etc…
How do I go about finding a company to do the build for me? Have been looking at Class Bs but I realize they’re way more than what I want or need …. I am a musician who does road trips and I know what I want but it appears it will have to be a DIY conversion ….. only I’m not a DIY person …. don’t have the tools. Sooooooo….. and advice?
Hello, Explorevanx maintains a directory of conversion companies that you may be able to contact: https://explorevanx.com/. Other than that, there seem to be van converters popping up all over the place, so perhaps Google in your local area. Another option would be asking in vanlife Facebook groups to see if anyone might be able to help you out. I apologize we don’t have more specific info, but we’re more on the DIY side and aren’t too familiar with the world of van converters.
~John
Awesome site!
I’m not very handy, so maybe this is a dumb question, but if the floor plywood is only 1/4″ thick, is that enough to screw in furniture securely, or is there some other way you secure a bedframe, or a small sink or something? Do you only secure it into metal wall studs? More info on how to secure furnishing into the van would be so helpful to me!
-Marc
Hi Mark, it seems I need to update this page. We did not have any issues with out 1/4″ subfloor since the screws were also going through a layer of laminate flooring. However, we currently recommend going with a minimum 3/8″ subfloor, and 1/2″ would be better. Here is a more updated post with regards to van flooring: https://gnomadhome.com/vanlife-mold-prevention-flooring-redo/ As for securing furniture, screwing down into the subfloor certainly keeps things stationary, but we definitely recommend also securing it to the van frame directly. We did this with self-tapping screws straight into the van frame, but a more secure way… Read more »
Me and my friend are planning on doing a summer trip around the US in a van. I was wondering if you need insulation for temperatures from anywhere 60-100 degrees F during the daytime.
Hi Mackenzie, insulation is going to have the biggest impact in cold temperatures, where it can hold heat in and make it easier to heat the inside of your van. In “comfortable weather,” you might be able to forego insulation altogether. In hot weather, no amount of insulation is going to prevent your van from getting hot eventually. The biggest bang for your buck in warmer weather is going to be proper ventilation (a roof vent fan is ideal), reflective window coverings, and shade (either parking in shade or creating your own with an awning setup). Hope that helps!
~John
Great resource! We’re just starting our build on a similar van (2015 Express). What size plywood did you use to construct cabinets and bed? Thanks!
Hi Tim, thanks for the kind words! We used 1/2″ birch plywood for the cabinets and the bed. We highly recommend going with a high quality plywood, like birch or marine grade. Hope that helps!
Thanks for the reply! One more question: We are going to use the 1/2″ XPS as insulation for the floor. I saw that you just glued the subfloor to the top of the Reflectix. Would you recommend that over the XPS? I was thinking of using self tapping screws to secure the subfloor to the high ribs of the van floor. Thoughts? Pros/cons?
Hi Tim, we used Reflectix purely to save on height while having a little bit of insulation, but Reflectix is ultimately not very effective without an air gap. If we were to do it over again we would definitely use XPS under our floor. As far as using screws for the subfloor, I would be concerned about the potential for rust to develop around the screws. With that being said, many people do screw down their subfloors (our van had a screwed down subfloor when we bought it), so with the right precautions it shouldn’t be a problem. Hope that… Read more »
I am extremely excited to plan my van build. There are so many options for everything that I am really trying to do my research. My biggest issue and maybe someone can reply, is I have Multiple Sclerosis, so there are a few things that I will not be able to do. One of these is hauling large bottles of water. I need a shower in toilet in the van, just because I need to be sitting to take a shower, and most places don’t have shower chairs. Lifting heavy bottles of water is not a possibility for me. Shopping,… Read more »
Hi Heather, thanks so much for reaching out! There are definitely ways to design your van to work best for you. I think in your situation, installing a fixed water tank inside your van would be the way to go. You would basically fill this up by sticking a hose into a fill port, which you could access by mounting the tank with easy access to either your side doors or rear doors. As far as where to get the water, if you stay at campgrounds they should have a drinking water fill station, and in the Western US there… Read more »
Hey John,
Thanks for sharing all this helpful information.
We bought a Nissan Caravan 2002 with 4 double sliding windows. We will be travelling in winter/spring in temperatures between 40-70 °F.
Is it worth a good insulation with so many windows or not? We were keen on insulating properly but some friends dissuaded us. What’s your opinion?
Thanks for your advice.
Cheers
Hi Antoine, thanks for reaching out! With that temperature range, it may stay fairly comfortable in your van without doing much to it. Insulation really comes in handy in cold winter temperatures, though, so if you think you’ll be in nighttime temps in the 30’s or below then I would personally insulate. Windows definitely represent a large uninsulated surface area, but that doesn’t mean it’s pointless to insulate your van. Insulating the walls/floor/ceiling will still improve the overall ability of your van to trap heat inside, and for cold overnights you can put up some insulated window coverings to mitigate… Read more »
I planned to not be in too cold or hot of temperatures either so I did some minimal insulation just in case it ever got too cold or hot. For me, it has been very nice to have but I also have a wood-burning stove to keep me very toasty in the winter, even though it has never gotten below freezing.
Thank you so much for compiling all of this useful information! I’m going to do a van build next year when I retire and plan to live in it full time. I’m sure I’ll come back to your site many many times.
Best Wishes
So glad you found it helpful! Best of luck!
Seriously the best resource I have found so far; better than any DIY videos! My wife and I are looking at a van this week. We can’t wait to use this site to navigate us through our camper build journey!
Hi Tyler, thanks so much for the kind words! We work hard to make this a helpful resource for people building out vans. Best of luck with your journey!
~John
You all have SUCH great, detailed information. I really appreciate how easy it is to maneuver though the website and topics and how much thought you have put into things. In addition, I love the easy to read charts! THANK YOU!
I am thinking about doing a conversion. Any thoughts on an electric stove top? I am considering this mostly for safety. There’s not much information that I have seen. Just curious if y’all have an opinion.
Hi Kate, so glad our site has been helpful! We’ve seen a few vans with electric induction cooktops, and we think that they’re great options. We are heavily considering one for our next build. The challenges/downsides, though, come down to cost. Unless you’re planning on plugging in at RV parks most of the time, you will need a large electrical system to power an electric cooktop, which adds a lot of expense. As far as how big of a system you will need, start by calculating how much power you’ll use in a typical day, and size your system appropriately… Read more »
If I’m misunderstanding how you are using your fans then I apologize in advance. But fans don’t cool of dogs like they do humans because they don’t sweat ,unless they are wet that is. Lott’s of great inspirational info here ,great job
Hi George, thanks for commenting! The fans help keep the temperature inside the van under control, which is the number one thing we try to do to keep our dogs comfortable. Also, fans used in conjunction with a cooling towel for evaporative cooling helps out a lot in hotter temps. Hope that clarifies things!
~John
Thank you so much for writing this in easily understandable language, especially for the electrical information. Now I understand what each component is and what I want in my van.
Hi Marcie, so glad we could help! Best of luck with your build!
Hello, just wanted to add a super budget tip that I didn’t see mentioned-
those rectangular water jugs you can buy at any grocery store for about 2 bucks work great for a sink. theyre refillable and gravity fed. the built in spigot can be left open, leaving both hands free, and you can even turn it just a little bit to adjust the amount of flow.
also, a pot full of warm water and a cup for pouring it works just fine outside.
Hi there, thanks so much for the tips!
I really really like and appreciate this. Great guide with all the options. Would you be interested in a “bare bones” guide? I think a lot of what you suggests works for the 2 to 5k budget, but there are some things to do on $200. Gym mats and used yoga mats for flooring. And air mattress for bedding? Using a mosquito net or a bedsheet as a mosquito barrier. That is, get the seal by overfitting the front door. Plastic bags for poop and pee. No insulation needed for temperatures above 40deg. Have a hot water bottle (i.e. a… Read more »
Hi Howard, I apologize for the delay! I just shot you an email.
~John
I did a budget van build that I lived in for three months and it only cost me $138.48 (not including the van) while I was testing van life. I loved and then had to remove all of it because it was a rental van. I kept the same basic layout and things that I had before.
One of my friends loves to go on road trips and he would like to buy a new vehicle to transport and live in. I like how you said that some vans are better for extra space. I will recommend him to keep the van that he has and to find a professional that can customize it to better fit his needs.
Fantastic guide guys, thanks for all the info. Can’t wait to start
Hi Connor, thanks for reaching out! Best of luck with your build!
~John
Thanks Guys!
Pretty much finished with converting my 2009 sprinter, and looking back I was kind of shocked at how much of the information here influenced what I did- I read this site thoroughly early on and now, re-reading I constantly find myself thinking ‘oh, that’s where that idea came from’. Couldn’t have done it without you.
Hi Jim, so glad we could be of help! Best of luck out there on the road!
~John
This is a great DIY conversion resource. Appreciate the pros and cons of all the complex aspects.
You suggest a 12V fuse box. Please also suggest a small 120V breaker box for shore power input to converter, AC and outlets.
Thanks
Hi Tom, thanks for the kind words and for the input! A breaker box is definitely a good idea if you’re dealing with a lot of 120V power. Our rig does not have shore power hookups, so our system is almost entirely 12V. We plan on updating our website in the near future to include a wider array of electrical systems, including systems with 120V shore power capabilities. Thanks again!
~John
I am intrigued by the comment that “our van is almost entirely 12V”. What prevents you from making it entirely 12V? If there is a device that converts the 12V to 5V needed for my electronic devices, I don’t see why I would need AC power,inverter, or outlets. What am I missing or why do you need the AC?
Hi Karen, we have an inverter for running AC appliances such as our immersion blender, dremel, power tools/battery chargers, computer chargers (can potentially get DC versions, but haven’t), and anything else we may have occasion to power. If you don’t see yourself using any AC appliances then it’s entirely optional. Hope that helps!
~John
INSULATON: If I may point out Please, A GREAT INSULATION that is * ABSOLUTELY FREE * and mildew safe and lung safe, that it seems everyone is overlooking, is loose Polyfill and Polyfill/Dacron batting. This is the typical the loose filling in our pillows and batting layers in our comforters. It’s made from recycled plastic 2 liter bottles or from virgin plastic and does not absorb moisture or much odors. The loose fill is great to stuff in van wall cavities and the batting sheets are great for the ceiling. Why I say FREE is because how I obtained these… Read more »
Jim, thanks again for sharing your tips! This will certainly help people reading this page who are looking for an inexpensive way to insulate their van conversion. Take care!
~John
Super information , can’t wait to start on my Peugeot boxer L3H2 van.
Thanks for sharing info …..
Of course PJ, best of luck on the build!