Every van is different, and throughout our van build we’ve found that ours poses some unique challenges with the shape and contours of its roof. Nothing is simple when you’re working with a curved surface, and mounting our solar panels was no different.
Solar power is a must for van life. Electricity gives us the ability to have lights and a fridge, run a fan, charge phones and computers, and work on the road. And solar panels let us be completely off grid, using only the energy that the sun gives to us.
Setting up your solar power system can be as simple or complex as you want it to be. From self-contained units to piecing together every component individually, there’s something out there for every budget and skill level.
Unless you want to prop up your solar panels on the ground every day, you’ll need to mount them to your van roof. And if you have a high top conversion van like ours, this may not be simple.
Read More: The Best Solar Panels for Van Conversion Power Systems
Picking our solar and batteries
For our solar setup, we went with Renogy’s 400-Watt Premium Solar Kit. This kit comes with just about everything you need, including charge controller, Bluetooth module, cables, and an inline fuse for solar panels. It does not come with an inverter or batteries, but for those we picked up a pair of VMAX 155ah deep cycle batteries and a Xantrex 1000W inverter.
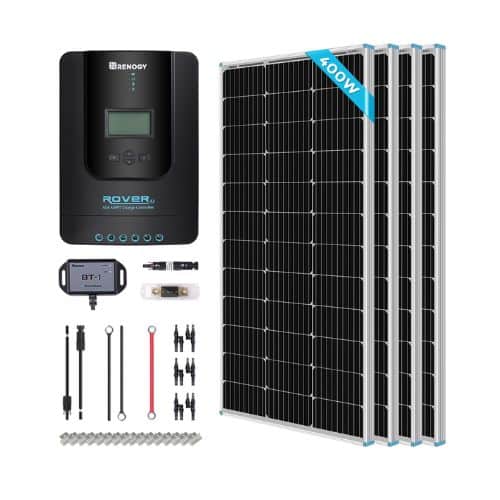
With 40A MPPT charge controller, 9BB solar panels, Bluetooth module, mounting brackets, wiring, and fuses.
Enter discount code Gnomad8 for 8% off at Renogy.com
This is more solar that many people get, but we figure that it’s better than running out of juice in the middle of the woods. We know we’re going to need electricity to work, it fits within our budget, and we would rather not have to worry about it if we don’t have to.
If you’re looking for a smaller system, Renogy offers solar kits in other sizes, and VMAX also has smaller battery sizes.
Read More: 9 Best RV Solar Panel Kits That Are Actually Legit
All of this stuff arrived at our house in five large, heavy boxes from Amazon. The UPS guy probably hates us by now. Unpacking everything was a lot of fun, but then we had to figure out the best way to mount solar panels on our fiberglass van roof.
How Do We Mount Solar Panels to this Screwy Surface?
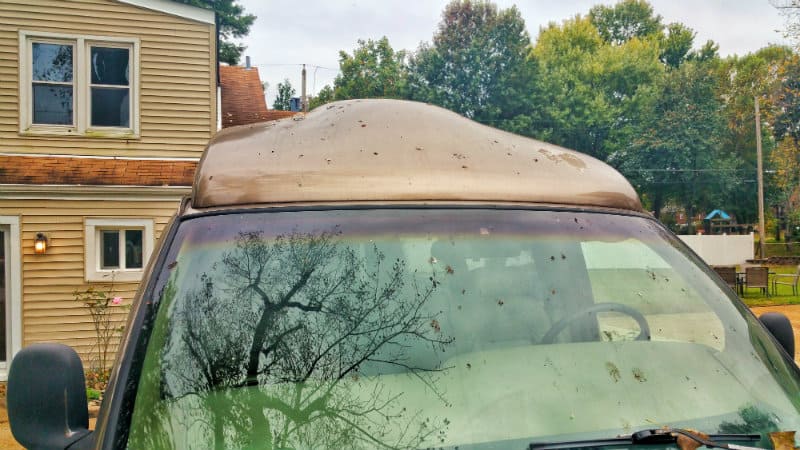
Our van roof is weird. It’s a fiberglass high topper, and it has a lot of curves, slopes and grooves. So not only did we have to decide on the best way to attach mounting brackets to relatively flimsy fiberglass, we also had to figure out how to mount flat solar panels on a non-flat surface.
A lot of RVers and vanlifers use 3M VHB tape to mount their solar panels. This stuff is incredibly strong (they use it to install windows in skyscrapers) and it eliminates the need to drill holes in your roof. But there’s something unsettling about the idea of flying down the highway at 70 mph knowing our solar panels are only held on with tape, so we decided to bolt ours down.
The Renogy kit comes with self-tapping screws for mounting to sheet metal, but fiberglass doesn’t provide as much hold so we had to come up with something different. We found this post on cheaprvliving.com that talks about reinforcing the fiberglass roof with strips of plywood and screwing the panels down into the wood. Bingo!
We also picked up some Loctite PL Marine adhesive for some extra security, and Dicor lap sealant for waterproofing.
Now that we had our game plan, we could get to the installation.
Mounting the Solar Panels Step-by-Step
What We Used to Mount Our Solar Panels
- Loctite PL Marine Adhesive
- Dicor Lap Sealant
- Caulk gun
- Tools (cordless drill, ratchet set, hammer, putty knife)
- 1/4″ bolts, nuts and washers
- Wooden blocks
- Spray paint
- Signstek Y Branch MC4 Cable Connector
- LINKSOLAR Weatherproof Double Wire Entry Gland
- 3M VHB Tape
Step 1: Attach brackets to the solar panels.
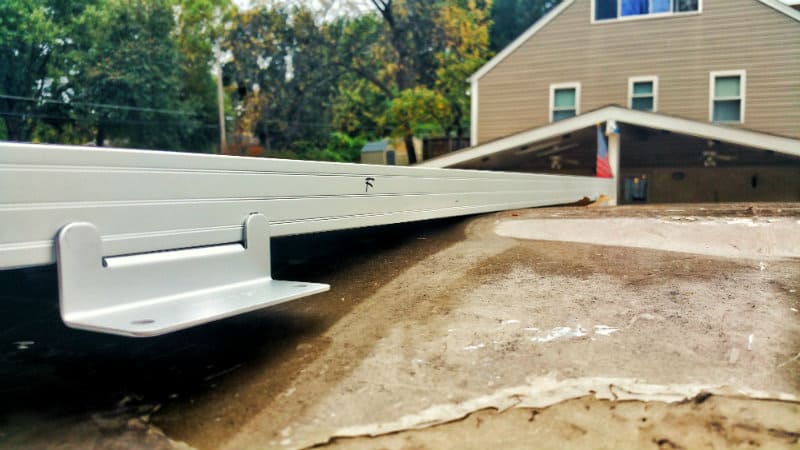
The Renogy kit comes with their Z-bracket mounting system, which mounts the solar panels with about an inch of space underneath them for airflow. Each panel needs four brackets, and there are several ways to configure them. We initially attached the brackets to the bolt holes closest to the corners.
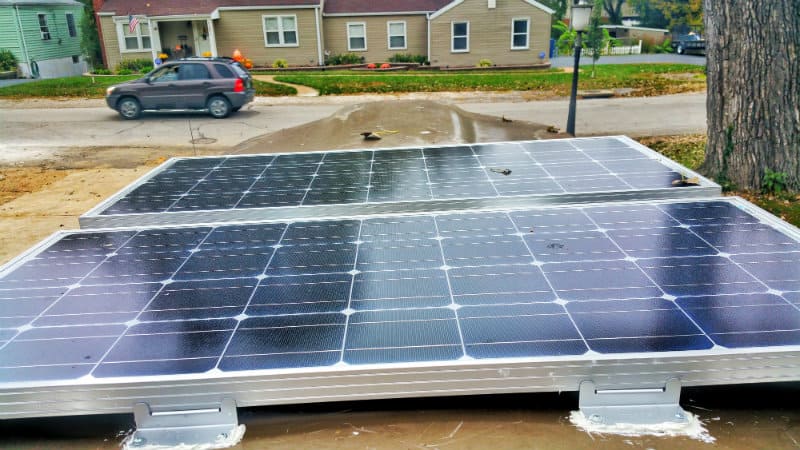
Step 2: Dry fit the solar panels on the van roof.
It’s important to dry fit everything first to see how it looks on your van roof. We tested a couple different layouts before deciding what worked best. We also had to change the bracket configuration a few times to get the panels to sit just right.
Because of the huge curve in the middle of our van’s roof, only one of the panels mounted flat right off the bat. The others had pretty hefty gaps between the mounting brackets and the fiberglass.
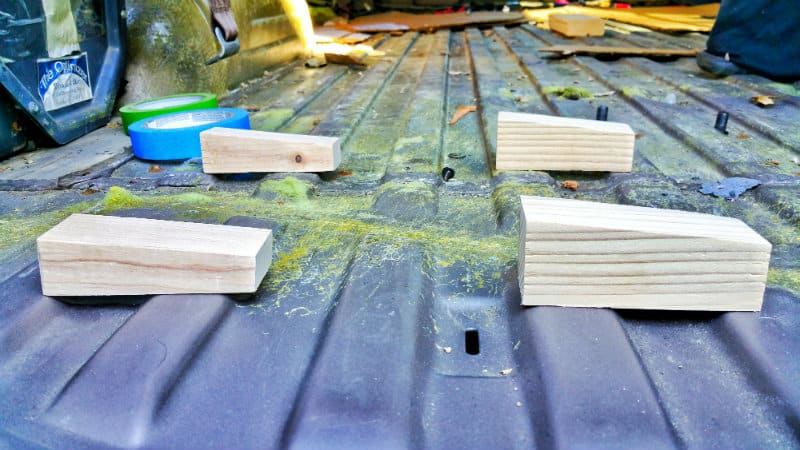
To fix this, John cut angled spacers out of scrap wood and painted them to seal them from the elements. These spacers worked perfectly and provided something for the brackets to sit on.
Step 3: Mark and drill holes in the van roof.
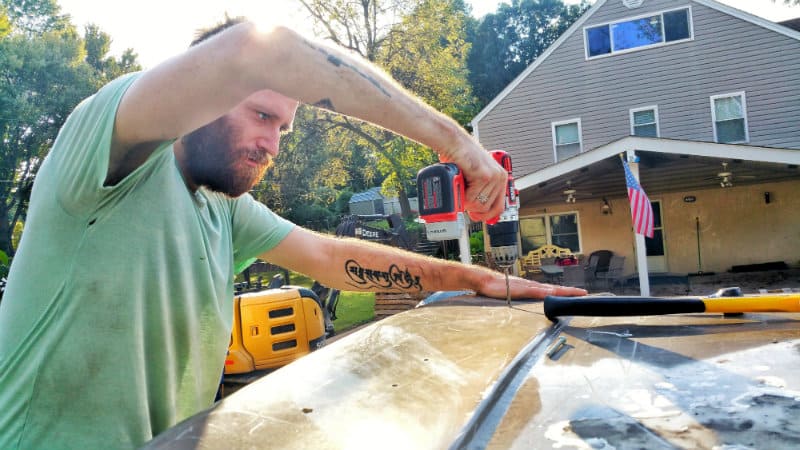
This was the scary part. Once we had the panels how we wanted, we marked the bracket holes with a Sharpie and drilled into the van roof. No turning back now!
Step 4: Cut plywood reinforcement strips and drill holes.
For the plywood reinforcements, we used strips of ¾” scrap plywood that we gutted from the van. The strips were already about 4 inches wide, and we cut them down to about 6-8 inches in length.
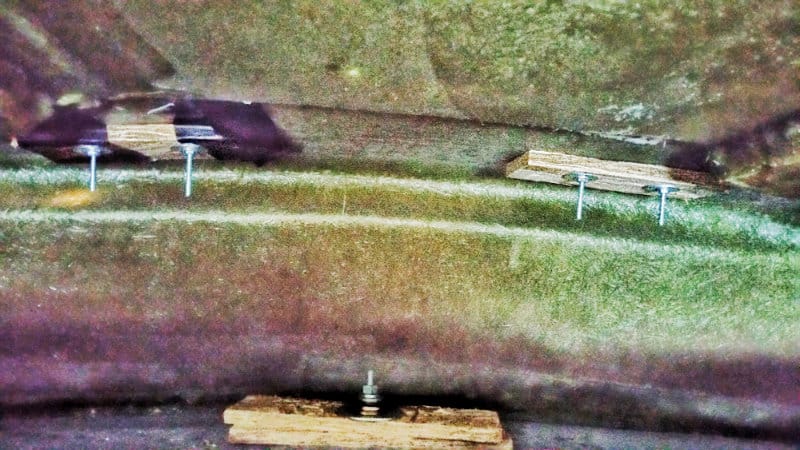
For the first set of these, we used Gorilla tape to hold them up to the roof under the pilot holes, then drilled down into the plywood from the top. This turned out to be a pain, and we eventually figured out that it was much easier to measure the hole spacing and drill into the plywood separately.
We had to cut smaller strips of plywood for spacers when the solar panels were above a ridge in the ceiling.
Step 5: Clean roof and apply Loctite PL adhesive.
With any adhesive, the surface needs to be clean to get the best grip. We wiped down the van roof underneath the mounting brackets with rubbing alcohol. Man, was our van roof dirty! In hindsight, we should have given the whole van a thorough scrub before mounting things to the roof.
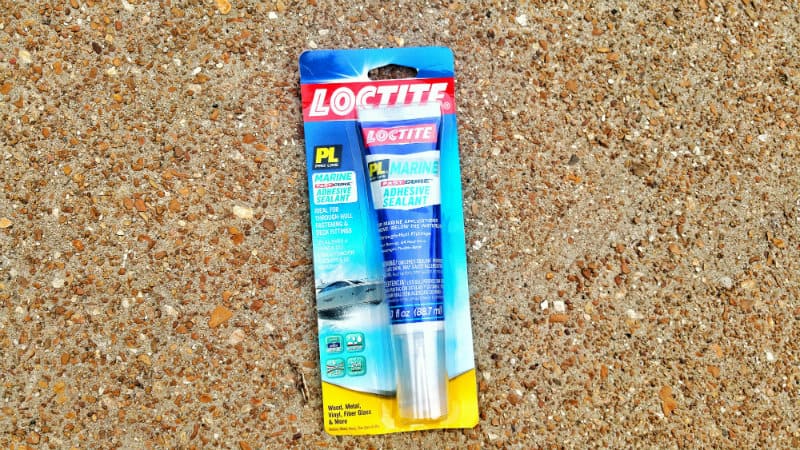
The next step was to spread Loctite PL Marine Adhesive underneath the brackets. This stuff is used for permanently joining various materials together on boats (including wood, fiberglass, and metal), and it provides a flexible, strong, and watertight bond.
For the solar panels with wooden spacers, we applied PL adhesive to each side of the spacers so it would adhere to the bracket and the van roof.
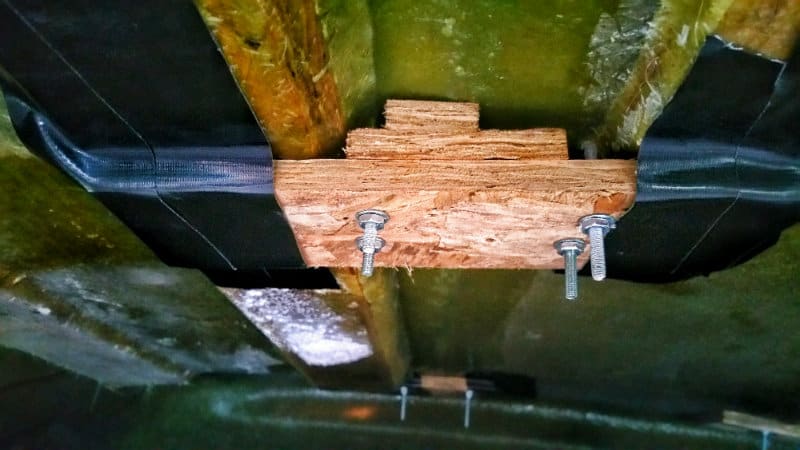
Step 6: Bolt solar panels to roof and plywood strips.
We used bolts, nuts and washers to hold down our solar panels. The plywood spreads out the tension from the solar panels and gives them something meatier than the thin fiberglass to hold on to. The holes on the Renogy Z-brackets will fit ¼” bolts.
We used a washer under the bolt head at the top, and a wide washer under the nut on the inside of the van for more of a contact point with the plywood strips.
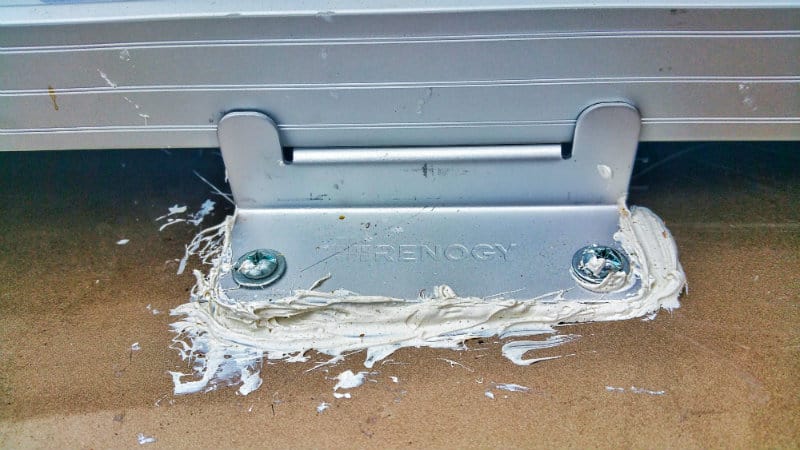
Step 7: Let adhesive cure, then seal with Dicor lap sealant.
We let the adhesive cure for 24 hours, then we used a caulk gun to douse the brackets in Dicor lap sealant. This seals everything up so all the holes we drilled into the roof won’t leak.
We covered every seam and bolt head in Dicor, and we also made sure to completely cover the wooden spacers to further protect them from the elements.
Step 8: Cut off excess bolts inside van.
The bolts we used extended a few inches past the plywood on the inside. We needed to cut off the excess so they wouldn’t interfere with putting up the ceiling.
We used a friend’s angle grinder to shear off the extra length, but you could also use bolt cutters or a hacksaw.
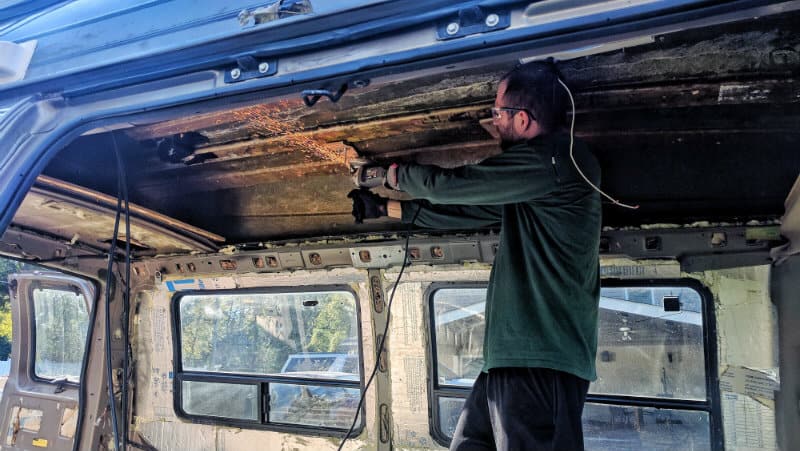
Step 9: Wire panels together and run wiring inside van.
The Renogy kit comes set to wire the panels in series, but we wanted to wire ours in parallel. We used these Signstek Y Branch MC4 Cable Connectors to wire the panels together.
Important Note: We now recommend wiring solar panels in series vs parallel in most cases.
To run the wires inside the van, we had to drill a ¾” hole in the side of the topper. To ensure this hole is fully leakproof, we picked up this Weatherproof Double Wire Entry Gland from LINKSOLAR and attached it using 3M VHB tape and plenty of Dicor sealant.
We’ll cover wiring the electrical system, including solar, in detail in a future post.
We Have Solar Panels!
Our fiberglass van topper didn’t make this easy, but we now have three solar panels mounted to the roof! We’re going to keep the fourth one in the underbed storage and set it up using a homemade portable PVC tilt mount when we’re boondocking for longer periods.
Next up is installing a vent fan, wiring and flooring. It’s amazing to see how everything is coming together, and we can’t wait to share the finished Gnomad Home with you all.


Hey there, so my high top is only fiberglass without any wood to secure the framing and future solar, indoor cabinets etc… any suggestions on how to frame it out or secure it so it’s structurally sound for these future projects?
Hi Hannah, fiberglass tops can be tricky, especially if there’s no built in wood reinforcements. I don’t know the specifics of your top, but there are a few options you could consider. First of all, I wouldn’t mount anything heavy like overhead cabinetry to just your fiberglass top. These things need to be secured to the vehicle frame. At best you’re looking at figuring out a way to secure your ceiling to the fiberglass, not anything significantly heavy like cabinets, etc. Usually there’s a metal ridge/shelf from the original van body that runs along the lower edge of fiberglass toppers.… Read more »
Hey ya all! I noticed you didn’t ground the frame of your solar panels to the chassis. Am I correct?
Hi, that’s correct.
Hi! Some of your pages on this blog don’t show the pictures. I’m more of a visual learner and the pictures help me learn. I’m also doing a build with a high top conversion van that has a fiberglass roof, this website is very useful. Are you able to fix the pictures? Thank you.
Hi Hutch, apologies for the issues! This may have something to do with how the cached images are being served to your device. We’re not seeing any issues on our end, please let me know if you’re still having problems.
~John
Hi! Are you ever concerned about the panels flying off the roof because of the wind? Thanks!
Hi Edouard, that’s exactly why we reinforced them so heavily. When we first took the van on the highway we definitely had fears about the panels flying off (having never done this before), but after almost 50,000 miles with zero issues we aren’t worried. As long as you are careful to count your panels correctly, this should not be an issue. Hope this helps!
~John
Love your site!
I’ve seen y’all mention that you wish you would have put a roof rack on your van. I have a similar van with a fiberglass high top and I was considering a rack myself. I was wondering how y’all might go about doing it? I’ve seen people do custom rain gutter racks, artificial rain gutters attached to the fiberglass top, and that one that vantech makes. I would love to hear your suggestion.
Hi Reed, we haven’t done this ourselves yet so I don’t have any direct recommendations. For when I was looking into it, it seemed like rain gutter racks that are tall enough to fit over a high top generally are custom jobs/on the pricey side. I’ve also seen people attach regular roof racks by drilling into the fiberglass, which could be an option to think about before building out the ceiling (in case you need to add reinforcements). I don’t think I’ve seen the artificial rain gutters solution, but that seems like an interesting one since standard ladder racks are… Read more »
Hi John!
I ran the solar wires in the van but how did u fuse it? And I did buy the splice but not sure what to do with it
Thanks
Hi Joe, there are a couple options for fusing the solar panel. You can get an inline fuse holder like this one, along with the proper sized fuse. One end of the wire will need to be crimped onto the positive wire from your panels, with the other end heading towards the charge controller. Another option is to use an ANL or AGU fuse/holder (again with the proper sized fuse), which does not require crimping.
If you had to do this again would you install a roof rack first, then attach the solar panels to it? I found a company that does make a rack that should attach to a conversion van. https://vantech.us/Conversion-Vans_c143.htm
Hi Greg, yes we would install a roof rack first then attach the solar panels to it. That way we could easily add on an awning and/or a road shower, a roof storage box, or whatever else we might need. We just installed an awning on our van, and it was a bit of a process to figure out how to attach it without the benefit of a roof rack.
~John
Have you had any leaks with this install?
Hi Chad, we had one small leak at the very beginning because I had missed a spot when I sealed around the solar mounts. Fixing it was quick and easy with some silicone caulk. Any time you drill a hole into your roof you’ll need to make sure it’s properly sealed against leaks, but if you’re careful and diligent about it you should be good to go. Hope that helps!
Thanks,
John
I love how practical and affordable your diy post is. It looks like you can get most of the supplies at a hardware store, which is a plus. My only question is, have more people “noticed” your van since you mounted the solar panels? Is it harder to go into “stealth mode” or has nothing changed in that regard? Also, love your paw print bumper sticker.
Hi Jemma, Glad you liked the post. We did indeed get everything we needed at the hardware store! To answer your question – we have had the occasional person approach us with questions because they saw our solar panels, but it’s been much fewer than I originally expected. In our eyes the panels are glaringly obvious, but our real world experience has been that most people just don’t notice them. It’s kind of like when you’re shopping for a new car and you have your eye on a specific model. Suddenly, you start seeing that model car everywhere when before… Read more »
very innovative! looks goo too!
We appreciate it, Gary! 🙂
Thanks for this post. Have you found that your batteries provide adequate power supply?
What is the max depth of discharge you allow your batteries to run to before recharging?
How long do you find it takes to go from that max depth to full equalized/float charge level?
Thanks again!
Hi Rob, Thanks for reading! Those are tough questions for me to answer specifically right now since we don’t have a way to accurately measure our batteries’ state of charge. We have the MT-5 Tracer Meter that Renogy recommends for use with their Tracer charge controllers, but we have come to realize that it’s woefully inaccurate. It displays SOC%, but the second the sun goes down and you have a load connected (i.e. lights turned on) it loses 20-30% on the meter immediately, and there’s no way that’s correct. Other people have reported the SOC% dropping dramatically when the sun… Read more »
Throwing in a quick update now that we’ve been on the road more. When we have full sunlight, we have absolutely no problems. We don’t discharge our batteries much at all, and they’re fully charged well before noon. However, when we’re boondocking in the deep woods where there’s not much sun, we run into problems adequately replacing the power we’ve consumed. In that scenario, we can last about 3 days before our batteries run below 50%. We’re getting a Victron battery monitor to keep better tabs on the situation, and we also just got a battery isolator so we can… Read more »
Somewhere I saw it mentioned that you are in Affton , is that the st. Louis Affton as I also live in Affton and I would love to see this project I just came across it. I am down by Syberg’s 7 houses up on the west side Street.
Hey there Tim! We apologize for the delayed response! We would love to show you the van! Send us an e-mail at gnomadhome@gmail.com and we can set up a time for you to check it out! Thanks for following!