A few weeks ago we did a post on how we insulated our conversion van. The last thing we did in the insulation process was laying down Reflectix on the floor. Now we get to install the rest of the floor!
There are three main parts to a flooring installation for a van build:
- Insulation
- Subfloor
- Flooring
There are several options for van flooring. Many van dwellers choose vinyl flooring because it’s thin and waterproof. Our neighbor offered us some old hardwood flooring, but the ¾” thickness would have taken too much height out of the van.
We ultimately decided to use laminate flooring because it looks better than vinyl, it’s easy to install, and it’s thinner than hardwood. We found some gorgeous laminate flooring with interesting wood grain effect at Menard’s (our new favorite store! And no, we don’t get paid to say that). We needed 3 boxes (60 sq ft) to do the entire floor.
Update from the Road
Because of some leaky rear door seals, we had a run in with mold growing on our subfloor. We ended up ripping out the entire floor, installing a new mold-proof subfloor, and redoing the flooring with a different material.
Read about mold prevention and our new floor here.
We still think laminate is a good option for a van floor, but there are other options as well. Check out the flooring section on our Build Your Van page for more info on different options.
The instructions below will show you how to install a subfloor and any kind of tongue-and-groove flooring (laminate, vinyl planks, etc).
Installing Laminate Flooring in Our Van
We had a few frustrations and setbacks, but once we got into a good groove the flooring install flew by. We got most of it done in a day.
What We Used to Install Our Flooring
- Reflectix for insulation
- 1/4″ Plywood Underlayment for the subfloor
- 3M High Strength 90 Adhesive
- Gorilla Tape
- Laminate Flooring – 60 sq ft
- Jigsaw
- Hammer and Scrap Wood
Step 1: Insulate the Metal Van Floor
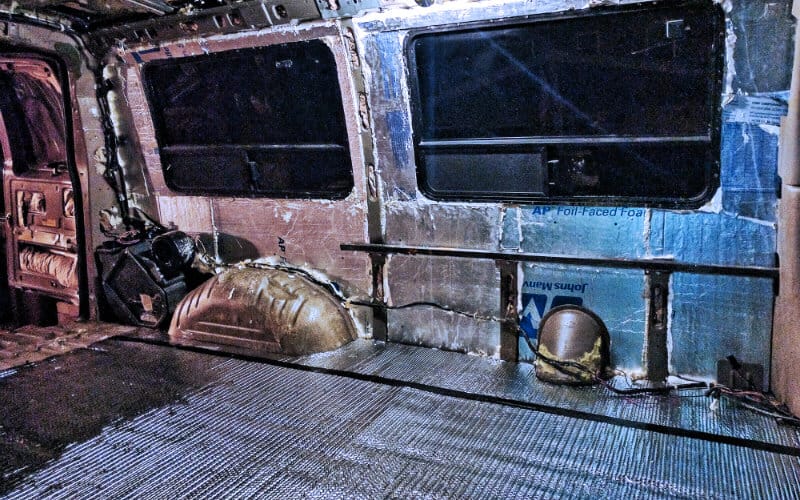
A metal van floor doesn’t provide much of a temperature barrier between you and the outside, so you’ll want to put down some sort of insulation. We used Reflectix for this because it’s thin (less than 1/4″ thick) and easy to work with.
The R-value of Relfectix is minimal and its reflective properties won’t work if there isn’t an air gap, but it’s better than nothing. An even better choice would be 1/2″ pink extruded polystyrene sheets.
We were able to roll the Reflectix straight down the length of the van, then Jayme made cardboard templates for the wheel wells and other odd shapes along the walls. We then traced the templates onto the Reflectix and cut pieces to fit. We used 3M High Strength 90 spray adhesive to glue down the Reflectix, and Gorilla Tape to cover the seams between pieces.
Step 2: Lay Down the Subfloor
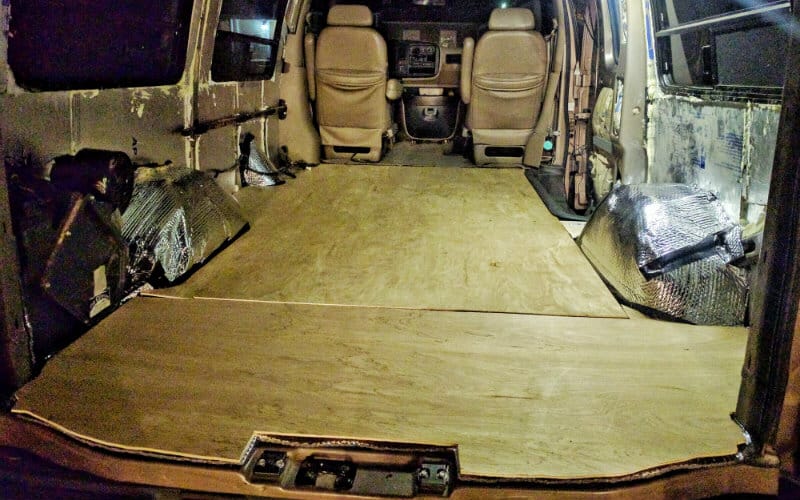
The subfloor provides a sturdy base on which to lay your actual flooring. We used 1/4” plywood underlayment for this, which worked perfectly. Many van lifers use thick 3/4” plywood for their subfloors, but it’s not necessary to go that thick and it cuts out too much height. This is a van, not a house!
Update: We recommend using 3/8″ or 1/3″ plywood for the subfloor. These thicknesses add much more “grip” for screws than 1/4″, but don’t take away as much height (or add as much weight) as 3/4″.
Installing the subfloor was just like installing the Reflectix. We started by laying down a full sheet and glued it down with High Strength 90.
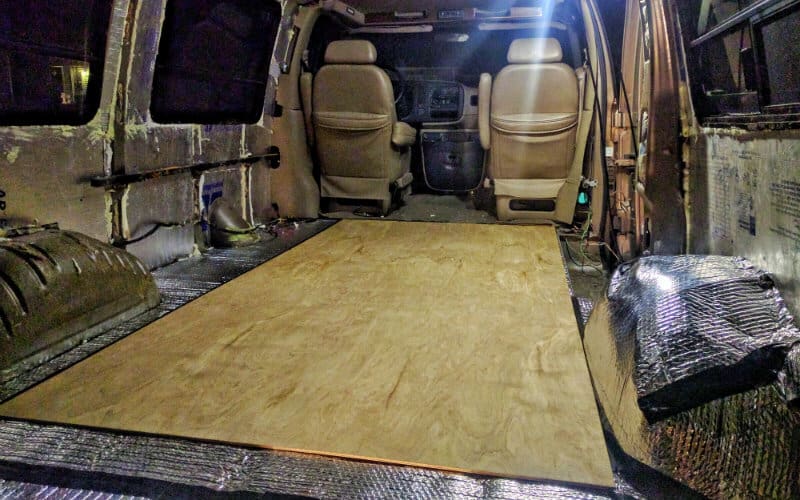
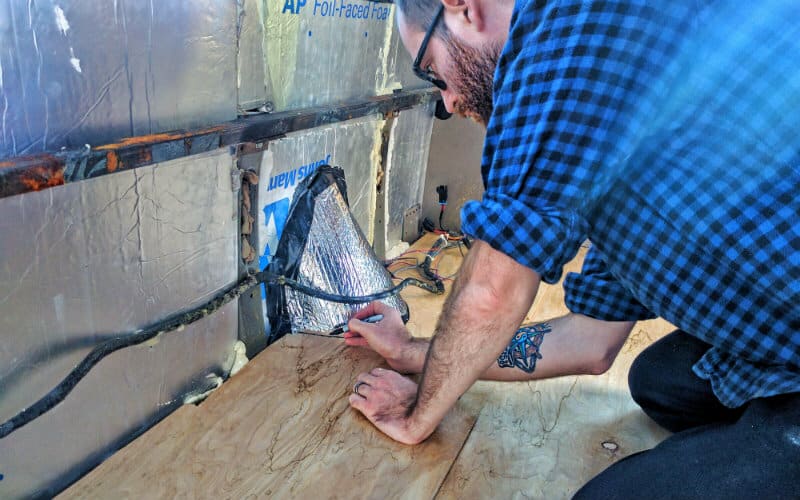
We then used the templates we made for the Reflectix to trace and cut pieces for the sides and back of the van. The jigsaw really comes in handy here!
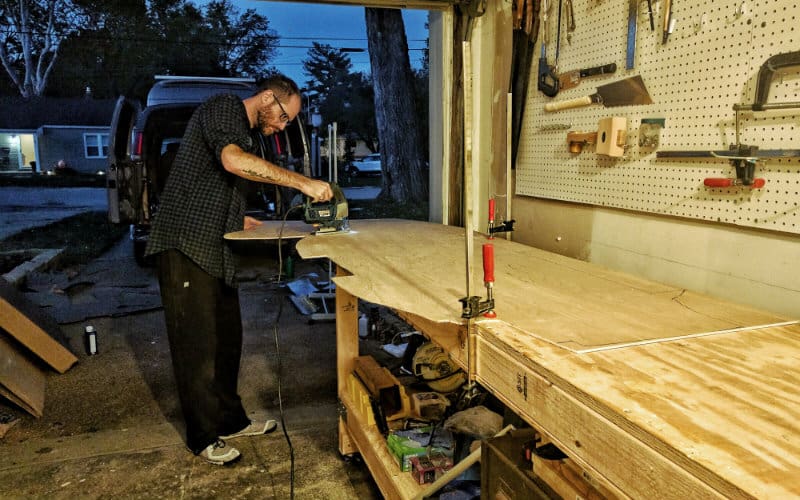
You’ll probably have to fine tune your cuts before your subfloor will fit perfectly around things like the wheel wells and fuel pipe.
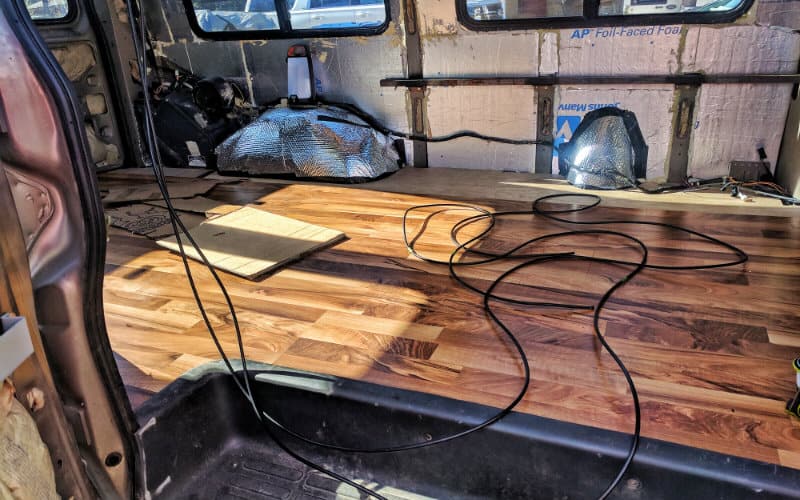
Step 3: Start Laying Out Your Flooring
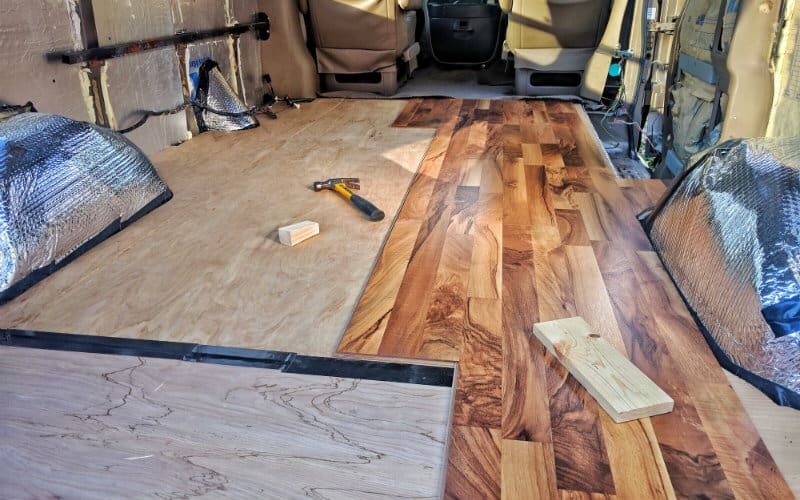
You’ll want to put down the laminate flooring one row at a time. We started with the passenger side because we could run one row along the side door and wheel well all the way to the back.
Start the next row with a half piece so that it’s offset from the first row. We used a miter saw to cut the first piece in half, but you could also use a jigsaw or circular saw if you have a steady hand or a jig.
The T-Lock system takes a little getting used to, but once you get the hang of it it’s pretty easy. Here’s how you lock pieces together:
Lock the long edge together first by inserting the new piece at an angle.

Use scrap wood and a hammer to tap the end of the board and lock in the short side.
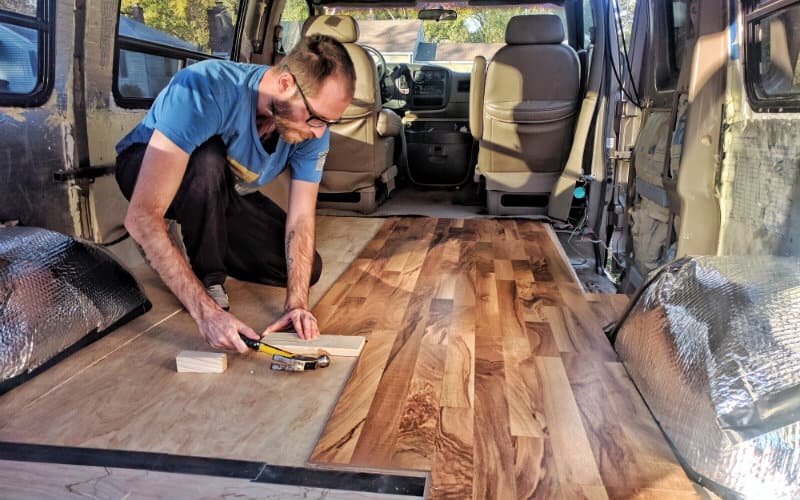
That’s pretty much it! This flooring is a “floating floor,” which means you don’t need nails or glue to hold it down.
This Youtube video helped us a lot on the install. Check it out if you’re having trouble.
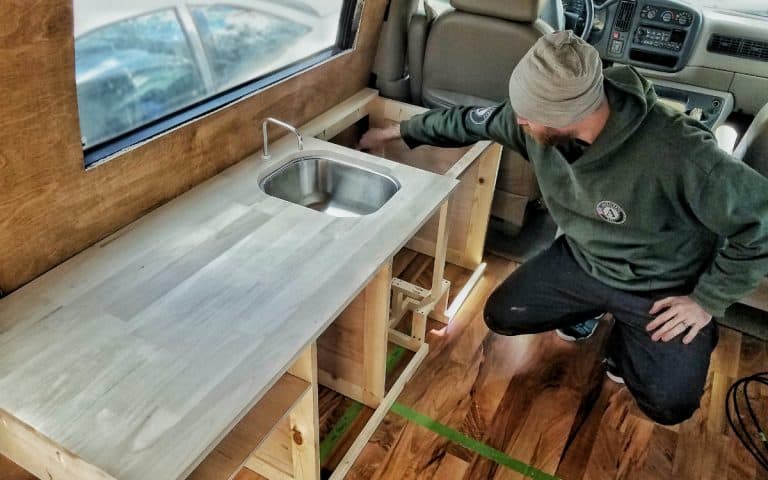
Step 4: Use Templates to Cut Flooring For Irregular Spaces
We used the same templates from the Reflectix and subfloor installs to cut and trace pieces of laminate flooring for the odd-shaped areas at the back and sides of the van.
Note: You may want to cut off your laminate flooring a few inches from the back of your van. We spent time tracing and cutting our flooring to perfectly match the contours of the rear of our van only to find out that the flooring is so thick it makes the doors stick. We had to recut the end pieces to fix this.
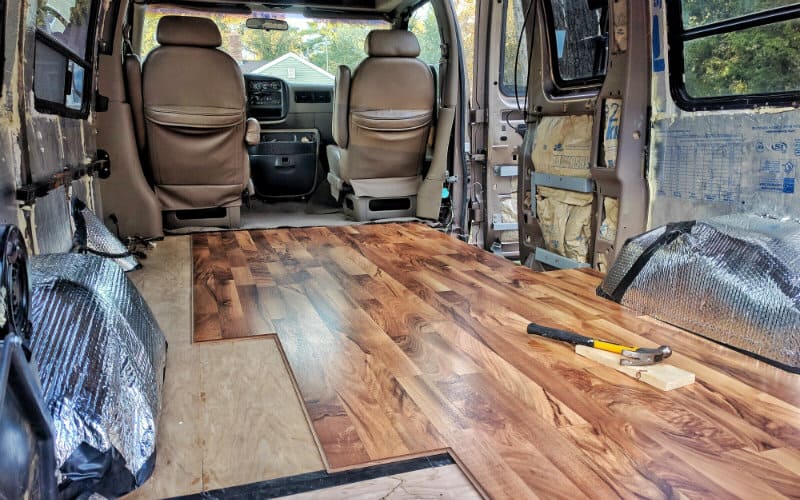
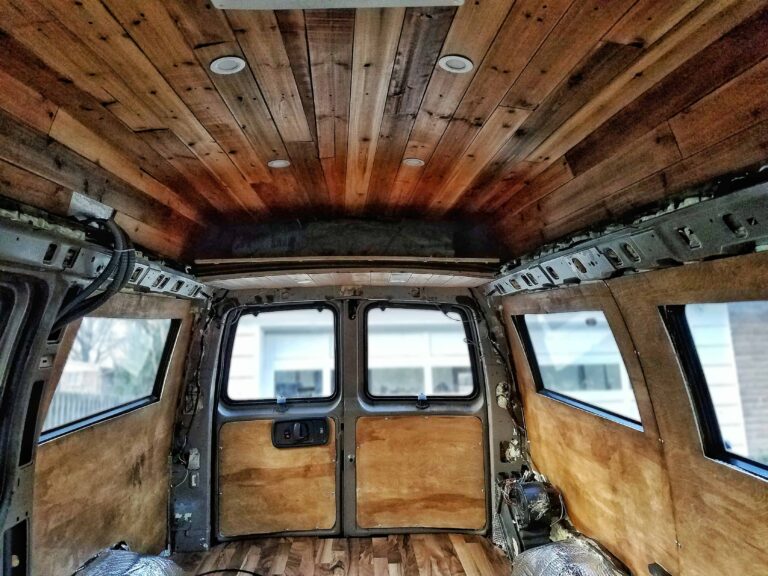
Look At That Beautiful Floor!
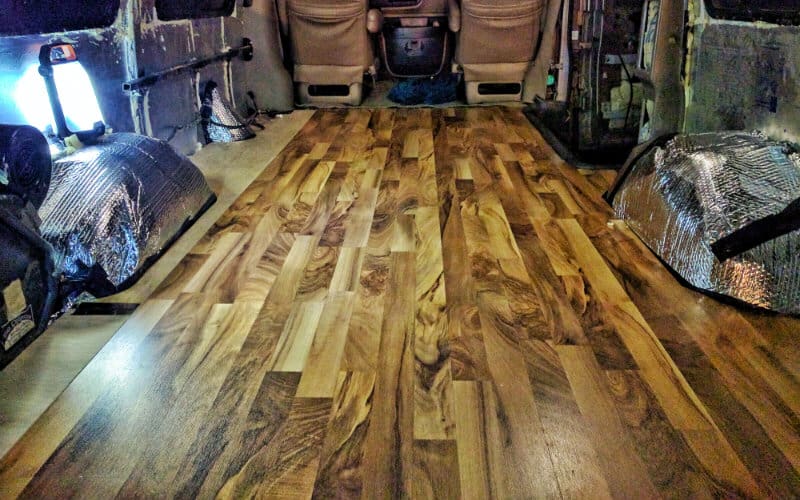
It’s finally starting to look like a home! Once we finished the install, we were so excited that we had to climb into the van for a little dance sesh celebration, tap dance style. John can’t fully stand up in the van, but he’s great (terrible) at dancing hunched over. Now that we have our flooring installed we can start on our walls!
Stay tuned for more build updates and don’t forget to follow us on Instagram @gnomad_home and on Facebook at: Gnomad Home.

Thx for your can build details, super helpful. My Chevy Express has a similar molded plastic cover over side door step that I’d like to keep, but unsure how to make it fit since my flooring adds 1.5” (mincell foam, subfloor, vinyl). How were you able to trim around it to make it fit? Thx!
Hi Garlin, thanks for writing! We’ve gone through several iterations of this. The most successful so far has been exactly what you suggest, which is trimming around it. Once you’ve got the subfloor and insulation in, this will probably be a little bit higher than the top of the step cover. You could put in some spacers (thinner foam or plywood) to make it flush with the top of your insulation, run your flooring on top of everything, then use aluminum L channel or something similar to conceal the seam and create a finished look. I hope that makes sense… Read more »
What color did you use for your laminate floor? There are two options for the Menard’s product: Italian Walnut or Creston Oak. I’m guessing it’s the walnut one? I absolutely love it!
Hi Kelcey, I don’t remember the specific color off the top of my head, unfortunately. There were several different colors at Menard’s when we went (back in 2016), so I’m not sure if they are all still available for that specific one.
~John
HEY! Done with out flooring and beginning on construction of all else. I am wondering – and it looks like you found it – what you used for the capping of your vinyl floor and subfloor at the trunk and sliding door entrances in order to keep it from getting banged up etc.
Hi Cole, we used metal flooring transition pieces that we got from one of the big box hardware stores (Lowes/Home Depot). For the side door, we left the plastic step cover in and build the floor to be flush with it. We then concealed the seam using a metal flooring transition piece. For the back door, we covered the edge of the floor with an aluminum L-shaped cover (I believe it’s meant for protecting the edge of stairs). We cut both with a jigsaw with metal blades. We basically found them by spending a lot of time in the flooring… Read more »
Hi did u just glue the plywood to the reflective paper? Or did u bolt it down? Thanks
Hi Kyle, it’s just glued down with construction adhesive. ~John
I am enormously appreciative of all the thoughtful work you have put into your site. It’s incredibly comprehensive and just a wealth of valuable information and is clearly a labor of love. Our family recently purchased a GMC explorer van conversion (very similar to yours actually- same chassis) and I am in the early stages of pulling out all the stuff we won’t be needing, TV/DVD player, electric sofa, wall panels, etc. I am kind of intimidated by the sheer quantity of wires and have thus far left the wires intact, labeling them as they have been disconnected- most seem… Read more »
Hi Jeff, thanks so much for the kind words! We do indeed put a lot of work into this site, and we always love hearing when it helps others on their own journeys! 🙂 We had the same issue with the wiring in our van, but we were so anxious to get the van gutted that we didn’t label them along the way. It was quite a nightmare figuring out what we could get rid of, but in the end we were able to identify and remove all the non-vehicle wiring. Most of it was for the TV/audio/mood lighting, so… Read more »
Thank you for sharing this blog of yours. Laminate flooring is DIY-friendly, durable and versatile.
Thanks for commenting, Eleanor!
Hi! Finding your website has been such a MIRACLE! I love your story, and how thoroughly and efficiently you’ve documented and made your process a collective resource! I recently acquired an express van and I’m starting my build this week. Starting with gutting, the floor and the insulation. I’ll be working on it this spring and however long it takes.
Maybe I missed it on this post, but how did you seal the flooring? Did you use any sort of filler between the edges of the laminate (now vinyl) and the walls?
Hi Kali, thanks for writing and I’m glad our resource has been helpful! If you’re using laminate or vinyl, the actual flooring itself it already completely sealed and ready to go. The first time we did our floor we did not seal the subfloor, but due to a water leak that we procrastinated fixing the subfloor got wet and developed a mold problem. When we installed our new flooring, we treated the subfloor with Concrobium mold killer/preventative (you can find it at Home Depot/Lowe’s) and sealed it with Zinsser Bullseye 123 mold preventative primer. We did not put any sort… Read more »
Hi John!! Amazing resource!! <3
How small are the gaps that develop in cold weather? I am also installing vinyl planks and a friend of mine mentioned he's heard horror stories about the floor expanding and contracting so much that it bubbles up.
Have you found that to be an issue? Or did you not have the planks long enough to tell since I read that you re did your floor?
Hi Lorena, thanks for commenting! The gaps we’ve seen aren’t more than about 1/8th of an inch (probably less), and we haven’t had any issues with the floor bubbling. Expansion/contraction definitely is an issue with vinyl planks, and it is something to consider when picking your flooring material. Hope that helps!
~John
Looks awesome! We are in the process of insulating the floor and wondering if we need to put wooden beans on the metal floor to make sure we secure the the subfloor. Did you drill your kitchen/bed frame into the laminate flooring?
Ooops, just realized you answered this with the comment below!
Hi Veronica, glad you found the answer! 🙂 I would also recommend checking out our recent blog post about mold prevention and redoing our floor for some new tips on installing a van floor.
Best of luck!
~John
Hello! Thanks for all this awesome information. Super complete and clear. We recently bought a 1995 Ford Econoline Conversion van and we are following your guides.
The black box next to the wheel, on the right side of the rear, is that a heat-a/c unit? Did you guys remove it? Or just leave it there? Did you disconnect any valve/cable? We have the same thing in our van and we don’t know what to do wih it! We wouldn’t mind leaving it there, but i’m concerned that it might be dangerous?
Thanks!!
Hi Flor, that’s exciting! The black box in the rear of our van is a rear air handler/AC/heater core unit. It’s certainly possible to take it out, but it’s not something you can do yourself. These units are connected to the main AC and heat system via piping that runs under the van. To safely remove it, you would need a qualified professional to depressurize your AC system, cut the pipe and cap it off (which would likely require a custom piece being fabricated), and recharge your AC. The heating lines aren’t pressurized, so you could in theory cut and… Read more »
Hi John. I have just started my van conversion & find your blog very helpful. Thanks for so much detailed info, especially on the flooring, which I’m tackling now. I also need to have my AC serviced & wondered who you used in Taos, where I happen to live. Happy Trails!
Hi Jim, so glad our site has been helpful! We absolutely love Taos and Northern NM! The Rio Grande Gorge was our first “real” stop when we hit the road two years ago, and we actually just spent the entire month of February (and a bit of January and March) in that area. We’re dreaming of eventually purchasing some land around there and setting up a home base of sorts, complete with tiny homes and/or yurts, and maybe an Earthship someday, haha. For our AC servicing we went to Metric Motors on Paseo del Pueblo Sur because they had a… Read more »
OK, thanks John. I’ve had brake work done at Metric Motors before & know they do good work. I spent this afternoon along the banks of the Rio Grande on one of our first spring days – it’s an awesome area. Happy Trails!
OK thanks John. I’ve had brake work done at Metric Motors & know they do good work. I was able to spend this afternoon along the banks of the Rio Grande as spring finally begins to take hold after a brutal winter. Taos is amazing country – happy trails!
Thanks for all of this information! Question about where your floor meetings the door behind the passenger seat: how did you get the full build up (insulation, subfloor, laminate) to fit under the plastic floor cover?? Having trouble with ours – will probably need a trim piece – but curious if you did anything in particular.
Hi Monica, Great question! We had the same problem. Our plastic floor cover (the step protector for the side door) comes out, so we basically placed it on top of the floor. Since the floor we put in was so much higher than the stock floor, this created a gap on the underside that we filled with additional insulation. But it was not the best setup. Just a couple of weeks ago we redid our entire floor (we had some mold/water damage to the subfloor due to leaky rear door seals). This time, we cut the subfloor so it would… Read more »
It does help, thanks! Will look forward to that post 🙂
First big fan of your site, keep it up! Second, did ya’ll screw through the subfloor or laminate floor to secure the matierals to the floor of the actual van at all? I have seen others who have drilled up through the floor of the van and into the plywood subfloor. Or did you only use adhesive? What do you do to combat the floor sliding or moving? Does the adhesive suffice? Or is it that once you start securing the bed/shelving to the walls and flooring they kind of lock the floor in place? Thanks for any feedback in… Read more »
Hi Mitch, Glad you enjoy the site! We used 3M High Strength 90 spray adhesive to secure the 1/4″ plywood subfloor to the insulation below it. The laminate flooring we have is a “floating floor” so we did not secure it at all. The floor is held down pretty well by the weight of everything on top of it, but we did screw down all of furniture pieces (bed frame, bench, and kitchen cabinets) using angle brackets and 3/4″ screws. The screws are penetrating both the floor and subfloor, and we also bracketed all the furniture to the walls for… Read more »