In our last post we went over how we installed plywood walls in our van. The next step in turning our van into a home is hanging the ceiling.
We toyed with a few different options for our ceiling. Many van-lifers just screw up a sheet of 1/4” or 1/8” plywood, which is relatively easy to do and looks good. It’s also versatile because you can paint it, stain it, or put a tapestry over it.
We wanted an all-wood, rustic, “log cabin” kind of look, so for us wooden boards were the way to go. At first, we had it in our heads to use 1×4 boards. But then we were browsing around Menard’s (our favorite store!) and found some awesome cedar plank paneling.
This paneling was perfect. It was only 5/16” thick, which made it lightweight and easy to work with. And we really wanted cedar for the great looks and even better smell. It cost us $18 for a box, and we needed about four boxes to cover our whole ceiling. They also had pine paneling for $6 a box, which probably would have worked just as well.
How To Install a Cedar Plank Ceiling in a Van
Before we jump right into the installation process, it’s important to note that there were several vital steps we took before we even thought about hanging the ceiling.
Before installing the ceiling we:
- Put up 3/4” polyisio foam insulation
- Attached 1×2” “studs” to screw the ceiling planks to
- Ran wiring for our LED lights and our vent fan
If you haven’t done any of those things, go check out our post on insulating our van first (and our epic post on van life insulation). You’ll want to insulate your van’s roof, make sure you have something to screw your ceiling to, and run any wires that will go behind the ceiling before you move forward.
What We Used to Install Our Ceiling
- 5/16” tongue-and-groove cedar plank paneling
- Gorilla Heavy Duty Construction Adhesive
- 1-1/4” GRK self-tapping trim head screws
- 2-¼” hole saw
- Caulk gun
- Jigsaw
- Cordless drill
We cut and installed planks one row at a time. We wanted the ceiling planks to have a mismatched look, so instead of using full planks (which probably would have been easier) we cut the planks to random lengths.
One row might have a short board then a long board, the next might have a long board then a short board, or two half boards, or a full board. We tried to vary it as much as possible to create an interesting randomized pattern.
Putting Up the Side Panels
We wanted to cover both the sides and the ceiling of our van’s high topper with cedar, and we decided to put the side panels up first. That way the top and bottom of the side panels would eventually be wedged behind the edge of the actual ceiling on the top, and the shelving we’re planning on installing on the bottom. Since we didn’t have anything to screw the side panels into, we felt this extra security was important.
We needed some way to hang the side panels until we put up the actual ceiling, and Gorilla Heavy Duty Construction Adhesive really came in handy here. This stuff is quick-drying and creates an incredible bond.
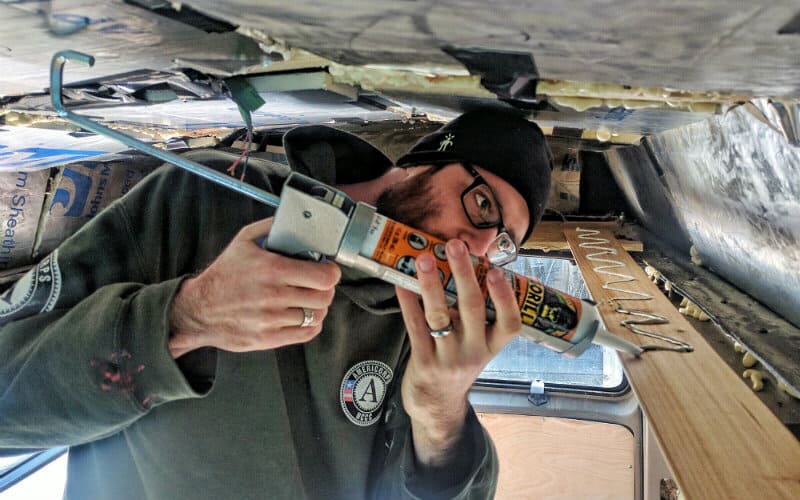
Starting with the bottom row, we spread the adhesive in a zig-zag along the back of each plank, then pressed it against the foam insulation on the side of the van topper (groove side down) and held it in place for 30 seconds. This was enough time for the adhesive to set and hold up the board.
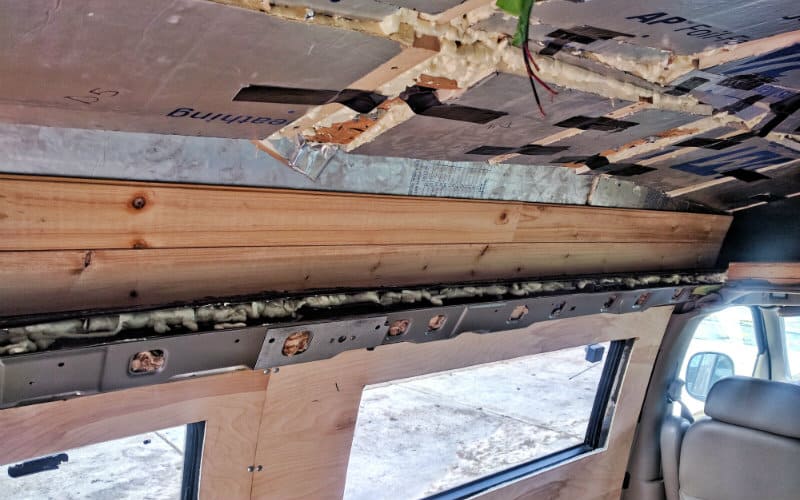
We continued with the next row–spreading adhesive on the back, setting the tongue and groove together, and pressing the plank in place until the adhesive took hold. It took three rows to cover each side.
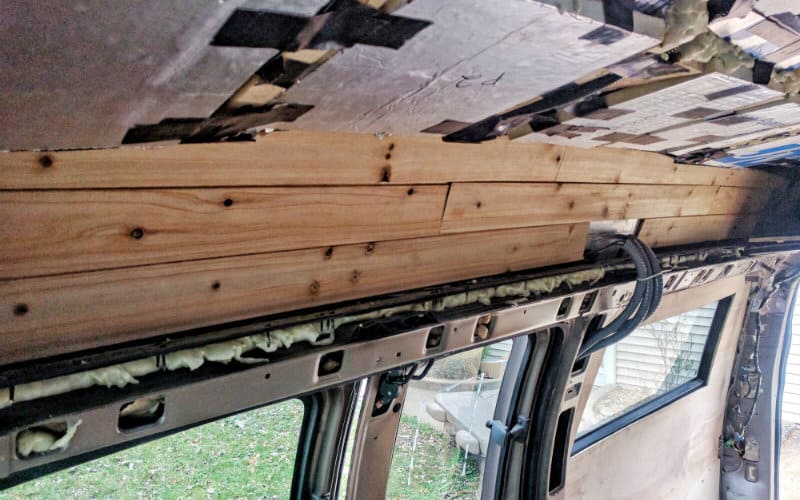
Since the top of our van slopes downwards at the front and back, we had to measure the slope and cut the planks to fit with a jigsaw, which took some trial and error. Luckily, we were able to jam the rough cut edges behind the foam insulation on the ceiling, so most of the mistakes we made would be concealed.
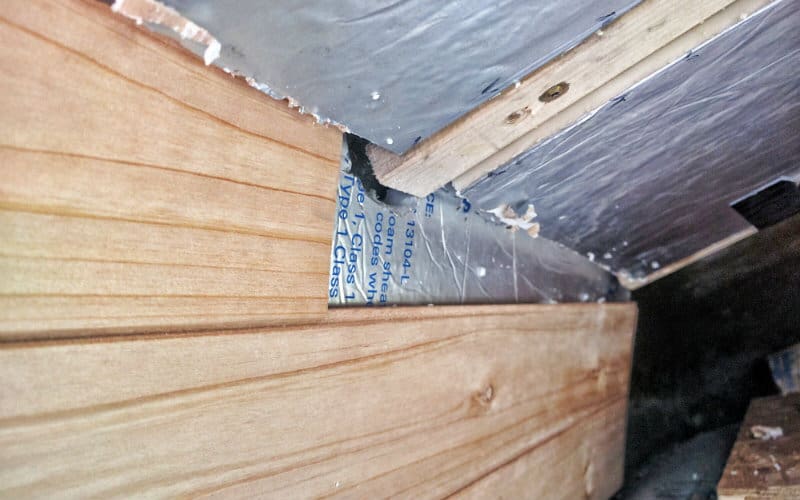
We also had to cut notches to go around some of the ceiling studs. If we had to do it again, we would have made these a little bit shorter.
Hanging the Ceiling
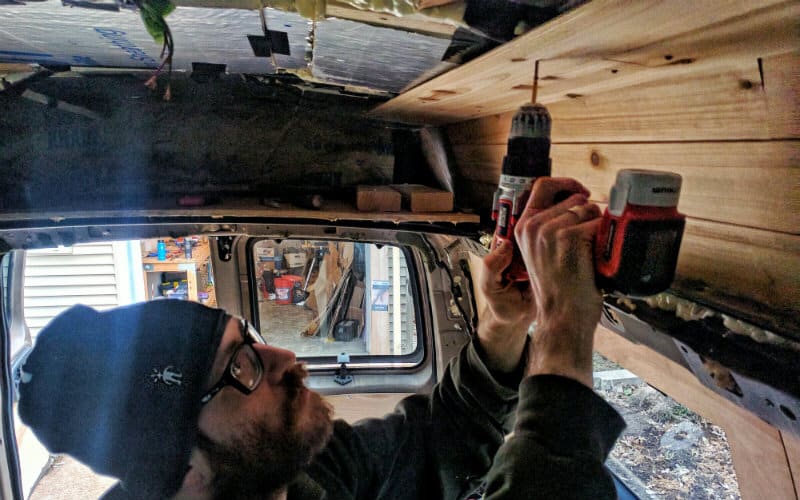
Once we had the sides panels in place we could start on the actual ceiling. We hung one row at a time and alternated between the driver’s side and passenger’s side. We planned on having the two sides meet in the middle.
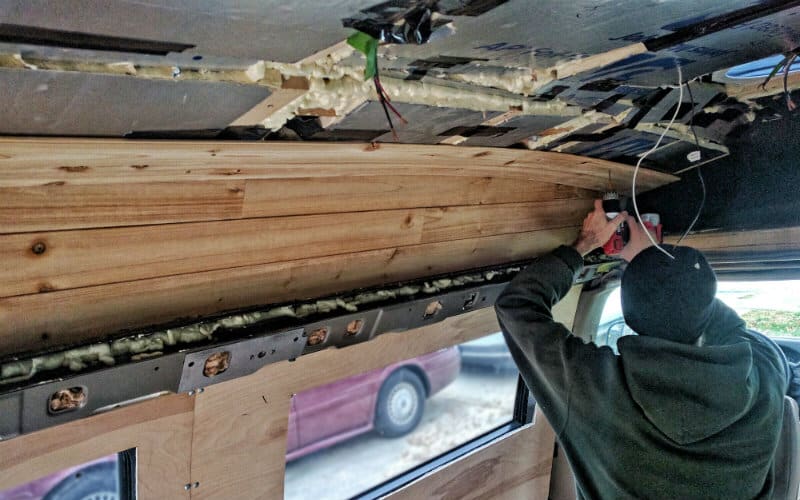
For the first row, we pressed the “groove” side of the plank against the side panel, then screwed it into the ceiling studs using 1-1/4” GRK self-tapping trim head screws.
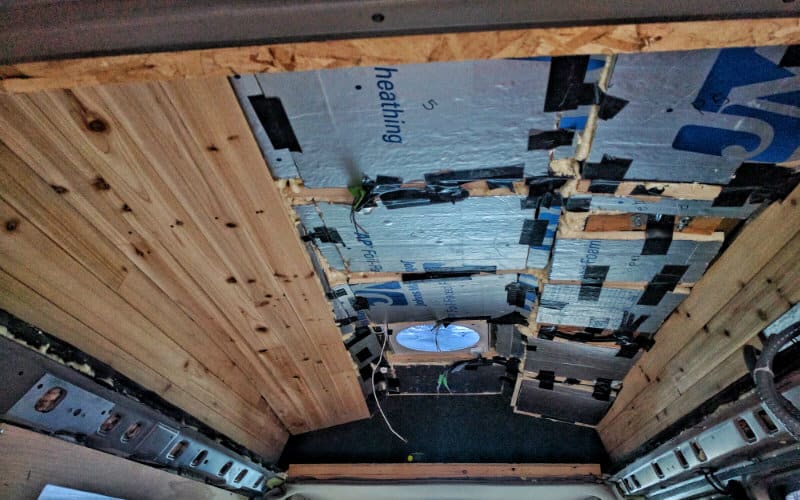
After the first row on each side was up, the next rows were just a matter of lining up the tongue-and-groove and screwing the planks into place.
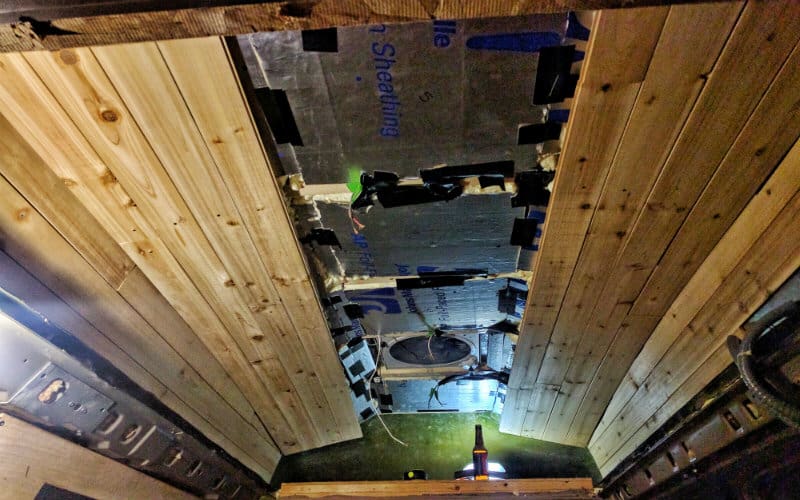
Of course, our van topper is not a flat surface. The middle part of the ceiling has much more height than the sides. At first, we planned on our ceiling follow the contours of the topper, but that would have been much more difficult and complicated.
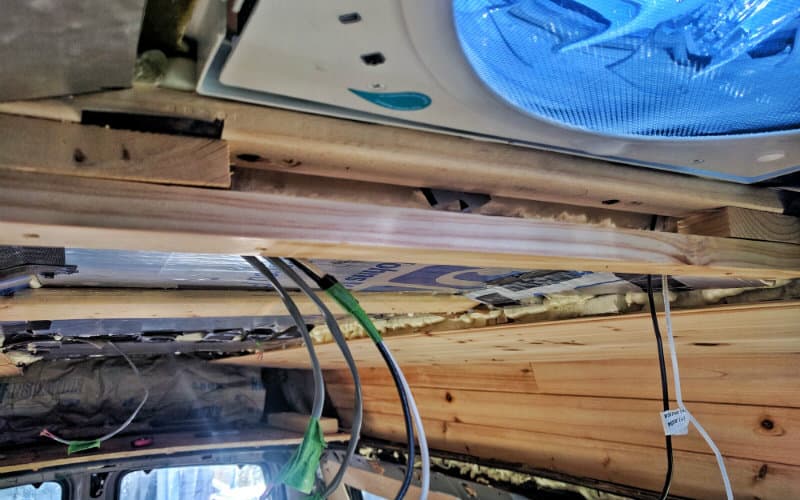
We decided to add spacers and double up the ceiling studs on the deepest parts of the ceiling, which created a more uniform surface to hang the ceiling over. This took a bit of height out of the van, but it made the ceiling install much easier. And the way we look at it, Jayme can still stand up and John couldn’t in the first place, so it’s all the same in the end.
Prepping for Our Future Lighting Install
As part of our van life electrical system, we planned on installing two rows of 12V LED lights in our ceiling, so we had to cut holes for these and thread wires through the holes.
Once we got to the row on each side that would have the lights, we dry fit the planks in the tongue-and-groove, then measured and marked the spacing for the lights.
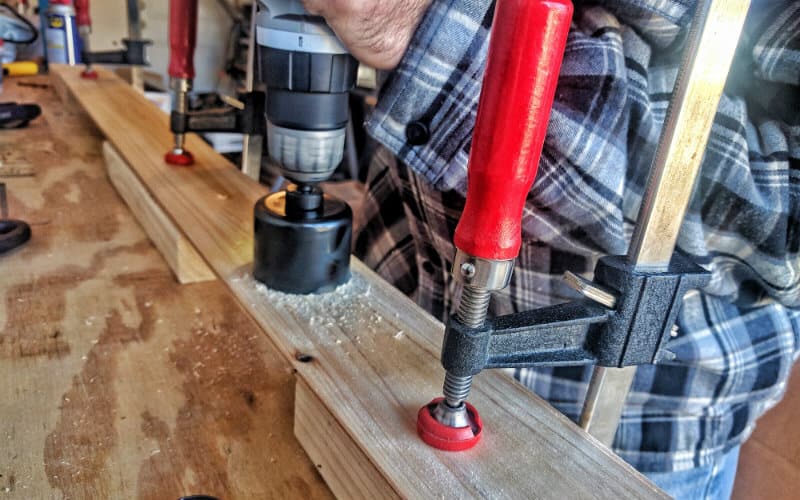
We then took the boards down and cut holes for the lights using a cordless drill and a 1-1/4″ hole saw.
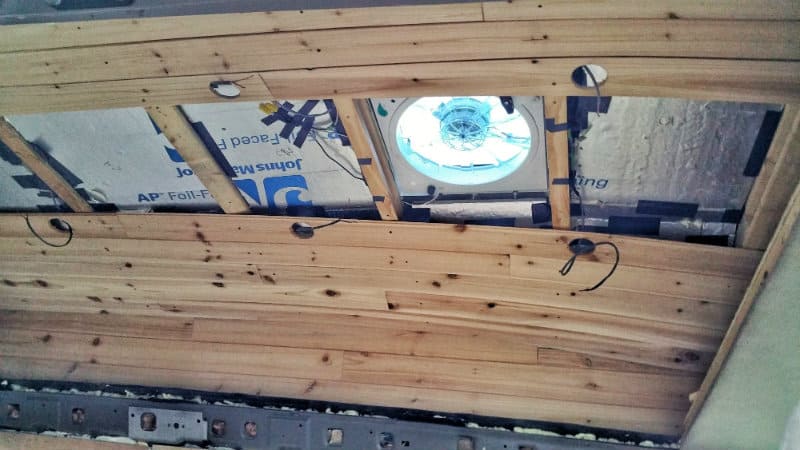
Once the holes were cut, we put the boards back up, screwed them into place, and fed the wiring for the lights through the holes so we could wire and install the lights later.
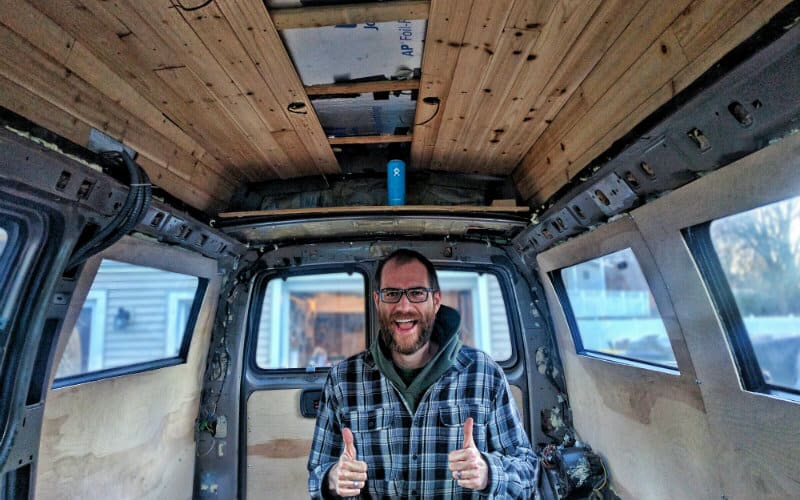
Meeting in the Middle
We planned it so the two sides of the ceiling would meet in the middle, but they met at an angle, so we had to heavily modify the middle row to connect the two sides. We had a triangle-shaped gap to fill using rectangular planks.
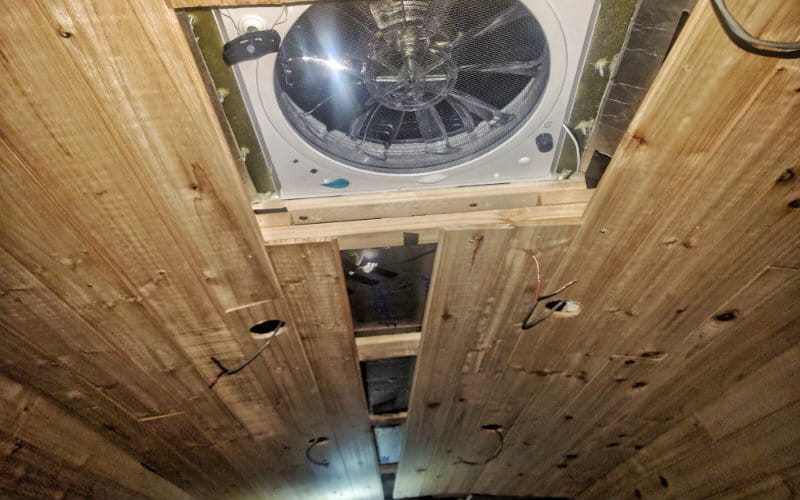
To trace the shape, we held a plank up to the gap and marked different spots along the angle. Since it was a straight angle, we were able to connect the dots with a straight edge and cut it with our jigsaw.
Once we had the basic shape, we had to do some more cutting and trimming to make the plank fit as flush as possible within the tongue-and-groove scenario. It didn’t end up being perfect, but the great thing about the whole random mismatched look is that mistakes and imperfections seem like they’re intentional!
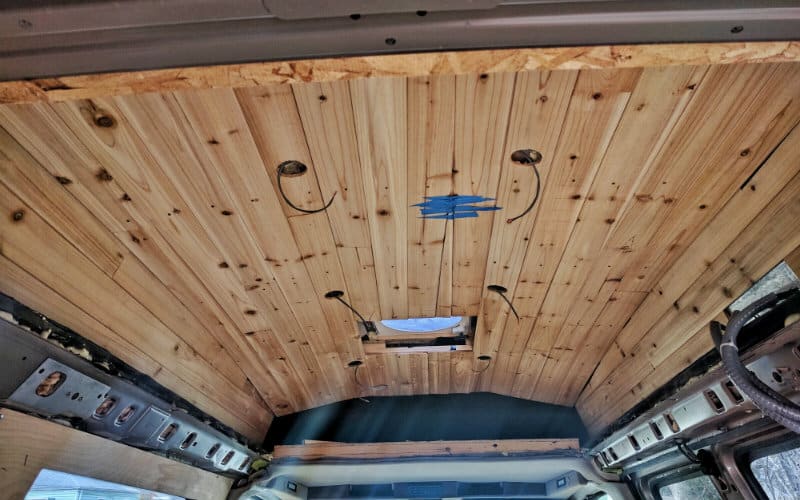
We didn’t have any way to screw down the tip of the triangle without splitting the wood, so we spread some adhesive along the back and held it in place with painter’s tape until it dried.
Hanging the Bedroom Ceiling
Now that we had the main part of the ceiling completed, we just had to put up the ceiling above the bedroom area.
Below the high topper in our van, there is a shelf in the back where the ceiling for the original van body used to be. When we’re lying in bed, our heads will rest right below this shelf. We wanted to have lights under here and a nice cedar ceiling to look at.
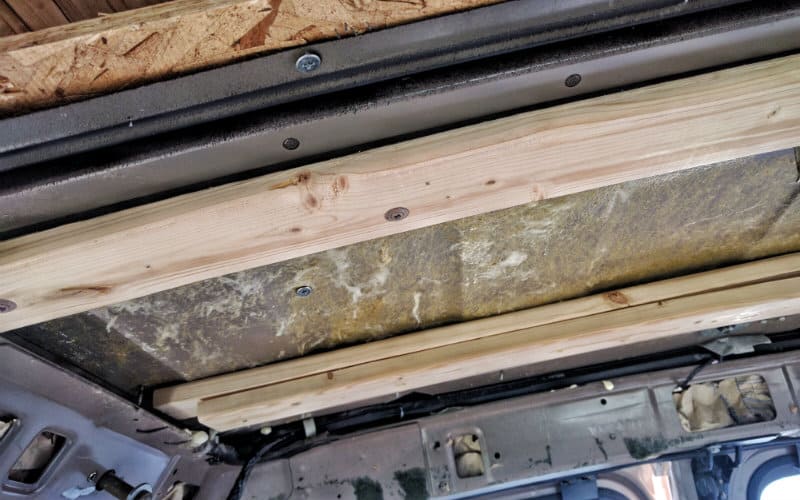
This was probably the easiest part of the ceiling installation. First, we put up ceiling studs by screwing 1×2” boards into the sheet metal using 1-1/2″ self-tapping sheet metal screws.
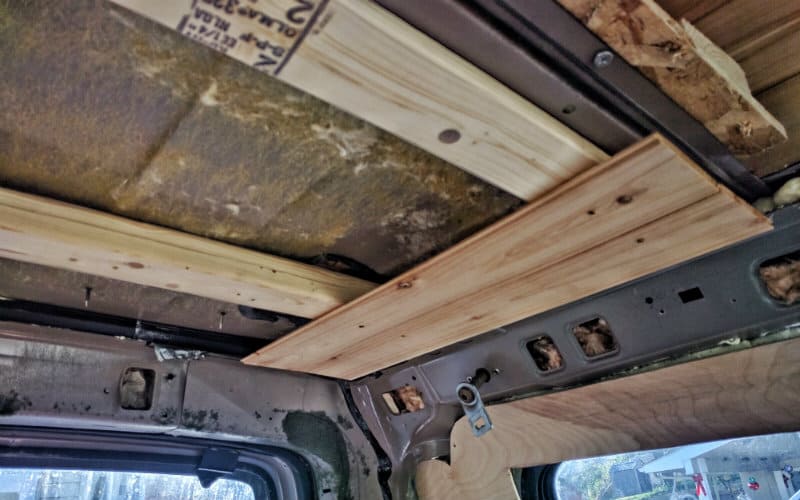
We then cut cedar boards to length and screwed them into the studs, moving from the driver’s side to the passenger side and setting the tongue-and-groove along the way.
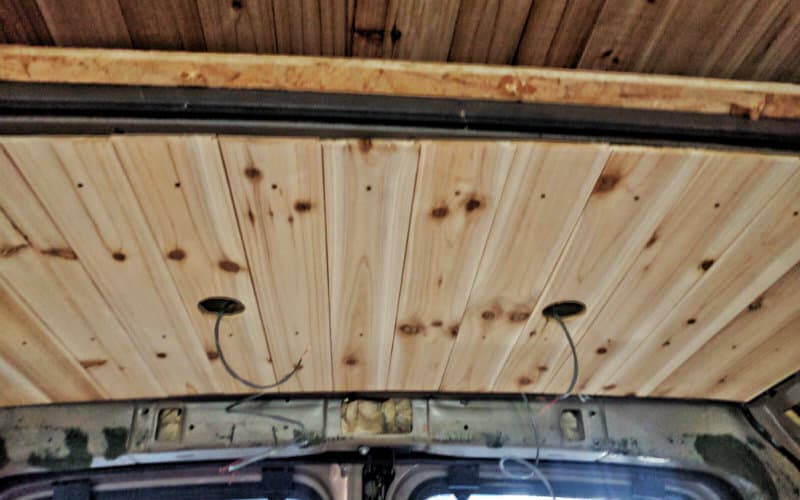
When we got to boards that needed lights we marked where the lights would go, then cut holes using our drill and hole saw. Finally, we fed the wires for the lights through the holes and finished the rest of the ceiling.
Tips and Challenges
- When planning your cuts, make sure the end of each board is close to a stud so you’ll have something to attach it too. But don’t put it too close.
- Do not try to put a screw too close to the end of a plank. The wood is so thin that you run the risk of causing a split. Cedar is particularly brittle, so it WILL split on you if you’re not careful.
- Make sure to put your screws in slowly so you don’t go all the way through the wood!
Check Out That Sweet Ceiling!
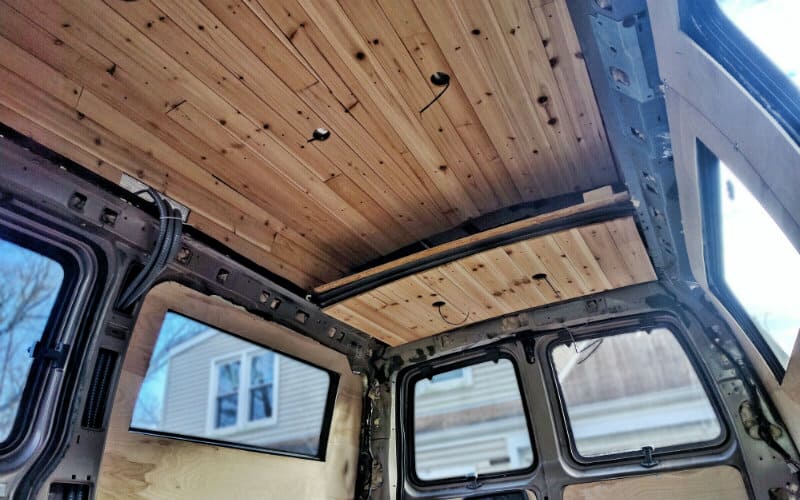
Our ceiling is now finished and it looks awesome! We’re well on the way toward completing our quest to have every available surface in our van covered with wood.
Next up in our van build series we’ll show you how we stained the ceiling and walls several different colors to really enhance that mismatched board look.
Stay tuned for more updates and walkthroughs, and as always thanks for all the love and support! We couldn’t do this without you! If you’re not already, be sure to follow us on Instagram @gnomad_home and on Facebook at Gnomad Home.

Hi John, this is perfect fo4 our needs, and I love the idea of using cedar. But I am unclear about your dimensions. You never say what the exact dimensions of the cedar planks are, other than 5/16”. Are they 1×4’s? Menards only sells NOW 1×6 T&G cedar, which are 11/16″ x 5-3/8″. Not 5/16” so double the thickness…
Hi JC, the ones we used were 5/16″ thick, and if memory serves they were about the width of 4″ lumber, so 3.5″. I’m not sure what they carry or have available now – Menard’s was the only place we found planks that thin. Sometimes they have a wider variety available online that you can order and have sent to a store. Hope that helps!
~John
Hey! thanks so much for putting all this out there! I’ve also got a Chevy Express with a high top, so you guys have been a huge help. I’m going to install a cedar plank ceiling like you guys, but I was wondering how you attached the furring strips to the ceiling? I have a 1/2″ reinforcement ply (built in to the top by Fiberine), so I was originally thinking of screwing 2x3s perpendicular to fit Havelock wool and 1/2″ polyiso (I plan on spending a lot of time in the snow and I’m pretty short), however the only screws… Read more »
Hi Diego, sorry for the delayed reply – hopefully you’ve got something working for your build. Attaching all of this to a fiberglass topper can be a tricky proposition, and all high tops are different. Ours also has 1/2″ plywood reinforcements, and we did a combination of using screws and Gorilla construction adhesive. VHB tape could also work. We really like the Gorilla construction adhesive because it’s very strong, sets in under a minute, and works on a wide variety of materials. Using screws in this scenario, you want to be extra careful not to go all the way through… Read more »
Have you had any issues with the cedar expanding or contracting? Did you seal it in any way? Or do you not have extreme fluctuating temperatures?
Hi Mallory, we have not had issues with the cedar expanding or contracting, but the tongue-and-groove aspect does help a bit with anything that would occur across the width. We’ve spent time in temperatures ranging from about 100 degrees F down to 15 degrees F. Hope that helps!
~John
Nice
That’s the same wood I used.
Awesome, it’s worked great for us!
Hi guys! First off – love your blog. I have a ’98 ford econoline with the fiberglass stop and this website has been the most applicable to my build! Secondly – question for you… I have the “bulkhead” (where the ceiling drops down) towards to back of the van just like yours does. I’m thinking about cutting this out to take advantage of the high top roof all the way to the back. However, I’m worried that cutting that out may impact the structural integrity support of the van. SO, is there any reason you chose to keep yours in?… Read more »
Hi Terry, thanks for following along and so glad our site has been helpful! We chose to keep our bulkhead in mainly because it’s such an awesome storage shelf. We converted it into a closet with a door, and we keep all of our clothes up there. As far as structural integrity – our van high top has heavy duty bolts going through both the front and rear bulkheads, so it does help hold our high top on (in addition to all of the screws going around the edges). However, these bolts are very close to the vehicle frame, so… Read more »
Why not use a nail gun to shoot nails into the tongue? So there would be no visible screws.
Hi Tom, thanks for reading! Three reasons: first, 1/4″ paneling is far too thin, and cedar is far too brittle, to withstand the force of a nail gun. The tongue on 1/4″ cedar paneling is pretty fragile. Second, we personally like the exposed screw look. Third, we don’t have a nail gun, and many/most DIY converters will likely not have access to one either. On a barebones budget, there are far more versatile tools to throw down for. Hope that helps!
~John
Hey, I love your build! I’m converting my high top conversion van and your website has been such an amazing resource! I just wanted to let you know, I got the same lights as you and in this post you linked to a 1 1/4 hole saw to install the lights but the instructions that came with the lights call for a 60mm (2 3/8) hole saw.
Thank you so much for making such a detailed site!!!!!
– Danny
Hi Danny, thanks for catching that! We actually used a 2-1/4″ hole saw for ours, so I think this is an error. We’ll update this. Best of luck on the build!
~John
Hi guys, i was wondering what you did with the front part of your van’s ceiling where the tv would have went in vans original form. In your picture, it looks like you left the fiber glass bare. Did you end up covering this up? If not, does it affect your vans temperature? Thanks for all the great insight, very helpful!
Hey Zach, we chose not to put ceiling planks over that part because the curve was just too extreme. We did, however, line the fiberglass with Reflectix (we glued it up using 3M High Strength 90 and taped the seams with 3M foil tape). Since this space is a big open cavity (we use it as our pantry) there is more than enough air gap for the Reflectix to be effective as a radiant barrier. Hope that helps!
~John
So how did you know the length of screws to use and where to screw them into the frame of the van??
Hi Kort, It’s all about knowing the thickness of the materials that you’re working with and figuring it out from there. The walls were the only part that we screwed directly to the vehicle frame. First, we measured the depth of the vehicle frame (it’s been awhile, but I think it was about 3/4″). That plus the 1/4″ plywood that we used for the walls gave us 1″ to work with. We went with 3/4″ self-tapping sheet metal screws, which we felt was a good length to provide enough hold while having no danger of puncturing the outer van wall.… Read more »
Hello, we’ve been reading your blog and find it very interesting. We want to isolate and finish our van ceiling with V joint pine. Our concern is the resin dripping from the nots…did you have any bad experience with that matter?
Thank you
Hi Maryse, we used cedar paneling on our ceiling and did not have any issues with resin. If you’re using properly dried and cured wood, there should not be any resin to worry about. Sealing your ceiling with polyurethane or similar should also help, but starting with quality lumber is the first step. Hope that helps!
~John
Love the site! Could you have cut off that lower ceiling toward the end of the van and just had the higher ceiling run the whole way to the back if you wanted to? If so, how would that have been accomplished? Thanks in advance for any insight you might be able to offer!
Hi Robert, Glad you enjoy the site! We certainly could have cut off the rear lower ceiling if we wanted to. Our rear lower ceiling is sheet metal leftover from the original van ceiling. When installing the high top, the conversion company cut out a big section of the original ceiling, but left this shelf in the back as well as the ceiling above the cab. Removing this lower ceiling is just a matter of cutting it out. I don’t have direct experience with cutting large sections of sheet metal, but this post on Cheaprvliving about installing a high top… Read more »
Much obliged, John. Your site has really been so helpful in outlining exactly how I’ll set up my van. I’m not sure I would be able to do it without your help. Thanks a ton!