After fully insulating our van and installing laminate flooring, the next step was to put up the walls.
As with every part of the van build process, there are many different options to choose from for walling material. For our van, we decided to go with 1/4” birch plywood because it’s flexible, easy to work with, and has a nice grain pattern. We decided to hang the plywood by screwing it directly to the van’s metal frame.
Putting up plywood walls in our van was a little intimidating at first. We weren’t sure how the install would work out, if just screwing the plywood to the metal frame would hold it well enough, or how it would look.
But once we got on a roll, the walls went up pretty easily and the finished product looks great. Here’s how we did it.
What We Used to Install Our Walls
- 1/4″ Birch Plywood
- 3/4″ Self-Tapping Sheet Metal Screws
- Cordless Drill
- Jigsaw
- Cardboard
How To Install Plywood Walls in a Van
Step 1: Measure and cut cardboard templates

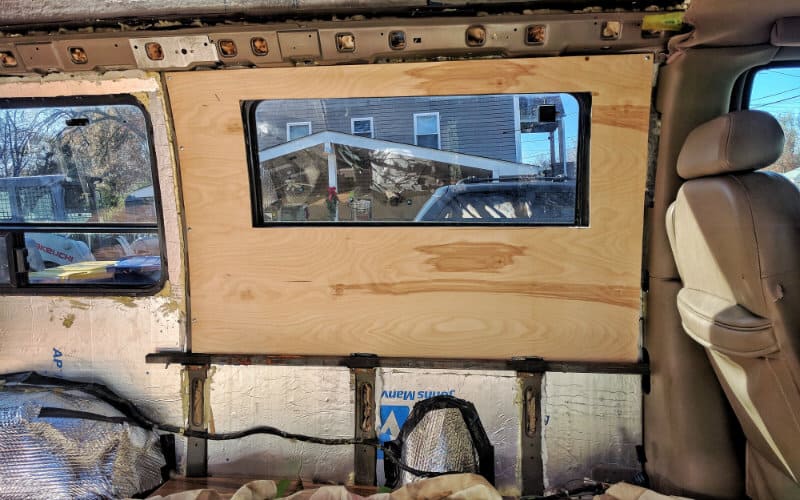
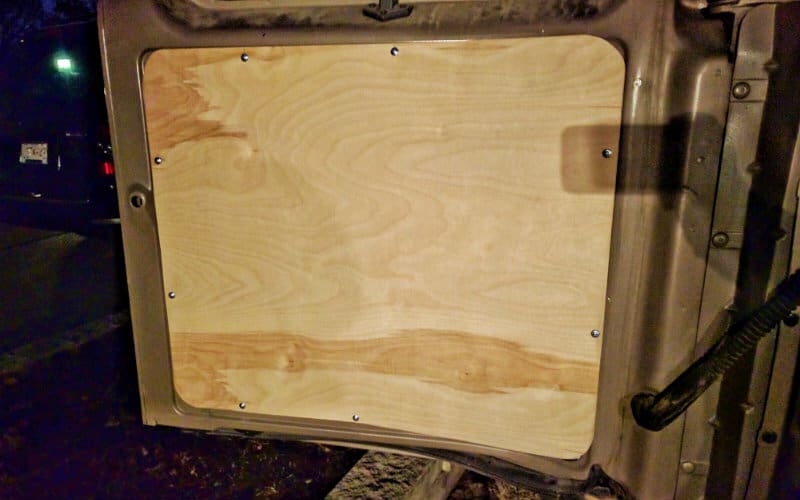
We started by making a cardboard template for the first wall panel, which extended from the metal rib between the two windows on the driver’s side to just behind the driver’s seat. We planned to screw the plywood directly into the metal rib, and wedge it behind the framing by the driver’s seat.
Step 2: Test Fit and Trim Templates
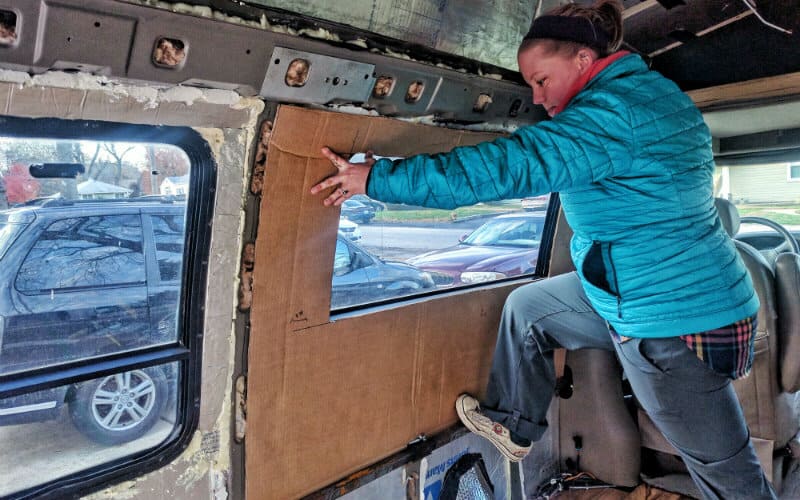
Once we cut out our template we tested it to make sure it fit. We had to trim a few spots here and there to get the sizing as close as possible.
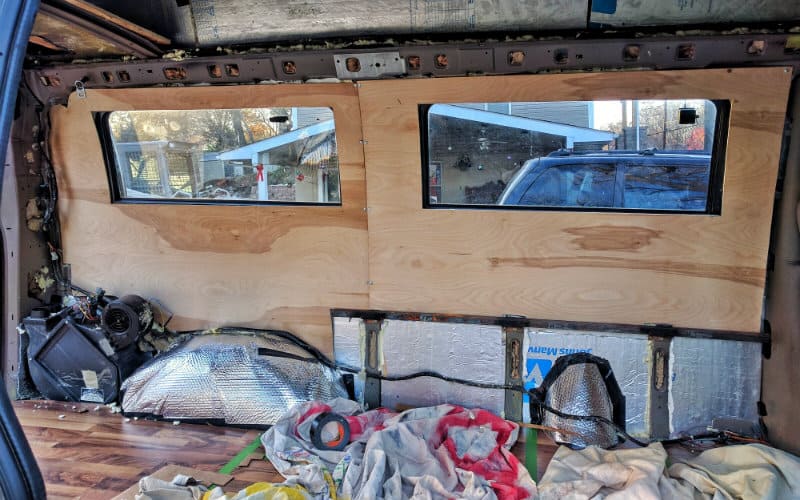
As you can see, the panel is blocking out the lower portion of the window. In our furniture design, the kitchen cabinets and the bed platform are higher than the bottom of the windows, so we decided to cover the part blocked by the furniture with plywood and additional insulation.
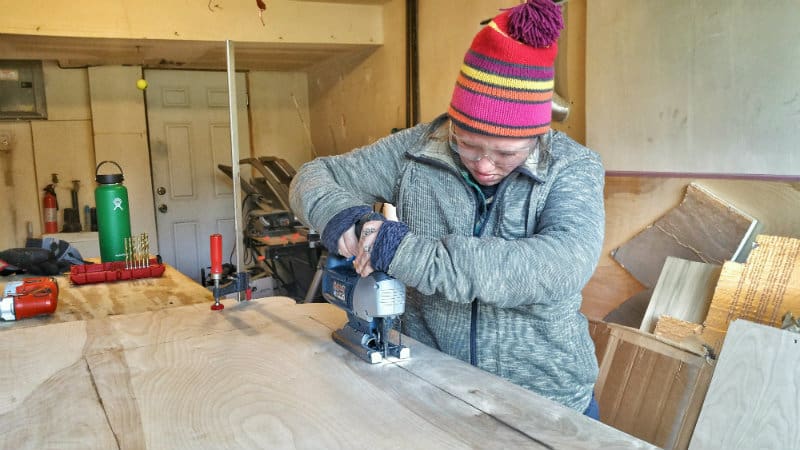
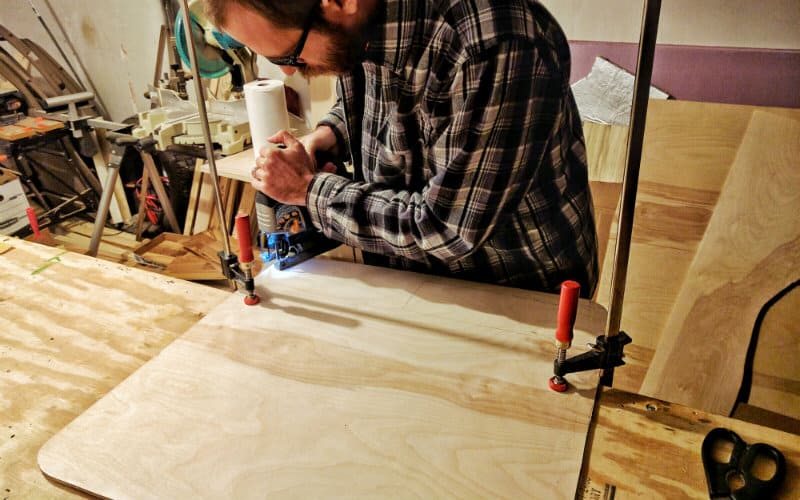
Step 3: Trace Onto Plywood and Cut with Jigsaw
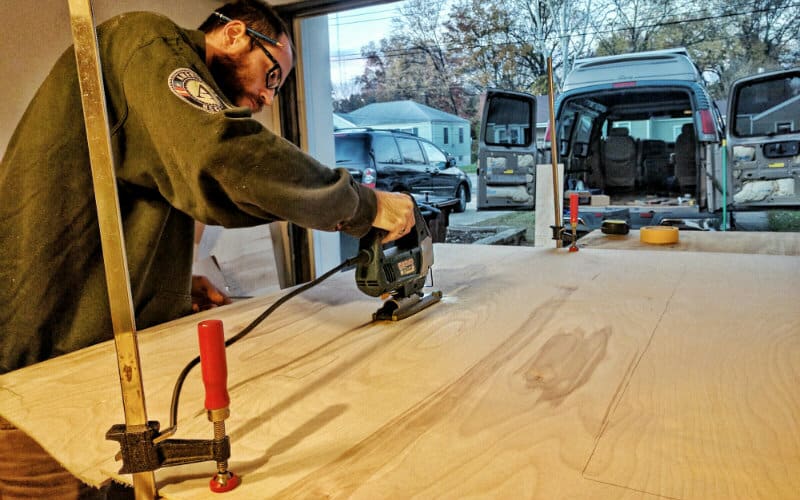
This is the fun part. We traced the template onto a sheet of plywood, then used our jigsaw to cut the outline.
Step 4: Cut Holes for Windows
To cut out the holes for the windows, we drilled holes in all four corners using a 1/4″ drill bit, then used the jigsaw to connect the dots.
Step 5: Test Fit and Trim Plywood
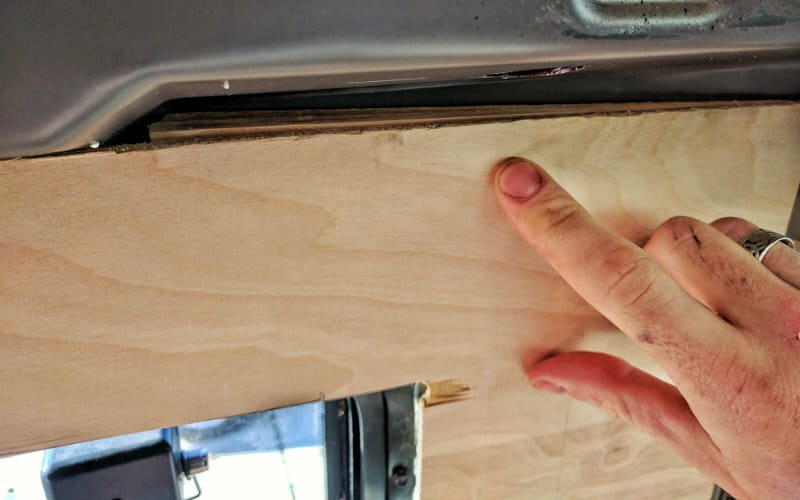
Even though we had tried to get our template as close as possible, we still had to trim down the plywood panel in a few spots to make it fit perfectly.
Step 6: Add More Insulation (If Necessary)
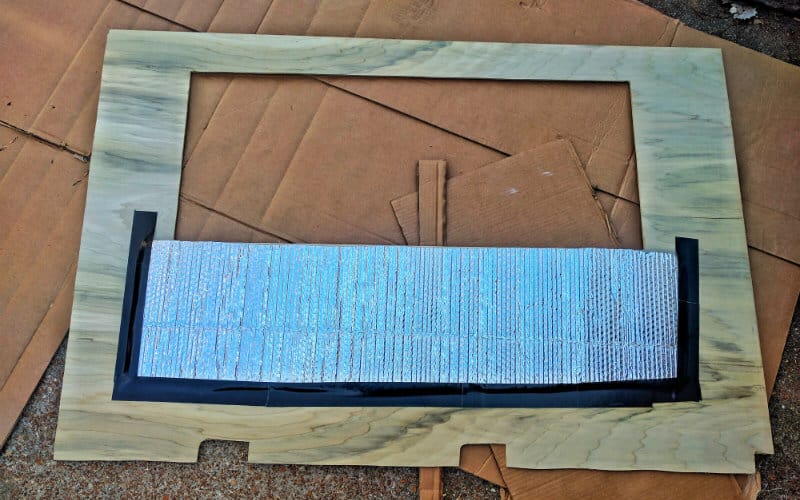
To add insulation to the part of the window that we were covering up, we attached Reflectix to the back of the plywood using 3M High Strength 90 adhesive and Gorilla tape.
Step 7: Screw Plywood to Metal Van Body
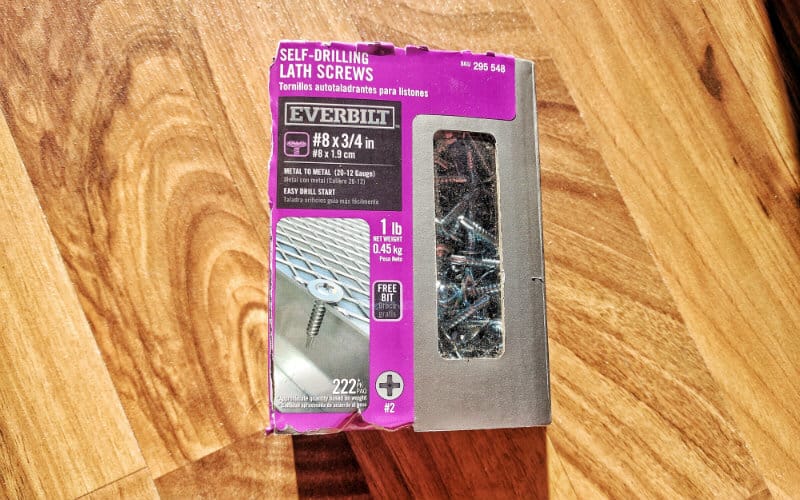
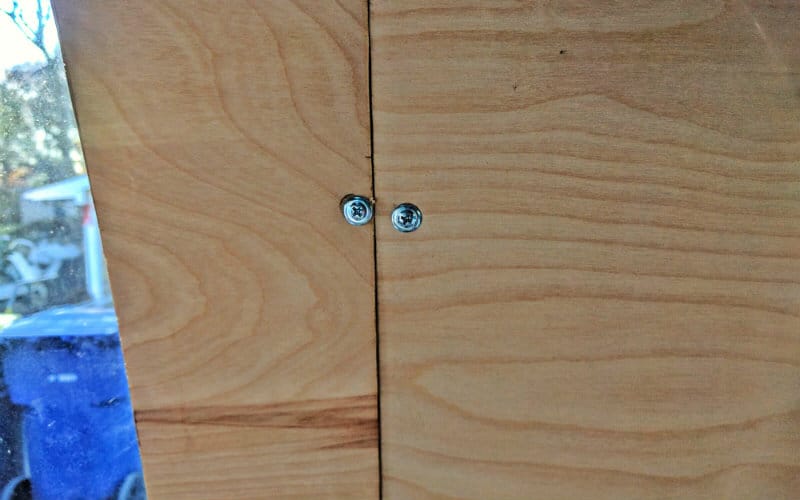
To attach the plywood to our van’s metal framing, we picked up some 3/4” self-tapping sheet metal screws. These screws went right through the plywood and into the frame without drilling pilot holes.
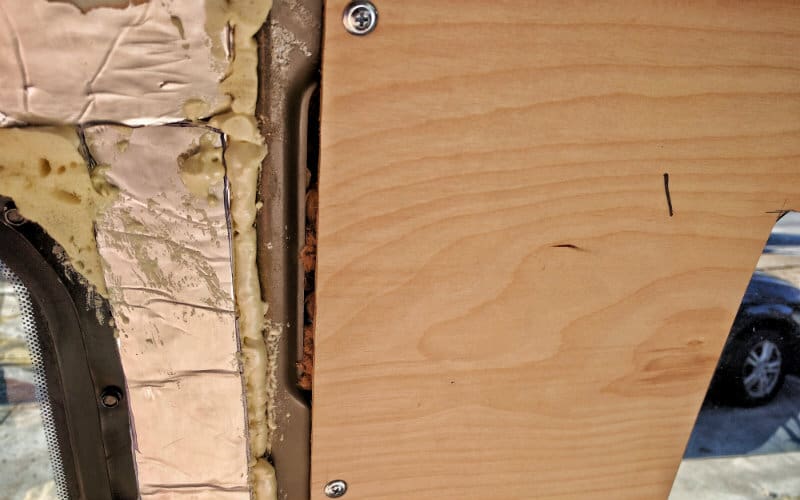
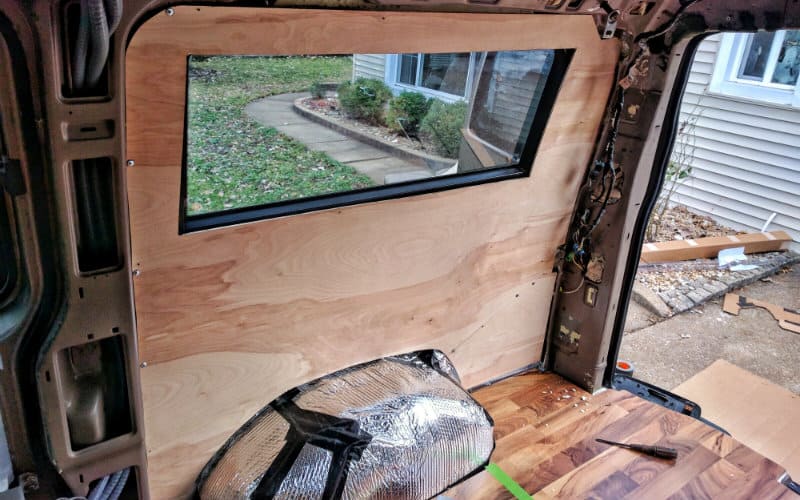
The great thing about 1/4″ plywood is that it’s somewhat flexible, so it will follow the curved contours of a van body. The first panel worked out perfectly.
Step 8: Follow the Same Procedure With the Other Panels
After hanging the first panel, we followed the same steps to cut and hang plywood for the rest of the van. The windows in our van are all the same size, so we were able to modify our first template to make the other two panels.
All we needed were a few cuts here and there and an additional piece at the bottom to make the template for the rear windows. Then we traced the template onto the plywood and grabbed our trusty jigsaw. Once we cut and fit the plywood, we screwed it into the metal van frame.
We cannot emphasize enough how much time reusing your templates will save you. We were able to use many of the same templates in several different steps of our van build.
Step 9: Trace and Cut Door Panels
Last but not least was adding plywood panels to the rear doors. If you’ve been following along this far, you can guess how we did this.
We made cardboard templates, traced them onto plywood, cut them out with a jigsaw, and screwed them into place.
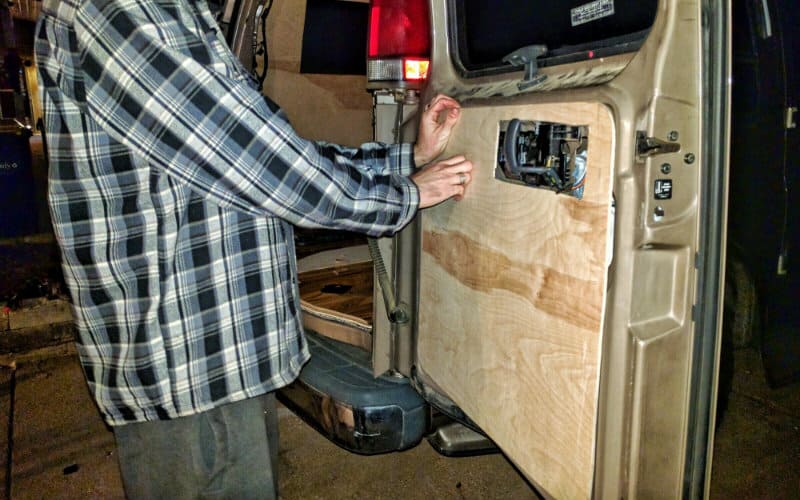
We cut holes to accommodate the door handles, and screwed the original plastic handle coverings back over the plywood.
Step 10: Admire Your Handiwork!
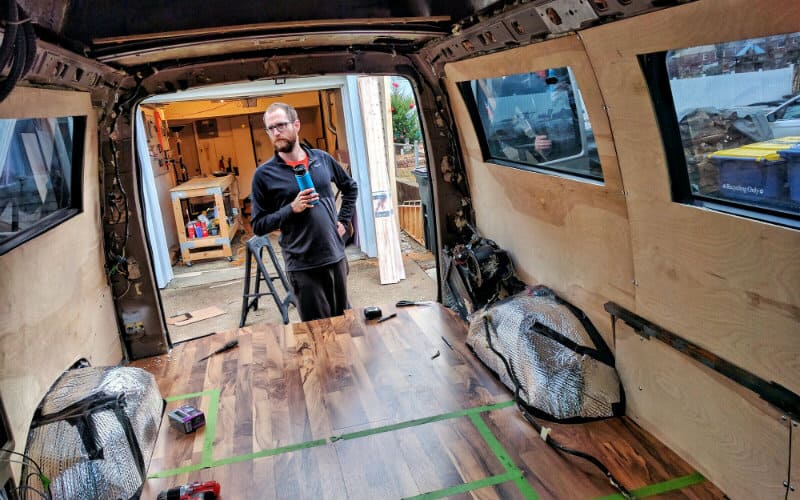
And there you have it! We officially have walls! It’s important to take a step back and applaud your progress after big milestones like this. It wasn’t too long ago that our van was just an empty shell. Now it’s starting to feel more like a home every day.
There’s something about the natural beauty of wood covering your living space that makes you feel peaceful and content. That’s why we decided to go with some beautiful cedar paneling for our van’s ceiling – which was next up in the build process.
We hope you’ve enjoyed keeping up with our progress thus far, and we appreciate all the love and support! You guys rock! Don’t forget to follow us on Instagram @gnomad_home and on Facebook at Gnomad Home. We can’t wait to finish our van build in the next few weeks and finally hit the road.

Hi all
Building out a ford transit
I’ve put 1×4 strips with L track on upper and lower frame
I want to put 2×4 verticals for bed track
Any suggestions
TIA
thank you so much. I will always follow this site.
How do you finish off the door panels? I have mine cut, but thought a nice rubber u-channel trim of some sort would look nice. I can’t find anything that matches the interior of my van color, so I wondered what you did to finish up after installing the wood panels. Thank you for any advice! 🙂
Hi Marci, we essentially put the plywood up and left the rest of it unfinished, which worked with the style of our van. Hope that helps!
Hey guys, the pictures don’t seem to be showing. Would love to see what you did.
Hi Tessa, It seems we were having some technical difficulties that should be resolved now. Sorry about that!
Obviously it is too late for this build… But for others reading, this may be of use. Or for future modifications. Instead of using screws to hold panels against the wall. Think about buying a bulk bag of push-lock or push-unlock panel-mounts. They work like expanding wall anchors. They have a pin inside that can be pushed in to expand the split anchor pawls. Pushing it in further, or pulling the pin out, makes the pawls retract. You can use many more of those, than screws, to get a nice contoured and secured mounting. They can even be painted or… Read more »
Thanks for the comment! Push locks are definitely a better solution than simply drilling into the wall or into the ribs. We are working on a major update of our site that will include information/demonstrations on using push locks and other methods in van builds. Thanks again for adding this info!
~John
Can you offer a link for these push- locks?
Hi Allison, you may be able to find these referred to as: plus nuts, rivet nuts, or cross nuts.
Here’s a link to Amazon search results showing a variety of these nuts to give you an idea of what they are.
Hope that helps!
~John
What did you guys do with the corners between the ceiling and the side walls? How did you cover that up? Thanks for the great info!
Hi Derek, that’s actually been an evolving situation. We initially left them as bare metal, because we had been building our van for months and really wanted to get on the road. This turned out to be pretty handy, because we could stick magnets on them. Later, we glued on thin foam for insulation and covered them with fabric. We’re now in the process of putting a different fabric on. We’ve also seen people box them in with wood. Hope that helps!
~John
Thanks guys! Did you use a sealer/varnish to finish the wood lining after installation? We have installed plywood lining in our van and we’re wondering about sealing it, but a carpenter friend warned us against it. Said it would take too long to air out. Did you do this/have any problem?
Thanks!
Jeff
Hi Jeff, we did put a coat of wipe on polyurethane on the plywood after staining. I would think it’s fine as long as you’re not currently living in it. If I remember correctly the smell was gone within a few days. Hope that helps!
~John
Thanks so much for the great info. I’m trying to decide whether to use rivnuts or just drill straight into the metal like you did. Your method definitely seems simpler, but others appear to use rivnuts to avoid rust where the metal is cut. Is that a concern? Thanks!
Hi Ryan, we have not had any issues with rust where we’ve drilled into our frame (or anywhere else). That said, rivnuts would certainly help your avoid any potential issues. Even if you mount your wall panels with screws rivnuts would be a good option for securing furniture to your vehicle frame. Hope that helps!
~John
awesome, thanks for the info.
Hi! We’re about to put walls up in our 97 dodge ram van and have been following a lot of info on your page (thank you!) In one section your page says you did use birch plywood for the walls and another section says you don’t recommend using it for the walls, to use luan instead. Which one did you use and find worked best for you?
Hi Jamie, thanks for reading – and for catching out errors! We clearly need to do some updating and clarifying about our wall choices. We actually used 1/4″ luan underlayment for our walls, mostly due to the cost (and we liked the grain pattern). A 4′ x 8′ sheet of 1/4″ luan is about $15 at Home Depot, whereas 1/4″ birch is about $28. The luan worked great for our purposes, it’s lighter than birch, so we thought it made sense to save a little money and weight there. That said, the Home Depot luan we used doesn’t take too… Read more »
Thank you so much for creating this amazing guide for us who our beginning our van life journey. I am working on a van very similar to yours (97 dodge ram 2500 passenger van) and it’s time for the wall paneling. I’m also going to be doing plywood walls but was wondering how many inches were lost due to attaching the ply to the metal ribs of the van? My vans ribs are located in the same places as yours but they stick out about 3 inches on either side. so I’d lose a considerable amount and the bed I’m… Read more »
Hi Nicole, thanks for reading! The ribs in our van are only about 3/4” so we didn’t have that issue. You could certainly put up paneling more flush to the walls, but you would probably need to install some sort of studs or nailers to attach it to. Hope that helps!
~John
My boyfriend and I are currently doing a build in the same van! Would love to see pictures of yours and hear how it’s going!
Those clamps are for pipes and with vibration will saw right through the insulation. Using p clamps or cushion clamps is way safer and easier to install.
https://www.amazon.com/Cushion-Insulated-Clamp-Stainless-Nuts-Assortment-Assortment/dp/B076V8W4TS/ref=mp_s_a_1_6?ie=UTF8&qid=1541980563&sr=8-6&pi=AC_SX236_SY340_FMwebp_QL65&keywords=cushion+clamp&dpPl=1&dpID=51nCr23I6iL&ref=plSrch
Electrical in a van is like electrical in a boat. It’s not terminated or dressed like house wiring. Look up abyc electrical standards.
Love your goals,thoughts and efforts. Keep up the good work
Hi Rich,
Great point. When we use the metal clamps like this we actually wrap them in electrical tape to avoid this problem. We will definitely update this to mention that and talk about the downside of using metal clamps for wiring. The insulated clamps are of course purpose-built and better for the application, but they’re not cheap in comparison. Thanks for the thoughts, tips, and kind words!
~John
Hi, I’m currently working on my van which is the same type as yours. I was wondering how you went about walling the back of the van? Like yours, mine has the heater motor along with tubes running up the back. I saw your van has walls covering those and was wondering how you went about it?
Hi Zach, we actually didn’t wall off the heater unit, we paneled around it and left it exposed. We have since removed it completely, and since this was under the bed anyway we covered the exposed area with Reflectix and called it good. Now it’s where we keep our oil pan and spare oil. A note on removing the air handler: it’s doable, but it requires a professional to evacuate the freon from your system, cut and cap off the pipes running under the van, and repressurize everything. We only did it because we had a leak and had to… Read more »
I like the plywood walls and intend to do the same. How did you finish or seal the plywood edges that are around the existing windows? I’ll have the same question/situation around my fan, shore power outlet, and floor drain.
Regards G-
Hi G, we just sealed ours with polyurethane, which we also used to finish the walls/ceiling. We thought about adding trim around the windows to make it look nicer, but at that point we just had to get on the road so we held off. If you’re thinking mold prevention, you can pre-treat wood with Concrobium (available at big box hardware stores), then seal it with polyurethane or a mold preventative paint like Zinsser Bullseye. Wood end grain and plywood edges draw liquid deep into the fibers, so you’ll want to use several coats to fully seal it. Hope that… Read more »
Hey guys! really enjoying all that you have done/ are doing!! m planning to be DIYing my first van build this upcoming spring and I’m just doing a lot of research so I can prepare myself. I’m getting super confused when it comes to laying down wiring for the solar system. I’ve checked out your guys’ section on that but I’m curious where/how it would be laid to get connected so it works ex: how the ceiling fan/vent would get connected to the solar panels…that kind of stuff lol.. ya feel? I don’t know if that makes any sense at… Read more »
Hi Jessica, electrical can definitely be confusing! We knew almost nothing about electrical before we built our van, so it’s definitely possible to learn what you need to know. We have a full wiring diagram for a van electrical system in our epic electrical post that shows how everything is laid out. Basically, everything runs through the solar charge controller. The charge controller takes the current from the solar panels and uses it to charge you batteries. It also takes current from your batteries and sends it to your fusebox (which is where your lights, fan, etc., are plugged in).… Read more »