One very important thing to consider when preparing to live in a van is temperature control. And the biggest factor in controlling your van’s temperature is insulation. A well-insulated van will stay cooler in the summer and warmer in the winter, and it will be easier to maintain a comfortable temperature.
When we were researching insulation for our van we had a few things to think about:
- Construction of the van. Our van body is single-wall sheet metal with metal ribs running up and down for support. It’s very curvy and kind of a pain at times. We wanted to insulate in a way that worked with our van and would also let us easily put walls over it.
- R-value per inch. Since a van is such a small space, every inch counts. We wanted to use material that would give us the highest amount of insulation with the lowest amount of thickness.
- Cost. We wanted our van well-insulated but we also did not want to spend extra money on stuff we didn’t need.
There’s a lot of information out there about insulating a van for van life, and there are a lot of different opinions on what’s the best method.
Want More Detailed Information?
The post below shows you exactly how we insulated our van, and we highly recommend reading it. But if you’re looking for an in-depth guide, we’ve since published a detailed post about van build insulation that dives into everything you need to know about different insulation materials and the best way to insulate a van.
Choosing insulation material
Based on our research, we decided to use a few different materials to insulate our van.
What We Used to Insulate Our Van
- 3/4″ Polyisio foil-faced foam sheets for the walls and ceiling
- R-19 fiberglass batts for the door panels and for inside the frame
- Reflectix for the floor and to make window coverings later
- Great Stuff Gaps & Cracks foam spray to fill in the gaps
- 3M High Strength 90 spray adhesive, 3M VHB tape, and Gorilla Tape to hold everything together
Update: We still highly recommend polyiso foam board as a cheap and effective van insulation. But after much research we think that sheep’s wool insulation is an excellent alternative that’s worth looking into. This is what we plan on using for van build #2.
Read more: Insulating Your Van: Everything You Need to Know for Your DIY Van Build
Polyisio gave us the best “bang for the buck” in terms of R-value per inch. It has an impressive R-6 per inch of thickness, compared to R-2.2 for fiberglass and R-5 for polystyrene foam. The foil face can also add a slight barrier to radiant heat.
The 3/4” panels (R-4.4) fit perfectly flush with the ribs of our van body, so we would be able to screw the wall to the ribs right over the insulation. They didn’t carry Polyisio at Home Depot or Lowe’s in our area, but Menard’s had a bunch of it.
Since we didn’t have the same thickness concerns with the door panels, we figured fiberglass insulation would be the easiest and give us the highest amount of R-value. It also doesn’t get moldy or hold onto moisture like denim or cellulose insulation.
A Note on Reflectix
It’s a really common piece of advice to use Reflectix as the backbone of insulating your van. Many blogs and forums will tell you to line the entire inside of your van with Reflectix to create a radiant heat barrier, then put foam or fiberglass insulation directly on top of the Reflectix.
The problem with this is that Reflectix needs an air gap to do its job. If there’s no air gap next to the Reflectix then it can’t reflect radiant heat, and its R-value is less than 1. This means that if Reflectix is used incorrectly, it doesn’t do a whole lot besides drain your wallet.
Reflectix is great as window insulation because it will reflect the heat of the sun away from your van. But for walls and ceilings, you’ll be better off and you’ll save a lot of money skipping the Reflectix and just using something like foam sheets.
We did decide to use Reflectix to insulate our floor because it’s thinner than foam and we figured that something was better than nothing.
Insulating the Door Panels and the Vehicle Frame
We bought your basic R-19 fiberglass insulation batts to insulate the doors and the framing of the van. The batts fit perfectly into the doors so there was no need to measure anything, and it stayed up pretty well without adhesive. We only had to use a little Gorilla tape here or there.
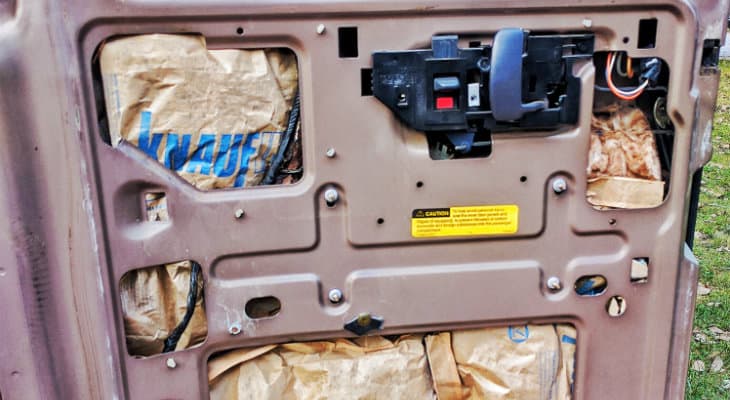
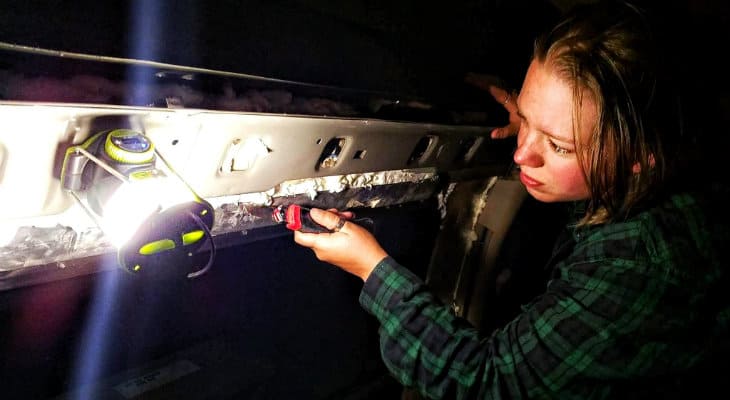
The framing was a bit more tedious. The metal “ribs” of our van are basically hollow, and we definitely wanted to get some insulation in there. For this, we cut the fiberglass batts into strips then used screwdrivers to jam it into the frame.
Insulating the Walls
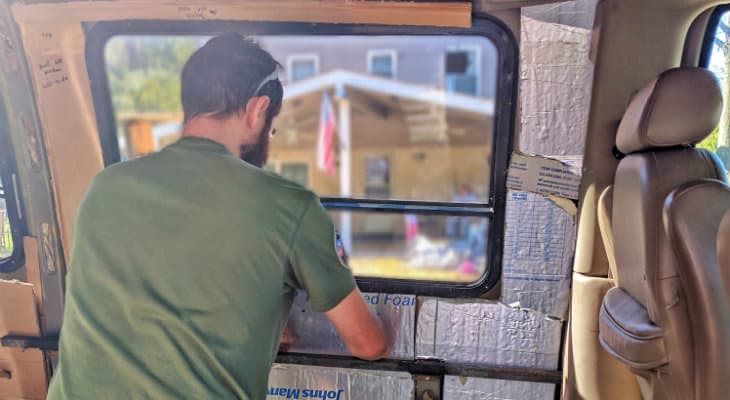
We used the 3/4” Polyisio foil-faced sheets to insulate the walls and ceiling of our van, and we hung it with the foil side facing inward to act as a slight radiant heat barrier. We thought this would be a huge pain because of all the weird shapes in our van, but luckily the internet came to the rescue.
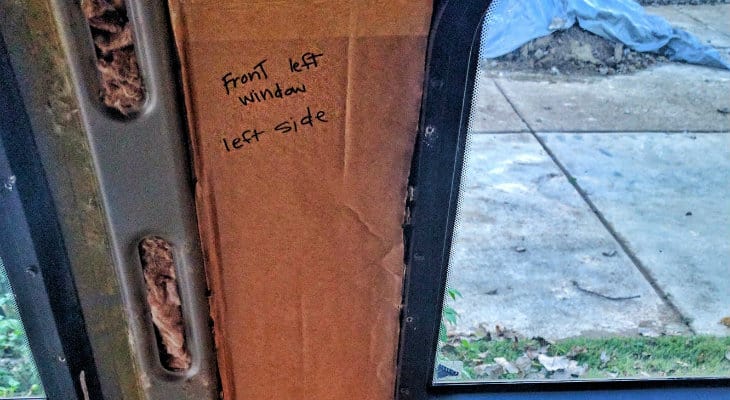
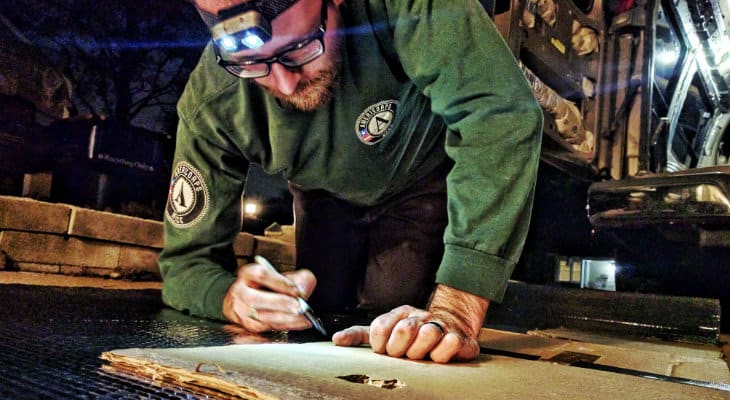
Fellow “van lifer” IntoTheMystery13 (check out his awesome Youtube channel) gave us the idea to cut cardboard templates for each section and trace that onto the Polyisio. A good friend of ours dropped off a bunch of extra large cardboard pieces (thanks, Ed!) to make the templates, and we were rolling.
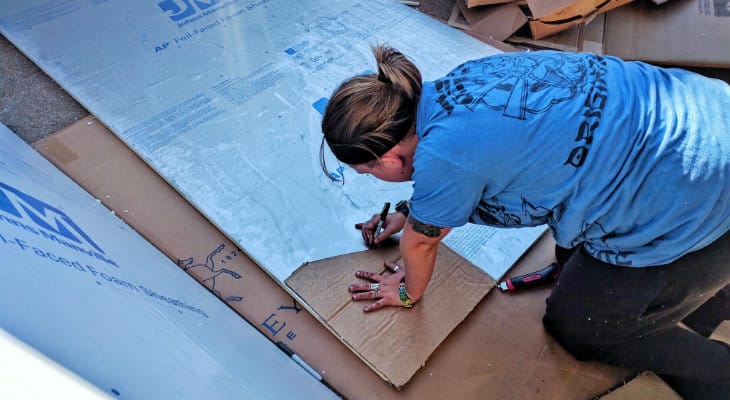
We started by roughly measuring each section and drawing these measurements onto the cardboard. We then cut out the templates, put them in place and cut them down until they fit perfectly. Once we were ready to move forward with cutting the actual sheets of insulation, we just laid the templates on top of the Polyisio, traced the outline with a Sharpie, and cut it out with a box cutter.
Some of the pieces fit perfectly snug right away and stayed up on their own and others needed to be trimmed down to fit. Finally, we made sure each piece stayed where we put it by spraying it with 3M High Strength 90 adhesive before sticking it to the wall. We did have a couple pieces give us some trouble, so we stuck those up with Gorilla tape.
Insulating the Ceiling
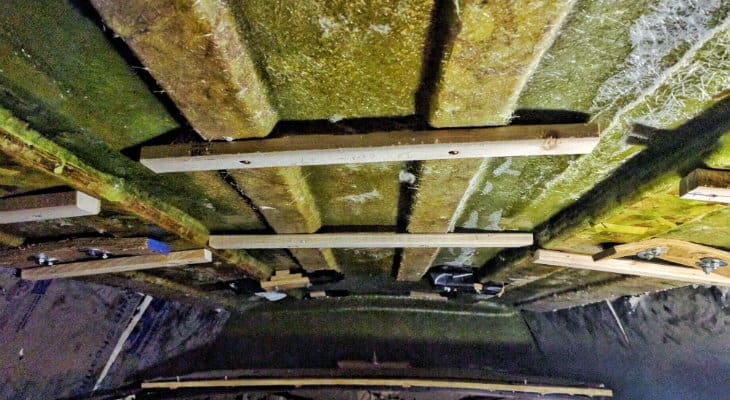
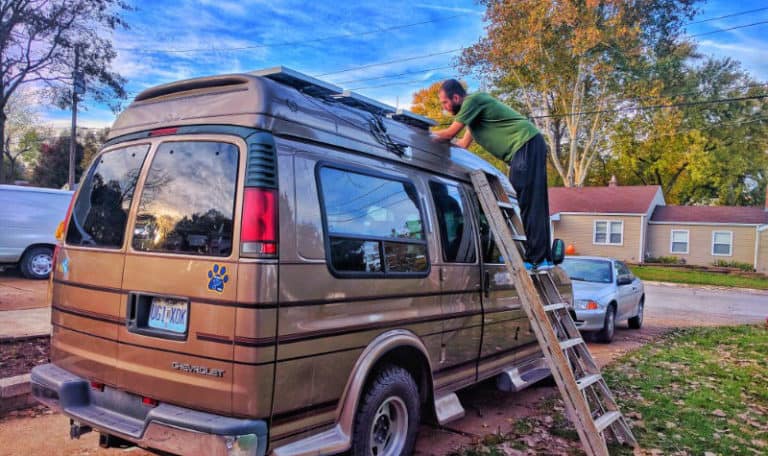
Before we started insulating the ceiling, we had some thinking ahead to do. The topper on our van is curvy with ridges, and is made almost entirely out of fiberglass. We eventually want to hang a wooden ceiling, and we needed some way to attach this to the topper.
We measured the width of the flat center part of the topper and cut 1×2″ “studs,” which we attached to the roof by screwing into the plywood bracing that runs from back to front within the fiberglass. When it’s time to hang the ceiling, we’ll screw it onto these studs.
To hang the Polyisio on the ceiling, we used the same process as we did for the walls: make cardboard templates, trace them on the insulation sheets, cut them out, and hang them in place. To hang the insulation to the ceiling, we used strips of 3M VHB tape instead of the spray adhesive, and also used some Gorilla tape for particularly stubborn areas.
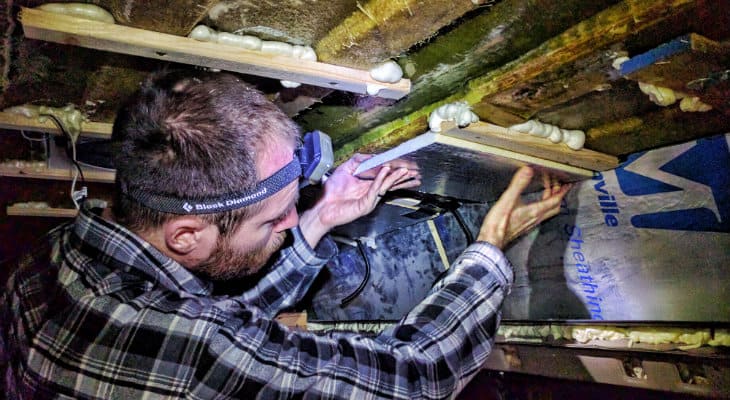
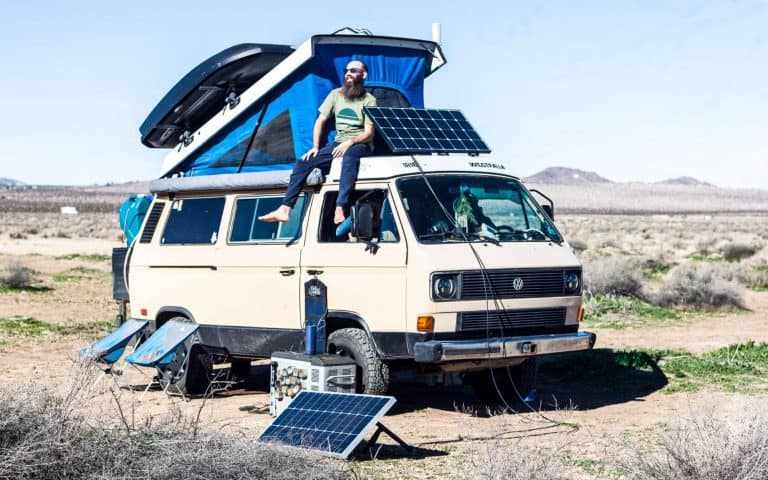
The 3M VHB Tape is some SERIOUS tape! It’s the same sort of tape they use to hang windows in skyscrapers, so you know — pretty strong! Many vanlifers use ONLY this stuff to attach solar panels to their van roofs!
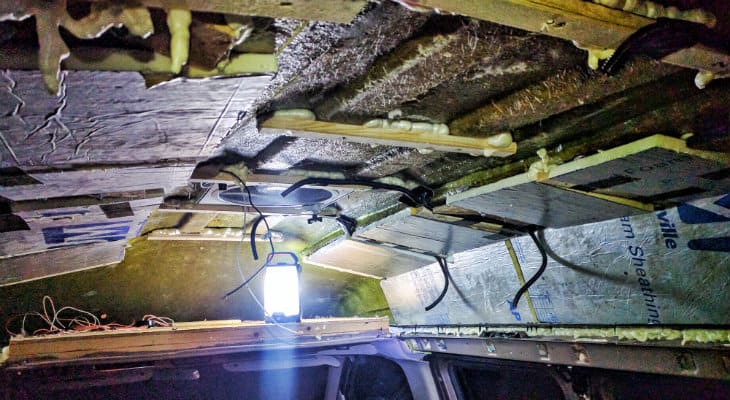
After we were finished hanging most of the insulation, we went around filling any gaps. For the bigger gaps we cut strips of Polyisio. For smaller cracks or harder to reach spots, we used Great Stuff Gaps & Cracks spray foam.
This stuff expands like crazy, so after it dried we had to go around with box cutters and shave off the excess so the walls and ceiling would have a flat, smooth surface.
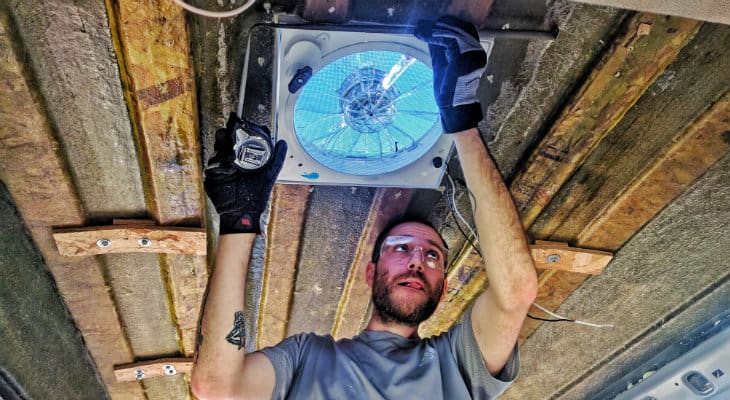
Make Sure to Think About Wiring!
We plan on having LED lights and a vent fan in the ceiling, as well as outlets in the walls. One of the next steps would be wiring and putting up the walls/ceiling, so we taped some conduit to parts of the ceiling where we plan to run wiring to our lights, etc.
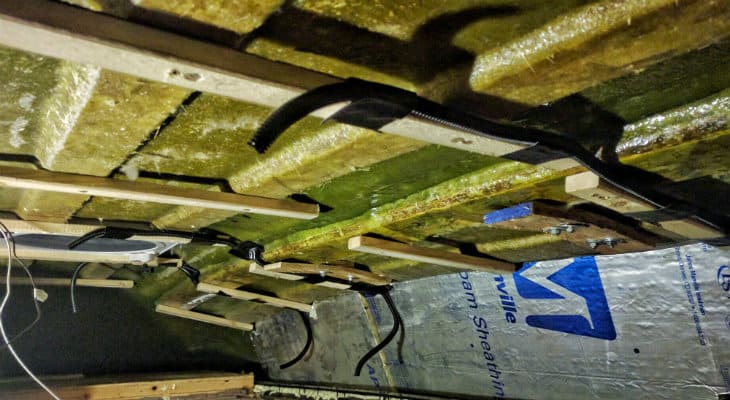
This way we have somewhere to run the wiring behind the walls/ceiling. It pays to think ahead at every step of a van build!
Insulating the Floor
We used Reflectix to insulate the floor. The R-value of Reflectix isn’t the greatest, but it’s better than nothing and it doesn’t cut much height out of the van.
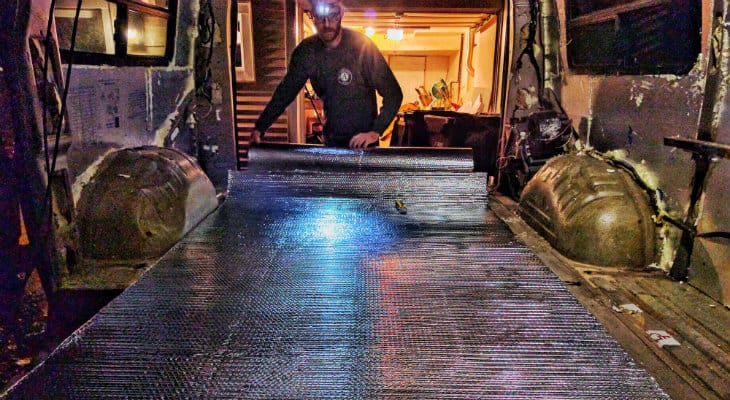
This was a pretty simple process. We unrolled a large piece from the front of the van all the way to the back and cut it to the shape of the rear of the van. This took care of most of the floor, except for the weird-shaped sections around the wheel wells. We made cardboard templates for remaining sections and cut the Reflectix to fit.
Van Build Tip: Keep all your templates! We used these same templates to cut the subfloor and laminate flooring to shape.
We used 3M High Strength 90 to hold the Reflectix down to the floor, and put Gorilla tape over the seams between the different pieces. We also covered the wheel wells and fuel pipe with Reflectix.

A Nice and Toasty Van!
The further we got on the insulation, the more we could actually feel the temperature difference. We were getting into the cooler weather of late October/early November, so it was pretty exciting and a great feeling of accomplishment being able to get into the van and take off our jackets due to the warmth.

Our van is now fully insulated and we’re looking forward to seeing the rest of it come together. We can’t wait to share the rest of our van build.
Thanks again for all the love and support and don’t forget to follow us on Instagram: @gnomad_home and on Facebook at: Gnomad Home.


Hey there! We have a 1997 Dodge 2500 conversion van that we’re planning on overhauling this spring. We spent six months in it with just some minor adjustments back in 2014, but we want to do a full remodel this go around. your site has been incredibly helpful for planning already! Thank you for being so detailed and taking such great photos of each step. I also noticed your comments below about shipping…hi Montana neighbor! Home base is Missoula for now!
Excited to keep up with y’all. Cheers!
Hi Sarah, thanks so much for the kind words, and we’re glad our site has been helpful! We’ve visited Montana twice on our travels, it’s a very beautiful state! We’re actually based in New Mexico. Best of luck with your van!
~John
Hey! I love you blog and have been using it to the max for my build. I was wondering, for the 1×2 studs you drilled into the ceiling how did you know where to drill? I’d imagine if you went too far the screw would come out of the other end of the fiberglass?
Hi Erick, so glad our site has been helpful! Our high top actually had visible plywood reinforcement strips embedded in the fiberglass, so that made it easy. We put up the ceiling in a friend’s van last year, and his high top had areas where the fiberglass material was much thicker than others (almost 2″ thick in some spots). This was only visible from the top, so we took measurements from the top and transferred it onto the ceiling on the inside so we would know where not to put a screw. But every high top is different, and it… Read more »
Hello friends. Quick question about insulating front doors with windows that roll down. Some serious issues here with making sure to keep mechanical bit free to move like window crank, door speaker, handle etc etc. Also, without a doubt water gets into doors with roll down windows. Theyre designed to be able to drain in fact. It’s inevitable. So what would be your strategy with these passenger doors? I don’t see anything on passenger doors in this build.
Cheers
Hi Colton, we did not insulate our passenger doors at all due to the issues that you mention. If you wanted to add a little something, these doors might actually be a good candidate for some reflectix since that won’t take up any interior space and will at least create a radiant barrier. We also have a curtain that separates the cab from the rear, and that helps provide insulation for the living space. Hope that helps!
~John
Hi Madeline, so glad it worked out! Hope to see you on the road!
Hi! I’m noticing the rear heater in your picture. Ours is there too and includes a bunch of big hoses running over the wheel well. We’re considering taking on ripping it out- curious if you guys did it yourself and what it was like? Thanks!
Hi Kara, we ended up taking ours out, but we didn’t do it ourselves. Ours was also a rear AC unit, so it had pressurized AC lines running to it under the van. Cutting these required a mechanic to drain the freon, then we had to go to machinist to have a custom cap fabricated for the line, then back to the mechanic to recharge the system. The heater line also had to be cut and diverted. This line is unpressurized so it could be a DIY job. Once these lines were taken care of, the unit easily unbolted and… Read more »
I just wanted to say, thank you so much for this information on the reflectix! I was actually trying to think of a better way NOT to have a gap because I’ve seen so much where they just sandwich it in. You saved me a lot of trouble and heat.
Of course Hallie, so glad to be of help! 😀
~John
Hey there! Thanks so much for the helpful tutorial, I’m about to start my own van build so having all this info is awesome. I do have a question about reflectix though. I’m intending to use foil backed eps foam insulation on the walls, and I understand why it’s pointless to use reflectix against the wall of your van, but what if you use foil backed insulation between the ribs of your van and then reflectix across the inside, attaching from rib to rib. I would think that would give the reflectix the proper gap it needed to work effectively… Read more »
Hey there, so glad this post was helpful! As to your question – there are a few things to think about. First, how deep are the ribs of your van? Ours are only about 3/4″ to 1″, so one sheet of foam fully filled the space. If you have deeper ribs, then that could certainly give you enough of an air gap (minimum 3/4″) for the Reflectix to be effective. But the next question is – how effective will it really be compared to just adding more foam insulation? The actual R-value of Reflectix is heavily dependent on air gap… Read more »
We are in the process of planning out our van build to begin early next month and so far this site has been extremely helpful! My biggest question is where to start? Are solar panels and ventilation the first step or insulation? Any feedback would help! Also living on the road, how do you go about online ordering things with shipping and all?
Thanks! Look forward to starting our own journey!
Hi Cierra, glad the site has been helpful! You can insulate the walls and put in flooring at any time, but if you’re planning on adding solar and ventilation I would personally do that before you insulate the ceiling. That way you’ll have everything exposed in case you need to do any reinforcing from the inside. That said, if you’re not planning on doing solar right away then don’t think you need to delay your build for it! You can always start with a good battery and a battery isolator for basic electrical and add solar later on if you… Read more »
Thank you for the step-by-step guide and the awesome collection of photos along the way. Do you have an estimate as to what insulating your van costs?
Hi David, glad you enjoyed the guide! We’re coming out with an even more detailed post on all aspects of van insulation soon, so stay tuned. As far as costs, we spent about $150 on the insulation (2 sheets of 3/4″ polyiso, 4 cans of spray foam, 1 roll of fiberglass, 1 roll of reflectix, and 2 cans of spray adhesive). In addition to that, we also made reflective insulating curtains that probably cost another $120 or so in materials. Costs can differ from van to van depending on square footage, amount of windows, etc. I hope that helps! Thanks,… Read more »
Awesome, thank you for the quick reply! Van insulation has got to be the most controversial and confusing topic in the vanlife world; I appreciate how detailed you guys are with everything.
We have windows nearly all the way around our van and I was considering permanently blocking/insulating a few of the rear windows that wrap around our bed in order to keep our sleeping quarters cozy. Is this necessary? And if so, how would your recommend insulating them?