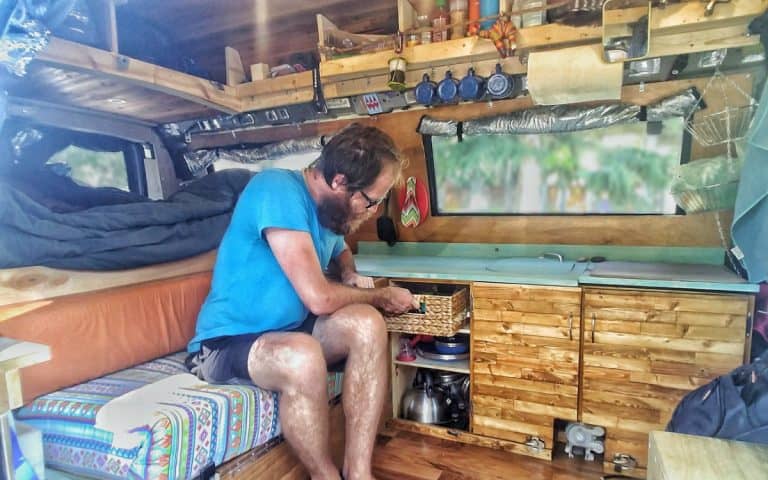
Last week we took a pretty big step in our DIY camper van build: we finally completed building, staining and finishing our kitchen cabinets and countertop. We continued the mismatched log cabin style we had going on our cedar plank ceiling, and we threw in some blue stain to add a splash of color to the van.
And let us just say that the cabinets look awesome! They’re now installed in the van, and we’re tantalizingly close to getting this thing on the road.
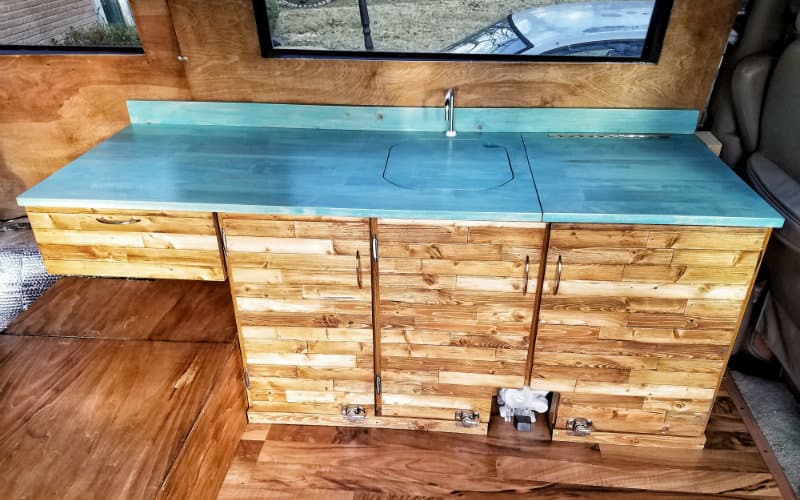
Aside from how everything turned out, the most exciting thing about finishing the cabinets is that we could finally install all those van kitchen appliances we bought months ago.
Here’s a look at what’s inside our kitchen cabinets, and why we chose what we did.
Camp Stove for Cooking
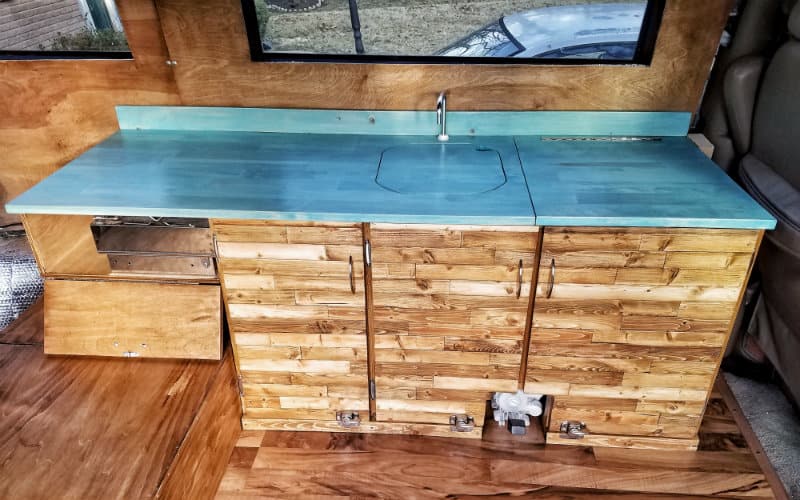
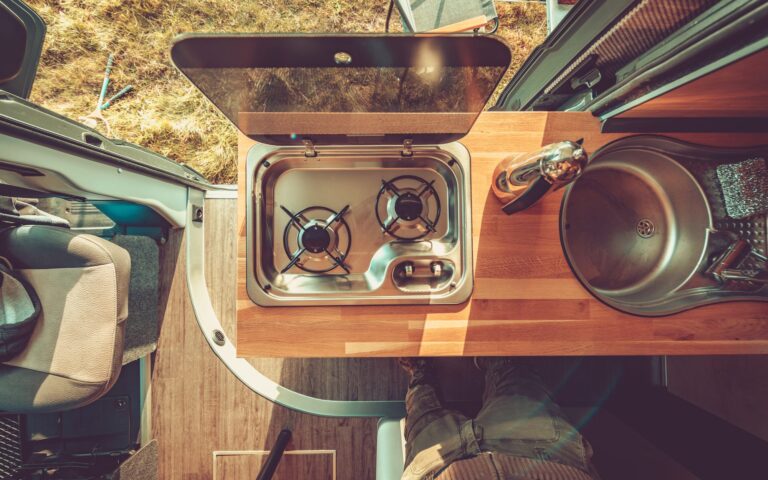
Starting on the left side of the van kitchenette, we have a flip open cubby that holds our stove when it’s not in use. We chose the Origo 3000 2-burner Alcohol Stove (since discontinued) rather than your typical propane stove.
Even though everyone seems to have propane stoves in their vans, we were kinda freaked out by the remote possibility of explosion and carbon monoxide filling our small living space. We know that propane is perfectly safe if you set it up correctly, but we wanted to rule out suffocation and violent death as much as possible :-).
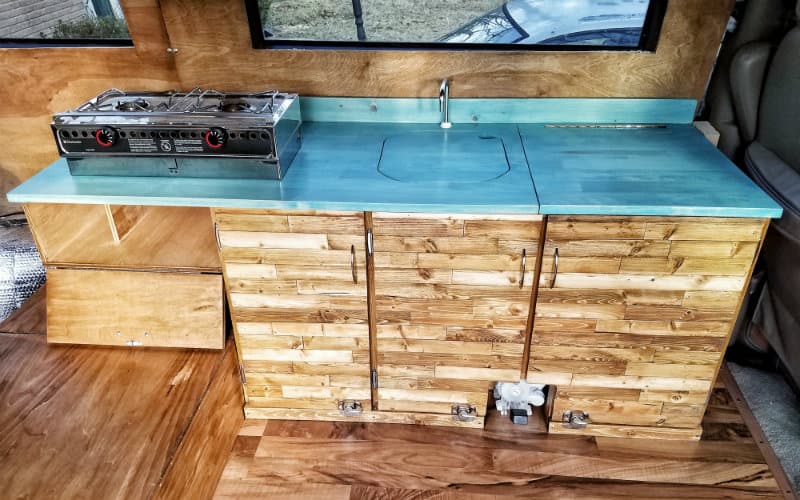
After much research, we saw the Origo 3000 alcohol stove recommended on The Vanual. No, it doesn’t run off of tequila and cheap beer. It runs off of denatured alcohol, which you used to be able to buy by the gallon at almost any hardware store, Walmart or REI. However, now due to law changes this fuel is almost impossible to find and this great little stove has been discontinued (no, you can’t have ours! We’ll still fight over this thing!).
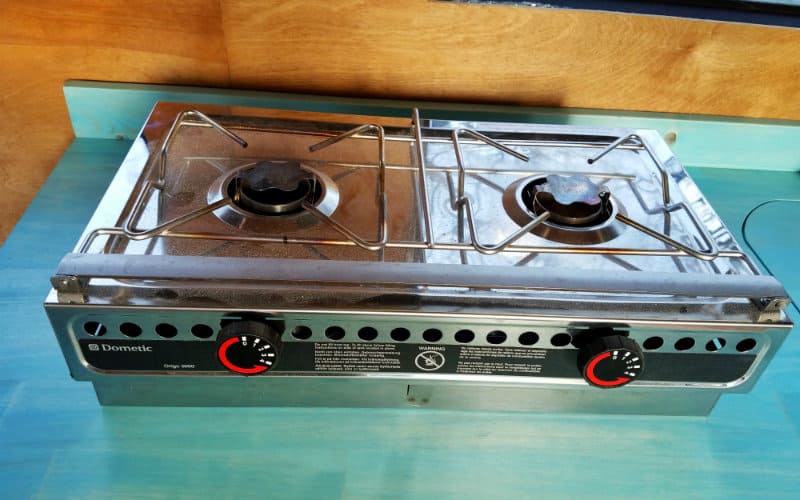
The stove is super simple to use. There’s a reservoir under each burner that you fill with alcohol. To light it, you turn the burner knob to open the lid above the reservoir and stick a lighter in. It’s completely non-pressurized, so there’s no risk of explosion.
Some people have complained about slower cook times on alcohol stoves vs propane, but our stove cooks everything just fine.
Storage Cabinet!
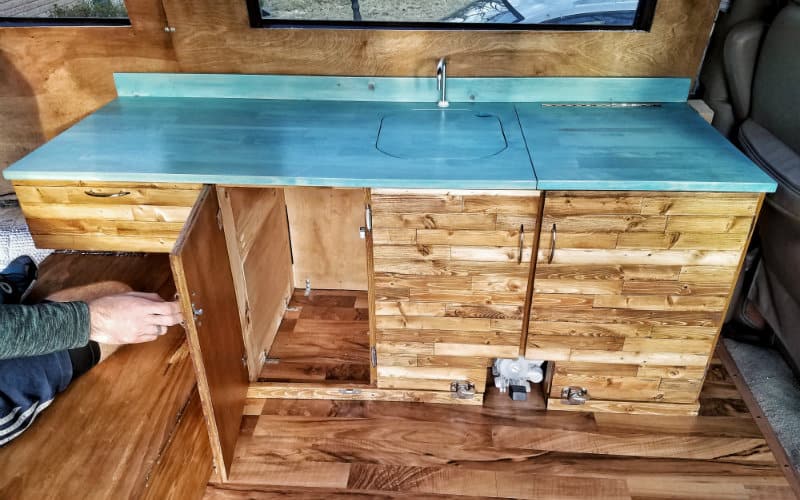
This will be general kitchen storage, where we will store our utensils, plates, bowls, cups, etc. Follow us on Instagram to see how it looks as soon as it’s officially set up!
Bar Sink and Drain Bucket
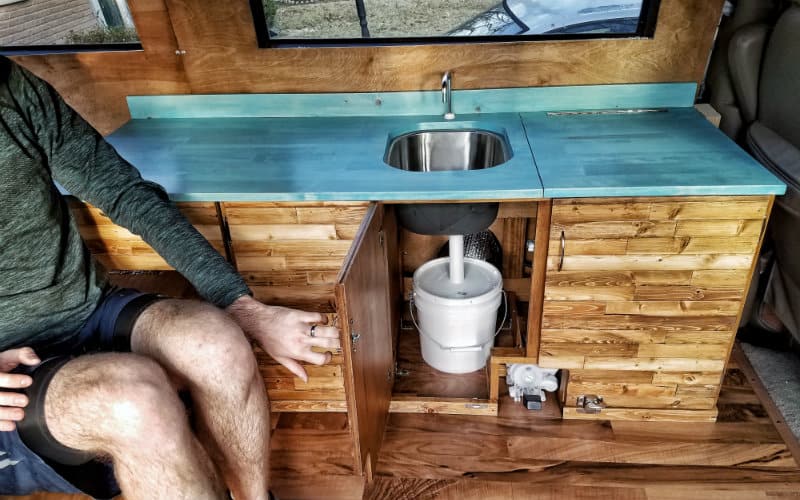
Next in line is our sink setup, which is part of our van life water system. We originally bought this 16-inch stainless steel sink, but a friend of ours had a spare bar sink lying around that he gave to us.
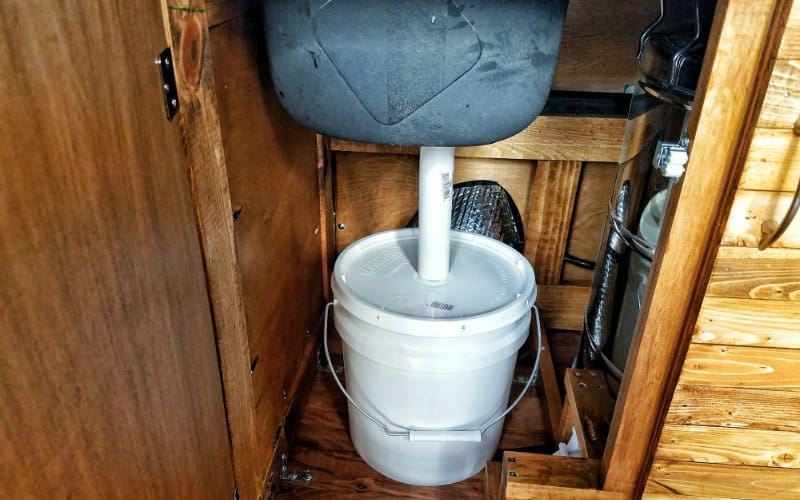
For drainage, we have a standard sink drain and drain pipe that feeds into a 2-gallon bucket inside the cabinet We won’t have too much wastewater to deal with, so it shouldn’t be a problem emptying this out as needed. We’ll also have the bucket ratchet-strapped to the vehicle frame so it won’t dump over when we’re driving.
Update: The 2-gallon bucket was too small and spilled easily. We upgraded to a 5-gallon container within a month of being on the road.
Whale Watering Systems Gusher Galley MK3 Foot Pump
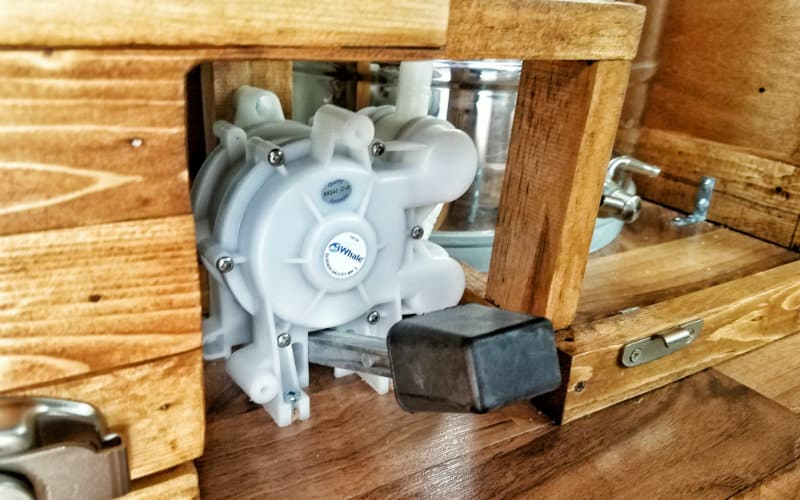
We decided to go with a manual water pump in our van. Not that electric water pumps aren’t great–we just like the simplicity and water savings of a manual pump. And the electrical install is intimidating as it is, so not getting an electric pump helped us cut down on components.
The pump we chose is the Whale Water Systems Gusher Galley MK3 Foot Pump. We built a little cut out for it in the bottom of our cabinet and screwed it directly to the floor. Hand pumps are cheaper, but we liked the idea of a foot pump because it allows us to wash things in the sink with both hands.
Whale Watering Systems Telescoping Faucet
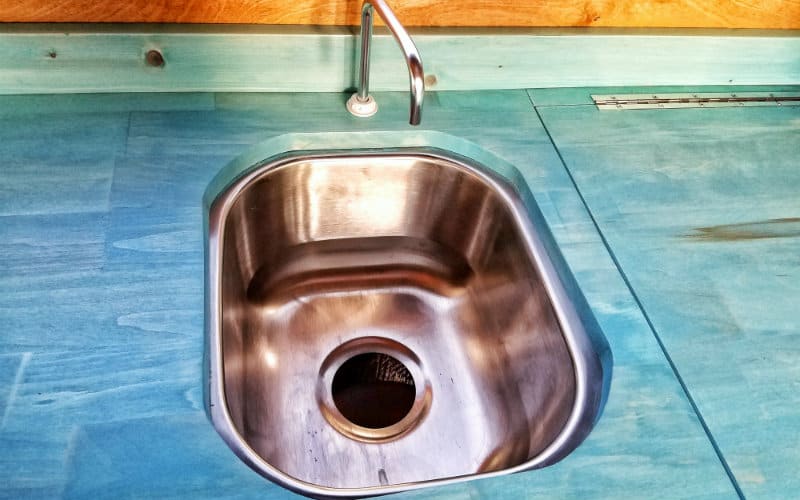
The Whale Systems Telescoping Faucet is made to be used with the MK3 foot pump, so it was an obvious choice. It attaches through a hole in the countertop behind our sink, and sits conveniently out of the way. When you want to use it, just extend it upwards like a telescope and position it over the sink.
Stainless Steel Water Tank with Ball Valve
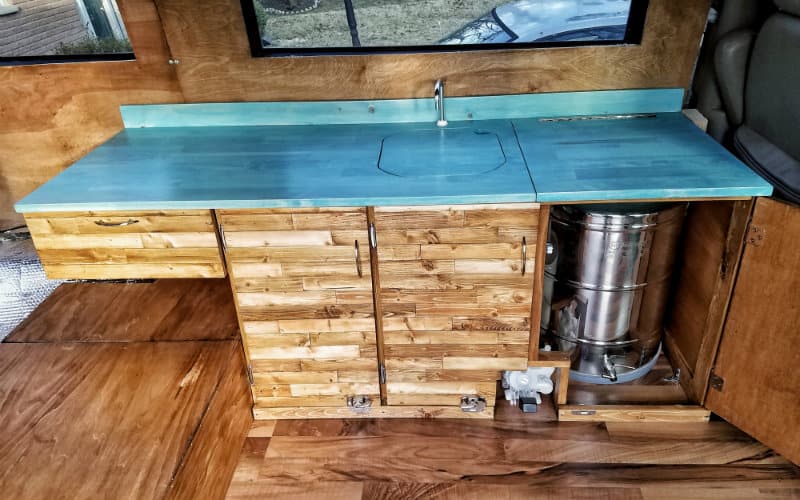
Most people go with inexpensive plastic water tanks, but we didn’t like the thought of chemicals leeching into our water. Taste was a factor too. The water from John’s old Nalgene bottle always tasted like plastic after sitting in there for a few hours.
Sure, you can get BPA-free containers that are advertised as water safe, but who knows what other harmful chemicals are getting into your water–especially if you’re storing it for days at a time.
We spent weeks researching options for non-plastic water tanks, but we couldn’t find anything that we didn’t have to order from a custom fabricator.
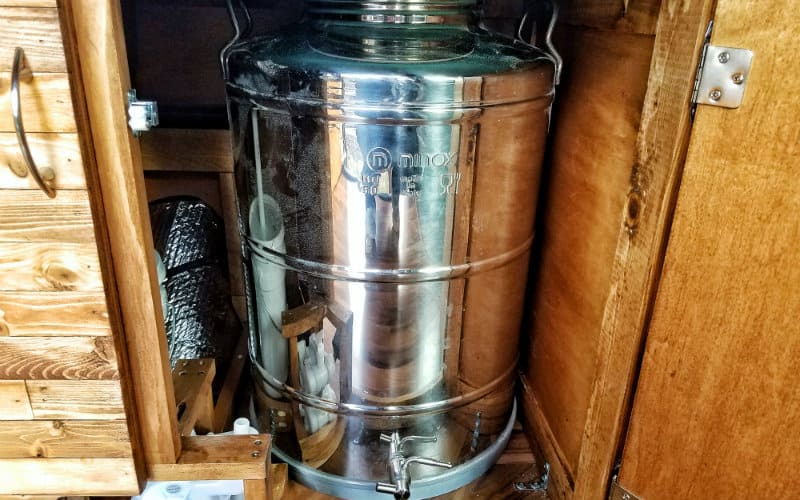
Finally, we stumbled upon this 14-gallon stainless steel fusti tank at MoreWine! Fusti tanks are used in the winemaking process, but they also work perfectly as van water tanks. They’re quite a bit more expensive than some of the plastic options, but we think it’s worth it for great-tasting, chemical-free water on the road.
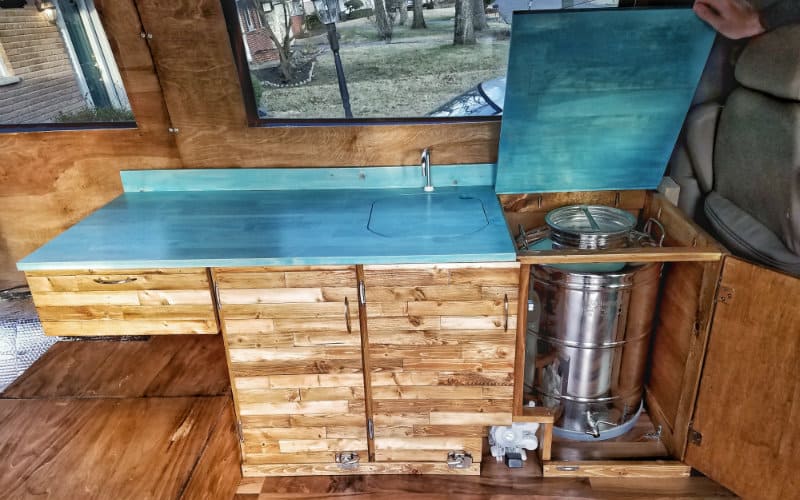
For refilling the water tank, we cut out a section of our countertop and attached a hinge. Whenever we need a refill we can just open this up and either run a hose or dump water into the tank.
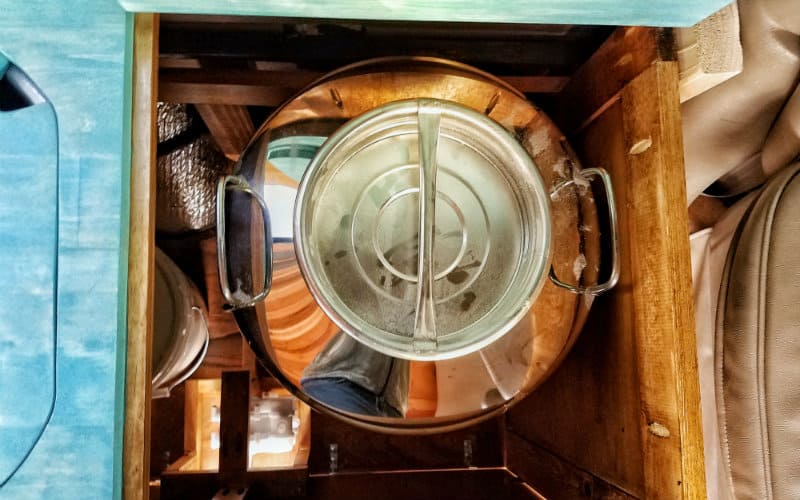
14 gallons should be plenty of water to last us for up to a week in the middle of nowhere. MoreWine! also sells a ball valve for the fusti tank that accepts ½” tubing, so we can connect it to our foot pump.
ARB 50-quart Fridge/Freezer
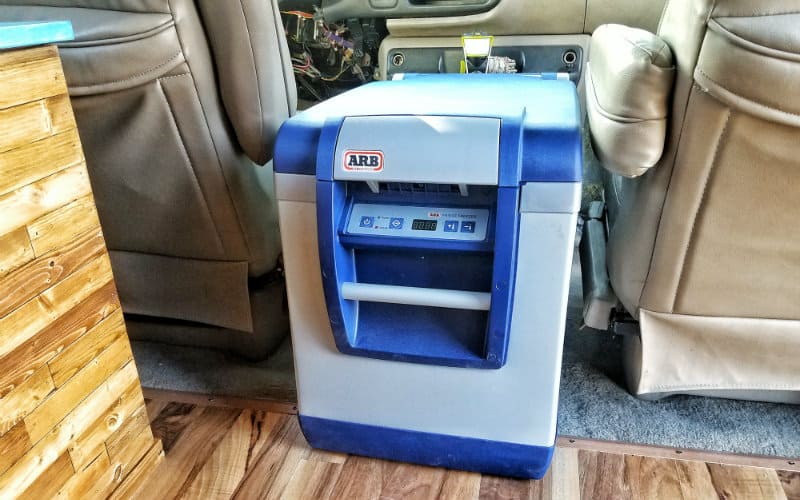
We were originally going to include our fridge inside the kitchenette, but then we realized that it fits perfectly between the two front seats. So we decided to put it in the front to free up room for storage in the kitchen unit.
When we were looking for a 12V fridge, we considered three options:
- Get something like a big Yeti cooler and keep it stocked with ice (biggest pain-in-the-ass)
- Figure out how to wire a standard mini-fridge into our 12V system (cheapest, also a pain-in-the-ass)
- Get a 12V vehicle fridge (most expensive, but easiest in the long run)
We eventually settled on getting a 12V fridge, and based on recommendations from other vanlifers we went with the ARB 50-quart fridge/freezer.
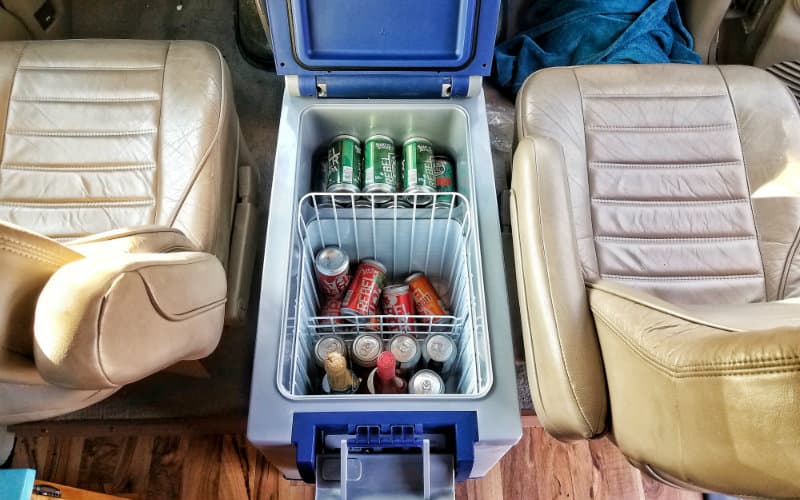
It’s energy-efficient, works as a fridge or a freezer (but not both at the same time), and it’s very spacious on the inside. And it’s designed for use on 4x4s, so it can take a beating.
We also heard a lot of great things about the Engel Marine Fridge.
Everything We Need in a Small Space
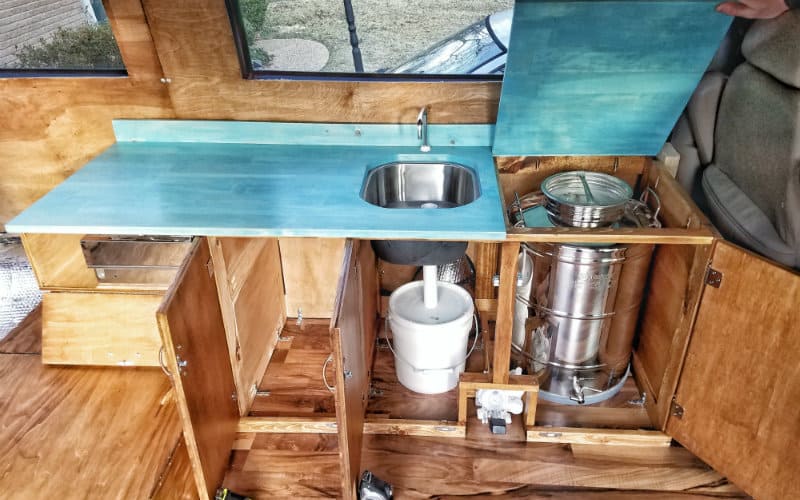
With our kitchen setup, we have everything we need to stay hydrated and cook some badass meals on the road. There’s not much you can’t do with a two-burner stove, a pot, and a frying pan. And the water system should be more than enough for our needs.
We cover how we actually planned and built the cabinets in another post. Next up is connecting the electrical system and building our bed frame.
For more adventures and van build updates, don’t forget to follow us on Instagram @gnomad_home, and on Facebook at Gnomad Home.

I love your water tank! Could you explain more about the ball valve and how it hooks up to the foot pump? THANKS!!!
Thanks, we love it too! We basically clamped beverage-safe clear vinyl tubing onto the output barb of the ball valve, and clamped the other end onto the input barb for the foot pump. The two barbs are different sizes, so we had to use two different size tubings (I believe it was 1/2″ tubing for the ball valve and 5/8″ for the foot pump), with a coupler in the middle that stepped up the size. Hope that helps!
This is mind blowing, thanks for sharing this precious information with us.
Hey- I’m wondering how did you connect the hose to your faucet, did you have to use any clamps? I just installed my whale pump faucet and it’s leaking… but it’s hard to see where. Just trying to reference if I need more grab. Thanks!
Hi Jackie, we used hose clamps on all of our plumbing connections, including the faucet, and have not had any issues with leaks (knock on wood). Hope that helps!
~John
Thank you for giving me a springboard with your blog. I’d never picked up a power tool before last week. Now I’ve done the floor and most of a kitchenette build! I am still intimidated by the wiring, however!
Hi Chad, that’s awesome, great work! We’re rooting you on from the Tetons! The wiring is definitely intimidating, but we were able to do it with zero electrical experience, so it’s doable! Let us know if you have any questions!
~John