It gets hot in the summer. Even hotter inside of a van – no matter how good your insulation and ventilation are. And when the sun’s beating down and making that temperature rise, sometimes you just need to park your van in the shade to help keep it cool.
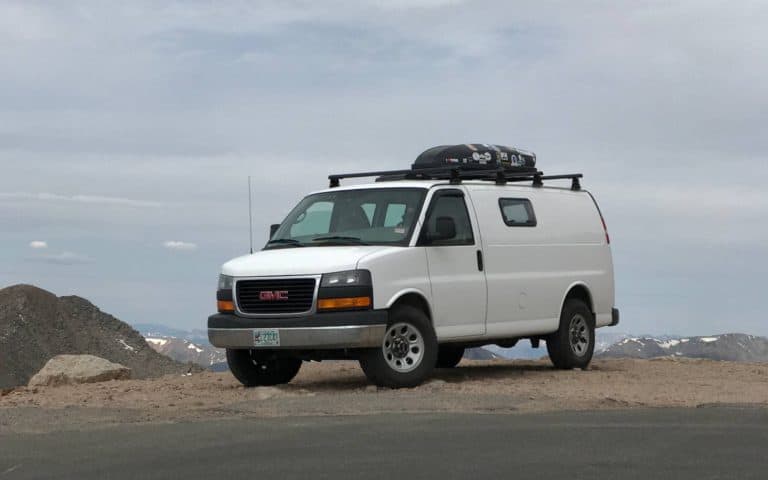
The problem with that, though, is we derive all of our electricity from the sun. We’re completely off-grid and hookup-free here at Gnomad Home, and without sunlight we can’t work, or charge our phones, or write these epic vanlife guides. And with our roof-mounted solar panels, we had no way to charge up our batteries without parking the van directly in the sun.
(Cue movie preview voice) …Until now…
With the help of the internet and our own ingenuity we built an easy portable, collapsible, and storable solar panel mount out of nothing but PVC and zip ties. We also rigged up a quick-disconnect wiring system. So now we can park the van under the trees, prop up our solar panel in a sunny clearing, and charge our batteries all day long.
Read More: The Best Solar Panels for Van Conversion Power Systems
What the @$*! Do We Do With this Extra Solar Panel?
When we originally put together our electrical system we bought Renogy’s 400-Watt Premium Solar Kit, which comes with four 100-watt panels.
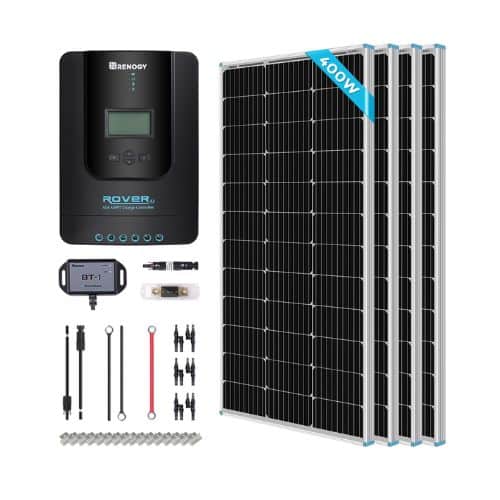
With 40A MPPT charge controller, 9BB solar panels, Bluetooth module, mounting brackets, wiring, and fuses.
Enter discount code Gnomad8 for 8% off at Renogy.com
But we could only fit three of them on our roof, which left us with an extra panel. The plan was to attach our fourth panel to some sort of tilt mount and install a plug-and-play wiring system so that we could roll it out if we needed some extra juice.
Read more: 9 Best RV Solar Panel Kits That Are Actually Legit
We bought a solar panel tilt mount from Amazon, but it just did not do what we needed it to. This mount was designed for fixed mounting on a roof, so it did not easily fold up for storage – we had to unscrew and screw in several wingnuts to set it up and break it down. It was also much wider than our solar panel and it just took up too much space in the van.
So, we decided to return it and figure something else out. We found a Youtube video showing a portable solar mount made out of PVC pipe and we just knew it was a great idea.
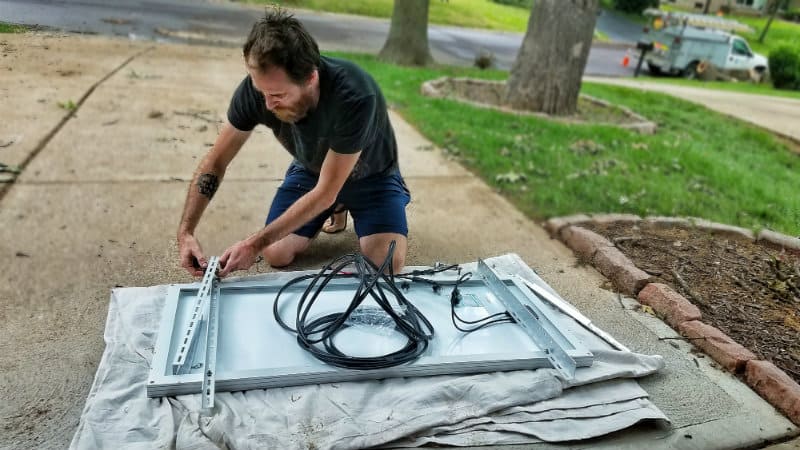
The video shows a mount for a small 30-watt panel, but we took the concept and completely redesigned it to work with our 100-watt panel. We also made it sturdier and improved the hinge mechanism. We now have a lightweight and compact solar mount that stores easily and sets up in just a few seconds. Here’s how we did it.
How to Build a Portable Solar Panel Mount
The Plans
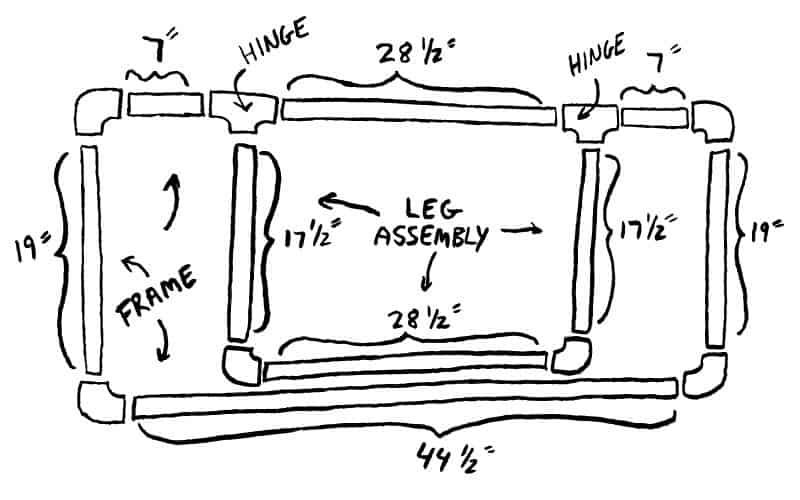
Measurements here are for a Renogy 100-watt panel, which is 21-¼” wide and 47” long. If you have a different panel, make sure to modify accordingly.
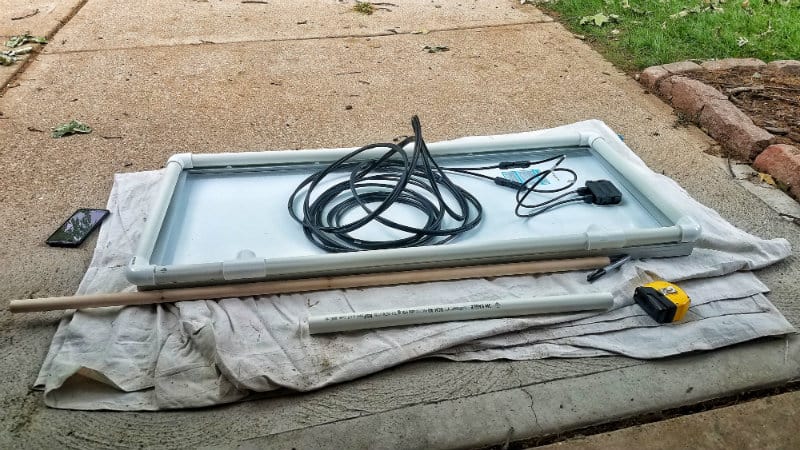
What You Need
Solar Mount
- (2) 10 ft lengths of 1” Schedule 40 PVC Pipe
- 1” Wooden Dowel
- (6) 1” PVC Elbow Fittings
- (2) 1” PVC T-Fittings
- PVC Cement and Primer
- 1-¼” Screws
- Heavy Duty Zip Ties
- (4) #6 Screw Eyes
- Tent Stakes
- Velcro Cable Ties
Quick-Disconnect Wiring
- Renogy 30-ft Cable with MC4 Connectors (10 AWG Wire)
- SAE Quick Disconnect Wire Harness (10 AWG Wire)
- Zamp Solar SAE Sidewall Port
- 12-10 AWG Heat-Shrink Butt Splices (the Yellow Ones)
- Wire Cutter/Stripper/Crimper
- Round Weatherproof Junction Box and Round Cover
- Electrical Tape
- 3M VHB Tape
- Dicor or Sikaflex Sealant
Step 1. Cut PVC to Length
Here’s all the measurements in list form:
- Sides: 2 @ 19”
- Bottom: 1 @ 44-½”
- Top/hinge Section:
- 1 @ 28-½”
- 2 @ 7”
- Legs:
- 1 @ 28-½”
- 2 @ 17-½”
- Wooden Dowel: 42”
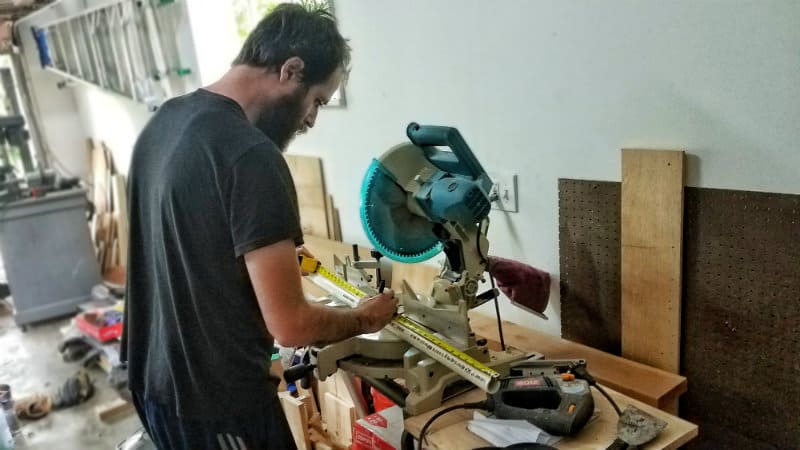
PVC cuts pretty easily, but you’ll want to make sure your cuts are straight. We used a compound miter saw, but if you don’t have access to power tools we recommend using a miter box.
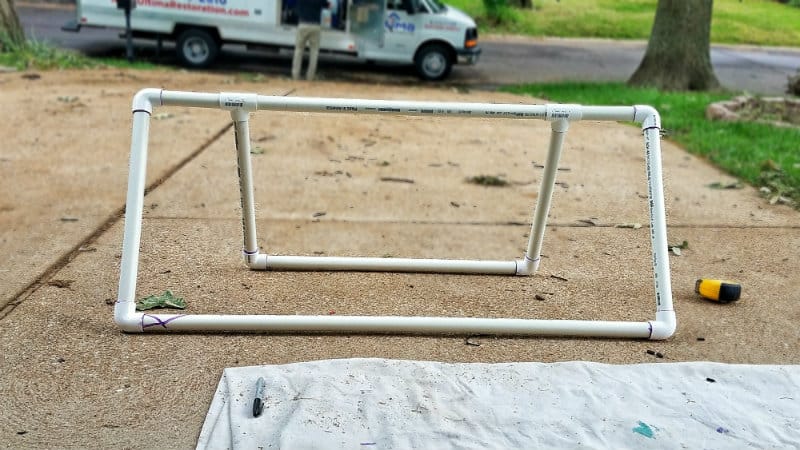
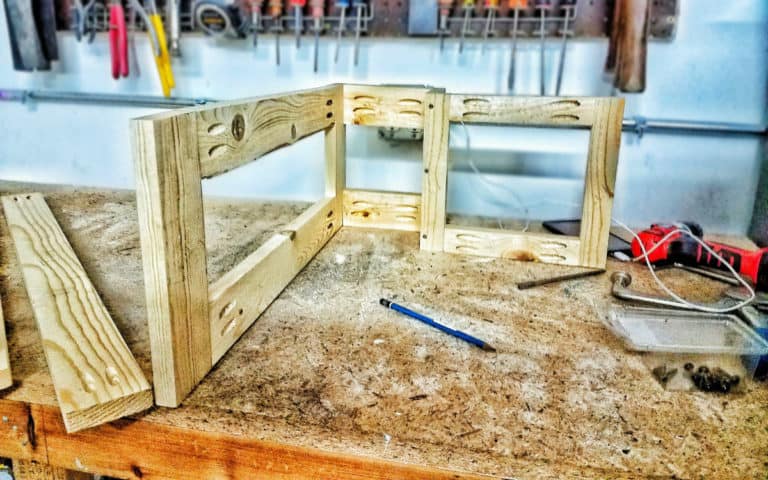
Step 2: Assemble and Test Fit the Pieces
Put the mount together and place it on top of your solar panel to check the fit.
Step 3: Disassemble and Reassemble (This Time Using PVC Cement)
Assemble the joints one-by-one, but this time coat both pieces in PVC primer and cement. Just do the main frame and the legs. Do not attach the legs to the T-fittings yet.
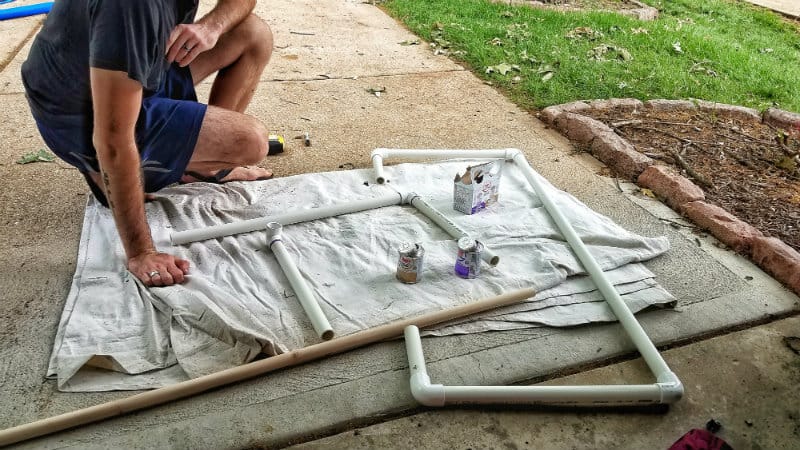
Tip: Make sure to press the PVC pipe firmly into the fitting and hold for 30 seconds. If you don’t hold it firmly, it might slide out a bit and screw up your measurements (we learned this the hard way).
Important: Do Not Cement the T-Fittings
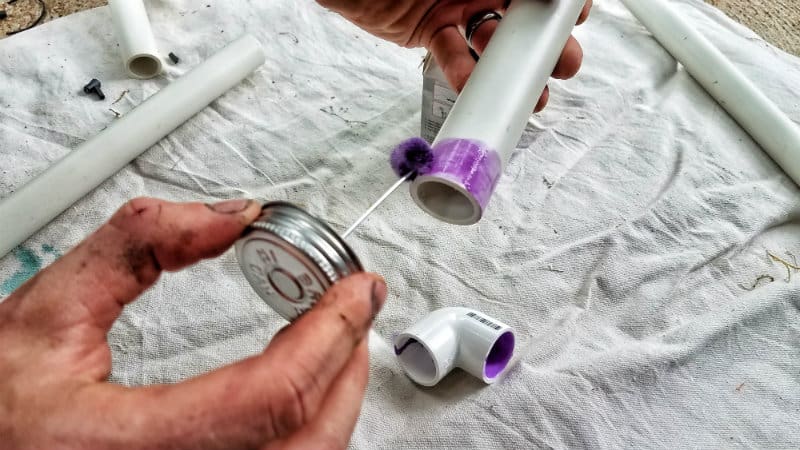
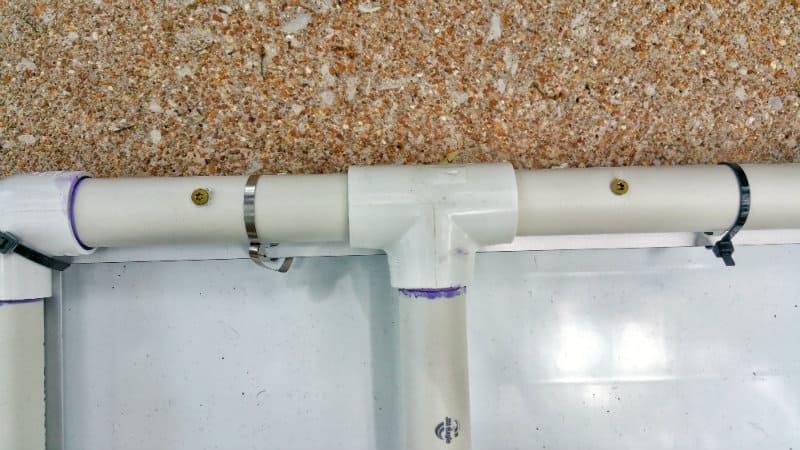
Step 4: Put Together the Hinge Assembly
The wooden dowel goes inside the PVC pipe to keep everything together for the hinge assembly. Your piece should look like this:
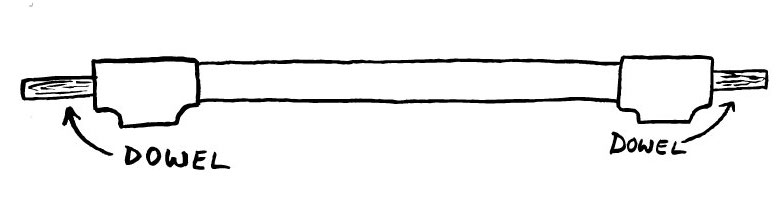
Insert the dowel into the top part of the frame and connect the t-fittings. Remember, do not cement any part of this hinge assembly. Pop some screws through the PVC pipe and into the wooden dowel to lock it in.
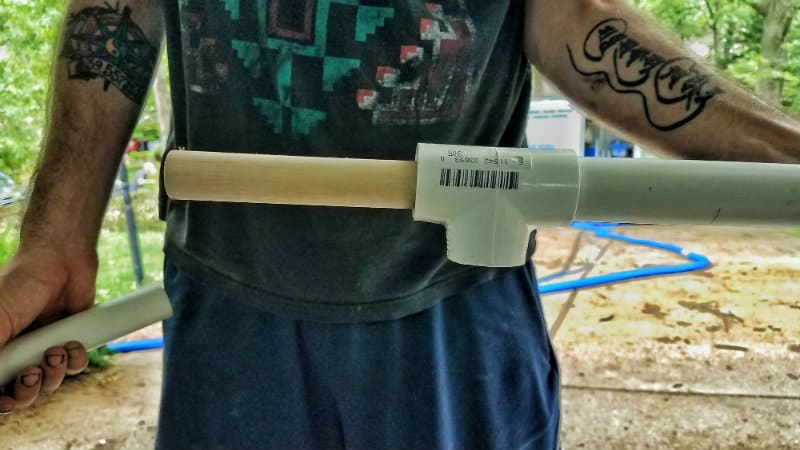
Step 5: Cement the Legs into the Hinges
Spread some PVC primer and cement on the legs and t-fittings and push them into place. Now you’ve got a free-standing solar mount with legs that easily swing out!
Step 6: Zip Tie the Solar Panel to the Mount
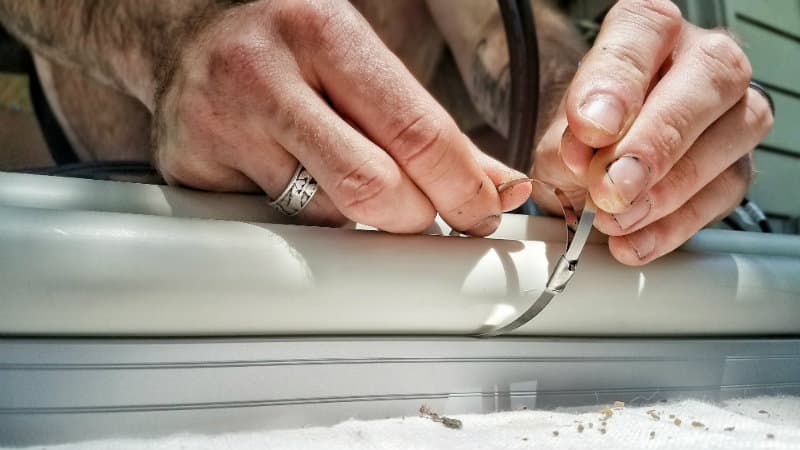
We used a combination of 11” stainless steel zip ties and regular plastic ones, threading them through the existing mounting holes on the solar panel frame.
Step 7: Install Screw Eyes for Tent Stakes
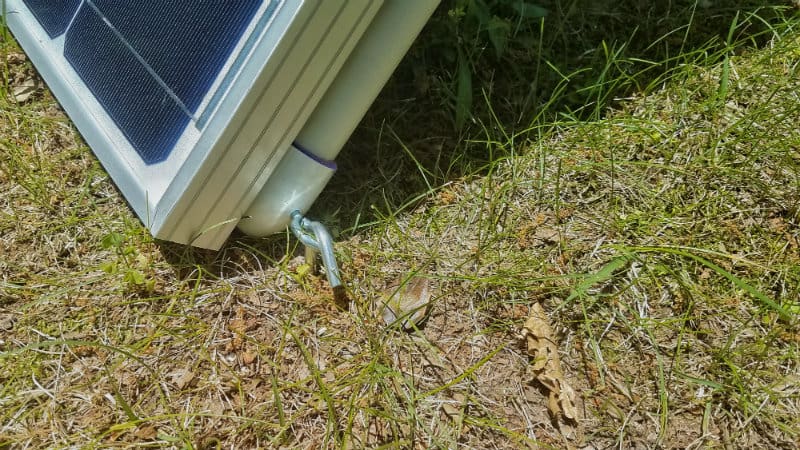
We added four #6 screw eyes to the bottom corners of the frame and legs so we can stake the mount down. Nobody wants their solar panel blowing over in the wind.
How To Wire a Quick-Disconnect System for Your Solar Panel
Now that we’ve got our mount, we need a way to plug it into our electrical system. We wired our roof panels in parallel using the Signstek Y-branch cable connector, so we had some open MC4 connectors to plug in to. MC4 connectors are great and all, but you need a special tool to take them apart, and that’s a no-go if you’re building something that’s supposed to set up quick and easy.
Thanks to the power of the internet, we discovered SAE connectors. SAE connectors were used on some older solar panels, and while we’re sure MC4 is better overall, SAE has the advantage of being quick-disconnect. So, we decided to wire up an SAE plug on the side of our van to hook our fourth panel into.
Step 1: Plug Extension Cable into Solar Panel
One end of the extension cable plugs right into the solar panel’s MC4 connectors. The other end is bare wire.
Step 2: Splice Extension Cable onto SAE Wiring Harness
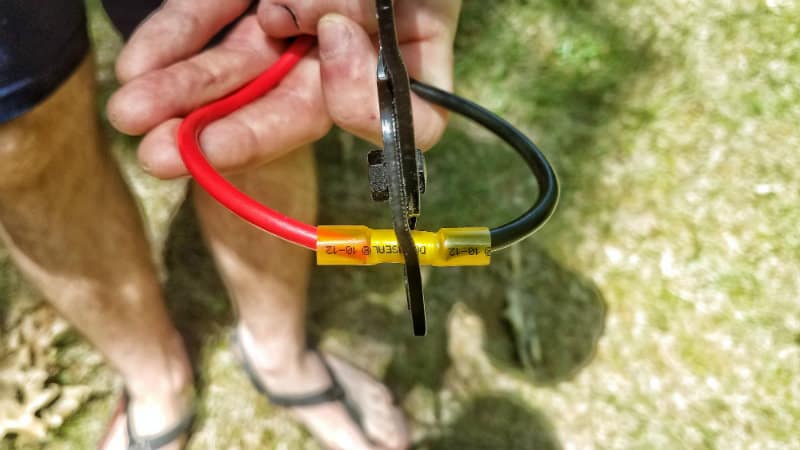
The wiring harness we used had two SAE connectors at either end, so we just cut the wires and used one of the connectors. Strip the wires and splice it onto the extension cable using a heat-shrink butt splice. Seal it by applying a heat source (a lighter works fine) and wrapping it in electrical tape.
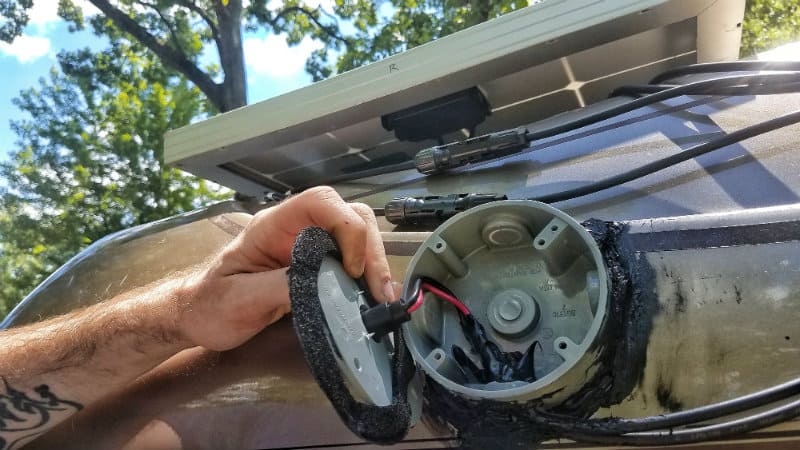
Step 3: Mount Sidewall Port in Junction Box Cover
Drill a hole in the junction box cover big enough for the SAE sidewall port, and screw it into the cover.
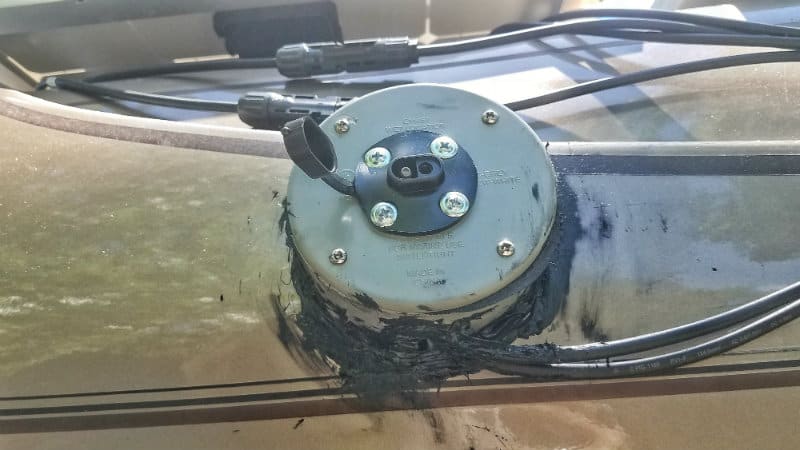
Step 4: Splice Signstek Y-Connector to Sidewall Port
First, cut the MC4 connectors off the Signstek Y-Connector. Then, feed the wires into the junction box and splice them to the SAE sidewall port wires with heat shrink butt splices and electrical tape (make sure to pay attention to positives and negatives). Finally, screw the cover onto the junction box
Step 5: Attach Junction Box to Van
Mount the junction box onto your van using 3M VHB Tape. Seal around the edges with the sealant of your choice (Dicor and Sikaflex both work great).
Step 6: Add Velcro Cable Ties for Easy Storage
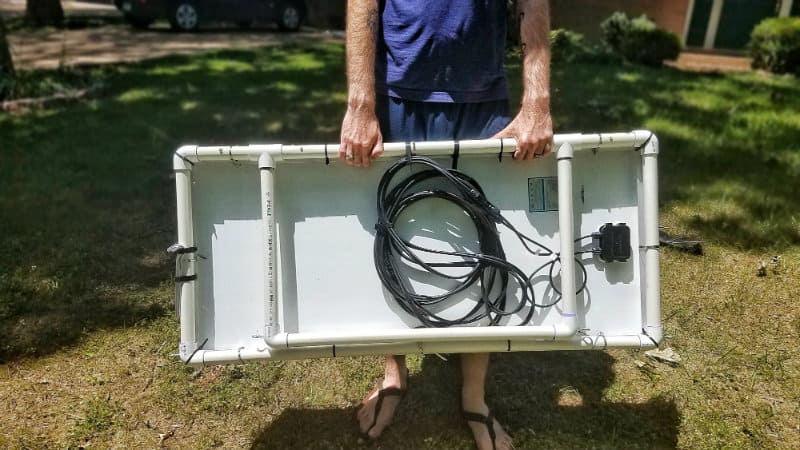
Adding some velcro cable ties to the frame lets us attach the tent stakes and wiring directly to the mount and makes storage a whole lot easier.
Portable Solar Power All Day!

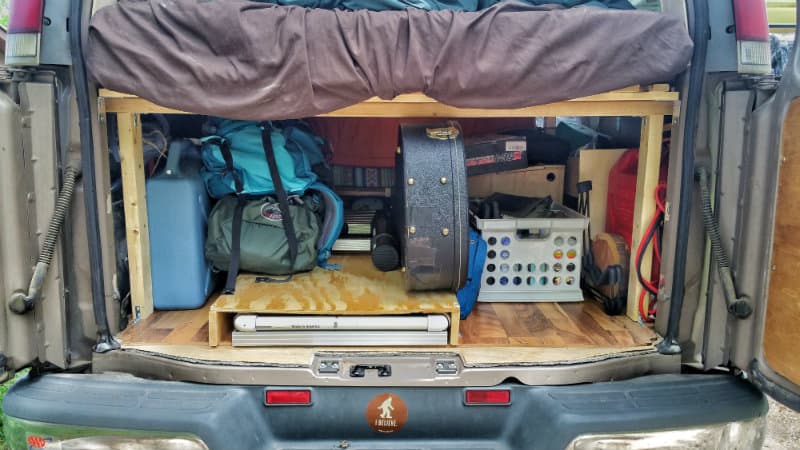
Things are way cooler inside Gnomie these days since we’ve been parking in the shade a lot more. We now have a use for our fourth solar panel, and we couldn’t be happier with how the PVC mount turned out. And we store it under this plywood platform we built, so it barely takes up any room in the van.
Stay tuned for more van build guides, travel updates and van life tips. And don’t forget to follow us on Instagram @gnomad_home and on Facebook. Cheers!

Thank you. Great DIY project!
This is good and very helpful. I am going to make a smaller one for my panel and let the panel hang out on each side. It should still be very stable if I peg it to the ground.
So glad this was helpful!
Verry tremendous helpful, it is might better to understand to add a picture in every bold tittle stages.
Thanks you very much 🙂
Hi Zuhdi, I’m glad the article was helpful and thanks for the suggestion!
How did you get 3 panels on that contoured roof? It’s similar to mine and I’m torn with how to install enough panels.
Hi Kathy, mounting our panels was a bit of an adventure. We had to make spacers to go under the brackets in order to get the panels as level as possible. This post details exactly how we did it. Hope that helps and best of luck!
~John