Where do we house all of the electrical components in our van build? We have two big AGM (absorbed glass mat) batteries in our van, and we decided to build our own battery box out of plywood.
With a sealed battery like AGM or LiFePO4, a battery box isn’t required. If charged and discharged properly, sealed batteries should not leak or vent corrosive gasses – two reason why battery boxes are a must with older wet cell lead acid batteries. But we still thought it was a good idea to have a battery box for our batteries because it would:
- Create an enclosure to keep the batteries separated from everything else in our rear storage area
- Protect the battery terminals from shorting or coming into contact with anything they shouldn’t
- Prevent dust, dirt, grime, and dog hair from getting near the batteries
- Provide some insurance in case something did go catastrophically wrong with the batteries or charging system
Some may argue that a battery box is unnecessary for AGM batteries, but we just felt safer having one. And because our batteries are a weird size, we couldn’t find any commercially available battery boxes that would fit them. So, we built our own. This post describes how.
Do You Even Need a Battery Box?
Honestly – probably not (that is, unless you’re running old school flooded lead acid batteries).
Most batteries you’ll actually buy these days are either maintenance-free AGM batteries or Lithium Iron Phospate (LiFePO4 or LFP) batteries, neither of which require being contained. We recommend covering the terminals in some way, but a dedicated battery box is extreme overkill.
Designing Our Battery Box
We built our battery box to house our two VMAX 155ah deep cycle batteries. These batteries are about 13-½” long, 6-¾” wide, and 11-½” tall. We decided to have them sit side by side, so the inside of our battery box had to be about a 14” x 14” square. We also wanted plenty of room above the battery terminals.
Here are the pieces we cut:
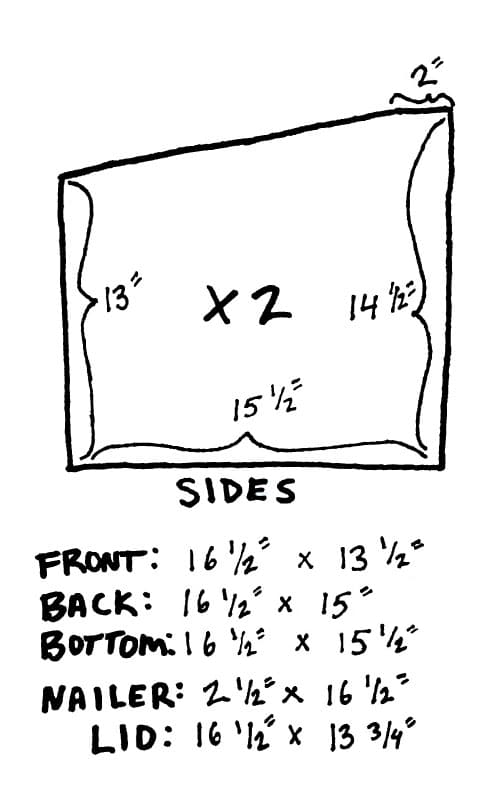
The battery box is taller in the back than in the front. We made the top of the battery box angle upwards for two reasons:
- It will make it somewhat easier to open the lid and access the batteries once the battery box is mounted underneath our pullout queen-sized bed frame.
- If our batteries did release hydrogen gas, the raised area gives it somewhere to rise and vent out through the vent holes that we drilled. Hydrogen can be explosive when confined to a small area like a battery box, but is less dangerous when vented out to the larger area of our van. Note: It’s extremely unlikely that AGM batteries will vent gas. This is all precautionary.
We also lined the inside of the battery box with plastic to help contain battery acid in the (extremely unlikely) event of a spill. This step is completely optional, and if you have LiFePO4 batteries it’s completely unnecessary.
Constructing the Battery Box
What We Used to Build Our Battery Box
- ½” Birch Plywood
- 1×3 furring strips
- 6 Mil Plastic Sheeting
- 1-½” Angle Brackets
- 1” Pocket Hole Screws
- 1-¼” Pocket Hole Screws
- 1” GRK Cabinet Screws
- 1-¼” GRK Trim Head Screws
- 1-½” Spade Drill Bit or Hole Saw
- 3/4″ Self-tapping Screws
- 12” Piano Hinge
- Safety Hasp (Latch)
- Gorilla Tape
- 3M High Strength 90 Spray Adhesive
- Titebond II Wood Glue
- Tie Down Straps
- Light Duty D-Ring Anchor Points
- Kreg Jig Pocket Hole Kit
- Cordless Drill
- Carpenter’s Square
- Jigsaw
Step 1: Measure and Cut Plywood Pieces
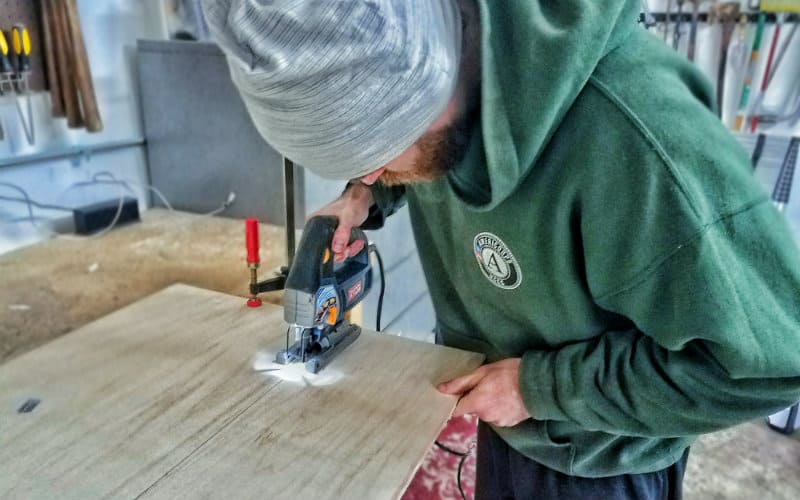
First, we cut out all the plywood pieces with our trusty jigsaw. For the angled pieces, we drew the measurements on the plywood first using a carpenter’s square.
Step 2: Drill Pocket Holes
We attached all the sides of the box together using pocket holes. If you’re not familiar with pocket hole joinery, it’s a game-changer when it comes to building things out of wood. Check out our guide to using pocket holes in a van build.
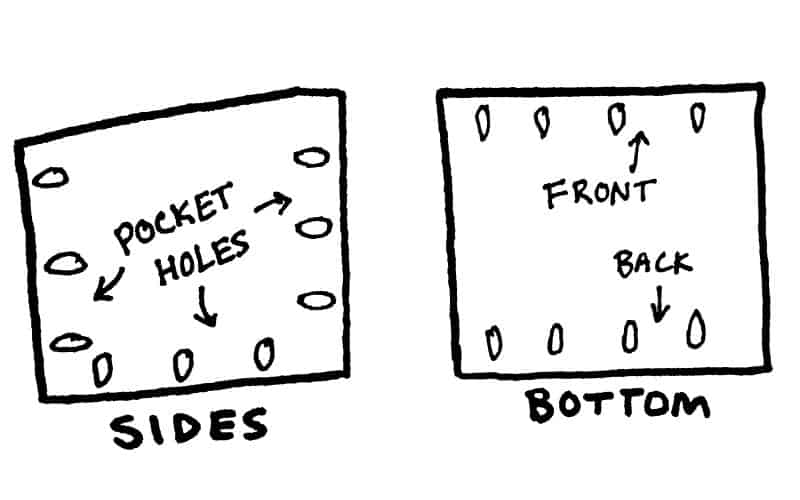
The angled side pieces got pocket holes on three sides – every side but the top. The bottom piece got pocket holes on the sides facing the front and back of the box.
Step 3: Screw Box Together
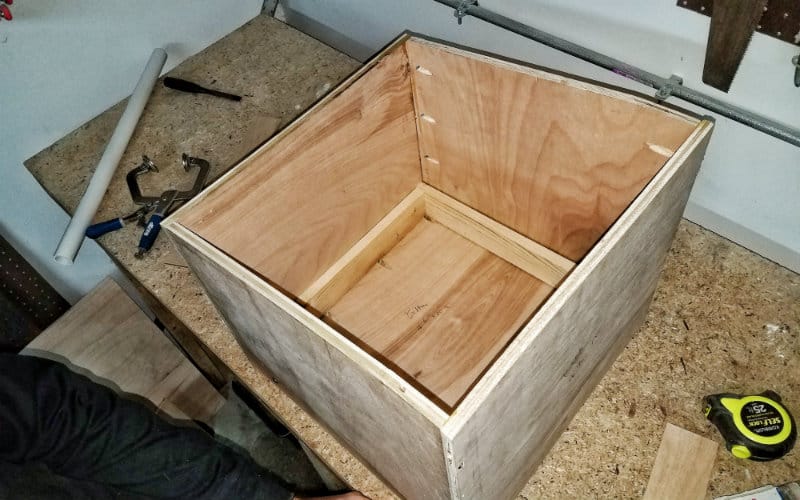
After drilling the pocket holes, we screwed the box together using 1” pocket hole screws. Our Kreg right-angle clamp really helped keep everything lined up and in place while we drove in the screws.
Step 4: Cut 1×3’s for Spacer
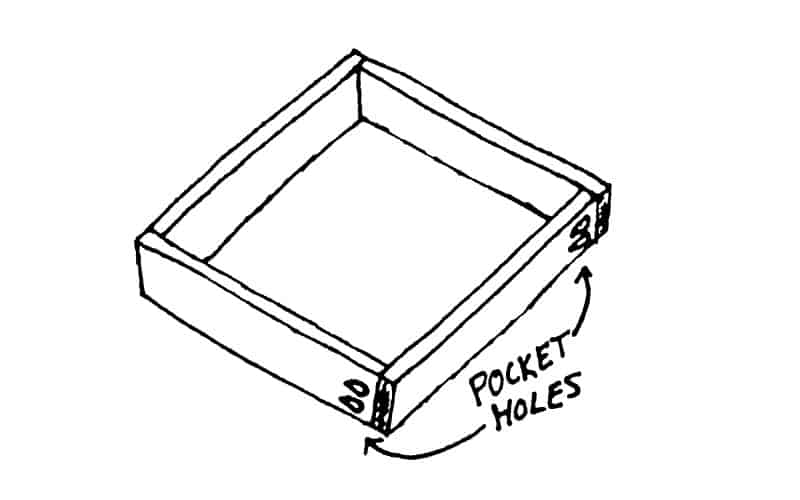
Since we designed our battery box with some wiggle room to allow for airflow, we needed a way to keep the batteries in place inside the box. So, we made a spacer out of 1×3 furring strips arranged into a square and attached together using pocket holes and 1-¼” pocket hole screws.
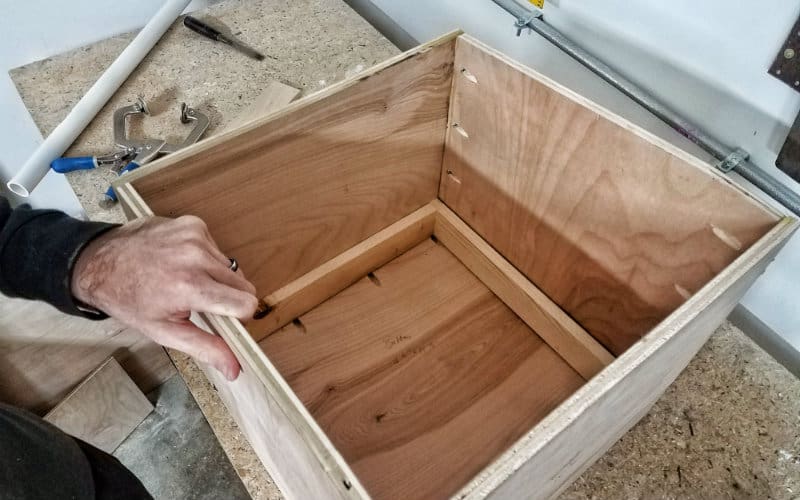
The spacer fits perfectly in the bottom of our battery box.
Step 5: Install Spacer
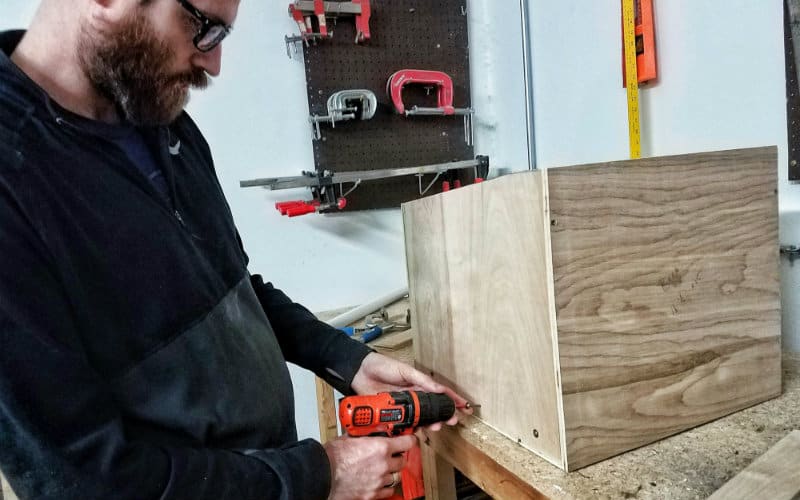
Once the spacer was set in place inside the battery box, we permanently attached it using 1” GRK cabinet screws driven in from the outside.
Step 6: Make Sure the Batteries Fit
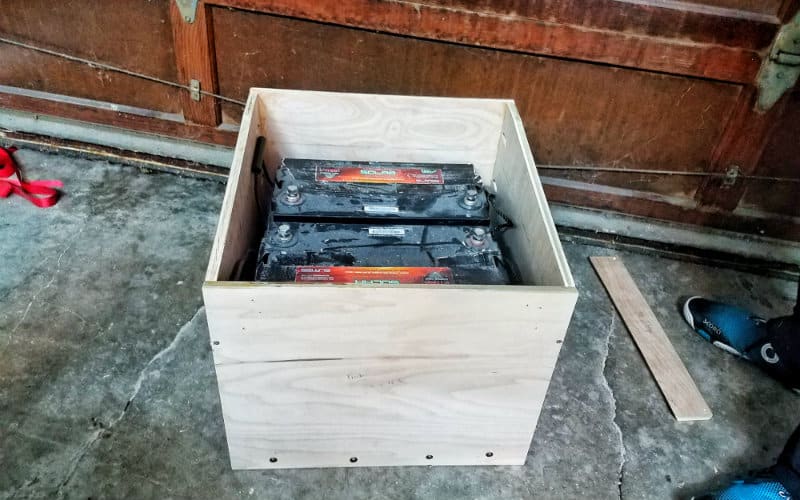
Dry-fitting the batteries proves that we didn’t screw up any of our measurements!
Step 7: Drill Holes for Vents and Wiring
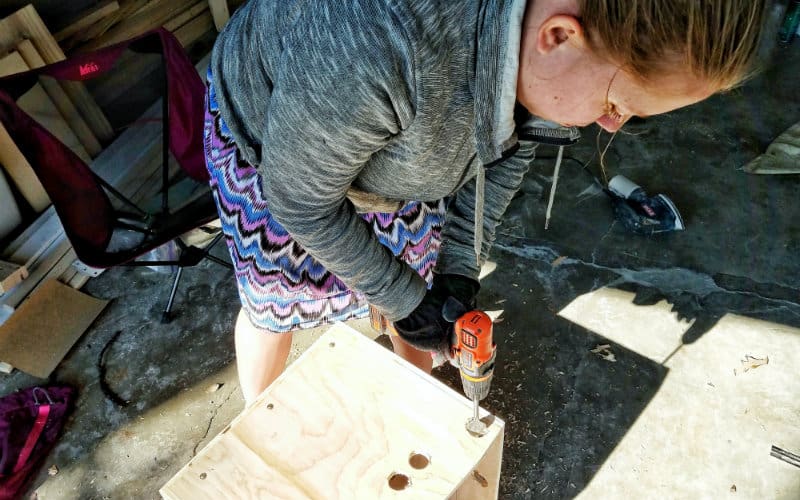
For ventilation, we drilled several holes in the front, sides, and back of the battery box using a 1-½” spade drill bit (a hole saw would work too). The front of the battery box got four holes a few inches down to allow for fresh air to flow in. We drilled holes right at the top of the angled side pieces and three more holes along the top of the back piece to let any released hydrogen rise up and escape (this is very unlikely with AGM batteries).
We also drilled holes about halfway down on the left side (the side closest to the rest of the electrical components) to run our wiring through.
Step 8: Install Anchor Points for Ratchet Straps
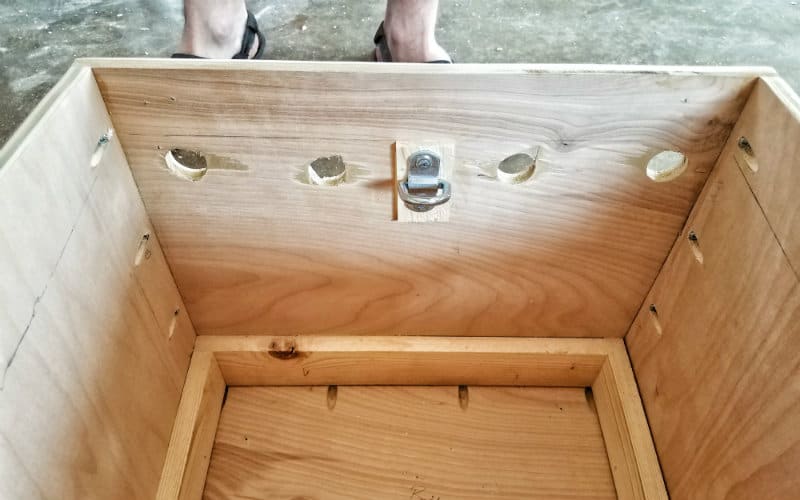
Two D-ring anchor points inside the battery box (one on the front and one on the back) let us strap our batteries down. To install them, we used a piece of ¼” plywood as a spacer, Titebond II wood glue, and ¾” self-tapping screws.
Step 9: Layer Plastic Sheeting Inside Box (optional for AGM or LiFePO4 batteries)
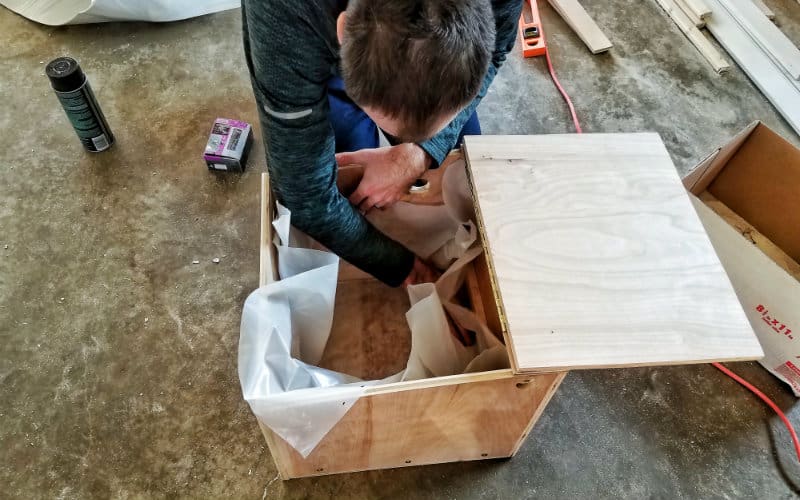
We layered the inside of the battery box with plastic – just in case something goes catastrophically wrong and we have an acid leak (again, very unlikely with AGM batteries). Battery acid will eat right through wood, but plastic will contain it.
We bought a roll of 6-mil plastic sheeting and glued in four layers (extending about halfway up the inside of the battery box) using 3M High Strength 90 spray adhesive. We also used Gorilla tape to stop the top from folding in.
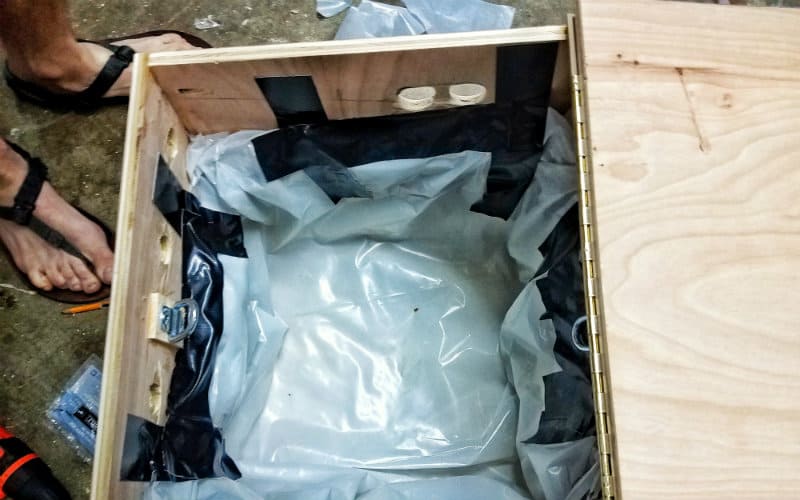
If you want something that looks cleaner and you’re willing to get your hands dirtier, you can also use epoxy and fiberglass to layer the inside of a wooden battery box. We thought lining it with plastic was easier.
Note: This step is not strictly necessary with AGM or LiFePO4 batteries.
Step 10: Install Lid, Hinges and Latch
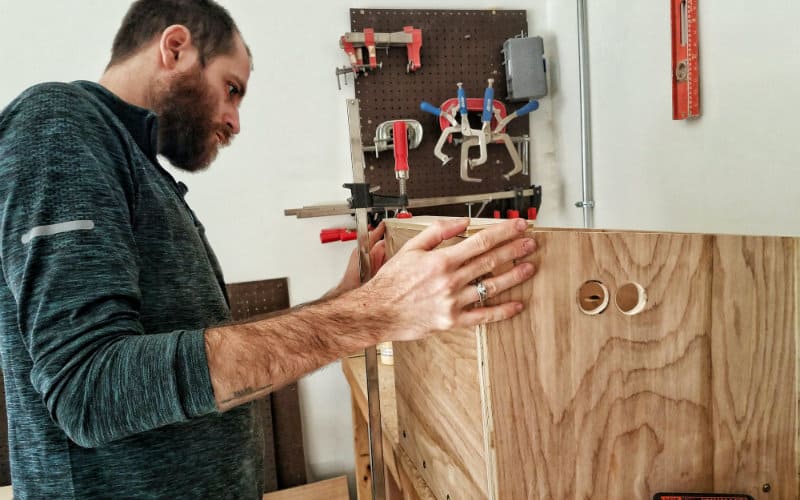
First, we screwed and glued a nailer strip to the flat section at the top of the battery box using 1-¼” GRK trim head screws and Titebond II wood glue.
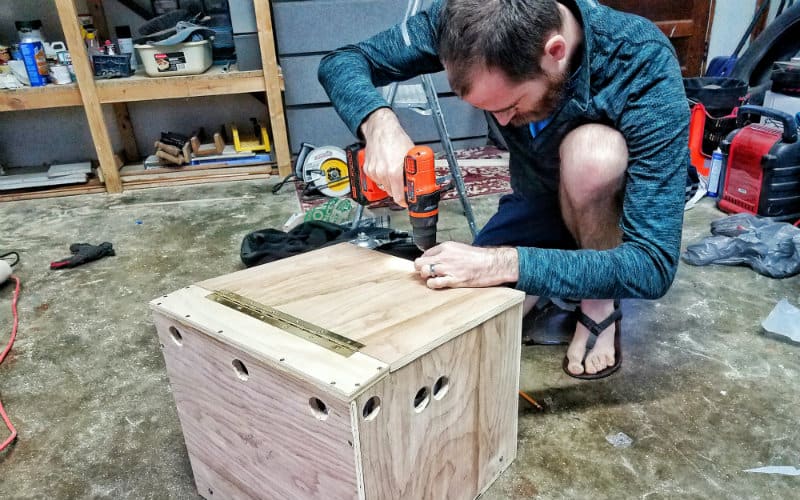
Then, we set the lid in place and installed the piano hinge and safety hasp latch.
Update from the Road
In practice, it proved a bit difficult to fully open the lid of the battery box once it was mounted under our bed. To fix this, we cut the lid in half and added another hinge, so that it needs less overhead clearance to fully open.
Step 11: Admire the Finished Battery Box
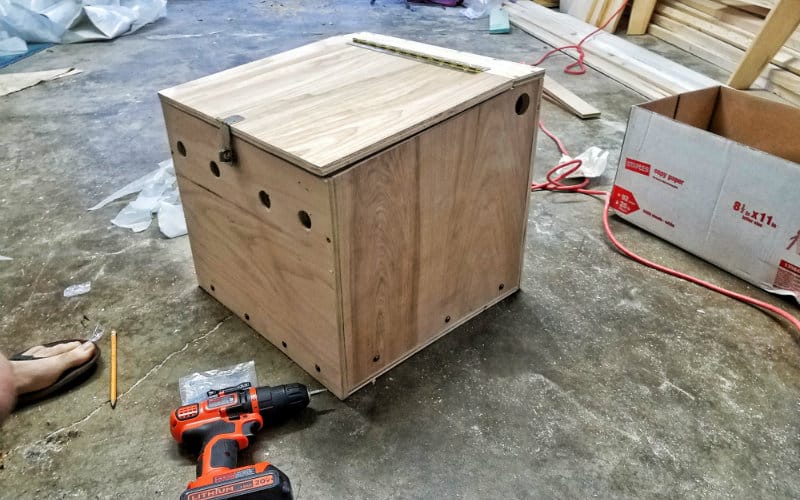
It’s always important to take the time to reflect on your progress.
Step 12: Mount Battery Box Inside Van
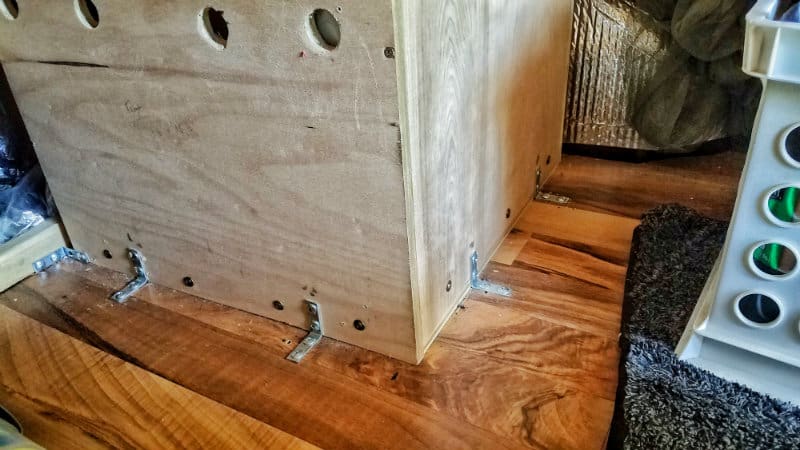
Once we had the battery box positioned where we wanted it, we screwed it directly to the laminate flooring and bed frame using a whole bunch of 1-½” angle brackets and ¾” self-tapping screws. This thing’s not going anywhere!
Step 13: Secure Batteries with Tie Down Straps
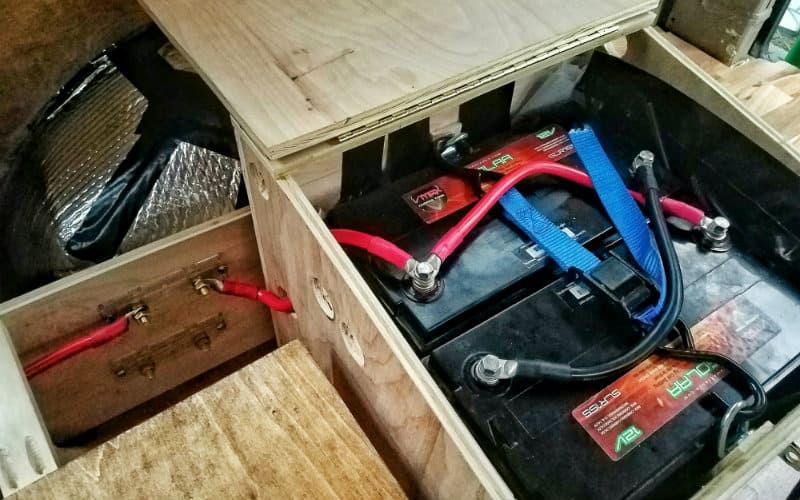
Finally, we dropped in the batteries and strapped them down. Next comes the fun part – hooking up our electrical system!
And that’s how you build a quick and simple plywood battery box. This box does the job we need it to do, it’s custom-sized to our van and batteries, and it’s a hell of a lot more sturdy than many commercially available plastic battery boxes. While a battery box may not be essential with sealed batteries, we still think it’s a great addition to our van.
Don’t forget to follow us on Instagram @gnomad_home and on Facebook for more van build tutorials, van life tips, travel updates, and musings. Cheers!




So helpful, thank you!
So glad this helped!
And one OTHER note that might be worth mentioning…..the battery you suggest getting comes FULLY CHARGED. It does mention it on the top to “not short circuit”. I was not keenly observing this when I measured the distance between the posts to lay out the terminal cable access holes…with a metal tape measure. Let’s just say touching those two together resulted in an instant “warming” of the tape along with two immediate crescent indentations on it.
Hi Greg, this is an excellent safety tip that I will be sure to add in here. Thanks again!
John, Andrew is RIGHT. I wish I had read this prior to cutting my wood….I only have one battery, but modeled up the CAD based on the dimensions you provided. You state that the sides are 15 1/2″ long, while the base is 16 1/2″. That would leave 1/2″ in both the front and back for the front and back walls. WHICH would be fine….except you state that you put pocket holes in the base for the front and back. The ONLY way that would work is if the front and back both dropped down to the floor, thereby allowing… Read more »
Hi Greg, thank you for commenting. To help figure out where the confusion is here I re-measured the battery box. It appears that when I drew the diagrams for this article that I swapped the measurements for the back and the bottom. The bottom should actually be 16 1/2″ x 15 1/2″, and the back should be 16 1/2″ x 15″. If you’re following this blueprint, you should be able to just swap the back piece you’ve already cut with the bottom and it will fit together. The side panels sit directly on top of the 15 1/2″ lengths of… Read more »
You drilled vent holes in the box for any potential gas to escape but you did not vent it to the outside. Why, any potential gasses would then vent into the van and be harmful to the occupants.
Hi George, in all honesty the type of batteries that we have (maintenance-free AGM batteries) do not off-gas or leak (or, at least, should not do so), so having this type of a battery box is a bit of overkill in the first place. As far as venting, the bigger danger for us would be the accumulation of combustible hydrogen inside the confined space of a battery box (lead acid batteries can produce hydrogen when overcharged), so we just wanted to provide a pathway for any gas to escape the battery box to reduce and risk of fire/combustion. As far… Read more »
Hey, just wanted to say that your craftsmanship is impressive! But, those batteries are not going to be safe in a crash. You should anchor them directly to the body if you can. Otherwise you might find 100+ lbs of lead flying at you. Stay safe.
Brian
Hi Brian, I 100% agree that things as heavy as a battery should be anchored to the body. Truth be told, there could be a lot of things flying around in our van in the case of a very serious crash. Our batteries are mounted under our bed and there’s a lot of other furniture in between us and them, but I agree that they could/should be anchored to the body for maximum safety.
~John
Either the sides should have a base of 15″ or the bottom should be 16.5″x15.” – the sides and bottom don’t fit together as depicted with this blueprint.
Hi Andrew,
The blueprint does call for the bottom piece to be 16.5″ x 15″. The measurements listed in the post are the exact measurements we used to construct our battery box. Good luck!
~John
Hi Andrew, it turns out that the bottom should be 16.5″x15.5″. The back should be 16.5″ by 15″, so I think I had swapped the measurements in my blueprint book, which then made it into the diagram for the post. When you posted this comment, I double checked the measurements in my blueprint book, but did not actually measure the box itself. I apologize for the confusion and for not double checking the actual measurements when you posted this comment.
~John
Can you describe exactly where this is sitting in your van? Is is directly behind the bench seat to the right and under the permanent portion of the bed? Or is it to the right of the bench seat? Thanks in advance!
Hey Robert,
The battery box sits under the bed frame just behind the bench seat. You can see it in this photo (towards the left).
~John