Solar electrical systems aren’t all that complicated once you understand the basics. But it’s also easy to get things wrong, especially with all the bad and/or incomplete information out there on the internet.
We recently reworked an incorrect solar installation in a friend’s RV, which involved replacing some key components and fixing wiring issues.
LiTime was kind enough to donate one of their 230Ah LiFePO4 Plus batteries, and BougeRV donated a 40A MPPT solar charge controller. We could not have made this happen without these donations, and we highly recommend products from both of these companies.
This case study shows the process of installing a van life solar electrical system, as well as illustrates what NOT to do. We hope this helps you out on your electrical journey!
The Problem: No Electricity for 18 Months
A good friend of ours (and sometimes writer for Gnomad Home), Jupiter from @doesthiscountasvanlife, had been dealing with electrical issues since moving into their Thor 24HE Class C RV back in 2021. They had an RV solar panel kit from GoPower installed in their previous rig, but nothing had worked properly since transferring it over to their new RV.

The batteries weren’t fully charging from the RV solar panels. Their converter was shutting on and off. Their campervan fridge wasn’t running. Well-meaning friends who looked at their system couldn’t figure out what was wrong, or did things that made the situation worse. This all culminated in a near-disastrous electrical fire in their battery bay.
They were living on the road full time without electricity for over 18 months.
From what little we had previously seen of Jupiter’s system in person, and from asking them a bunch of questions from afar, we determined the basic issues they were facing.
- They had 400Ah of AGM batteries that wouldn’t hold a charge and were probably shot.
- They had hooked up their 380W of solar panels to their RV’s solar prewiring, and were concerned that the wiring wasn’t thick enough.
- They also had an inefficient PWM charge controller, which probably wasn’t helping the situation.
At a minimum, they needed new batteries, a better MPPT charge controller, and a good look at their wiring.
Because we love doing van build projects and helping out friends, we offered to get some trusted companies to donate new components, install them ourselves, and fix any other issues we could find.
Sourcing New Components: Battery and Charge Controller

If we were replacing the batteries anyway, we wanted to upgrade Jupiter to LiFePO4 (LFP) batteries, which are better than AGM batteries in several ways.
- LFP batteries can be 100% discharged, whereas AGMs can only be regularly discharged 50% without damage. That means a 400Ah AGM battery bank only gets you 200Ah of usable capacity and you need to pay attention to your battery voltage to make sure you’re not drawing them down too much. A 200Ah LFP battery gets you 200Ah of usable capacity. Simple and easy.
- They last much longer. LFP batteries last 3000-5000 discharge cycles before they’re down to 80% of their original capacity, whereas AGM batteries last about 500 cycles.
- They’re much, much lighter. Jupiter’s 400Ah of AGM batteries weighed 300 lbs, whereas the equivalent capacity of LFP batteries weighs under 50 lbs.
The main issue with LFP batteries in the past has been higher cost. But that’s changing, especially with high quality budget LFP batteries coming on the market like those from LiTime.
LiTime has been developing their own affordable LFP batteries for over a decade, and their batteries are some of our favorites to recommend to van lifers on a budget.
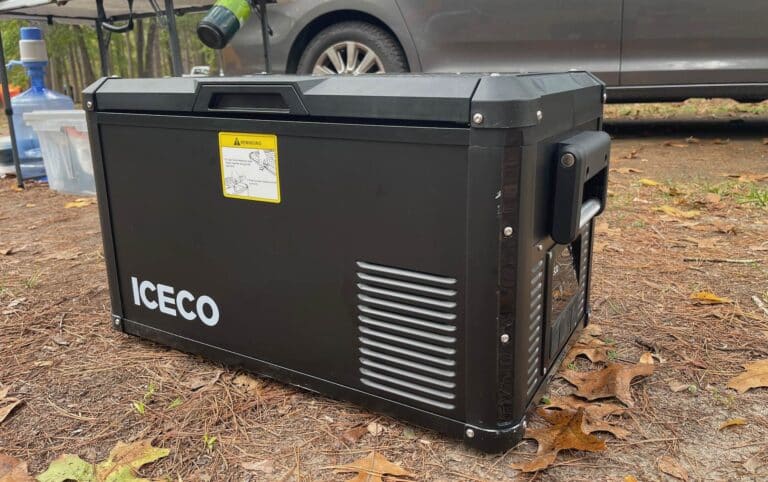
We reached out to LiTime to see if they’d be willing to provide a battery for this project, and they generously sent us their 230Ah Plus LiFePO4 battery. So not only were we upgrading the batteries, we were also upgrading the usable capacity.
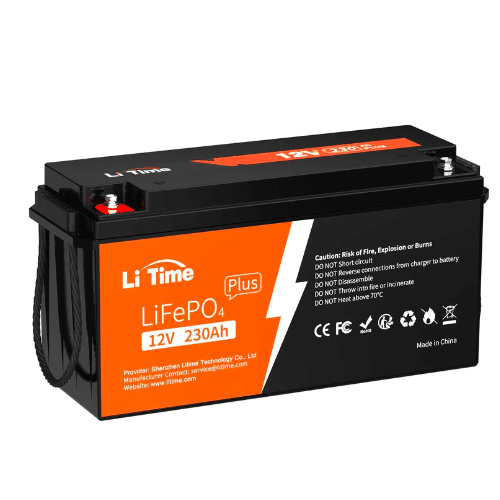
Affordable LiFePO4 battery that punches way above its price point.
Enter discount code Gnomad Home for 5% off at LiTime.com
We also needed a good MPPT charge controller that would work with the new battery. The LiTime battery has a recommended charge current of 46A, so a 40A charge controller would fit the bill.
We asked BougeRV to send us their 40A MPPT Charge Controller with Bluetooth, since they generally make great stuff and we’ve been wanting to test one out.
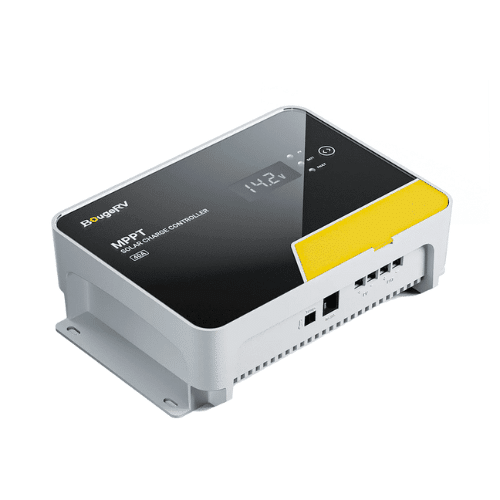
High quality 40A MPPT solar charge controller with Bluetooth.
Enter discount code Gnomad for 16% off at Bougerv.com
Upgrading the charge controller to MPPT would help Jupiter max out their solar energy. PWM charge controllers are cheap but suffer from up to 30% power loss compared to MPPT charge controllers. And built in Bluetooth would help them easily monitor their system from a phone app.
Beyond these two components, we weren’t sure what other issues we were going to find when we started digging into Jupiter’s system.
Once we had everything in hand, Jupiter headed north to our location.
Diagnosing the Electrical Issues
When Jupiter rolled into our spot, we took a deep dive into their system and came up with a gameplan.
Solar input was a concern, so I hopped up on the roof and took some voltage readings from their solar panels. They have two 190W solar panels wired in series. Both were working fine, and the entire array was putting out 43V.
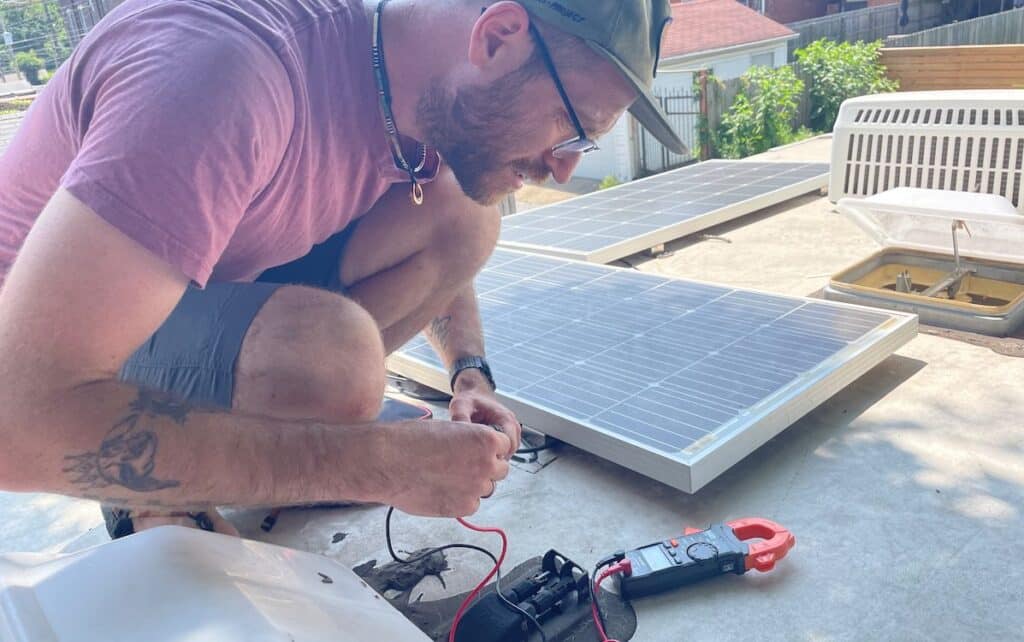
This was the perfect amount of voltage for these two panels, and this reinforced the decision to upgrade to an MPPT charge controller. PWM charge controllers lose efficiency the higher the solar voltage is above the battery charge voltage (about 14.4V for LFP), so most of it is just wasted.
I then tested the voltage coming out of the wiring at the charge controller to verify that everything was hooked up properly. I also checked the wire size – 10AWG, which is the optimal size for a typical RV solar array wired in series.
No concerns there.
The rest of the wiring was a different story.
Frankly, it was a bit of a mess.
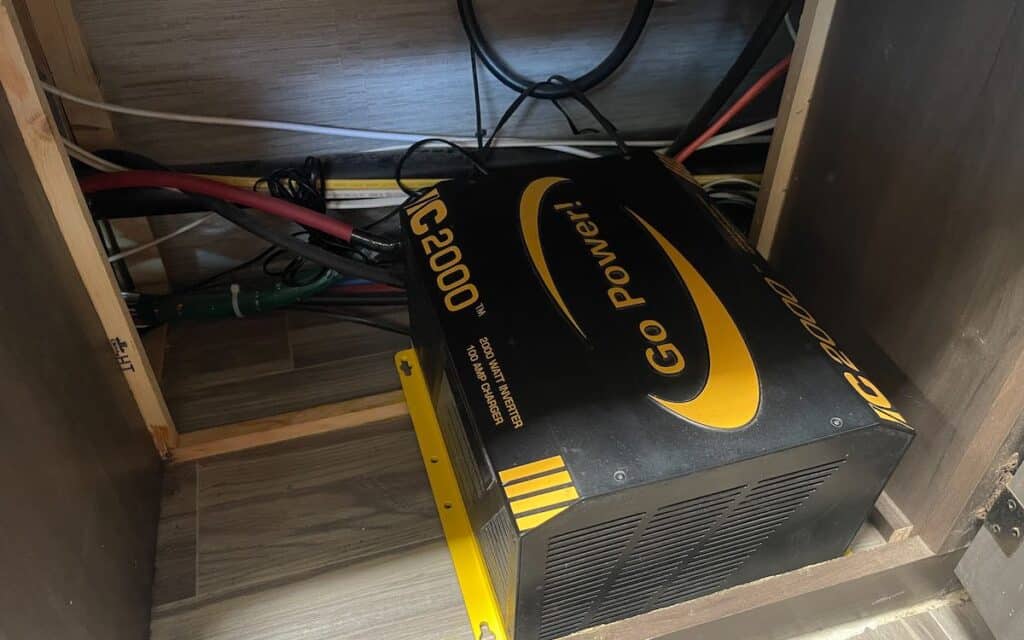
Their 2000W inverter-charger was not grounded, and also wasn’t screwed down to anything – meaning that the inverter could flop around while they’re driving, possibly causing issues with the wire connections. Not safe.
The battery bank was wired in parallel with 8AWG wire – far too small to handle the current. This was also done with premade wiring, and in spots where the wiring wasn’t long enough two wires were joined together with a nut and bolt through the lugs.
This is bad news, because making this kind of connection adds resistance in a spot where you really need current to flow.
The battery bank was not properly fused. There was a 300A class T fuse that came with the inverter – great news, because that’s the exact fuse we needed for the new LFP battery. However, the fuse was on the wrong side of the battery cut off switch.
Here’s how it was set up:
Battery bank → cut off switch → fuse → inverter
This wiring scheme is both wrong and dangerous. The fuse is too far from the positive battery terminal, and when that cutoff switch is “off” (which it was) the fuse is not doing anything. That means there could be a short close to the battery, and the battery would not be fused at all, which could cause a fire (or worse).
You need a proper fuse within 7 inches of your positive battery terminal. For AGM batteries it’s okay to use a high quality ANL fuse, but a terminal-mounted MRBF fuse is better. For LFP batteries, however, you really need a Class T fuse.
Important note on fuses: Lithium batteries are capable of putting out a ton of current when something goes wrong. So much that they can melt fuses that aren’t rated to handle it, allowing the current to continue flowing.
When we talk about the current that different types of fuses can handle, we’re talking about interrupt current, not the fuse amperage. For example, good ANL fuses can interrupt up to 6000A. This is true no matter the fuse amperage – so both a 40A ANL fuse and a 300A ANL fuse can interrupt up to 6000A from a shorted battery.
But shorted LFP batteries put out way more amps than that. The only fuses rated to interrupt more current than LFP batteries can put out are Class T fuses, which can interrupt up to 20,000A. These fuses aren’t cheap, but you’re taking some risks with any other type of fuse.
The wiring was improperly sized. The wires from the inverter to the Class T fuse were 2/0 AWG, which was fine. But the wire going from the fuse to the switch to the battery was only 2 AWG. I’m guessing whoever installed it ran out of 2/0 cable and just used whatever they had on hand.
You should never do this. Always use wire that is properly sized for the amount of current it needs to handle.
The charge controller was fried (and also wasn’t fused). We determined that at some point, the charge controller had been hooked up to the solar while the batteries were disconnected, which fried the charge controller.
When you’re working with solar, never connect your solar panels to your charge controller without the batteries being connected. If you need to disconnect the batteries, disconnect the charge controller first. We decided to add a solar cut off switch to the system, so that Jupiter could easily disconnect the solar if needed.
There also was no fuse between the charge controller and the battery bank. We decided to add a 40A ANL fuse here to protect this connection.
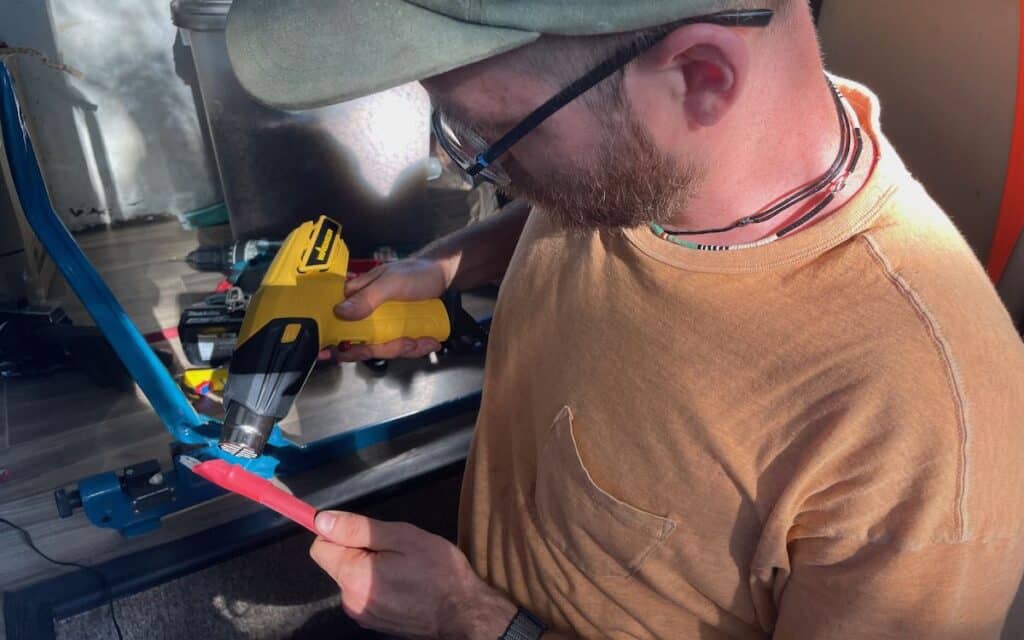
Wiring crimping issues. Many of the wire lugs were split or had sketchy-looking crimps. We needed to cut these off and crimp on new lugs.
Whew! That’s a lot of issues! We were basically looking at completely redoing the system.
Installing the New System
Retrofitting an existing system is always more difficult than doing a fresh install, and we had a few constraints and things we had to work around.
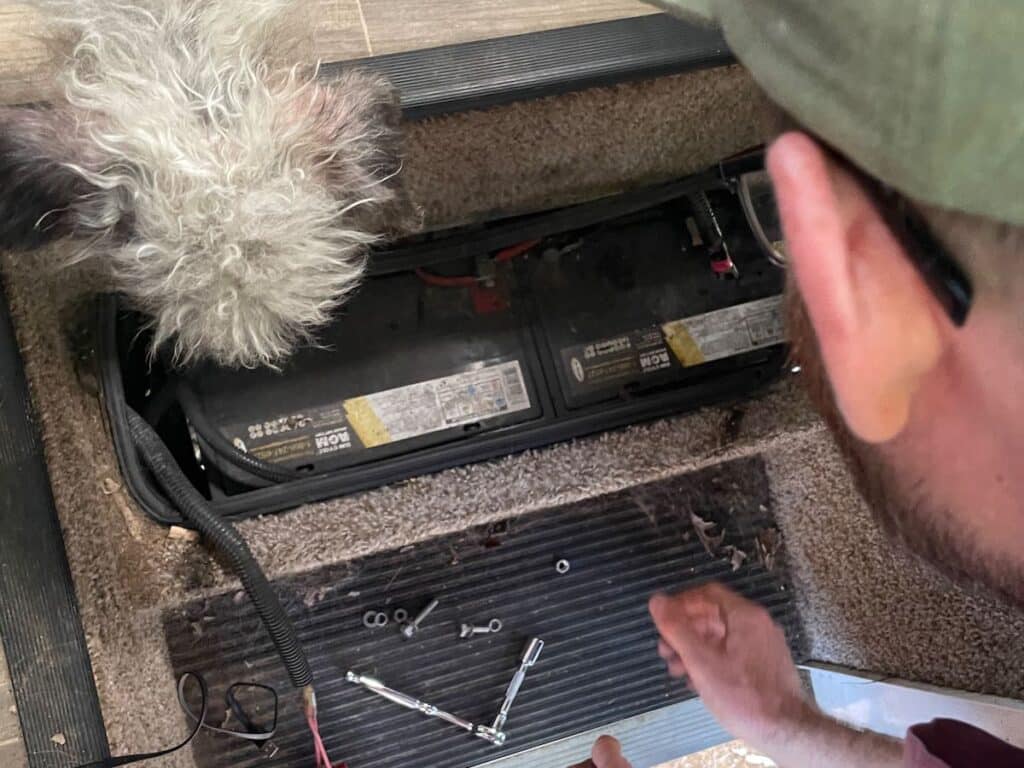
Prepping the battery bay
The battery bay was located in the RV stepwell. This is the lowest part of the RV, and it’s pretty exposed to splashback from wet or muddy roads.
I have no idea why Thor thinks it’s a good idea to put batteries there, but ¯\_(ツ)_/¯.
The stepwell is not a great spot for a battery bay. But the RV house wiring terminated there, and redoing all of that would add too much complexity to this project. We decided to keep the battery bay in the stepwell, and just work around the downsides.
After removing the old batteries, we enclosed the stepwell with cloroplast (corrugated plastic) to help protect the battery from road splashes. We sealed the seams with FlexSeal tape.

Situating an LFP battery in a spot that’s so exposed to external temperatures is not ideal. LFP batteries cannot be charged below 32 degrees F without damaging them, so if your batteries might be exposed to cold temperatures it’s a good idea to buy one with a cold temperature cutoff (at the very least) and/or a self-heating function if you’re frequently in cold weather.
LiTime’s 230Ah Plus battery does not have low temp cutoff or self-heating (they do have other batteries with both of these things). However, Jupiter spends most of their time in the South where this would rarely be an issue. To protect the battery against cold weather charging, Jupiter can simply shut off the new solar cutoff switch that we were about to install.
Reconfiguring the control panel
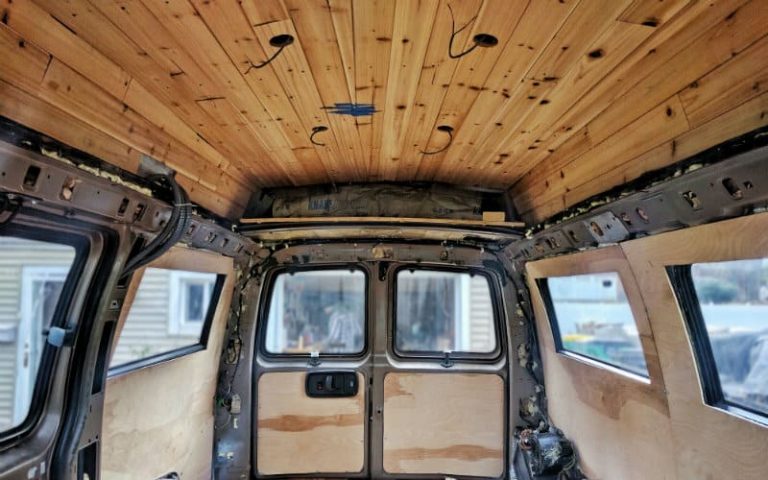
Jupiter’s RV had a control panel by the side door that served as the hub of their electrical system.
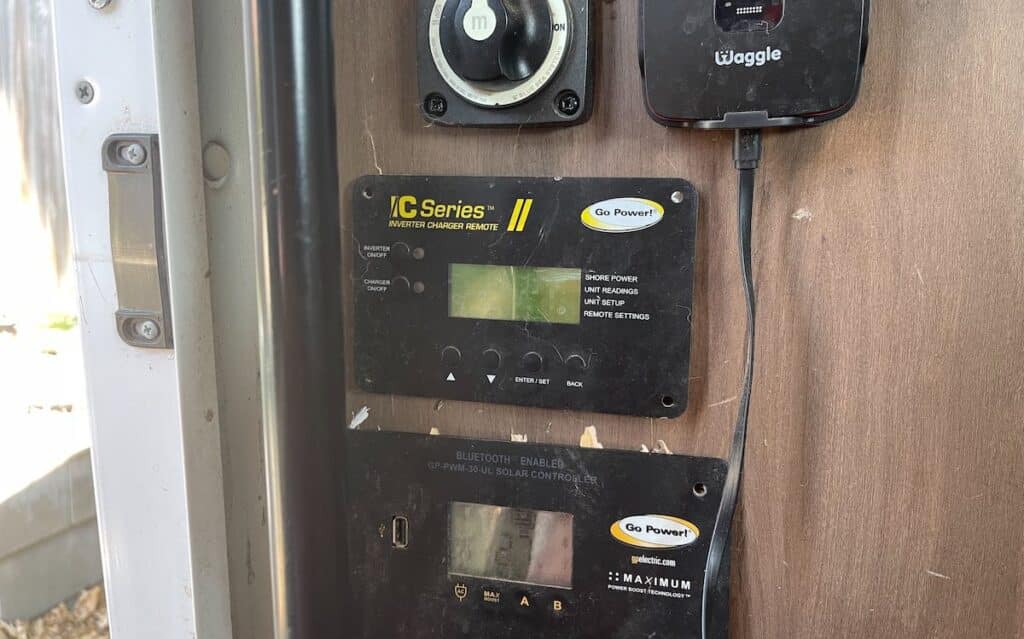
We took out the old charge controller, moved the inverter remote, and added
- A cutoff switch for the solar
- A 12V USB outlet to power the Waggle device that had been plugged into the old charge controller
We also needed to cover up the holes from the things we took out. To do this, we used a 12” x 12” piece of aluminum grating from Home Depot, which also provided some ventilation for the new charge controller.
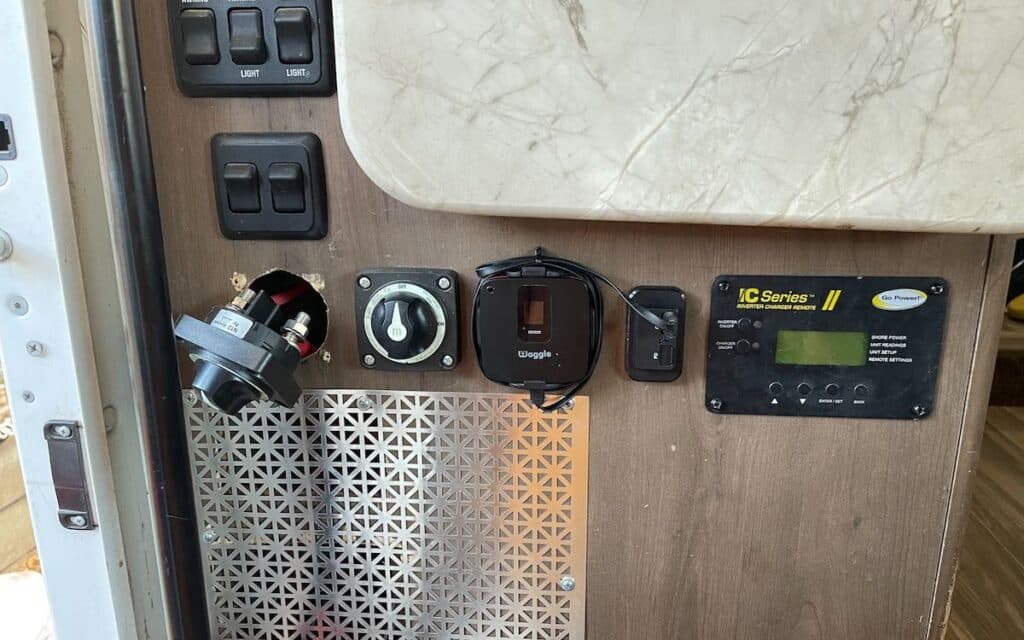
Positioning the new charge controller
The only place we could put the new charge controller was on the sidewall of the RV inside the kitchenette (directly behind the existing control panel). This location meant that Jupiter could not easily see the dislpay, but being able to access all the info and settings on their phone through a Bluetooth connection made that unecessary.
I did not want to drill into the flimsy RV wall to mount the charge controller, so I constructed a wooden mounting board that I secured to the frame of the kitchenette.
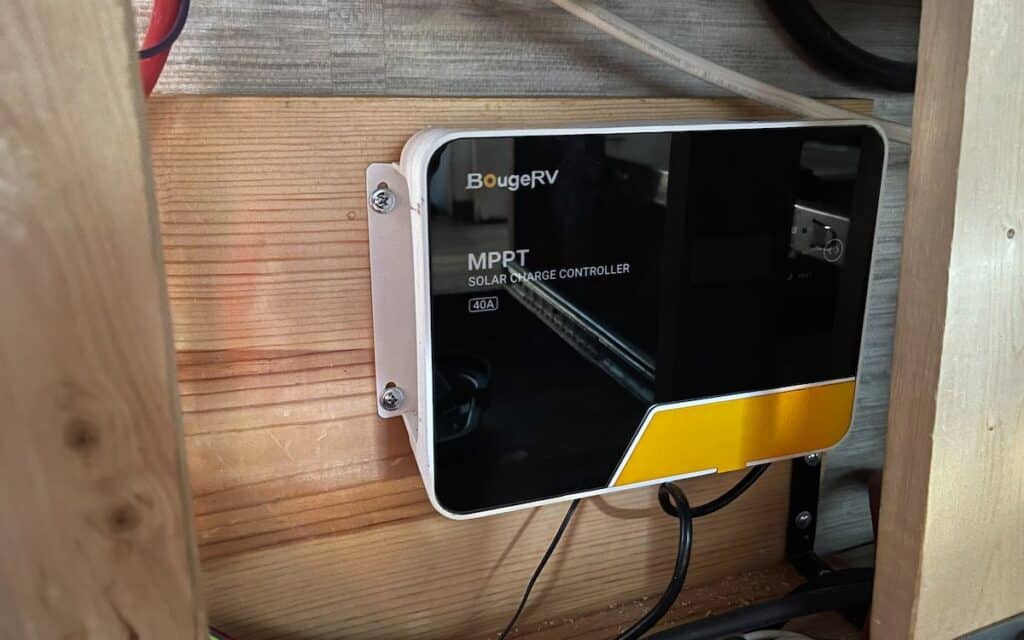
Once the charge controller was mounted, I connected the PV in and the battery out wires, and the ground wire (connecting the solar wires was not an issue because I had the new solar cutoff switch set to “off”).
Fixing the inverter situation
To permanently mount the inverter, I used a 1×12 board to create a level surface for it to sit on, and secured everything to the floor with screws.
I then crimped new lugs on both ends of the inverter cables, and ran a ground wire from the grounding terminal to the main chassis grounding point.
Wiring and fusing everything
Once that was done, I ran all the wires through a hole in the RV floor, underneath the vehicle, and into the side of the battery bay (ground wires ran to a nearby chassis grounding post on the vehicle frame).
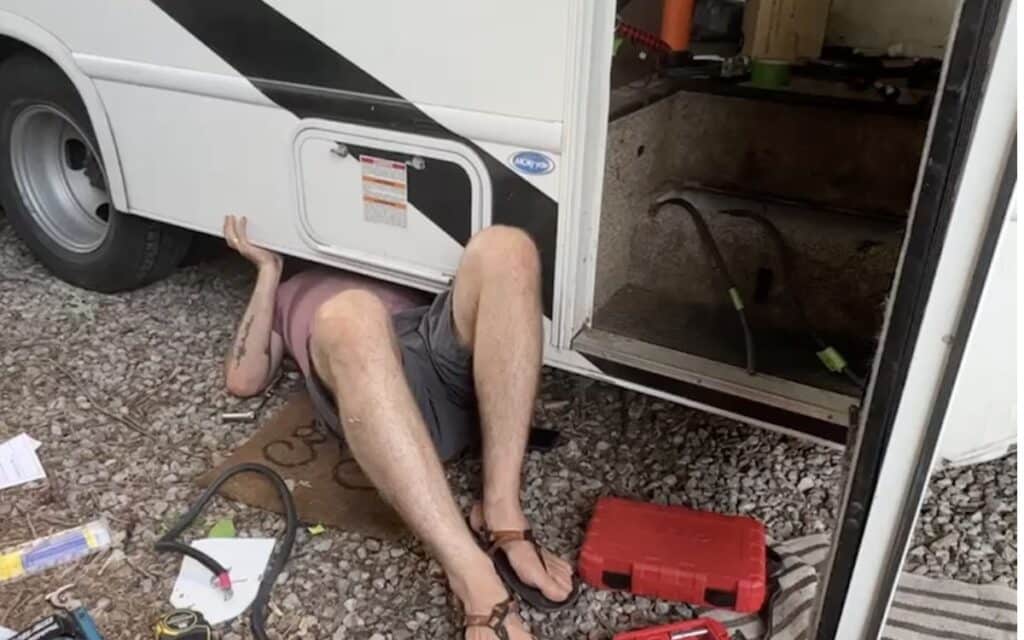
I also made sure the wiring running underneath the RV was neat and tidy, and wrapped all the positive wiring in wire looms to reduce the risk of metal rubbing through the insulation and causing a short.
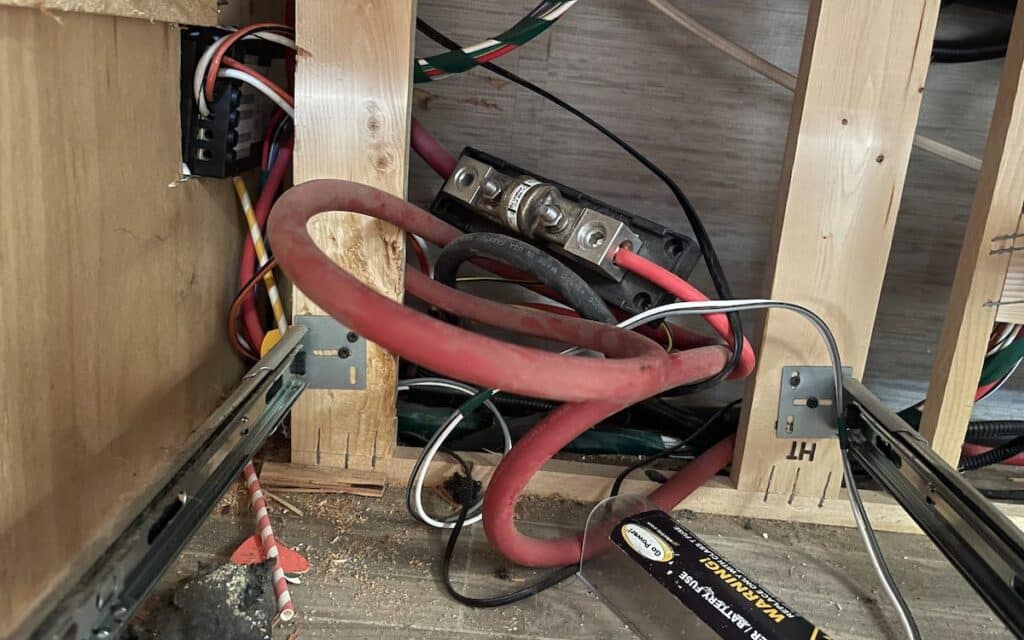
I ran all the positive wires to a 300A bus bar that I mounted to the side of the battery bay (the solar wire first ran to a 40A ANL fuse, as did the wire coming from the vehicle’s alternator charging system). Another wire ran from the bus bar to the 300A Class T fuse.
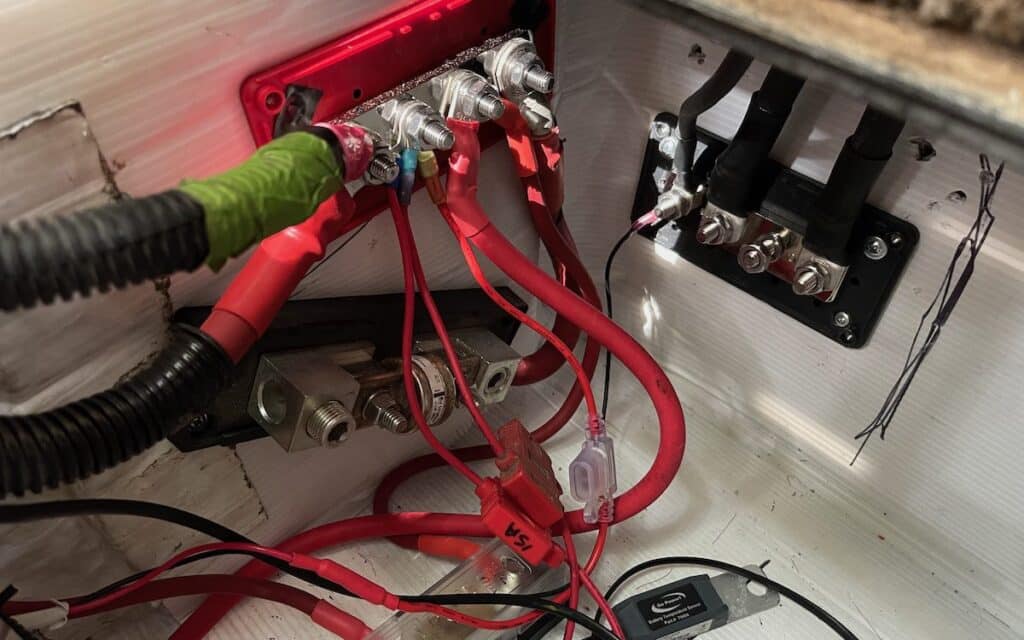
The inverter negative wire, the charge controller negative wire, and the main battery grounding wire ran to a 300A negative bus bar.
Hooking up the battery
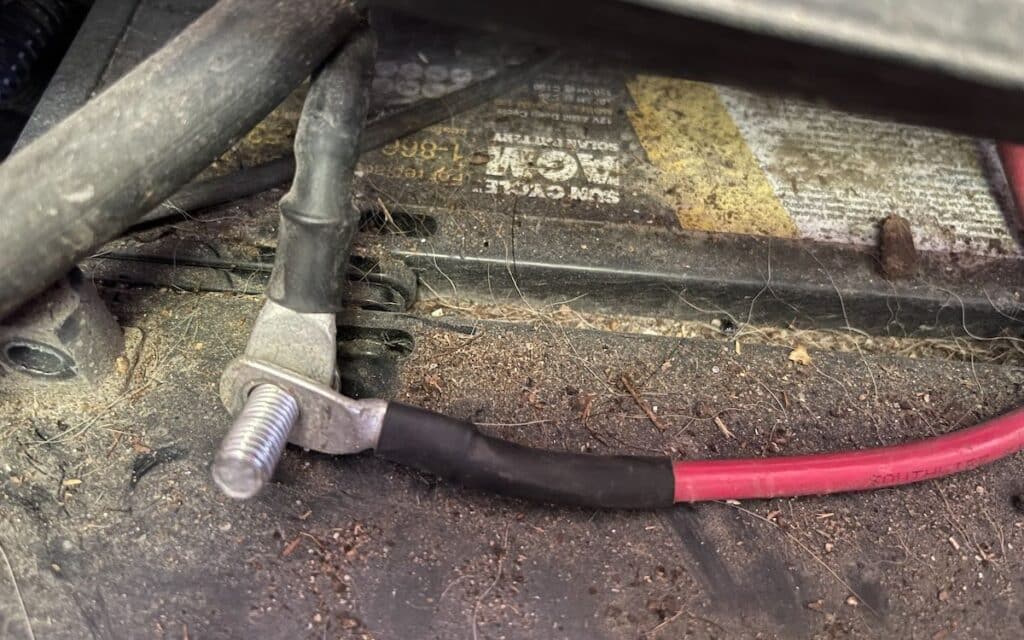
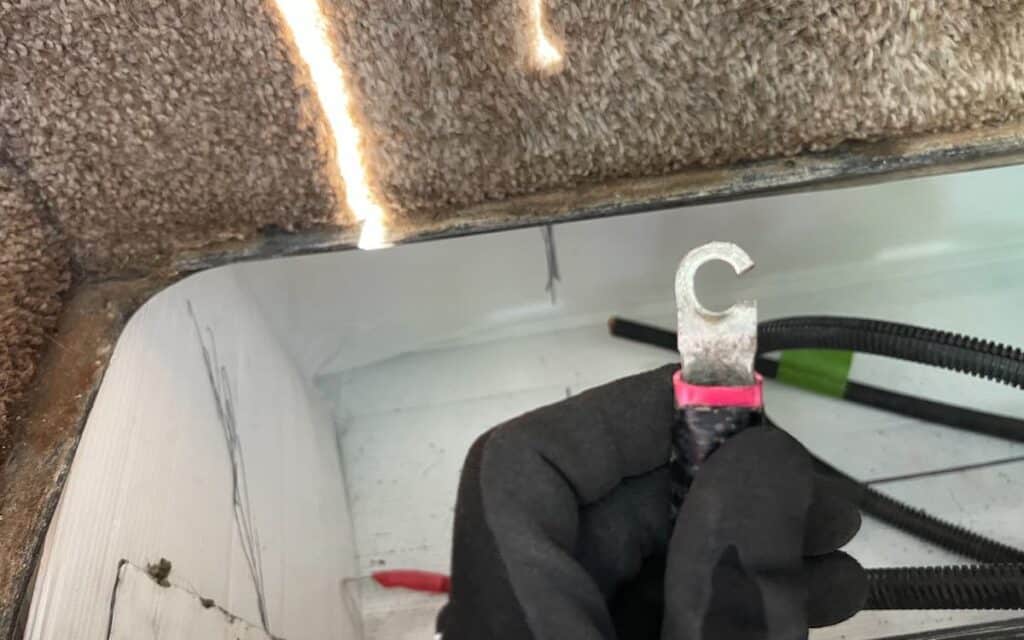
Once all that was wired up, it was time to drop in the battery and connect the terminals. I cut and crimped the final wires, and hooked the negative terminal up first by running a wire to the negative bus bar.
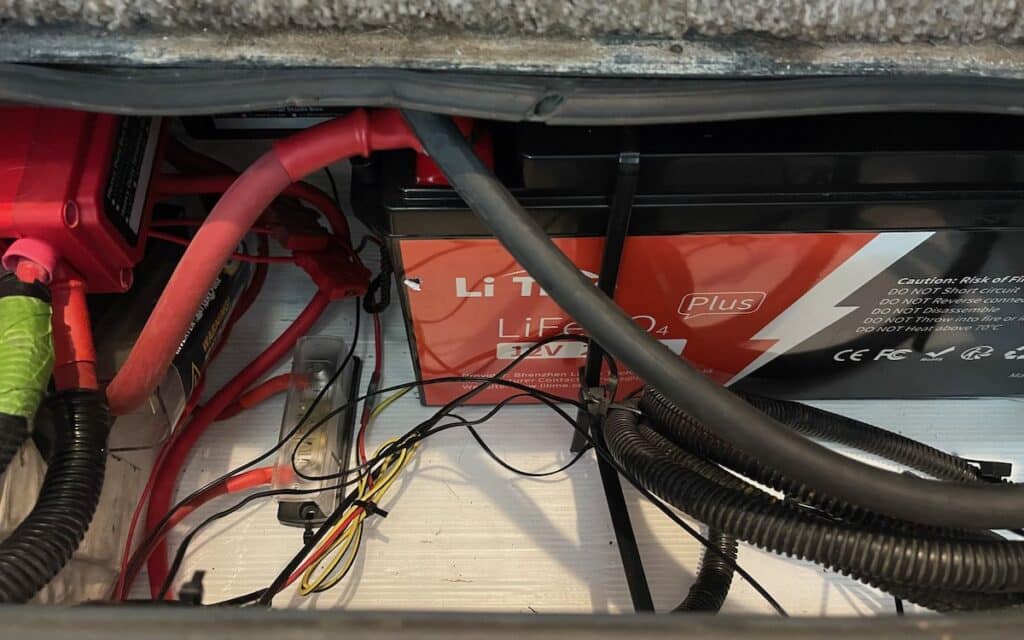
The positive terminal connected to the other end of the Class T fuse with a very short wire (less than 7” as required).
To help prevent movement, I strapped the battery down with some heavy duty zip ties.
Turning on and testing the system
Everything was hooked up and ready to go! It was time to turn on the switches and see if everything worked.
I turned the main battery switch to the “on” position, and lo and behold, the lights turned on!
After not having any electricity for 18 months, Jupiter’s rig was now powered up.
I then turned on the solar cut off switch and connected to the charge controller via Bluetooth. The app showed me the battery voltage, solar voltage, and current. Everything looked good, and the system was charging!
Power on the road!
It took us about five days to rework this system – two days of diagnosing and gameplanning, and three full days for the installation itself.
Sourcing high quality components from LiTime and BougeRV was a huge help in getting this done within Jupiter’s budget, and Amazon’s next-day shipping helped us quickly source wiring, fuses, and other odds and ends that we needed. We already had all the electrical tools we needed, including a good multimeter, crimpers, wirecutters, and wirestrippers.
We’re happy we were able to help out our friend, and we love getting our hands dirty with some good ol’ van build work.