We didn’t install a roof rack when we built our van. At the time, we didn’t see the need for one. “Our roof is going to be taken over by solar panels and a vent fan,” we thought. “There’s no reason for us to get a roof rack.”
How wrong we were. We know now that installing a roof rack is one of the best things you can do for your van build.
Roof racks give you a convenient and expandable place to attach things to your van. Mounting solar panels to a rack makes it much simpler to remove/replace them if needed (and they’re way less obvious if you care about stealth). Roof racks also give you an easy place to mount a road shower, or a roof storage box, or any number of other things.
But the thing that was giving us the most trouble was an awning.
Most awnings are meant to be installed on a roof rack. So how do you mount an awning on a fiberglass high top conversion van without one?
We didn’t even think about installing an awning on our van at first. But soon after we hit the road, we realized the benefits of having one (You can hang out outside during the rain and give your van some much-needed shade on hot days!).
For months, we dreamed of ways to build our own awning so we could write about it on here. We wanted something a little more intense than the basic tarp-and-tent poles setup. But we couldn’t come up with anything that wouldn’t cost us a bunch of money and time. And we would still have to figure out how to mount it onto our van.
We decided to throw down for the awesome ARB Touring 2500 awning (it was totally worth it). Our usable living space has more than doubled, and now we can relax outside in almost any weather conditions, from drizzling rain to blazing sun.
Here’s How We Mounted Our ARB Awning to Our Van’s Fiberglass High Top – Without a Roof Rack
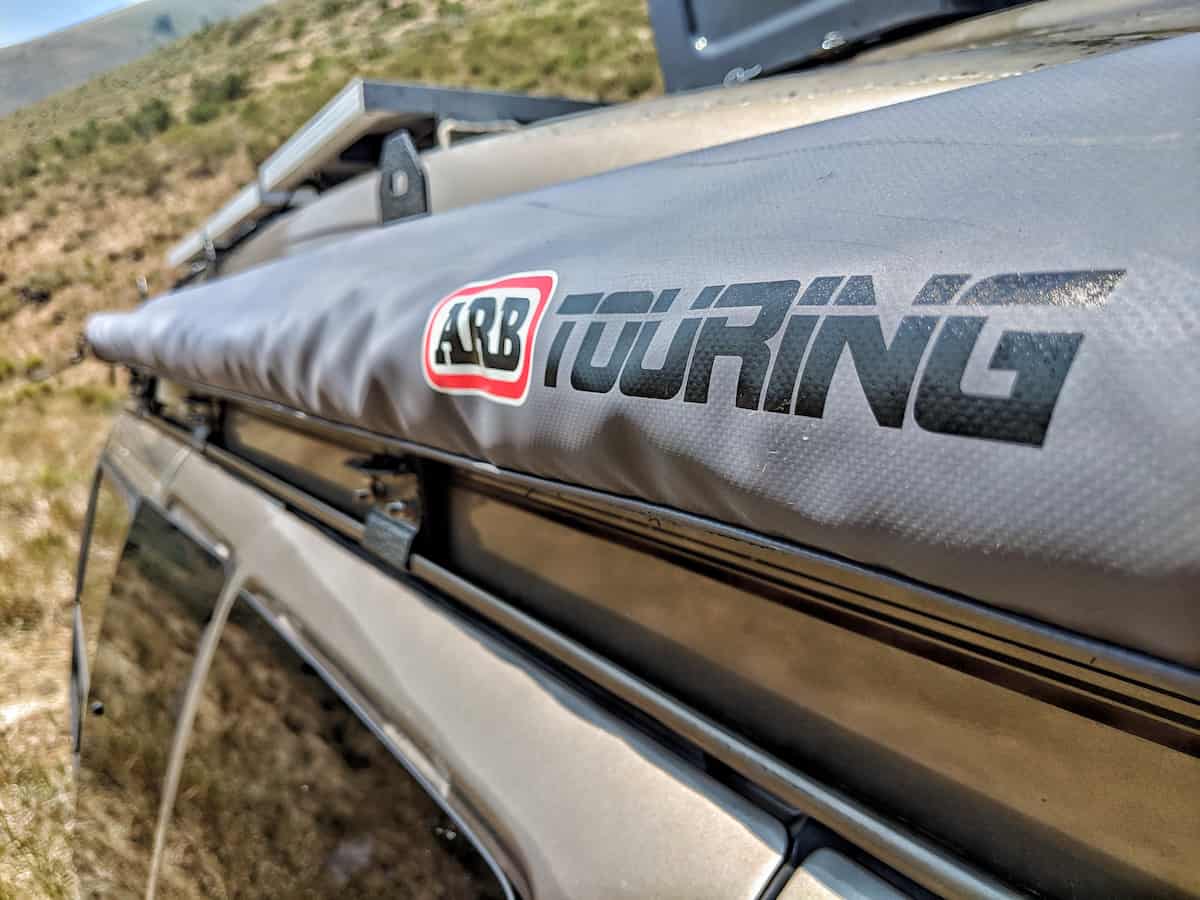
High top conversion vans present a whole bunch of obstacles when it comes to mounting an awning. Even if you haven’t mounted stuff to your roof yet, it’s very difficult (and expensive) to find a rain gutter roof rack that is tall enough to fit over your high top. And if your van is already covered with solar, then adding on a roof rack is out of the question.
Note: If you’re just starting your build, you may want to think about installing a roof rack first.
So what do you do? Some companies make rain gutter awning brackets. But the way they work usually requires screwing them into a frame post between the passenger and side cargo doors. If you have a typical conversion van, there’s no frame post there for the bracket to attach to, so that’s a total no-go.
After a lot of planning and searching around, we decided to repurpose the brackets from a cheap rain gutter bar carrier to mount our awning.
What We Used to Mount Our Awning
- ARB 2500 Touring Awning
- Highland Heavy Duty Bar Carrier
- Stainless Steel Bolts, Washers, and Lock Nuts (Optional. For replacing the non-stainless hardware that comes with the bar carrier).
- 5/16″ Stainless Steel Carriage Bolts (For reinforcing the brackets. Specific length depends on your high top. We used 3-1/2″ and 4″ bolts).
- 5/16″ Lock Washers
- Oversized Washers (1-1/2″ to 2″ minimum diameter, 5/16″ hole. For distributing the load on the inside).
- Silicone Caulk
- Cordless Drill and Drill Bits
- Wrench Set / Mechanic’s Toolset
The ladder rack comes with four brackets that attach to the rain gutters (two on either side of the van). Two crossbars connect the brackets across the roof, and provide most of the stability.
Because of our high top (and all the solar on our roof), we couldn’t use the crossbars. To make sure our awning stayed secure on the side of our van, we reinforced the brackets by drilling into the high top.
Luckily, the bolt holes on this ladder rack line up perfectly with the mounting system on the ARB awning.
Step 1: Switch Out the Ladder Rack Hardware for Stainless Steel (Optional)
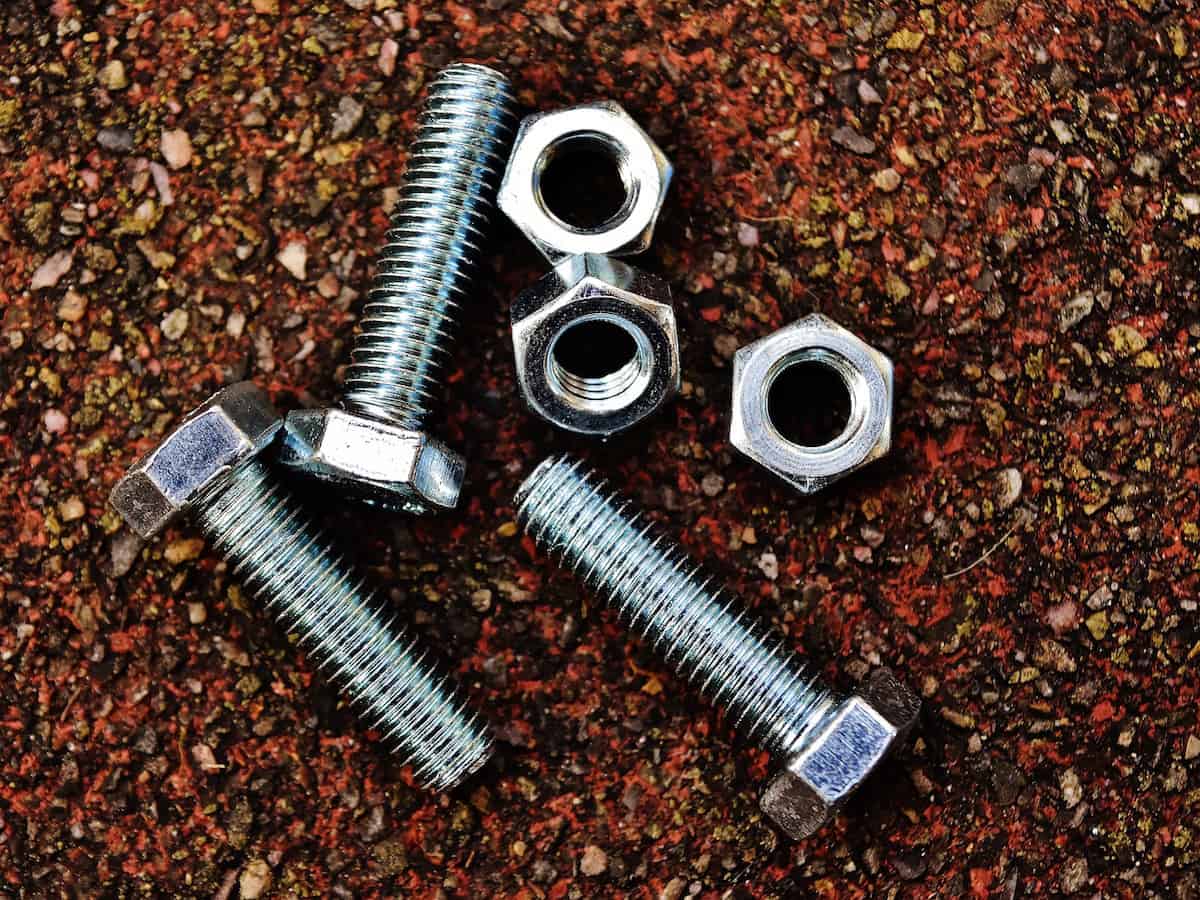
The ladder rack comes with all the necessary nuts and bolts. But they are not stainless steel, which means they have a higher risk of rust developing. So we decided to swap out the included bolts, carriage screws, washers, and lock nuts with stainless steel versions.
Stainless steel hardware is tougher to find than regular nickel-plated steel, so this was a bit of an adventure. We found bolts and washers at Home Depot, but had to go to Lowe’s for the lock nuts, and Menard’s for some of the longer bolts. (You can also find stainless steel hardware online, but we were on a time crunch).
Swapping out the hardware is optional, but we like the extra insurance against rust that it adds.
Step 2: Test Fit Awning to Van and Decide Where to Place the Brackets
We used three of the four brackets – one on either side of the awning and one in the middle. To figure out where to put them, we test fit the awning to the van, and marked the spots for the brackets.
Note: Make sure to check inside your van so you don’t end up drilling into something important. Our van just had shelving where we planned to drill, so we weren’t too worried about it. But we didn’t do the best job of checking where the holes would be, so we ended up drilling a bit too close to the shelf dividers. It wasn’t the end of the world, but it did cause some additional headaches.
Step 3: Bolt the Brackets onto the Rain Gutter
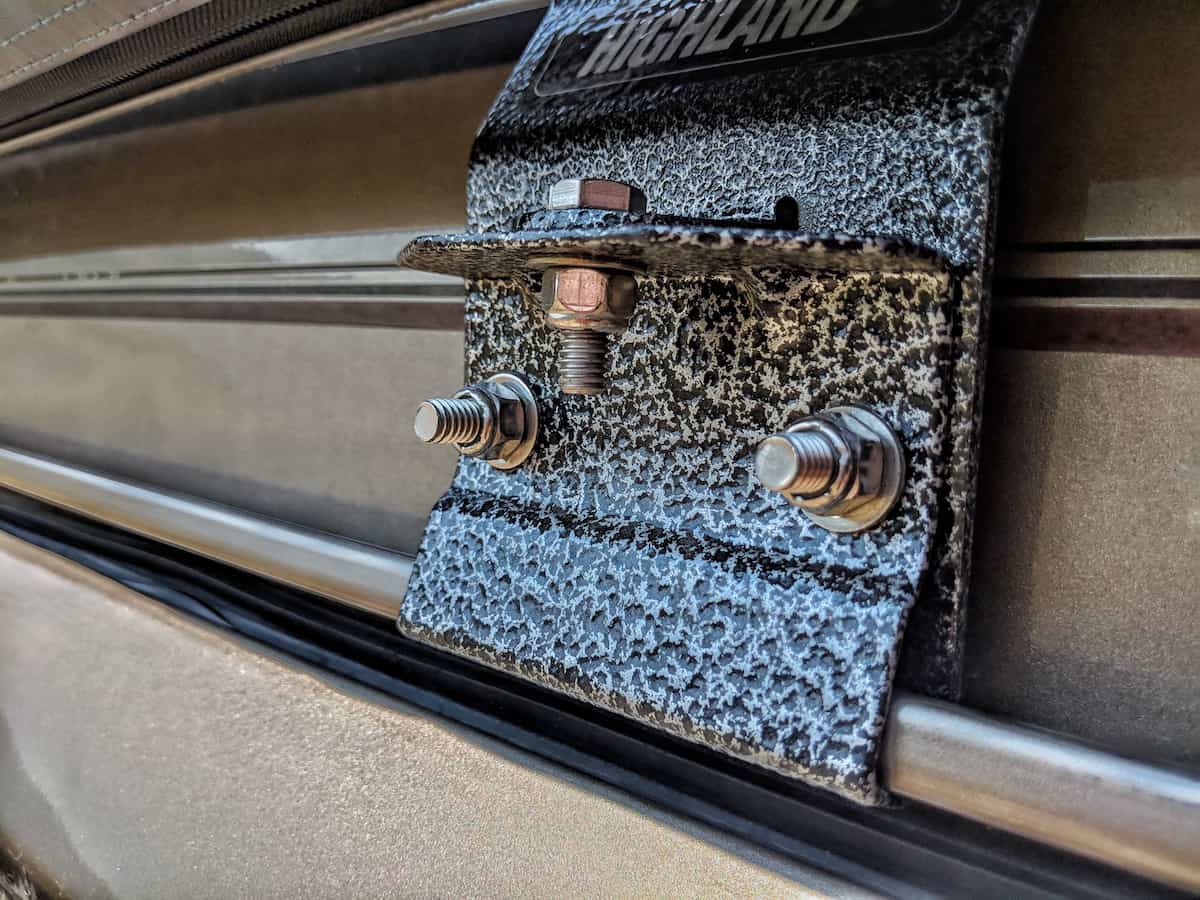
We bolted the brackets onto the rain gutter, tightening the vertical and horizontal bolts little by little until we had a secure fit. Since there was no crossbar, the brackets still wobbled quite a bit.
Step 4: Drill Bolt Holes into the High Top
Our goal was to run a 5/16″ carriage bolt through one of the holes on the bracket and into the high top. First, we stuck a sharpie through the bracket hole and marked the spot on the high top. Then, we drilled through with a 5/16” drill bit.
Step 5: Insert and Tighten Down Reinforcement Bolts
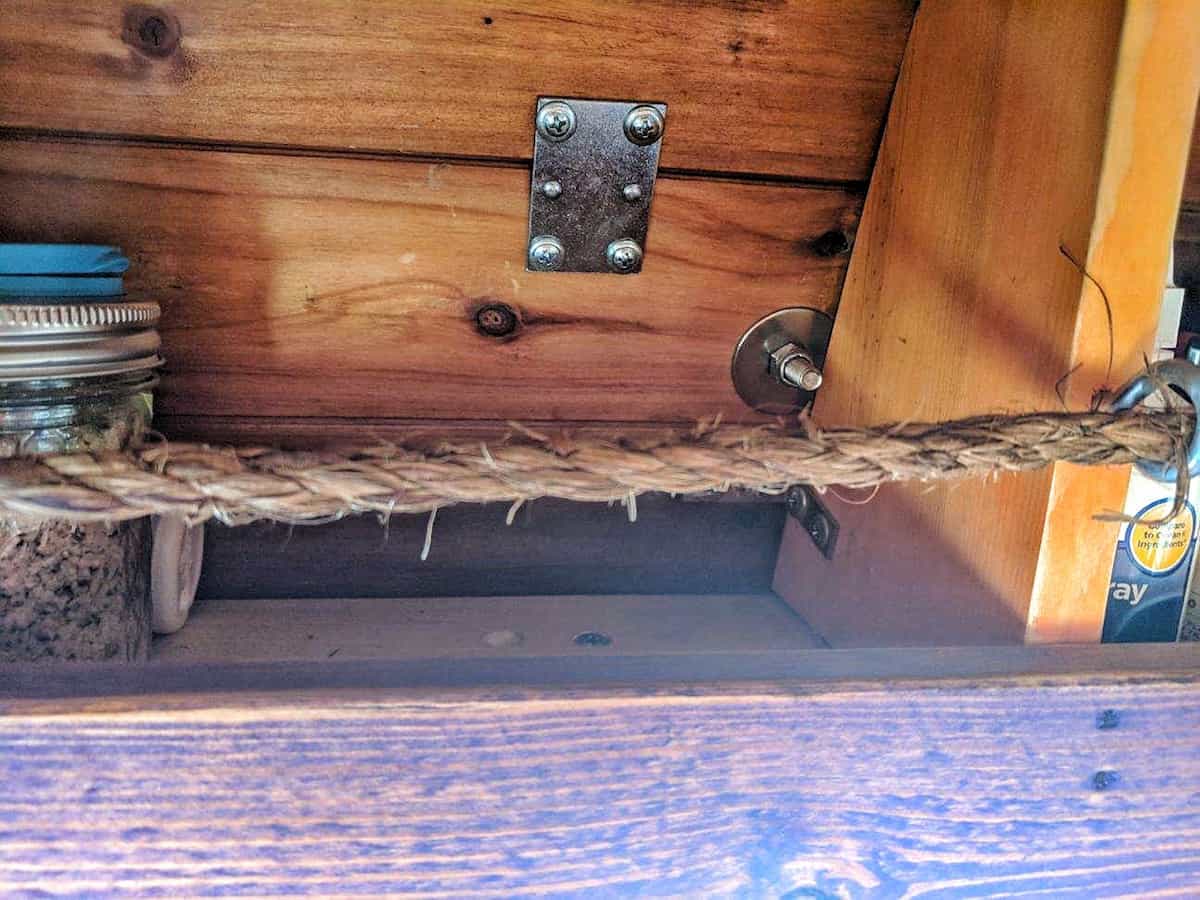
Next, we took our 5/16″ carriage bolts and inserted them through the brackets and into the high top. On the inside, we used an oversized washer to help distribute the load, and secured everything with a 5/16″ lock nut.
Step 6: Seal Around Holes with Silicone Caulk
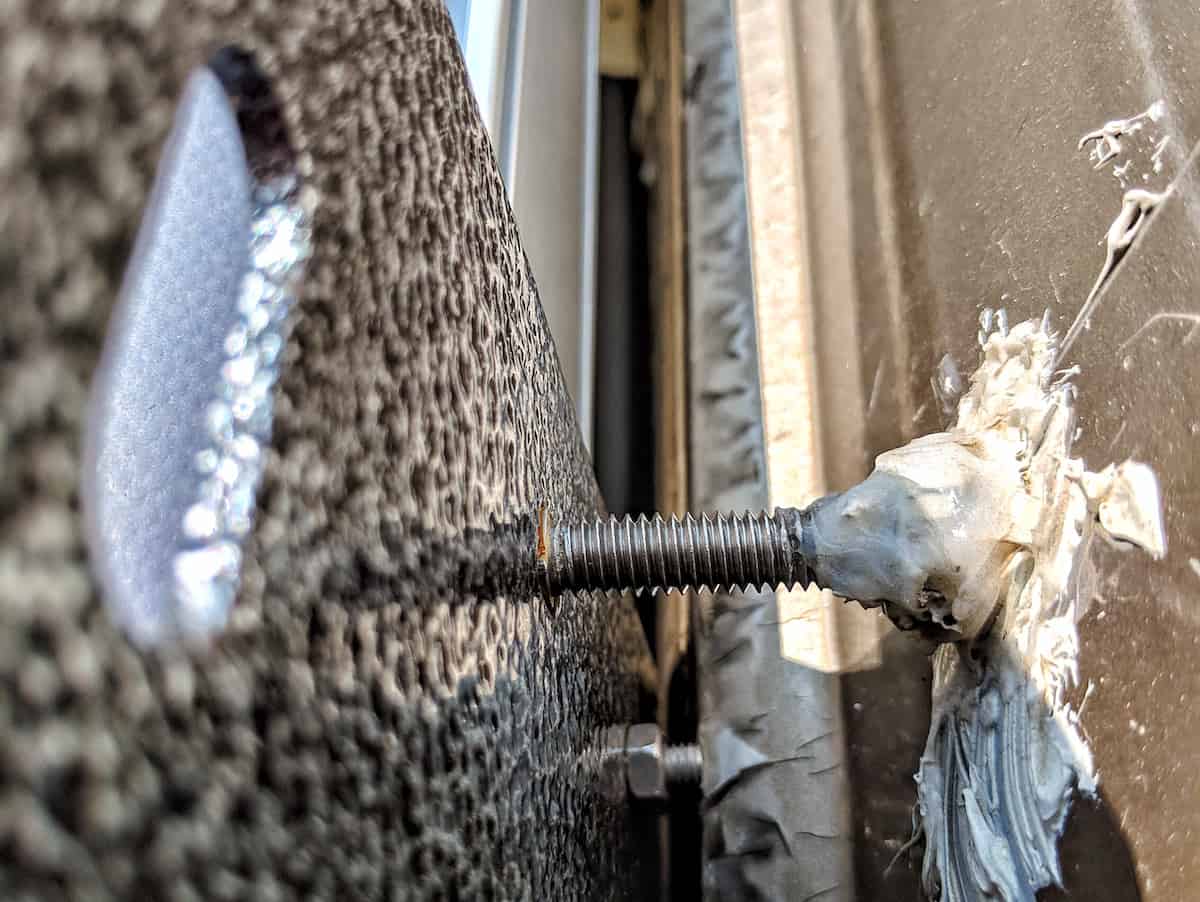
We don’t want leaks developing in our van, so we made sure to seal all the holes with outdoor silicone caulking.
Step 7: Mount the Awning!
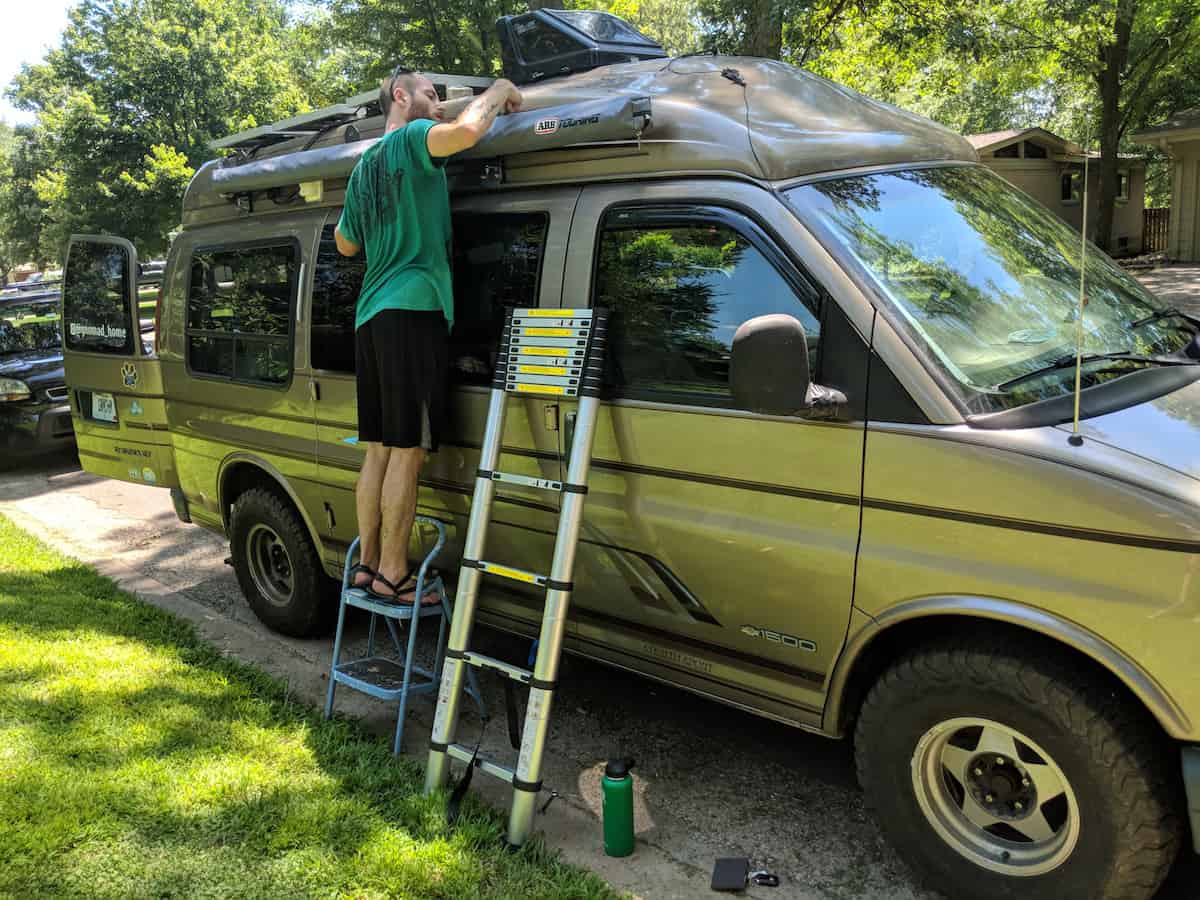
The ARB awning comes with six square head mounting bolts that slide into channels on the back of the awning. These channels line up exactly with the holes on the ladder rack brackets. To mount the awning, we decided to attach two bolts to each of the brackets. But it was a bit of a process to get everything inserted and tightened down.
First, we slid the bolts into the mounting channels. Then, John stood on a step ladder and held the awning up to the side of the van. Jayme stood on another ladder and worked on getting the bolts through the holes on the bracket. Then she screwed on the lock nuts on the other side. Finally, we tightened everything down with our wrenches.
Modifying Our Awning to Kick Ass in Windy Weather
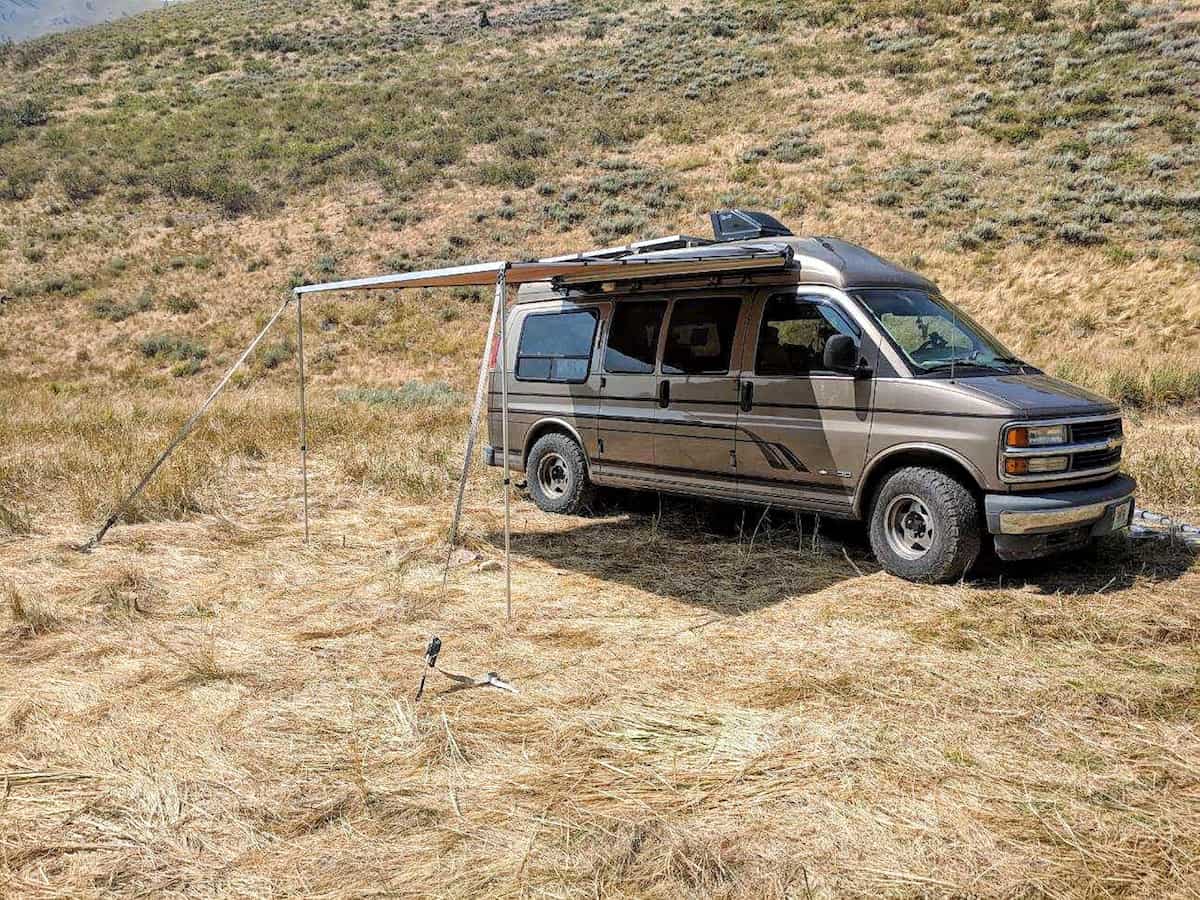
One big downside to many awnings is that you have to be careful keeping them up when it’s windy. Stories abound of expensive awnings crumpling or flying away when exposed to high winds. ARB awnings come with stakes and guy lines that help out a little, but in our opinion these are pretty flimsy.
Luckily, there’s an easy way to modify an ARB awning so that it withstands wind much better than it can with the included stakes and guy lines: stake down the awning with heavy duty steel stakes, carabiners, and tie down straps.
What We Use to Tie Down Our Awning
We attached the carabiners to the guy line holes on either side of the awning. These holes are a bit too small for the hooks on a tie down strap, so the carabiners provide somewhere to hook onto.
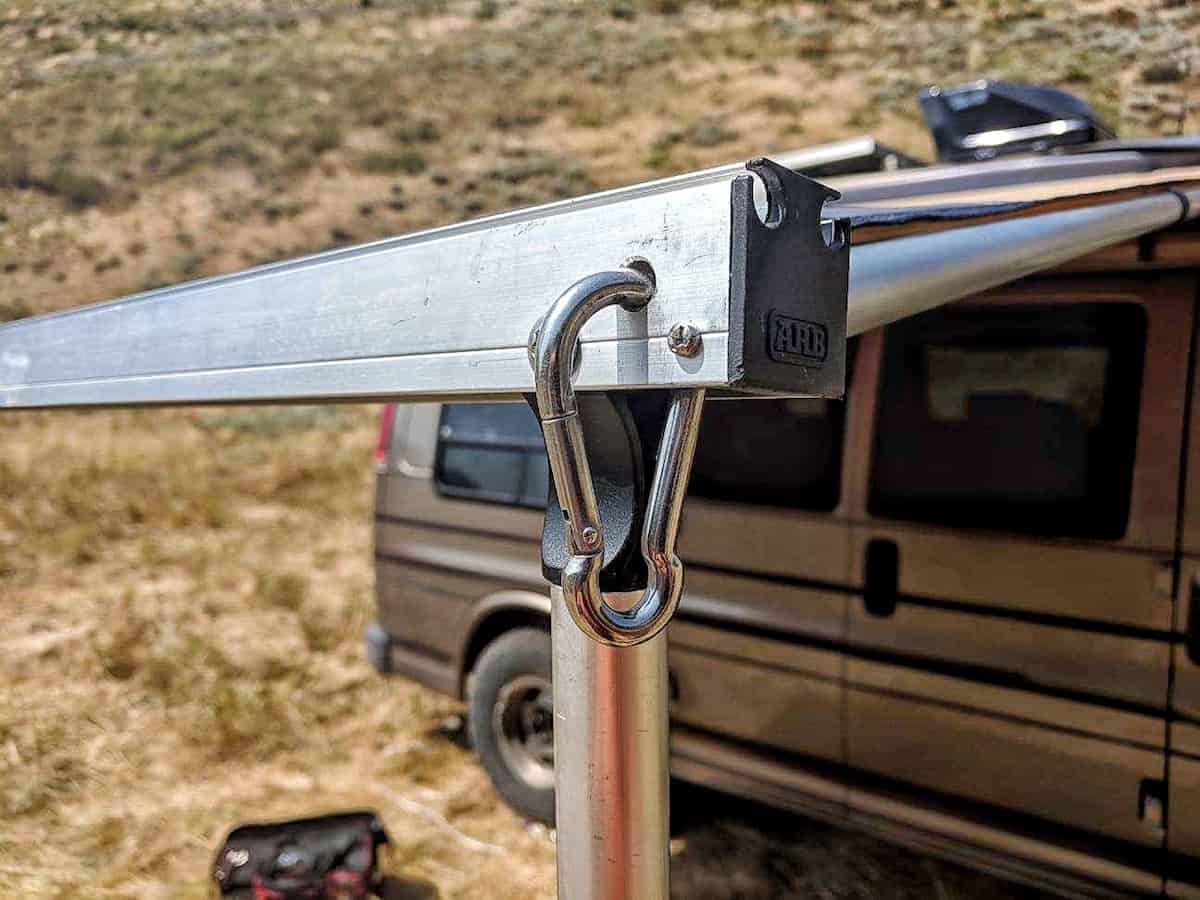
Heavy duty steel tent stakes hammer into the ground easier than basic ones. They also won’t bend, and they’re less likely to get pulled out in windy conditions.
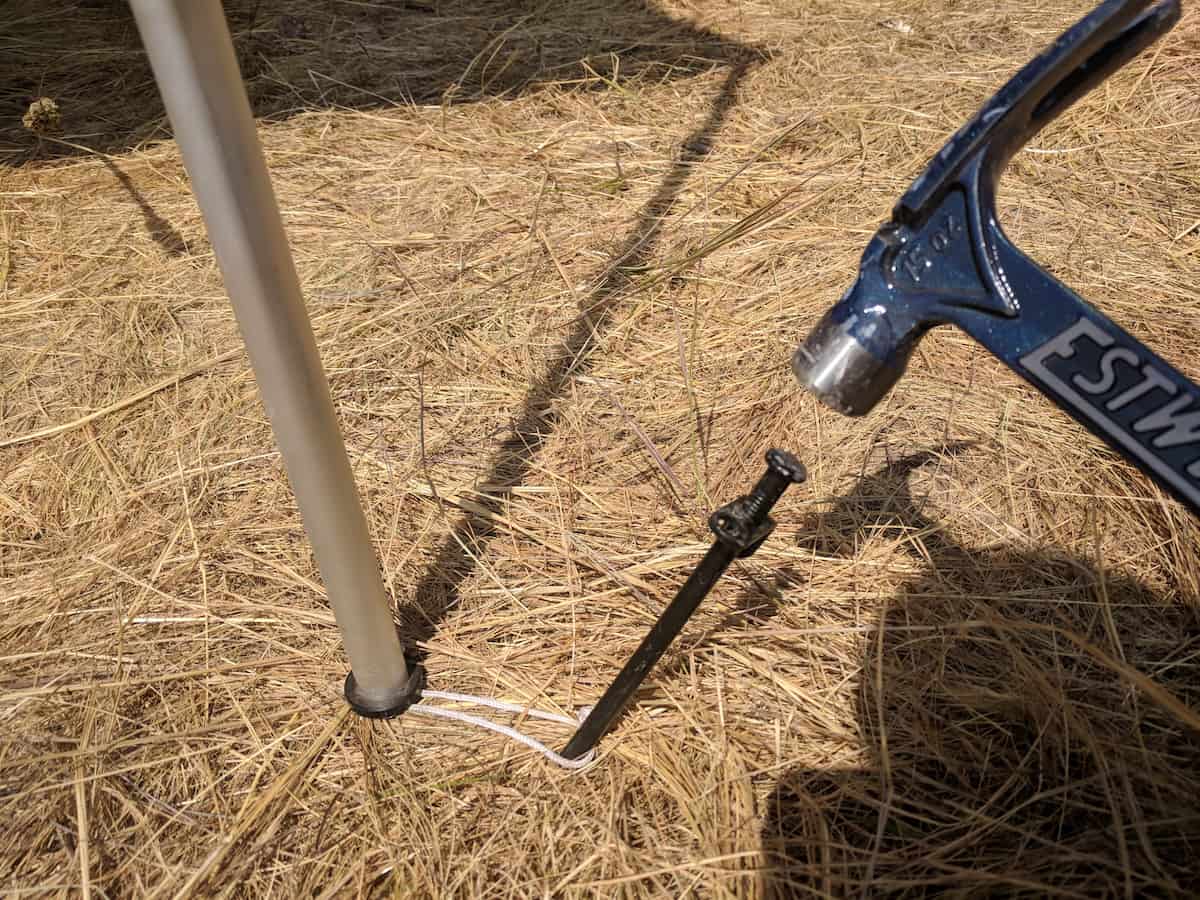
Tie down straps are much stronger than the included guy lines, and we’re able to tighten them down way better.
Here’s How We Tie Down Our Awning:
- Stake down the awning legs by driving a stake through the bottom rope loops. (Always drive stakes at an angle toward the legs so they’re less likely to get pulled out).
- Drive stakes into the ground at about a 45-degree angle out from the legs and a few feet away.
- Attach one end of the tie down straps to the carabiners, and the ratcheting end to the stakes. Ratchet until tight.
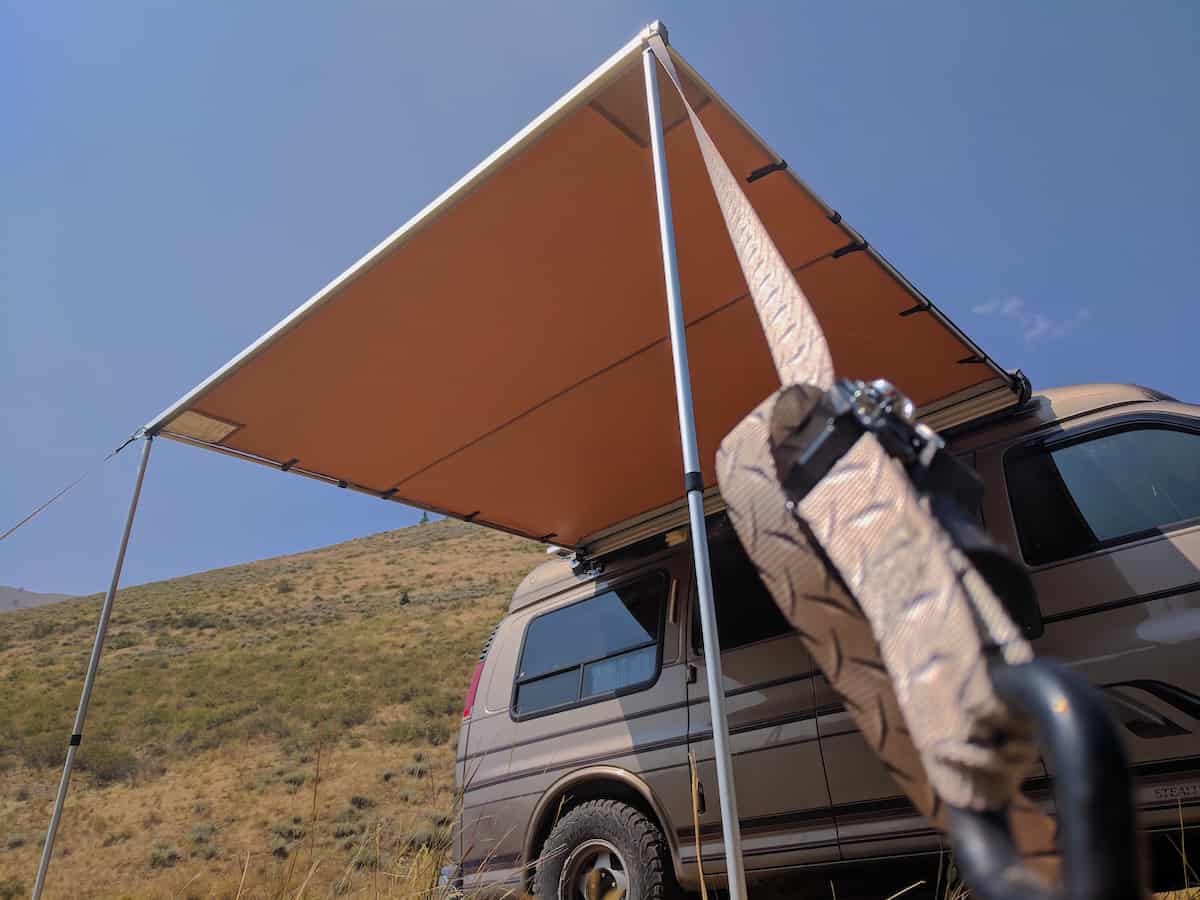
That Awning Ain’t Goin’ Nowhere!
Gnomie is finally rocking a sweet awning! Even though our high top gets in the way of most mounting schemes, we were able to attach our ARB awning safely and securely.
And upgrading the stock stakes and guy lines means we don’t have to worry as much about our awning in windy conditions. We probably wouldn’t leave it up during a storm, but we’re confident that it can hold its own in most conditions.
One of our favorite things about living in a van is that it’s easy to modify and upgrade our home as needed. For less than $400 and a few hours of work, we more than doubled our living space and added on a covered outdoor hangout area. Try doing that in a house!
For more in-depth build guides and helpful vanlife tips, be sure to follow us on Instagram @gnomad_home and on Facebook. Cheers!



Hmmm Four years later and it appears you still have the best solution for adding a ARB or similar awning to a fiberglass high top van. I have about exhausted all the various awning attachment scenarios possible. Wish the darn ARB Touring awnings hadn’t gone up so much in price. They are now 423.00 for the largest one. Thank you John. Still happy with your setup?
SierraVanCampers
Hi Jon, this setup worked great for us. However, we no longer own this van. We donated it to a nonprofit called Veterans Off Grid that provides off grid housing for veterans struggling with PTSD, so it’s in retirement as a stationary dwelling. We’re currently working on a new build.
Crazy that awnings are that expensive, I believe it was $299 when we bought it. Same with fridges. Our ARB fridge was $850, now they’re pushing $1100.
Hi, I have more of a question than a comment, I hope someone is able to help, I read all the information on how to install the brackets on a van with the high top conversion van but there was no information on where to purchase the brackets, I’ve looked all over the Internet for the brackets but haven’t been able to find them, I know that ARB is mentioned and the word “Highland” is on the bracket, if anyone can let me know where to locate the brackets it would be greatly appreciated. Thank you.
Hi Luis, the bracket came as part of a full ladder rack. I believe it was this one. We just used the brackets, not the cross bars or other unneeded components. Hope that helps!
It’s Ram Promaster … not Dodge
Why didn’t you just bolt the awning straight onto the fiberglass?
Hi Andrew, two reasons: One, our van was already built out, so unless we removed the wall paneling we did not have a way to add bolts directly to the fiberglass. Two, we didn’t think fiberglass would be strong enough to hold the awning, especially in windy conditions, without the awning flying away and taking big chunks of the fiberglass with it. If fiberglass is all you have to work with for mounting something (whether it’s an awning, solar panels, etc) we highly recommend adding interior reinforcements to distribute the load. Hope that helps!
~John
Hello John Serbell,
Question: I have a high top (curved roof) conversion van, similar to yours in the pictures. Do you know of any type of extension hardware to prop a standard/factory gutter rooftop rack up higher?
Thanks for any suggestions.
Hi Frances, that can be tough, and I haven’t looked around at what’s out there in awhile. I did find this Vantech rack (https://www.carid.com/vantech/h1-series-custom-cargo-rack-system-mpn-h1802b.html?view=263247&gclid=CjwKCAiApfeQBhAUEiwA7K_UH5Z2ASiDcTUOgqFBV03f8Yg7rueOhGQxaQOocww0QqpyxTQ409SinhoCZe0QAvD_BwE#specifications) that looks like it has 28″ uprights. Not sure if that would work. I don’t know of extensions, unfortunately.
~John
I will be mostly using my awning on concrete with sandbags because I work at street fairs. Any ideas on keeping steady in the wind? Also, would you recommend additional reinforcement inside of the fiberglass…like a wooden or aluminum rail?
Hi Mary, I don’t have a lot of experience setting up an awning in a non-camping environment, unfortunately. I would absolutely use something like sandbags to weight it down, because the ARB awning will take off if it’s not properly staked/weighted down. We had an instance trying to set up the awning on a windy day where I got distracted before I could stake it down, and the awning completely flipped up and almost broke. As far as the internal reinforcement, if you’re mounting to fiberglass I would absolutely add reinforcement on the inside. As you can see in this… Read more »
Thanks for the great Awning walk through, I just did the exact same setup on a 2000 Chevy Hightop following your site and I love it.
HI Jimmy, glad our article helped! Take care!
Thanks for the great guide! How many holes did you drill into your van for each bracket?
Hi Billy, we drilled one hole per bracket just to anchor the brackets to the high top. Hope that helps!
~John
I have a very similar van and would like to do the same thing but I am very hesitant to drill any holes into the fiberglass. Have you had any problems at all with the holes or any leaks?
Hi Tyler, I definitely don’t blame you for being hesitant. Any time you pop holes in your roof you are certainly at a greater risk of leaks developing, but the important thing is to make sure you properly seal around the hole. We’ve drilled into our roof to mount our solar panels, and also drilled into the side of the topper to run our solar wiring inside and mount our awning (as detailed in this post). We did have one leak initially from underneath one of the solar mounts, but adding additional caulking fixed the problem. We have not had… Read more »
Why do you believe that solar panels mounted on a roof rack would be more stealthy? I would think that the roof rack would be taller and make it more obvious that you have solar panels.
I just got a Ford Econoline with a conversion topper and I’m asking because I’m trying to decide how to mount my panels. Thanks
Hi Esteban, thanks for commenting! While roof racks are taller, they are very common on vans and tend to blend in. Solar panels mounted to the top of roof racks can also be pretty well concealed. Solar panels mounted straight to the roof, on the other hand, can’t be confused with anything other than solar panels. Mounting to a roof rack also offer other benefits like the ability to easily remove your solar panels if needed, and the ability to mount an awning to them. But a roof rack also adds expense, and our roof-mounted panels hold up just fine.… Read more »
Hi John, Thanks for the response and a huge thanks for all the content yall put out. You have given my girlfriend and I a lot of cool ideas as we begin our new journey. Please give a huge thanks to Nymeria and Delilah as well.
This would be perfect in the desert!
It’s definitely worked out for us! 🙂
Hi guys! Just bought a 98 Dodge 1500 high top conversion van and my husband and I have been debating the roof rack question, especially for solar, a cargo box, and surfboards, as we have a tiny passenger taking up storage space in her car seat :P. If you were installing a roof rack yourself, is there a brand you’d recommend?
Hi Nicole, that’s so exciting! The build process is a journey and it can be a lot of fun! As far as roof racks, we haven’t looked into
brands too in-depthly yet, so we don’t have specific recommendations. It can be a challenge finding gutter mount racks that will fit over a van high top (another option is looking at racks that you can screw directly into the high top). I know Aluminess makes quality products, but they can be quite pricey.
~John
Great creative problem solving! I have a question about the mounting brackets. You write, “The ARB awning comes with six square head mounting bolts that slide into channels on the back of the awning. These channels line up exactly with the holes on the ladder rack brackets.” Did you know beforehand that the dimensions on the awning and the brackets were exactly the same, or did you just get exceptionally lucky? Is there an industry standard dimension for these type of brackets/racks? Would you still have been able to mount the awning if you had the crossbars installed as well?… Read more »
Hi Brady, thanks for commenting! To answer your questions: –We did know beforehand that the brackets lined up with the holes. When I was combing through the Amazon reviews for this rack before we bought it, a reviewer mentioned that he used them to mount an ARB awning and the holes lined up perfectly. –I don’t know offhand whether there is an industry standard. But even if the holes did not line up, we would have been able to drill our own. –We would still have been able to mount the awning with the crossbars. There are four holes on… Read more »
I think your tie-downs are superior. Good thinking and simple work.
Thanks Stuart, they’ve worked very well so far!