It’s every vanlifer’s worst nightmare. There’s a leak somewhere, and a good rainstorm brings a steady drip of water that might not seem like a big deal at first. But that water ends up leaching into some dark, unventilated corner of your van, and before you know it you’ve got a mold problem.
This is exactly what happened to us recently. Since day one we’ve had issues with our aging rubber door seals – excessive wind noise in the front, and water leakage in the back. Every time it rained, a trickle of water dripped down our rear doors and soaked the edge of the flooring underneath our bed. Replacing the door seals actually made the problem worse, since they don’t make one of the pieces anymore (some creative caulking around the top of the door seal finally fixed the issue).
But after a year on the road the damage was already done. We were rearranging the trunk one morning when we noticed some white fuzz peaking up between the floorboards. Mold!
The leaky door seals had caused water to soak into the subfloor, and mold started growing. We began peeling up our laminate flooring bit by bit, revealing a dusting of white and greenish mold that continued along the left side up towards the front of the van.
Not wanting to deal with a mold-infested living space, we decided to tear everything out and completely redo our floor. In the process, we took a few extra steps to make sure that mold will never again be a problem.
Here’s everything we’ve learned about mold prevention in a van, the steps we took in our new flooring install, and what you can do to stop mold from taking hold in your van build.
Vanlife Mold Prevention 101
The idea of mold growing somewhere in your van without your knowledge is definitely worrisome. But if you take a few easy preventative measures, you can go a long way towards stopping the worst mold problems before they start.
Make Sure Your Van is Properly Sealed

Leaks are bad news, and not just because of the annoyance of water dripping on you and your belongings. With any leak, there’s the danger that moisture is collecting somewhere hidden, which is a big cause of mold.
Moisture + Organic Material + Lack of Ventilation = Mold
This is exactly what caused the bulk of our mold problems – leaky rear door seals. If we had dealt with this as soon as we noticed it instead of waiting for almost a year, we might have avoided the worst of our mold.
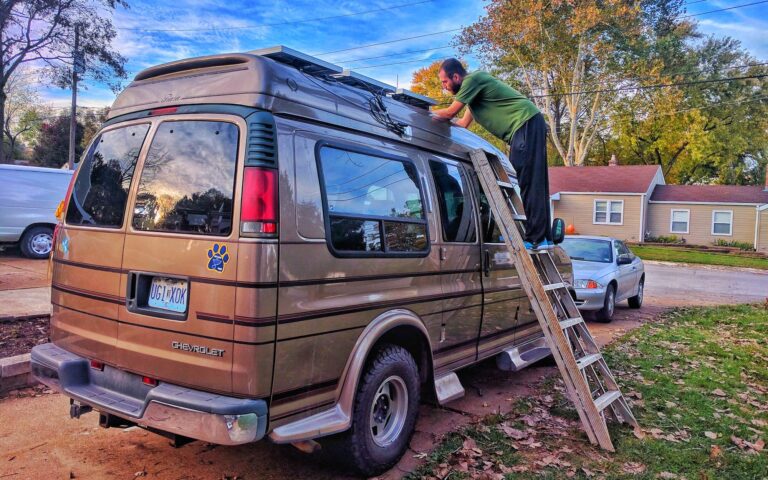
Check your door seals for leaks. Make sure you use plenty of sealant over any holes you drill in your roof for mounting solar panels or installing a vent fan. Fix any issues that crop up.
Make Good Ventilation a Priority
Mold does best in dark, poorly ventilated areas. If you allow too much moisture and condensation to collect inside your van, you’re creating a prime environment for mold spores to take hold and thrive.
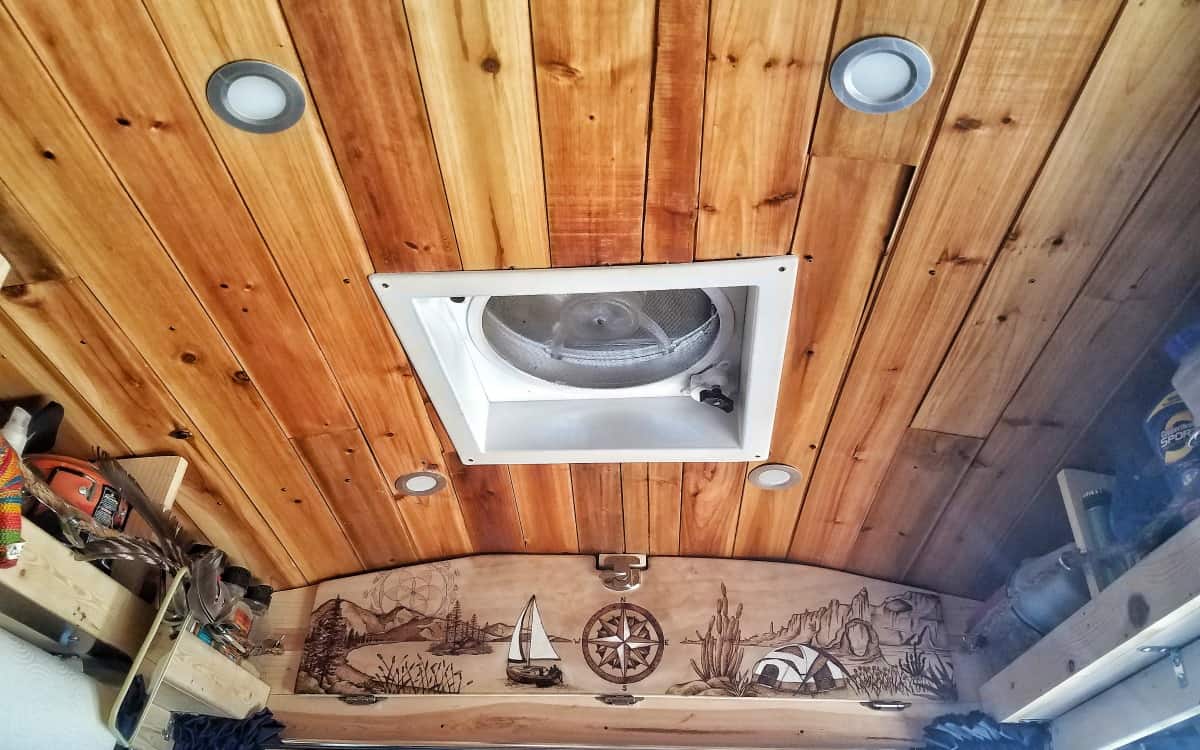
The number one thing you can do here is install a good roof ventilation fan. Vent fans suck out moist air and pull in fresh air, creating airflow that really helps keep things relatively dry. They also provide ventilation while cooking, and help keep your van cool. We almost never turn ours off.
We recommend the Maxxfan 6200K, since it has a built in rain cover that allows you to keep it running in all weather – a must have feature for living in a van, in our opinion.
If you don’t want to throw down for a vent fan just yet, we highly recommend at least getting some sort of 12V fan. That combined with an open window will go a long way towards creating proper ventilation.
Treat Hidden Surfaces with a Mold Preventative (or two)
Treating hidden, mold-vulnerable areas (like your subfloor and behind your walls/ceiling) with a mold preventative helps protect you from mold even if moisture does find its way to these areas.
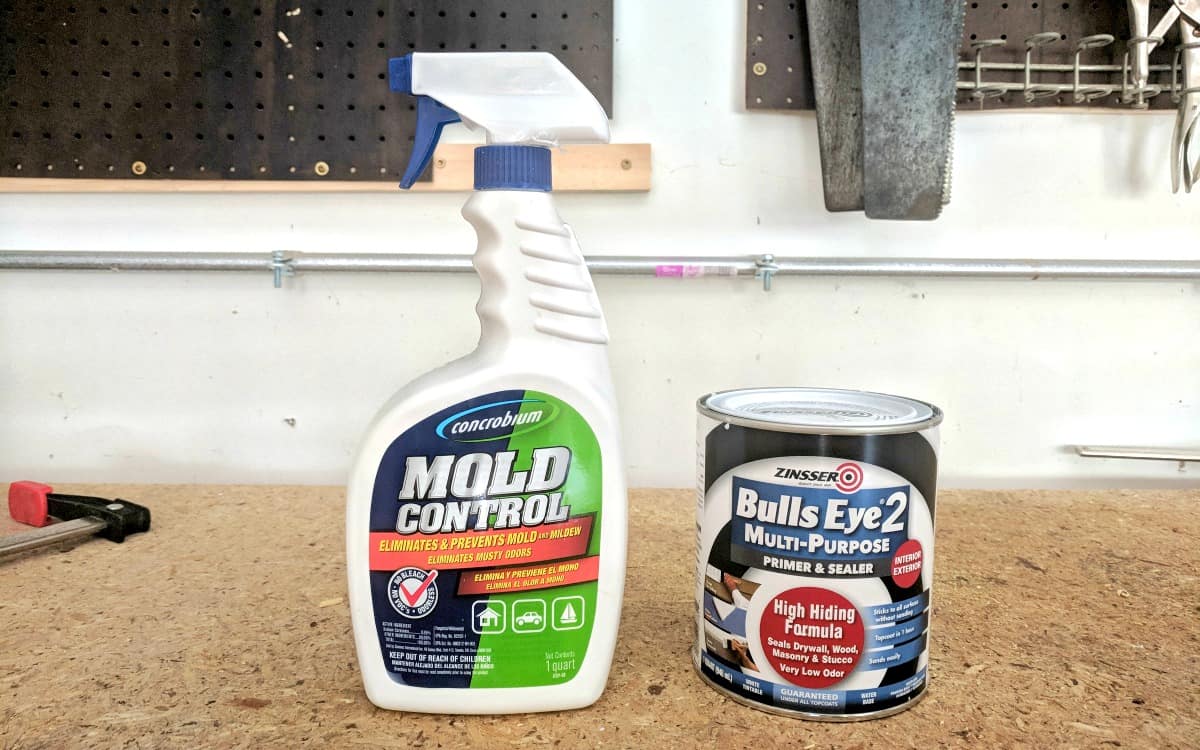
After we found the mold on our subfloor, we did a ton of research on this. We found out about a product called Concrobium, which is a natural, non-toxic mold killer and preventative spray. Unlike bleach or vinegar, which only treat surface mold, Concrobium penetrates deep into wood fibers to kill mold spores at the roots and prevent future mold from growing.
Spraying down your subfloor and the backs of your wall and ceiling paneling with Concrobium can stop mold growth before it starts. Concrobium is available at any big box hardware store, but it’s usually cheaper on Amazon.
Another product that can help prevent mold growth is Zinsser Bullseye 123, a paint primer that creates a mold-resistant film. Painting your subfloor with Zinsser Bullseye can help prevent mold from penetrating.
We wanted to be totally safe with our new subfloor, so we used both Concrobium and Zinsser Bullseye. We also treated the interior of our kitchenette with Concrobium, since this is a naturally wet area of our van.
Installing a Mold-Proof Subfloor and New Vinyl Plank Flooring in Our Van
What We Used to Redo Our Floors
Mold Prevention
Sound Deadening
Insulation
Subfloor
Flooring
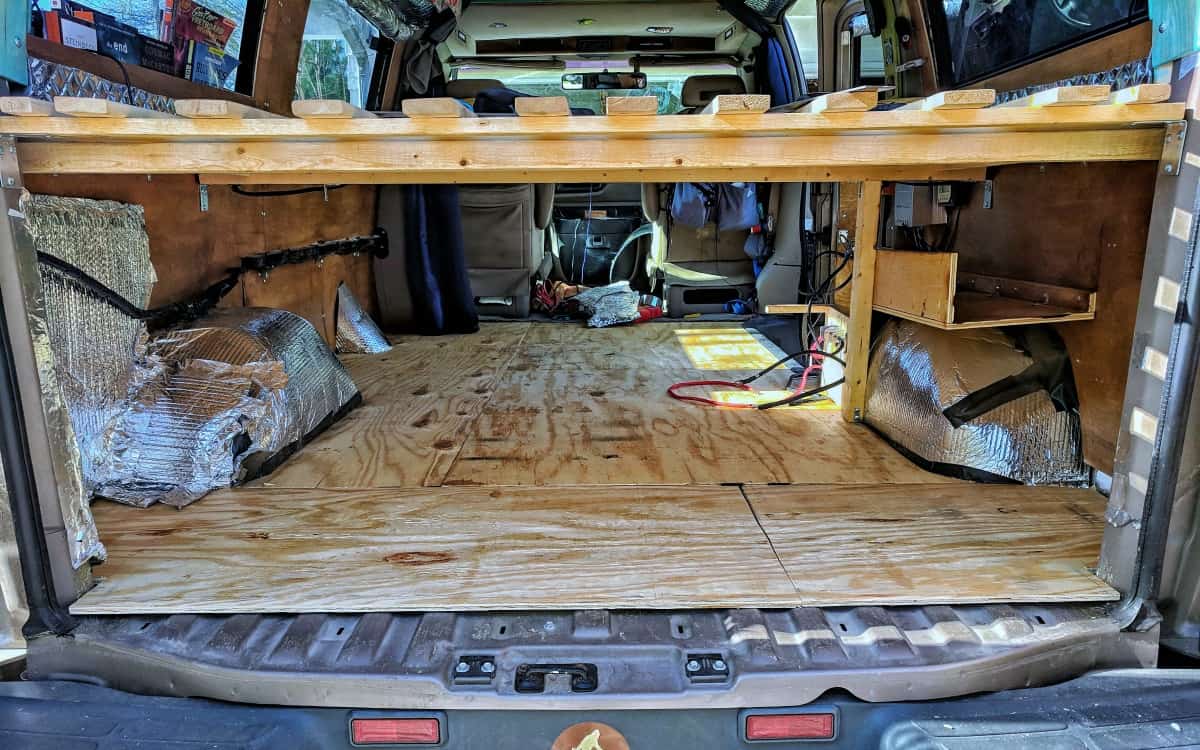
First, We Gutted the Van and Ripped Out the Old Flooring
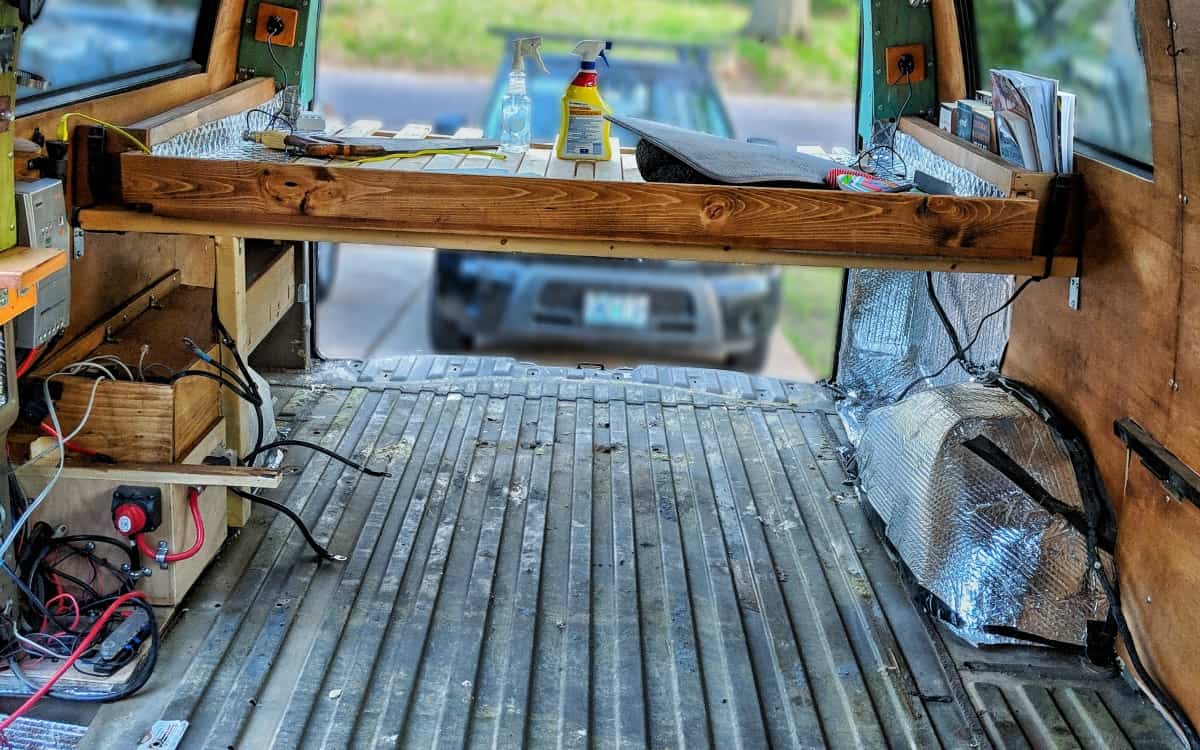
This went a lot quicker than we expected – it only took us a few hours to dismantle the furniture and rip out all the flooring and insulation. Luckily, we built our furniture to be somewhat modular, so once we undid all the brackets holding it down we could pretty much slide it right out. We also had to unhook most of our electrical system.
Note: As an added bonus, we took this opportunity to remove our van’s rear ac unit that had been taking up space by the back doors. Double win!
Next, We (Finally) Added Sound Deadening to Our Van
Not adding sound deadening before building our van was a major regret of ours because we had a ton of road noise. So while we didn’t have a floor we decided to add it in.
We didn’t have time to order actual sound deadening material online. Instead, we went to Lowe’s and picked up Peel and Seal flashing tape from the roofing aisle.
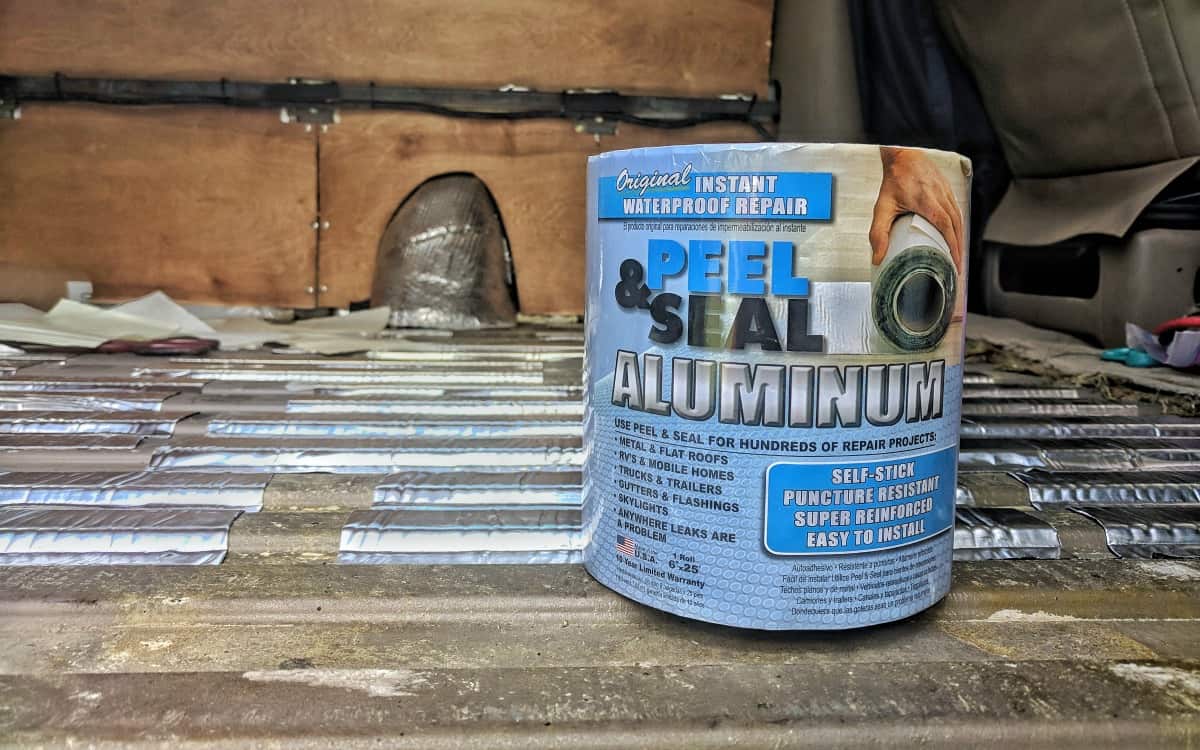
This stuff is very similar to commercial sound deadeners, but it’s easier to find and tends to be cheaper. Peel and Seal is about $1.28 per square foot, versus $1.77 for Noico and $2.19 for Fatmat. We used three rolls for the floor and the front door panels. Total cost: $48.
Installation was fairly simple. We cut strips of Peel and Seal, and pressed it in place using a small handheld roller tool that we had on hand. There’s no need to cover every inch of floor, because the mass of the sound deadener prevents surrounding areas from vibrating.
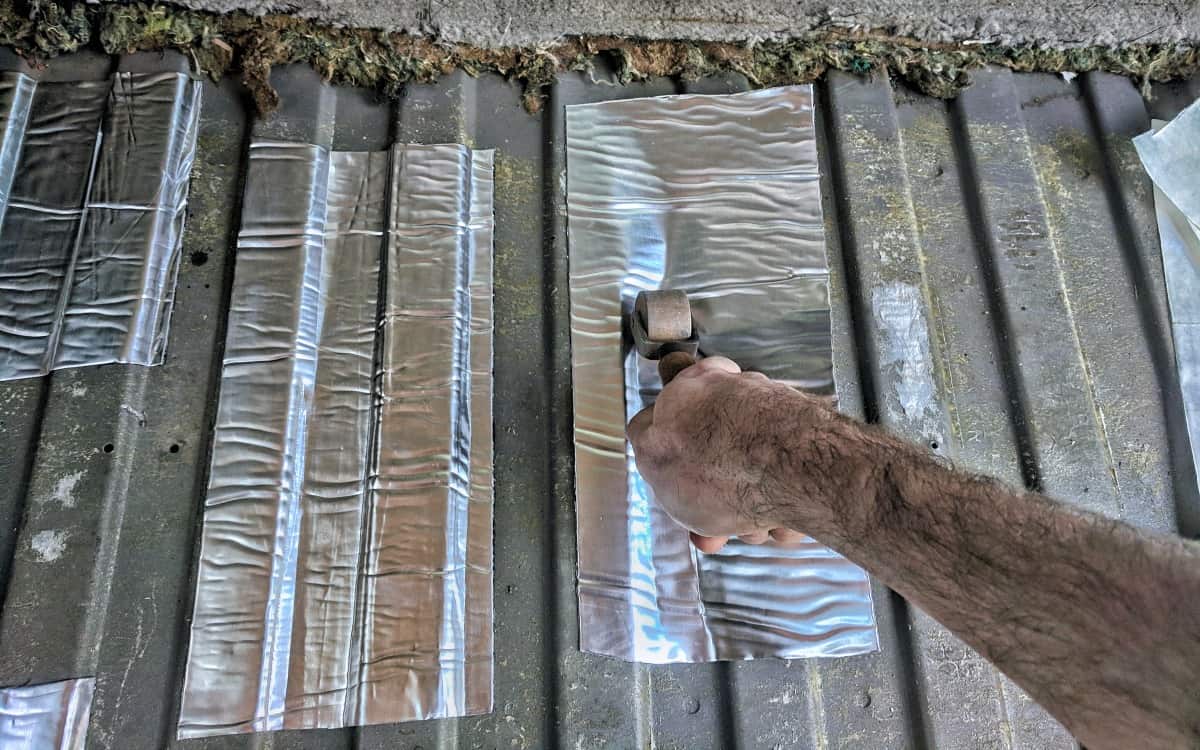
After installing this, our van is definitely quieter. We can’t compare its effectiveness to Noico or Fatmat, but it gets the job done.
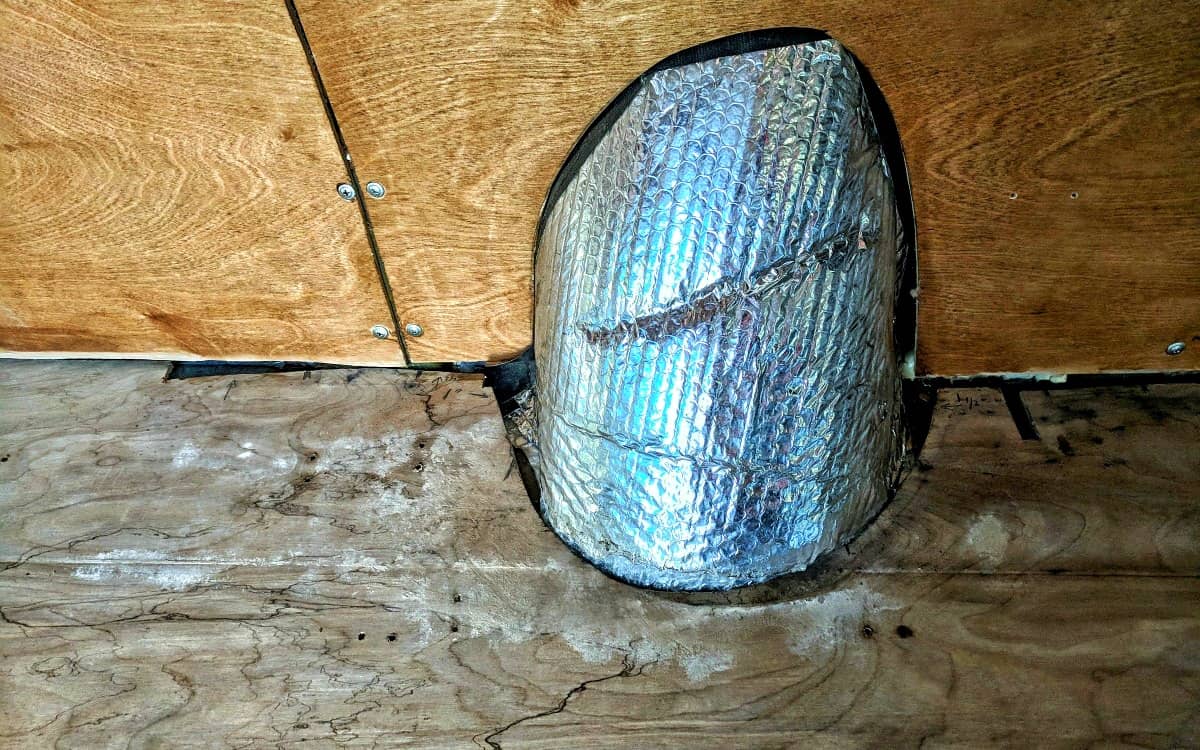
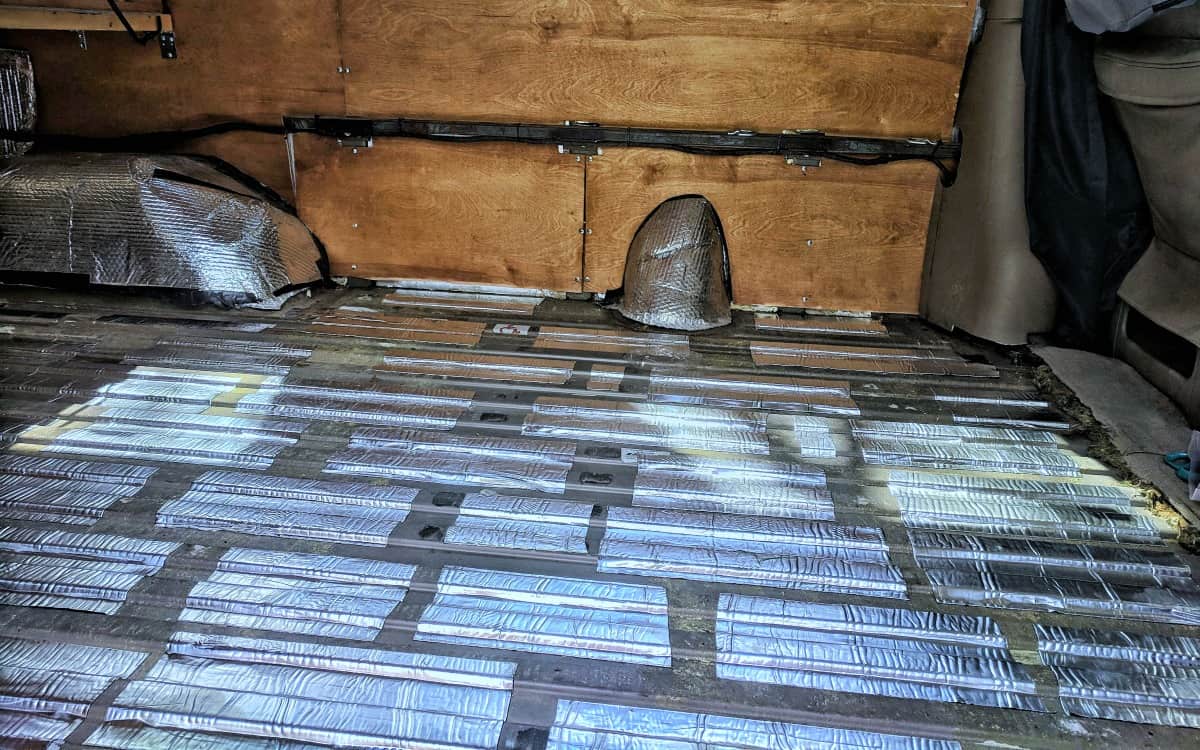
Then, We Laid Down a New Layer of Reflectix for Insulation
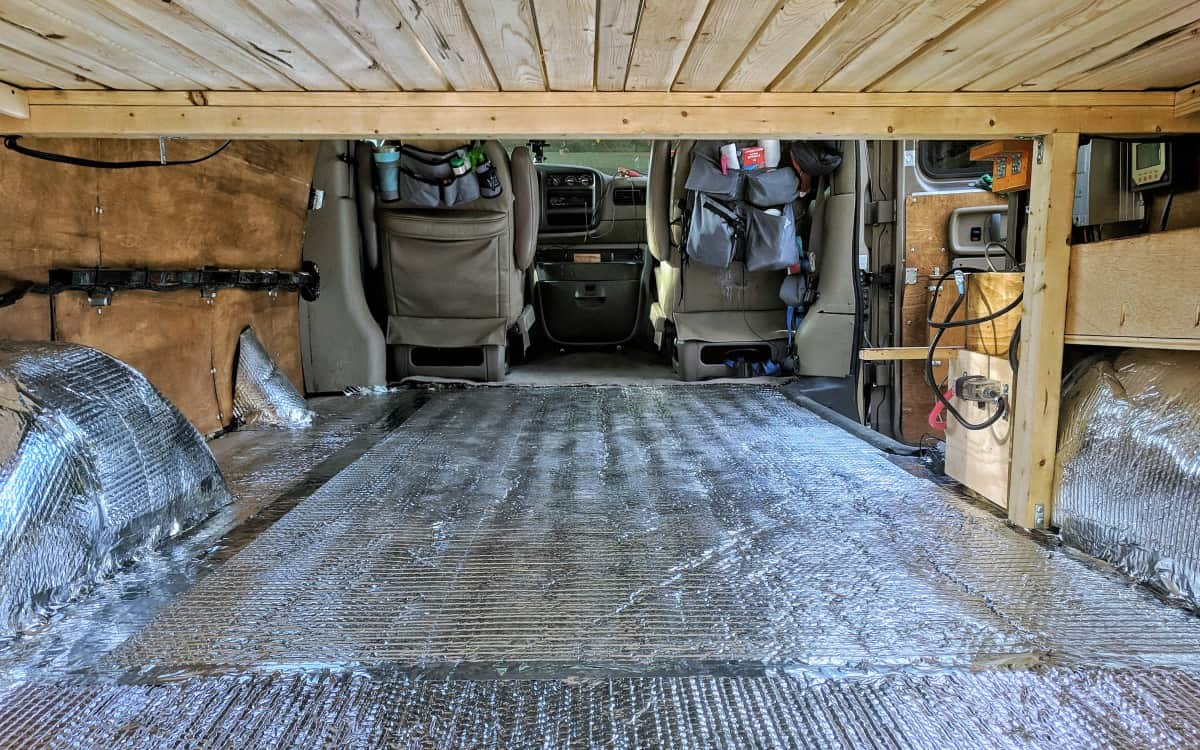
We know, we know. Reflectix needs an air gap to really be effective as a radiant heat barrier. But it’s still about R-1 by itself, it’s nice and thin so it won’t take up too much height, and it’s better than no insulation.
(Read our detailed post on different vanlife insulation materials for more information on Reflectix and its proper uses.)
To install the Reflectix we cut it to fit, sprayed the underside with 3M High Strength 90 adhesive, laid it down in the van, and taped the seams with 3M Foil Tape.
Next, We Measured, Cut, and Test Fit the Subfloor
We went with ⅜” plywood this time. Since the vinyl flooring we got is much thinner than laminate, the thicker subfloor provides more strength for screwing down our furniture.
In our initial flooring install, we used cardboard templates to trace the subfloor. This time, we were able to use the original subfloor as a basis to trace the van’s contours onto the new ⅜” plywood. Because the living space in our van is 6’x10’ and plywood sheets are 4’x8’, we needed two sheets of plywood to make the four interlocking pieces of the subfloor.
Once we had the subfloor traced, we cut it out with a jigsaw and test installed it in the van to make sure it fit. We had to tweak some corners here and there, but overall it was pretty close.
Then, We Mold Treated the New Subfloor and Installed it in the Van
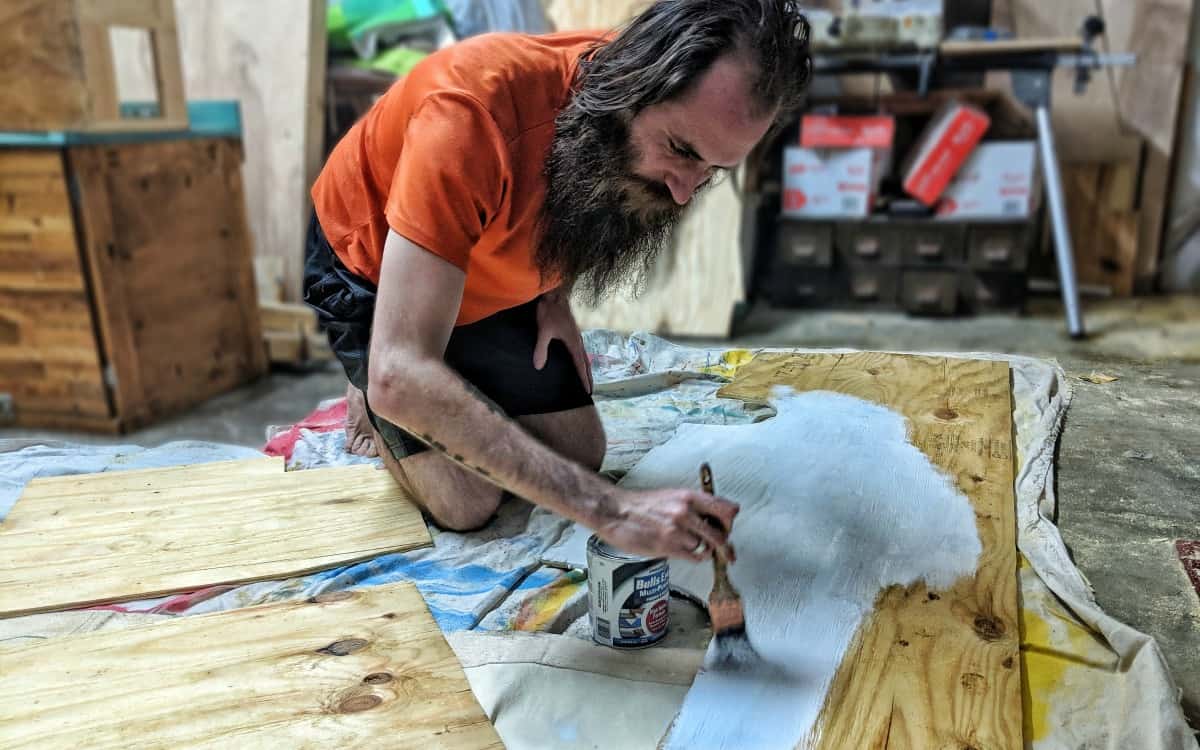
First, we soaked every inch of the subfloor with Concrobium mold killer/preventative and let it dry overnight. Then, we painted it with Zinsser Bullseye 123 mold resistant primer.
The Concrobium kills existing mold spores deep inside the wood fibers and helps prevent new ones from taking root. The Zinsser Bullseye seals the wood and prevents mold from penetrating. With both of these on our subfloor, we shouldn’t have to worry about future mold problems.
After treating the subfloor, we installed it in the van. To make sure the subfloor stayed together and level for the vinyl flooring, we filled the cracks between the subfloor pieces with Gorilla Construction Adhesive caulking, leveled it out, and covered it with Gorilla Tape.
Next, We Installed Our New Vinyl Plank Flooring
Putting in a new floor gave us the opportunity to rethink the material that we used. When we originally built our van, we used laminate flooring. Laminate is cheap, works well, looks good, and we were happy with it overall.
But the section in the back where water had been leaking undoubtedly showed deterioration, and when we started ripping it up it was nearly falling apart. That’s the big downside with laminate – it’s not as durable as some other options, and it doesn’t hold up well to prolonged exposure to moisture.
For our new floor, we decided to go with vinyl plank flooring (the interlocking variety that we got is called “luxury vinyl”). Vinyl flooring in general is a great option for vanlife because it’s durable and waterproof. Here’s what we liked about plank vinyl flooring:
- You can find different thicknesses for increased durability
- Luxury vinyl has interlocking edges like laminate, so installation is just as easy.
- Installing luxury vinyl planks is much easier and more forgiving than laying down sheet vinyl.
- It looks great, and often has a nice texture that makes it look more like wood (and stops dogs from sliding around – which was a BIG problem with our laminate flooring).
- It’s waterproof and non-organic, so it will not mold or show water damage (or allow water to penetrate to the subfloor).
Downsides of Vinyl Plank Flooring
While plank vinyl has several advantages that led us to choose it for our new floor, there are also a few disadvantages to be aware of.
- Contraction in cold weather. Vinyl planks are temperature sensitive, and they contract in cold weather. We’ve seen small gaps develop between our planks when we’re in lower temps. It doesn’t seem to affect the integrity of our floor, but we probably would have made a different choice if we had known about this ahead of time. Sheet vinyl would not have this issue, and our previous laminate floor did not contract.
- Cost. Luxury vinyl planks are more expensive than both sheet vinyl and laminate. We paid about $60 in total for our laminate flooring, whereas the vinyl planks cost us about $180.
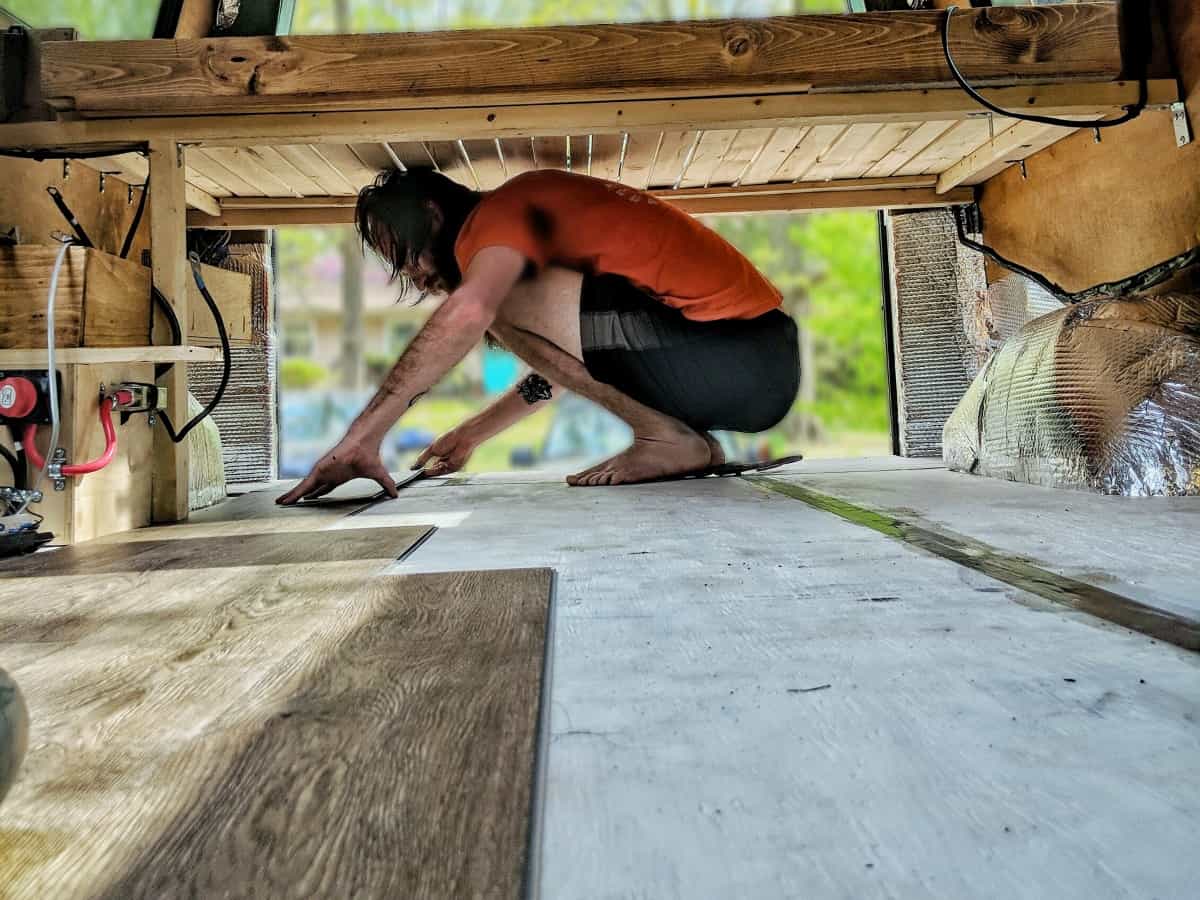
Installation was very similar to installing our original laminate floor.
We started by the side door, and laid it down one complete run at a time. The vinyl planks locked together much easier than the laminate, and we used a rubber mallet to complete the final tap in.
We mixed up the lengths for each run. The first run we started with a full length piece, then started the second with a half piece, then a third piece, then another full piece, and so on. This staggers the seams, which makes the floor look more natural and hold together better.
Cutting vinyl planks is super easy with just a box cutter or a good pair of kitchen shears, which made it MUCH simpler to fit the flooring around obstructions like the wheel wells.
Finally, We Put all the Furniture Back In – and Voila!
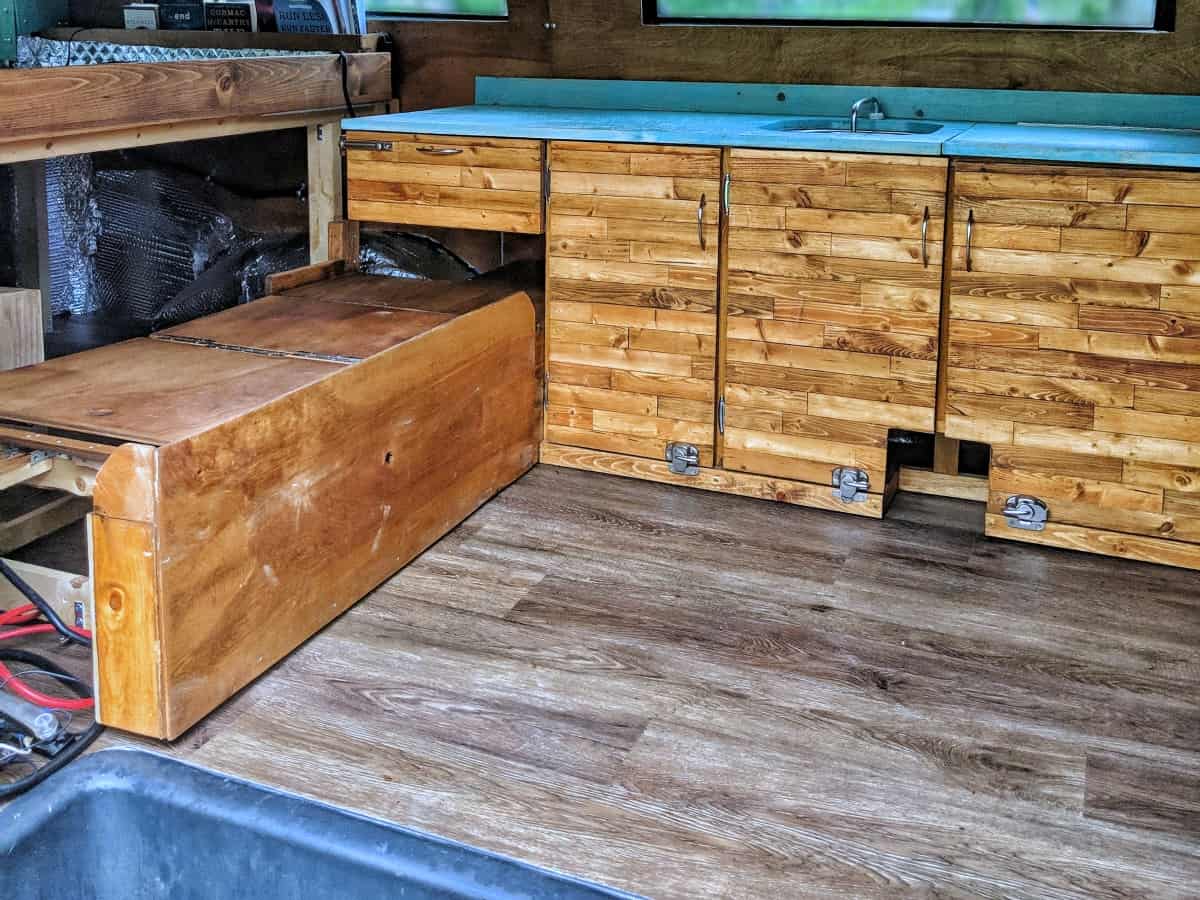
After we installed our brand new floor, all we had to do was put the furniture back in and reconnect the electrical – which didn’t end up being too bad since our furniture is largely modular.
We’re very happy with the new floor – it seems more durable, it looks a whole lot better, and the grayish tone that we went with breaks up the monotony of the wood color in our van.
Lessons Learned
- Leaks and mold are serious business. It’s worth it to take the extra time to check for leaks and treat hidden areas with mold preventatives.
- Make sure the furniture in your van is MODULAR – that way if you ever have to do something like this, it’s a whole lot easier to take things out and put them back in.
- Vinyl plank flooring is better than laminate for van use. While it is more expensive, it’s waterproof, it’s more durable, it will not mold, and it often has a texture that prevents dogs from sliding around as much.
- Vans are like houses – you’re always fixing or changing something!
Well, there you have it! Dismantling, mold treating, flooring, and reinstalling the furniture in our van took us about a week. Even though it was an unexpected problem, we learned a lot about mold prevention, and we were able to do a much better job with our flooring the second time around.

I live in chevy express (2010…oldie)….. I saw your website page about flooring….. I am about to gut the flooring out and put in new flooring…. i writing to ask advice/opinion? If you not available to respond, that is fine i understand. So okay when i gut the floor……….naturally i will be washing/scrubbing the bare metal van floor before putting in new floor… My question to you may sound silly but am assuming you may know better than I….what do you recommend i wash/scrub the bare van floor WITH? i know silly question….but not often one strips a vanfloor bare… So before laying down… Read more »
Great article! I may have missed it in your article, what do you do to seal the edges?
Hi Alec, we sealed the edges of the plywood with the Zinsser paint. For trim to make it look nice, we used aluminum angle strips similar to this: https://www.homedepot.com/p/Everbilt-3-4-in-x-1-2-in-x-48-in-Aluminum-Flat-Angle-with-1-16-in-Thick-801737/204273986
Hope that helps!
Thanks for the great post!
How do you do the flooring around the front two seats, especially where it’s uneven and has curvy mounds?
Also, best ways to take out the interior wall moulding and fix that after a mold/ leak issue where a conversion kit attaches?
Hi Nae, we typically only do custom flooring in the rear of the van, and leave the stock flooring in the cab. So unfortunately I don’t have general advice on this. Typically flooring products require a level/flat surface. But you could use sheet vinyl or marmoleum, which would cover everything, it just wouldn’t be flat.
Hi – quick question. Was your subfloor floating? If not, how did our attach it to the van floor? If screwed down, did you use any type of sealant? Same for the vinyl planking – did you attach it at any points to the subfloor?
Thanks!
Hi Sandra, we glued our subfloor down using construction adhesive. The vinyl planking is designed to be floating, so no attachments. For both the subfloor and flooring, the additional weight of the van furniture (which is attached to the frame) holds everything down. Hope that helps!
~John
Hi! Love your site, have been using it for my 2002 Ford Econoline camper conversion. Quick question about the vinyl flooring. You said it can be cut with scissors or box cutter? How thick was your flooring? I will be using 5-mm Thick Waterproof Interlocking Luxury Vinyl Plank Flooring. I do not own a table saw. Thanks!
Hi Marissa, I don’t remember off the top of my head the thickness, but it was luxury vinyl planks probably similar to yours. We were able to cut them with some good kitchen shears. The shears are good for cutting shapes/contours to fit the flooring around your van, whereas for straight cuts a box cutter with a straight edge was a good option. Hope that helps!
John
Super helpful, thanks! I’m curious how you dealt with gaps at the edges. Did you leave them to allow expansion/contraction, or fill them with silicone or something?
Hi Damon, we left ours. Since they do expand and contract, I’m not sure if I would fill them with anything. However, if/when we do our floor again, we’ll probably go with either vinyl or linoleum sheets to avoid this issue. Hope that helps!
Reflectix is not great for insulation. It has a low R value and also requires a airgap for it to work properly. Reflectix is best for repelling radiation!
Exactly correct. There are many misconceptions regarding reflctix, which we go over in our insulation post (https://gnomadhome.com/van-build-insulation/). As we’ve mentioned, we only used reflectix under our floor because we were concerned about height and figured the R-1 is has is better than nothing.
we are starting a build, how did you secure your subfloor down? Did you screw it to the floors frame?
Hi Rosanne, we used construction adhesive to help secure our subfloor to the insulation below it. That combined with the weight of the furniture on top (which is further secured to the vehicle frame) keeps everything very secure. Hope that helps!
~John
Hey John, thx so much for this info. Putting the floor in my 91 G30 right now!
I have engineered plank flooring that i think I’m going to use. Would prefer linoleum, but i have the engineered plank plorring. Will have to be careful about spills.
Question for you pls. How did you attach your furniture to the van’s frame? I would like to attach my kitchen to something more sturdy than just the 1/2 inch ply subfloor. Thank you!
Hi Nico, in our van we used self-tappoing sheet metal screws and brackets to attach things to the frame. However, I can’t say I recommend that route today for a variety of reasons. A better option is to use a product called “plus nuts” to create anchor points sing the existing holes in the frame, and bolt the furniture to those. Hope that helps!
~John
Thanks for all the great info. Just started building out my Astro and while I wait for all my supplies to arrive I’m going to spend lots of time making sure leaks are sealed. Old vans leak! It’s so easy in the excitement of the build to over look this important step. Really grateful for this site. Whenever I’m undecided about some aspect of the build this site usually helps make the final call. I was really having a hard time deciding on floor/subfloor, now I know what I’m doing. Thanks again.
Hi Nolan, so glad our site has been helpful! Best of luck on your journey!
~John
Thanks for all the great info.
Of course Kim, glad it was helpful!
Hełlo, enjoying your blog. Curious about the floor edging at the sliding door. It appears flush with the edging, and I wonder if it’s not sealed off? If not, wouldn’t that allow water to seep into the subfloor area?TIA
Hi Lillian, thanks for commenting! We actually covered that up with a metal flooring transition strip from the hardware store – we should add a photo of that to the post. You can sort of see it in this Instagram photo: https://www.instagram.com/p/Blqdsy5A1cm/
Hope that helps!
~John
Hey Guys, Thanks for all the great posts! We have learned a lot for you two! We have one question, as we have just finished our subfloor and looking into the type of flooring to install. Did you screw your cabinets down through the vinyl plank flooring? If so, have you experienced and buckling or any problems after doing so? I know that type of floating floor is supposed to breathe with the change in temps so we would love to hear your experience. We were initially very worried about putting a floating floor in our van! Haha. Thanks in… Read more »
Hi there, thanks for reading! We did screw out furniture directly through the vinyl plank flooring, we did not have issues with buckling, and the floor and furniture are all very secure. However, vinyl plank flooring does expand and contract with temperature, so we have seen gaps develop when we’re in cold temps. Our floating laminate floor did not have this issue, and vinyl sheet flooring also would not do this. Hope that helps!
~John
My GF and our two dogs spent 6 months in our 87 Ford E-150 last winter. This year its going to be a permanent thing. About to gut the original bed and interior in the next month and have been researching insulation and flooring. You have a bunch of great info and I love reading updates to see what and what doesn’t work. Thank you!! My question is did you prime both sides of your 3/8″ subfloor after treating with the Concrobium? Happy Travels!
Great post, much appreciated. Is the installed floor fixed to the van floor in any way?
Hi Dan, glad you like the post! The flooring itself is a floating floor, so it is not fixed down to anything. We did glue down the subfloor using heavy duty construction adhesive, but most plank flooring is intended to float on top and not be adhered down. Hope that helps!
~John
Thank you John! Very helpful.
Dan
You have been SO helpful during our van build— thank you!! Did you paint both sides of your plywood with the Zinsser (after concrobium spray), or is one side sufficient?
Hi Alyson, thanks for reading! We painted both sides of the plywood, which seals up the whole thing and prevents mold from penetrating. Hope that helps!
~John
Thanks for this article, too. I wonder if you’d elaborate on your leaky rear window fix. I have the exact same van with the exact same issue. Thanks!
Hi Chad, we basically took some silicone caulk and sealed all along the top of the rear door seals. There’s an outer piece above the doors, and an inner piece that seals the doors from the inside. We caulked along the top of both of those. It’s worked so far, but we’re still keeping an eye on it. Hope that helps!
~John
Thank you so much for this! Right now, we are building our ’89 Ford Econoline Campervan and during the gutting process we noticed there was lots of mold on the existing wood. We have already gutted it and and making sure our van is properly sealed (sealing holes, etc.). This article is super helpful because we want to make sure every hole is sealed properly and will be doing the exact same thing you did. Thank you, thank you!
Hi Veronica, mold can definitely be a pain! If you’re trying to rehab a piece and not rip it out entirely, Concrobium can also kill mold on existing wood better than bleach or other surface cleaners, and (theoretically) prevent it from growing back. Good luck with your build!
I’d love to see a photo of the makeshift seal you guys added to the leaking door!
Hi Victoria, there’s not much to see, it’s really just black silicone caulk smudged along the top of the door seal. We can try to snap a photo and add it in though!
~John
Great post on how not be moldie, if not an oldie. Thanks for the info.
Hope to see you guys again soon.
Thanks Dan! Hope to see you guys out on the road!