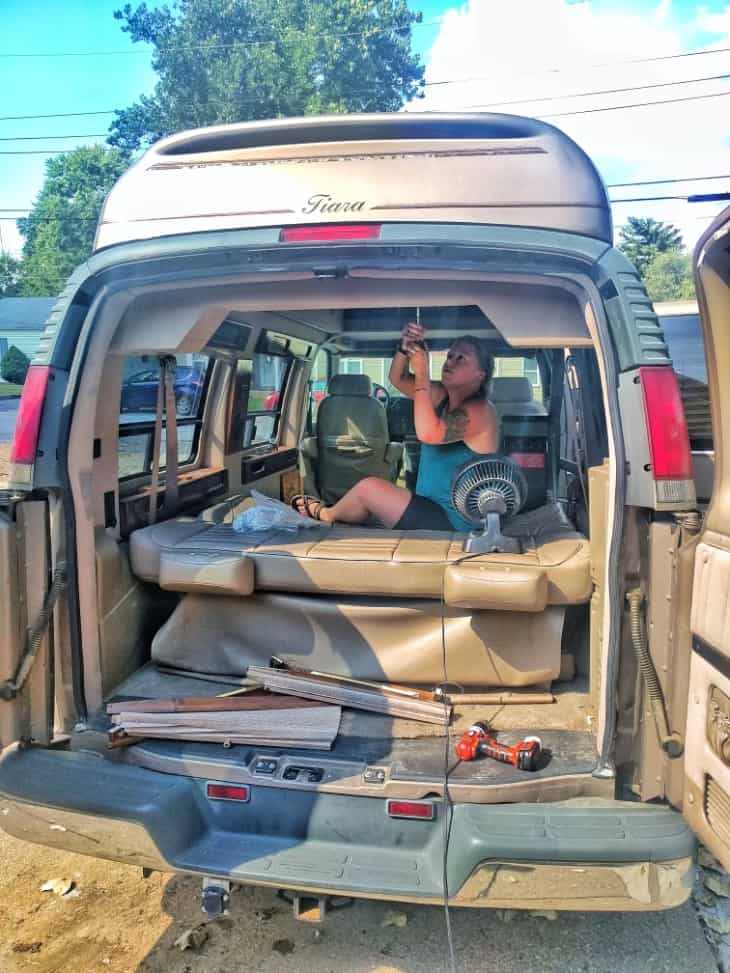
The van we bought was a 1996 Chevy Express high top conversion van with a wheelchair lift. The good thing about buying a van like this is that many of them have some pretty nice amenities – leather seats, power windows and locks, etc. – and, of course, the high top. While we can’t fully stand up in it (or, at least, John can’t), it’s still much better than dealing with the lower roof of a standard van.
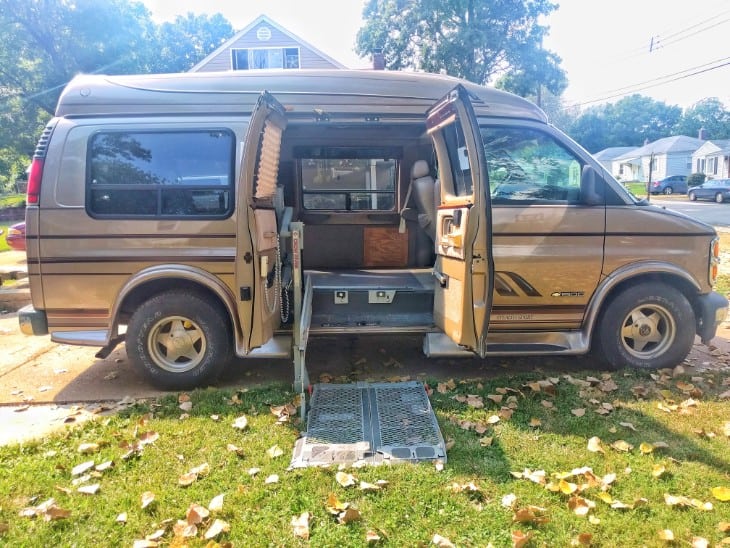
The bad thing about buying this type of van is that you need to gut it before you do anything else.
Gutting our van didn’t end up being too difficult, but it still took up a few days of our time and energy when we could have jumped right into building if we had bought something like a work van. And we made some mistakes along the way that caused us some headaches later on.
Ripping Out the Interior
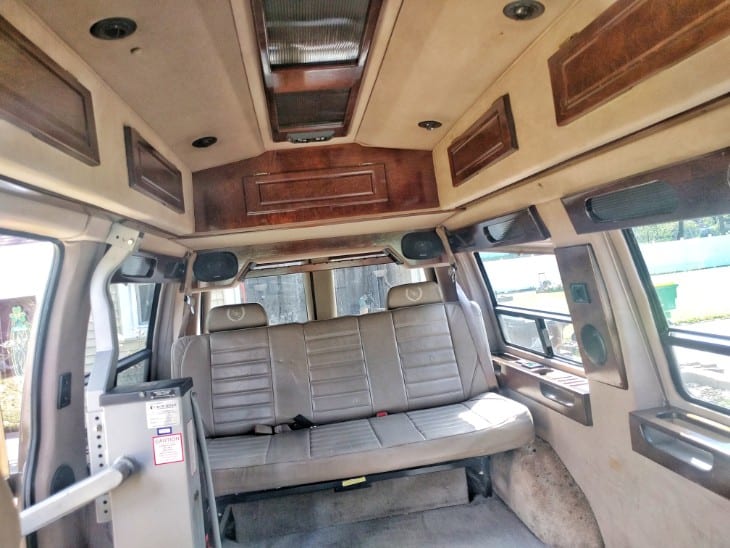
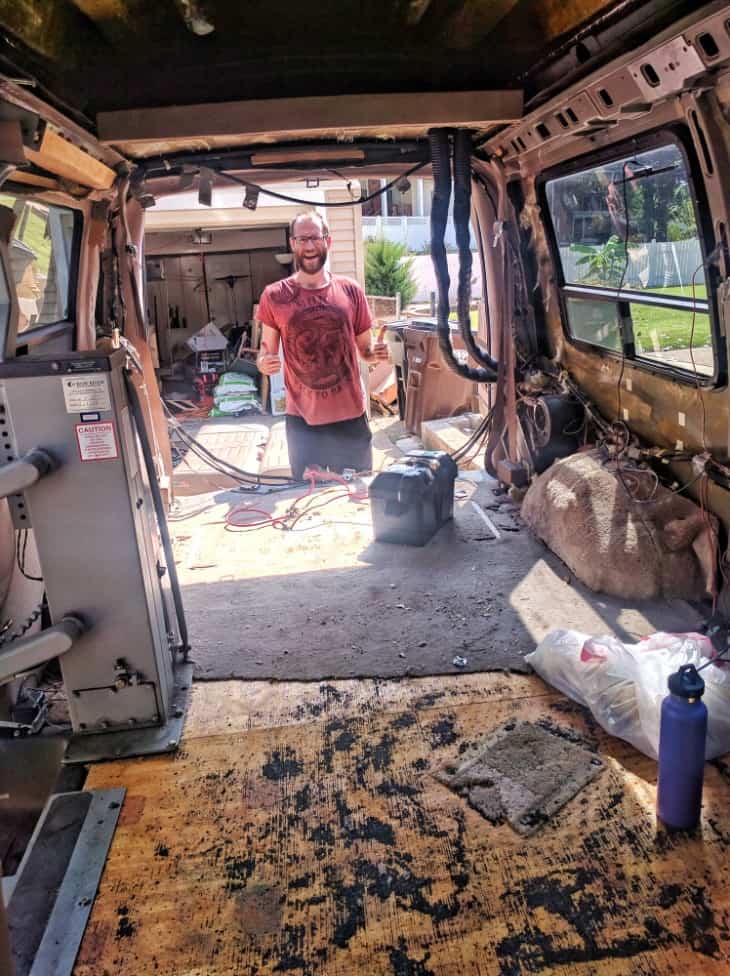
When we first got the van it was fully decked out with a TV, VHS player, speakers, fake wood accents, multi-colored LED mood lighting, the whole shebang.
It was almost a shame to rip apart something so nice, but we needed to put in insulation, wiring and our own customizations so it all had to go.
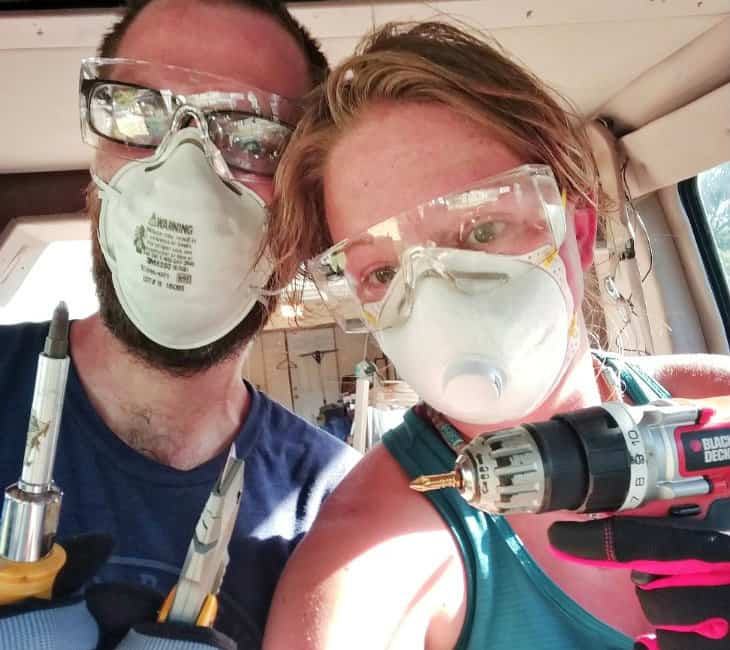
We began taking everything out as soon as we got the van home. We took our cordless drill and ratchet drive screwdriver and just started unscrewing every screw we could see.
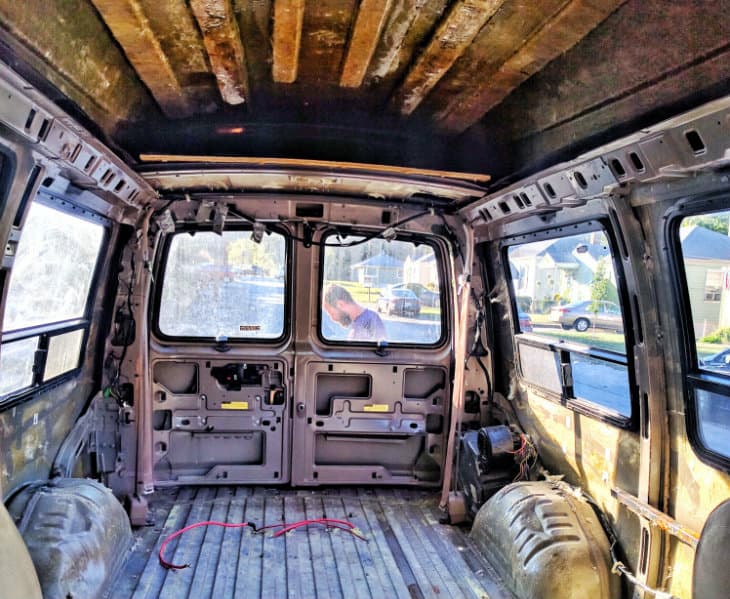
Before we knew it we were removing whole panels from the walls and ceiling.
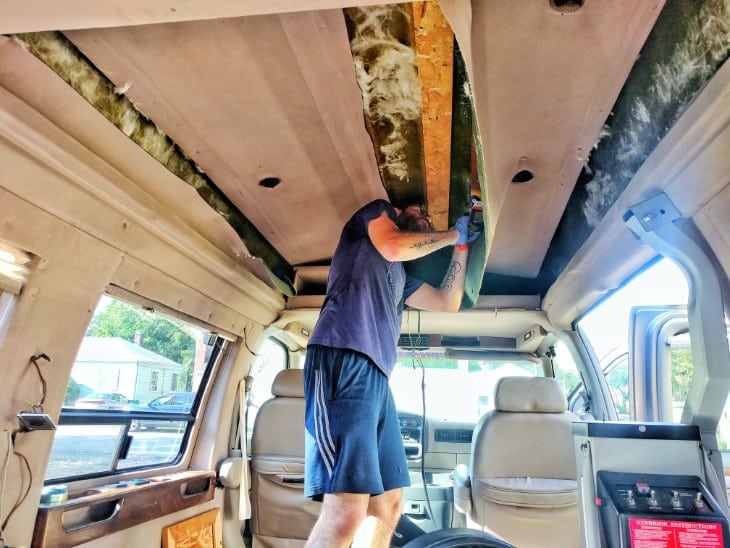
It was actually much easier than we had anticipated. Removing the larger items like the built-in cabinets and the TV was just a matter of removing a few screws and unplugging some wires.
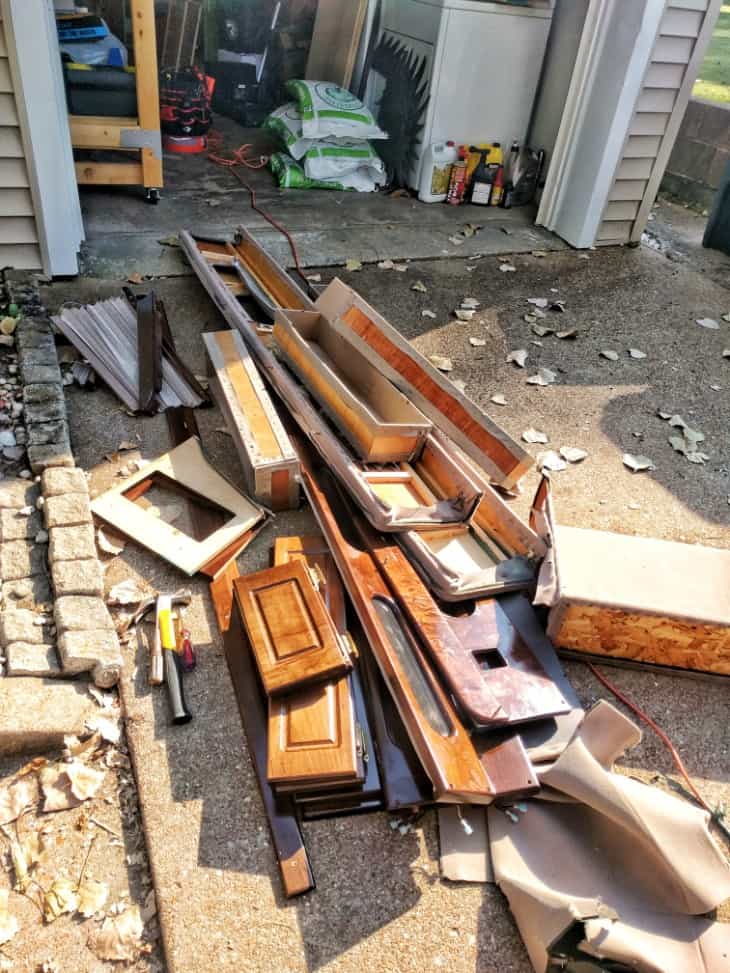
And we got to have a little fun along the way smashing things with hammers and working together to yank sections out of the van and throwing them into the driveway in triumphant glory.
Challenges: Bench Seat and Wheelchair Lift
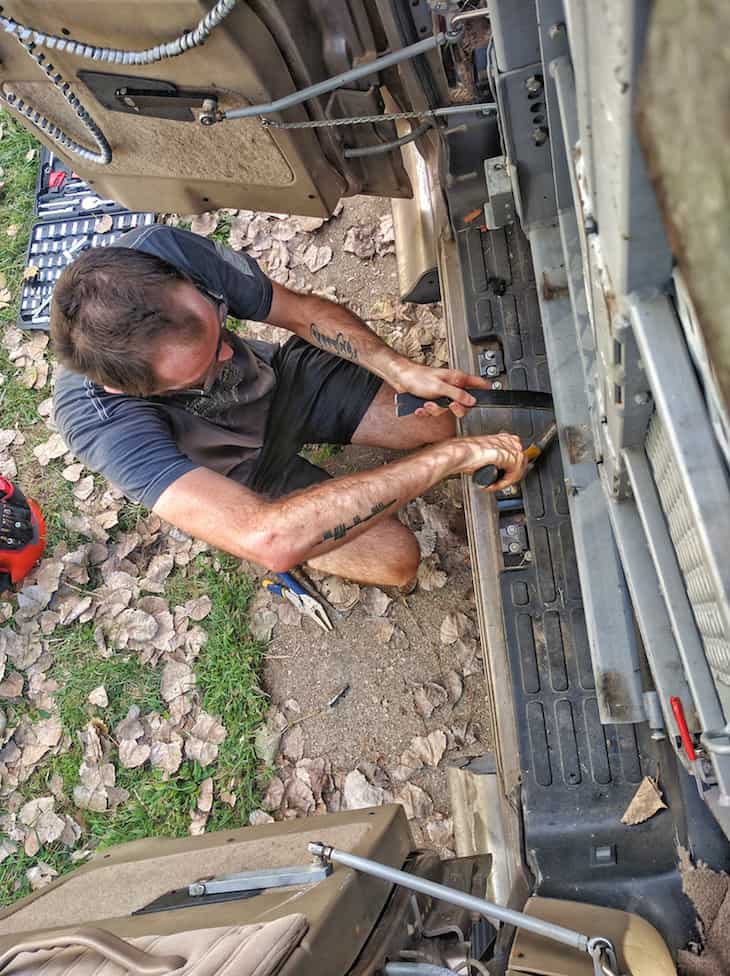
Our first challenge was taking out the rear bench seat. This was wired to an auxiliary battery so it could fold flat with the touch of a button. We first took apart the wiring then tried in vain to undo the bolts holding it to the floor. These things would not come out.
Finally our neighbor pointed out that it was probably bolted directly to the vehicle from underneath. John shimmied under the van to take a look, and sure enough there were bolts coming through the frame. Once we figured that out it was just a matter of teaming up to remove the bolts.
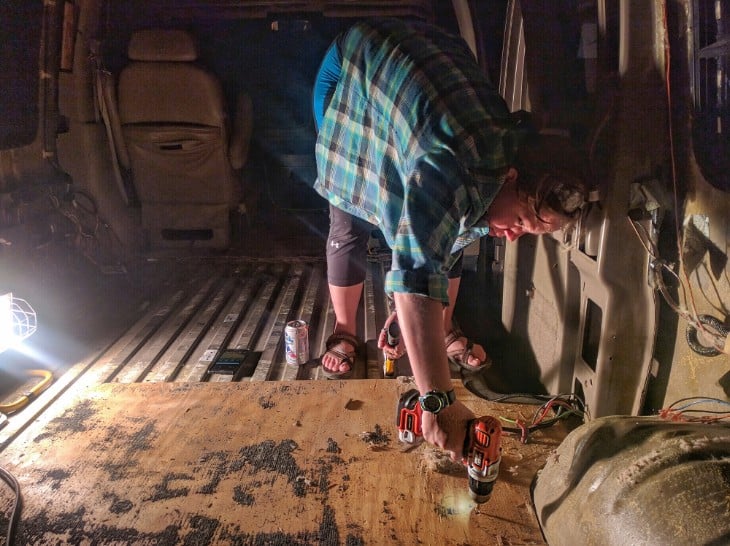
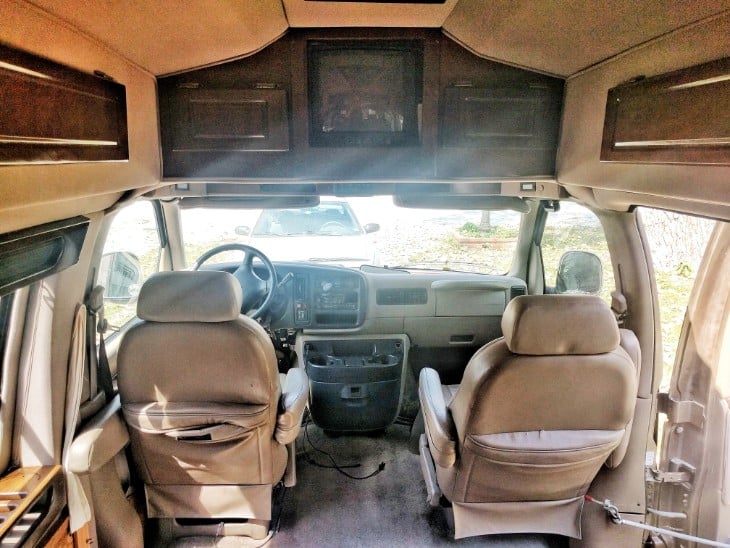
Once we got everything out of the van we tore up the carpet and removed the plywood subfloor. Then it was just the wiring and the wheelchair lift remaining.
The wheelchair lift seemed intimidating so we tried to do everything possible to avoid removing it ourselves. We had read online that others had success selling their wheelchair lifts and having the buyer remove them, so we posted ads on Craigslist and Ebay. We also looked into donating it to a nonprofit. But no one was interested in an old used wheelchair lift, and we didn’t have time to halt our van build for long.
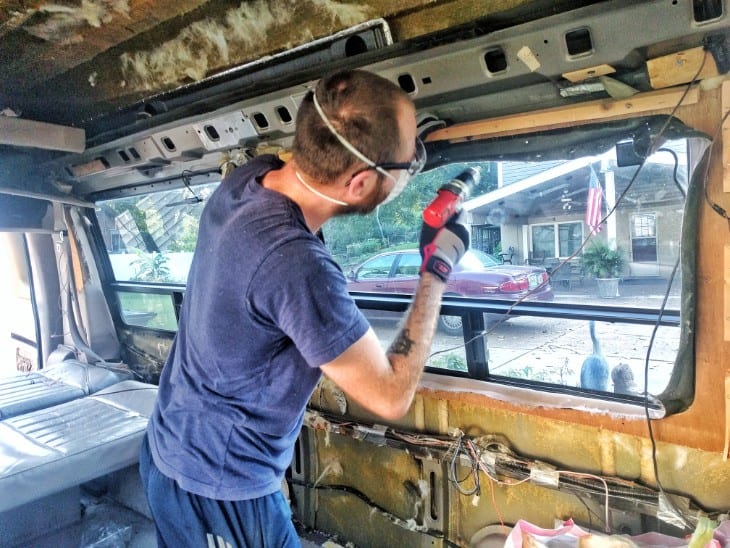
A friend of ours who is working towards living the same lifestyle told us he had removed a wheelchair lift from his bus. He came over with his angle grinder to help us remove ours, and it was actually much easier than we expected. It took us less than two hours to take the whole thing apart and get it out of the van.

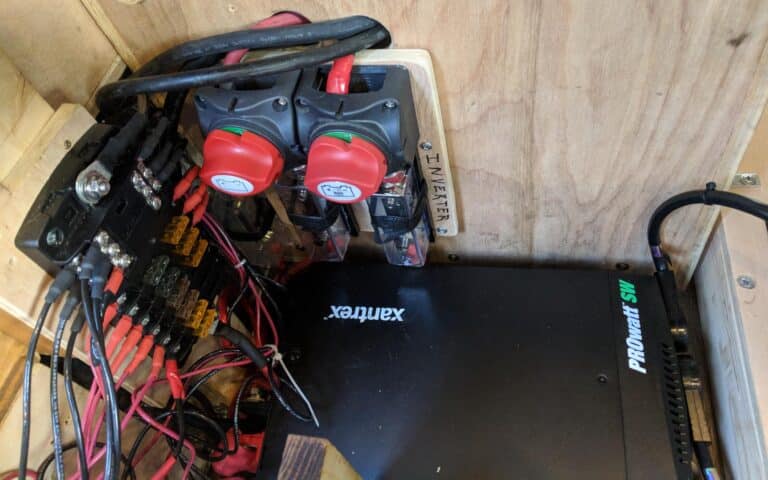
Where Does All This Wiring Go?
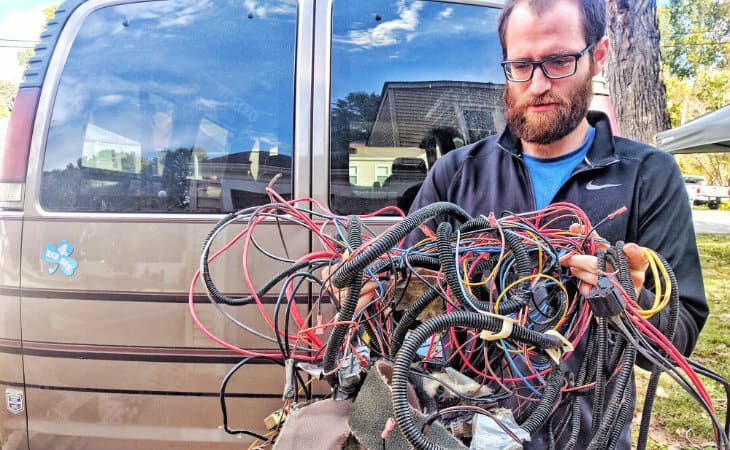
Now we just had the wiring to deal with. When we gutted the van, we unplugged everything without giving it much thought, so we had a nest of wires and no clue where they connected to. Since we didn’t want a bunch of extra wiring in our van, we spent a couple hours figuring out what we needed and taking out everything else.
This could have been much easier if we had labeled the wires when we gutted the van. That way we would know what was part of the vehicle and what was just extra wiring. It’s easy to get carried away ripping stuff out, but taking a little extra effort to label everything can save you time later on.
The whole gutting process ended up being relatively simple. And we were excited to get on to actually building our van into a home!
Tips for Gutting a Conversion Van
- Label all your wires! This will help you figure out what’s vital (like tail lights) and what was just part of the conversion (like mood lighting).
- Some parts may be bolted to the frame from underneath, so if a bolt is really giving you trouble take a look under the van.
We want to give a massive shout out to all of you for all of the love, support, shares, comments, etc we have received this past week in response to our first blog post! We can NOT thank nor love you all enough! You are all seriously the best!
We are so excited to have you all join us on this new adventure and life transition! Don’t forget to follow us on Instagram: @gnomad_home and on Facebook at: Gnomad Home. Hit us up for any questions, comments, suggestions, etc! We want to hear everything! Love and light to you all!


Hello, I am Susan and I am going to be making a camper van from a 1984 Econoline Ford Van which not only has a handicap ramp on it but also the steering wheel is for a handicap driver. I am getting excited about working on the van. Just wondering did you have a regular steering wheel in your van or did you have a steering wheel that was for a handicap driver?? I need to change it to a regular steering wheel.
Hi Susan, ours had a regular steering wheel, but it did have some hand controls that we were able to remove. I hope it’s not too difficult to do a steering wheel swap!
Hello, I am gutting a chevy astro conversion van and am at the place where everything is gone except 1000 wires! How did you unplug them all? I’ve unplugged from the devices/lights/electronics, but those wires still go somewhere and I can’t figure out where they go to. In other words, how did you find BOTH sides of the wires? Any tips? Mine go to far away places (like under the plywood at the very tip of the high top which is inaccessible or other very inaccessible places. I’m tempted to just snip them and cross my fingers! Thanks!
Hi Dot, that’s similar to the situation we ended up with, and it can be super confusing. The wires will eventually terminate at a fuse box somewhere in your van – our was underneath the steering wheel. If you can locate that fuse box, you should be able to determine which wires are for all the conversion electronics and disconnect them from there. We did not do this with our van. Our wiring ran underneath the rug, and under the driver’s seat. Rather than follow them all the way, we just snipped the wiring and taped it off, and only… Read more »
We have a van also and want to remove the wheel chair lift as did you. I can easily remove the bolts holding it to the floor and wiring. So wondering how you got rid of your lift after it was removed out of your van. I’m having trouble coming up with options i.e. donate, sell or scrap metal it.
Hi Bob, you should be able to easily scrap it. We tried selling it, but weren’t getting many bites. We ended up setting it at the end of our driveway the day before trash day, and some guys in a pickup truck stopped and asked us if they could take it barely 20 minutes later.
This explains why wheelchair conversion vans are so hard to get ahold of now. My husband is in a wheelchair pair and we have decided to take an extra long road trip. Thanks for the pics of the stripped interior, we are debating if it is worth it to strip. Was it insulated? It looks like there is some factory insulation.
Hi Grace, thanks for the comment. There was some factory insulation, but not much. We ended up insulating with polyiso foam, which did a pretty good job for us. Best of luck on your road trip!
Hello Great Read! Can you tell me more about how you disconnect the fuse box? or just more on how to disconnect tv/radio/outlets stuff from from the battery? Thank you!!
Hi Seth, thanks for reading! As far as what we did, we just followed the wiring as far forward as we could (to the point where it went underneath the driver’s seat), cut it, folded it over, and taped it off with electrical tape. Our van has a fuse box down by the driver’s feet, so my assumption is that wiring continues underneath the driver’s seat (and under the carpeting) and terminates at that fuse box. If you choose to fully remove your wiring, you may have to remove one of the front seats and possibly lift up the carpeting.… Read more »
Hey! Love your posts, since I just bought a similar high top conversion van (mine is just Ford instead of Chevy). I’ve basically gutted the entire van, and I’m hoping to rip out the wires today. I know you gave a tip a the end of this post to label the wires that you ripped out, but I’m a total noob, so I was wondering if you could go more in depth on the steps to remove the wires in the first place? Some wires I already cut in order to remove the object it was attached to. I cut… Read more »
Hi Silver, I apologize for the delay in my response. I’m sure you’ve done this by now, but I will respond here in case others have the same question. If you are removing the object that the wire is attached to (such as speakers, mood lighting, etc), then feel free to cut the wiring. Our recommendation to label the wiring was so that when it comes time to fully remove the wiring, you will know what wiring was for items that you removed vs vehicle wiring you may need to keep. Where to make the final cut: The wiring *probably*… Read more »
Hey, I wanted to know how long the gutting process eventually took? If anyone can give me an estimate timeline of the gutting process (I work full time and will have to separate it into blocks of 3 hours a night) I’d appreciate that!
Hi Manny, the gutting process didn’t take us long at all. We got the bulk of it done in a Saturday, and including removing all of the excess wiring it was a weekend project. Hope that helps!
~John
I see that the rear ac/heat is still in the vehicle. Is it still hooked up and functional? Or did you remove the lines running to it?
I am in the process of building my own van(2002 gmc savana conversion van) and want to remove this thing. But, I am a bit nervious about removing the lines that run to it from the refrigerant and coolant.
Any suggestions?
Hi Greg, we actually ended up taking ours out, but only because we had to cap the AC line to fix a leak. If you want to remove your rear unit, this is NOT something you should do yourself. The AC lines are under high pressure, and they need to be evacuated, cut, and capped by a qualified professional (we had to have a custom cap fabricated), then recharged once you’re done. This cost us a few hundred dollars in total. The heater line also needs to be cut and rerouted, but this is not under high pressure so you… Read more »
I have a 1994 GMC Vandura Tiara: where is the auxiliary battery? I want to remove the bench seat but don’t want it connected to the battery when I do it. Any tips on the removal?
Hi Carol, the auxiliary battery for our bench seat was just located directly under the bench seat in our van. Conversion vans are all different, though, so yours may be in a different place, or your seat may be powered by the starting battery (our van also had a wheelchair lift that necessitated a separate battery). If your seat is electrically powered, there should be a wire coming from it that connects to a clip-in wiring harness. Disconnecting this clip will cut the power to the seat. If you think it’s powered by the starting battery, you can also disconnect… Read more »
Hi! I am curious as to what the roof (ceiling) was like once stripped? I have gutted a van with the same profile, but didn’t touch the inside roof. Did you find wasted space under the fabric/ lights? Were you able to get any additional height?
I dont want to go thru the work if nothing is really gained. Once i cut into that fabric there is no turning back.
Hi Nao, any space that we gained by ripping out our ceiling we filled right back up with our own insulation and ceiling paneling. So if the main reason you would rip your ceiling out is to gain additional height, you probably won’t gain much. We ripped ours out so that we could put up better insulation (there wasn’t much to speak of behind our walls/ceiling), install lights, and put up wood paneling (we’re big on the homey log cabin feel). But if you don’t see the need to do any of those things, then keeping the stock ceiling can… Read more »
Hi, I love all your tips and getting to read about the process of your van build. My hubby and I are just starting out and are very excited. I love how your home turned out and am trying to do the same thing. We have a ’96 chevy express conversion van similar to yours. I was just wondering how you guys got the seat rails/bolts out?? We have two rails. Any tips you can pass along would be wonderful. Happy roaming.
Hi Emily, so glad you enjoy our blog! We’re big fans of our ’96 Chevy, you should have a fun adventure building it out! Our van didn’t have rails in it, but it did have the rear bench seat. We had a tough time figuring it out at first, until we realized that they were bolted through the floor. Here’s how we got ours out: one of us was under the van with a wrench holding the nut to prevent it from the turning. The other person was inside the van, loosening the other side with a ratchet. If yours… Read more »
Looks really good! My girlfriend and I are in the process of doing the exact same thing right now. What did you do with the wires that you didn’t need? (How did you remove them?) Did you cut them and wire cap them, or did you follow them all the way to the source and remove them from the battery? We are leaving some of the lighting on the top and the bundles of wires get quite complex when they all meet at the battery so we don’t know the best way to do this.
Hi Greg, welcome, and I hope this post was helpful! For our van, we thought it would be too complex to follow all the wires to the source, since they all went under the rug to the driver’s seat and we didn’t think it was worth gutting the cab to follow these wires. We just cut the ones that we knew we didn’t need and capped/taped them off. To figure out which ones we needed/didn’t need, we basically reverse-engineered them (i.e. figured out which wires go to the tail lights, etc.). Fortunately, all the vehicle wires were bundled together, and… Read more »
So I have the gmc that is just like the express. In fact, most of the parts are interchangeable. The top is also raised and have been considering stripping it out. Excet for the top! Is there any reason other than needing to insulate that I really need to.strip out the top? I don.t plan on visiting any cold areas with this van.
Hey Barbara, if you’re happy with the factory interior of your van then you definitely don’t need to strip it out. We gutted ours because we wanted to control how it was insulated, and also because we wanted to fully customize our interior with wood. But there are plenty of vandwellers who leave in the factory interior and just build it out with their own furniture. It’s totally up to you, and if you’re not planning on visiting cold areas then the factory insulation should do fine. If it ain’t broke, don’t fix it!
Hope that helps!
~John
Hi!! Can you tell me what you did to seal up the holes you made in the floor when you removed the frame! Ps. We love your blog and are going to be following a lot of your posts while we convert our 94 ford econoline conversion van! Thanks for being so awesome!!!
Hi Victoria,
We actually left our holes open. They weren’t rusting and had been painted, so we just put rolled our insulation over them and continued with the floor. I’m not sure what the best way to patch those would be, but I did find this forum thread that talks about filling them with Bondo (fiberglass) and painting both sides to seal from rust: https://www.sportsmobileforum.com/forums/f24/quick-question-rust-inhibitor-and-plugging-holes-3311.html
Glad you enjoy the blog and good luck with your build!
This is amazing. My GF and i bought a conversion van recently and we have been doing all the same things. It’s crazy. After months of research, buying a van, stripping it out and starting to plan out the interior we finally discovered this site. I was trying to find someone who had an idea how to mount solar panels to this crazy, curvy roof. I like your method. I will probably do something very similar. But i have a couple questions. What did you do with the holes in the floor after removing the rear bench and such? We… Read more »
Hi Timmy, Thanks for reading! We also had a tough time finding anything about dealing with a conversion van topper (mounting solar panels, putting up a ceiling, etc). I hope what we’ve put together on the blog helps you in your build! To answer your questions: We actually left the holes in our floor open. Our van originally had a wheelchair lift in it, so we had holes for all the wiring to and from the lift that were already wide open, in addition to the holes for mounting the rear seat/seatbelts. None of the holes were rusting and it… Read more »